Getting Started
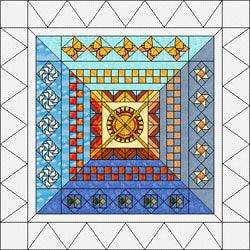
Print off these instructions from your internet browser by clicking FILE > Print. Follow each step of this lesson to begin making your “EQuinox” Mystery Quilt.
Open the EQuinox.PJ5 or .PJ6 File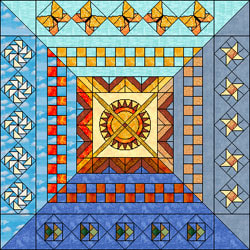
- Open EQ6 (EQ5).
- Click the Open an Existing Project tab (it appears immediately when you open EQ6 or EQ5).Or
On the menu bar, click FILE > Open. - Click on EQuinox.PJ6 (or EQuinox.PJ5 in EQ5).
- Click OK. The Sketchbook opens.
Edit the Quilt Layout
- Click the Quilts section to find your mystery quilt layout. Go to the last quilt in the Sketchbook.
- Click the Edit button. Your quilt appears on the Quilt worktable.
Create Border Six
- Click the Borders tab.
- Click the Add button. It adds a border.
- Under Select a border style, click the down arrow to display choices.
- Click Mitered (at the top of the list).
- In the sizing area, lock your borders so they will all move together by putting a check next to the “All” box.
- Drag the slider bar for Left (or click directly on the slider bar) to make the border 1.75 (4.45cm x 4.45cm). Since you have the “All” box checked, all border sides should change at once as you drag, so they are all now 1.75.
Create Border Seven
- Click the Add button. It adds a border.
- Under Select a border style, click the down arrow to display choices.
- Click Points In.
- Drag the slider bar for Left (or click directly on the slider bar) to make the border 6.00 (15.24cm x 15.24cm). Since you have the “All” box checked, all border sides should change at once as you drag, so they are all now 6.00.
- Use the arrows to change the number of blocks in the border. Change Horizontal and Vertical both to 5.
- Click the Layer 1 tab. Now we’ll get seven blocks out of the library to set into the border.
Get Five Blocks from the Library
- Click LIBRARIES > Block Library on the top menu bar.
- Scroll down in the libraries list, click on 6 Motifs.
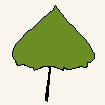
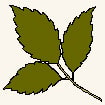
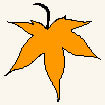
- Click on the Leaves style, to open it. We will add 4 of the leaves to our project.
- For each of the following motifs, first click the block to select it, then click the Add to Sketchbook button (Copy button in EQ5) to put it in your Sketchbook:
|
“Sycamore Leaf” |
“Elm” |
“Sweet Gum” |
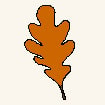
“White Oak” |
- Stay in 6 Motifs.
- Go up one style and click the “Landscape Elements” style.
- For each of the following motifs, first click the block to select it, then click the Add to Sketchbook button (Copy button in EQ5) to put it in your Sketchbook:
|
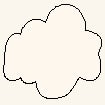
“Cloud” |
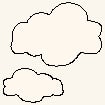
“Two Clouds” |
- Scroll up in the list and open the library “5 Contemporary Applique.”
- Click on “Christmas“.
- Near the end of all the blocks in this style, find the “Snowflake”. Click the block to select it, then click the Add to Sketchbook button (Copy button in EQ5) to put it in your Sketchbook.
|
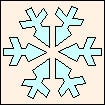
“Snowflake” |
- Click the Close button, to put the library away.
Change the Snowflake from a Block to a Motif
- Click the View Sketchbook
 button on the Project toolbar.
 - Click the Blocks section.
- Click the Snowflake block to select it and click Edit. You will be taken from the Quilt Worktable to the Block Worktable.
- The next step is different for EQ5 and EQ6. Please follow the appropriate instructions depending on which version you are using:
EQ6 Instructions:
- Click the Applique tab at the bottom of your screen.
- Click EDIT > Select All on the top menu bar.
- Click EDIT > Copy on the top menu bar.
- Click BLOCK > New Block > PatchDraw Motif on the top menu bar.
- Click EDIT > Paste on the top menu bar.
- In the center of the pasted patches is a crosshair. Position your cursor over the crosshair so it turns into a crosshair too. Click, hold, and drag the patches so they are centered within the “block outline”… and not over the edge.
- Click the Add to Sketchbook
 button on the top toolbar to save the motif.
EQ5 Instructions:
- Click the Select arrow on the top of the right Drawing toolbar.
- Click on the block outline so it is selected.
- Press your keyboard DELETE key.
- Click the Save in Sketchbook
 button to save the motif.
Draw the Raindrops as a Motif
- Follow the directions for the version you’re using to start a motif and get the correct tool:
EQ6 Instructions:
EQ5 Instructions:
- On the top menu bar, click BLOCK > New Block > PatchDraw.
- Click EDIT > Select All or press CTRL+A on your keyboard. (This will select the block outline.)
- Press your keyboard DELETE key.
- Find the Simple Oval tool on the right Drawing toolbar and click on the small black arrow in the button to make the flyout appear.
- Click on the 3rd patch that looks like a downward-facing raindrop.

- Position your cursor somewhere near the top-middle of the block (red dot in image below).
- Click and hold as you drag down and left, then release to stop the raindrop.
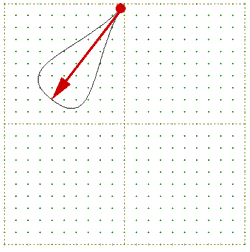
- Click EDIT > Select All on the top menu bar. (CTRL+A works too.) The raindrop will be selected and have a crosshair in the center.
- Click EDIT > Copy on the top menu bar. (CTRL+C works too.)
- Click EDIT > Paste on the top menu bar. (CTRL+V works too.) Now the pasted raindrop has the crosshair in the center.
- Grab the pasted raindrop by the crosshair and drag it to the lower-left part of the motif.
- Repeat steps 38 and 39 so your finished motif looks something like this:
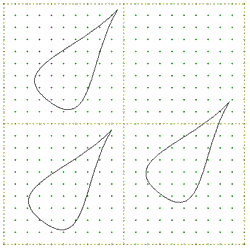
- Click the Add to Sketchbook
 button (Save in Sketchbook in EQ5) to save the motif. We now have all the motifs we need for this lesson.
 - Click WORKTABLE > Work on Quilt on the top menu bar.
Take a moment and name your new blocks
a) Click the View Sketchbook ![]() button.
button.
b) Click the Blocks section.
c) Above the blocks you see, click the Motifs tab.
d) Select the snowflake motif you made.
e) Click the Notecard button.
f) In the Name line, type: Snowflake
g) Click the X in the top corner of the notecard.
h) Select the raindrops motif you made.
i) Click the Notecard button.
j) In the Name line, type: Raindrops
k) Click the X in the top corner of the notecard.
l) Click Close or the X to close the Sketchbook.
Set Half-Square Triangle Blocks
- Click on the Set Block tool
 (Set tool in EQ5). The Sketchbook Blocks palette (Blocks palette in EQ5) appears.
 - Scroll to find the Half-Square Triangle block (from a previous lesson) in the Sketchbook palette, and click on it.
- Be sure the grayscale version you colored is the one you see in the palette. If not, use the colorway arrows
 so you see your grayscale coloring.
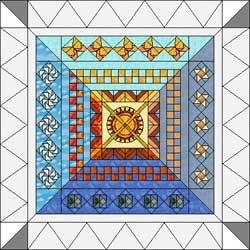
 - Hold down the CTRL key on your keyboard and click in the corner square of your outer border. The Half-Square Triangle block will set in all 4 corners.
- Click the Rotate Block tool
 (Rotate tool in EQ5).
 - Click on the top-right, then click on the bottom-left Half-Square Triangle block in the border. (You should notice the seam lines for your Half-Square Triangles line up with the mitered borers all the way to the center block.)
EQ5 Users Only: Steps 49-56
(EQ6 Users skip to step 57)
- Click the Set tool, so the Blocks palette appears.
- Make sure the Half-Square Triangle block is still selected in the palette.
- Hold down the CTRL key on your keyboard and point at the triangles (in your new border) that point in, and click.
- Now point to the triangles that point out and CTRL+click.
- In the Blocks palette, select the Four X block (we copied it at the end of Lesson 4).
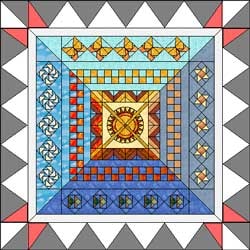
- Don’t hold down anything when you do this (just a regular click). Click in the 8 pink spots marked in the image below.
- Some of the borders will need rotating. You want the seam of the Half-Square Triangle block to be hidden along the edge of the border. Rotate until each of your in and out border triangles is filled with a triangle (rather than half-triangles) and matches the image below.To speed up your rotating, click the Rotate tool and ALT+click on a block in the border which needs rotating — this will rotate the entire side together.
- The reason we put blocks into these spaces is so you can print the patterns for triangular border pieces when you’re ready for patterns. You have to do this in EQ5 (not EQ6). Your quilt will now look something like this:
Color the New Borders
- Click on the Paintbrush
 tool.
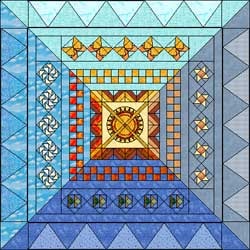
tool. - Color the new borders, to continue the seasonal theme.
- Click the Add to Sketchbook
 button (Save in Sketchbook in EQ5) to save your quilt coloring.
Set Motifs in Layer 2
- Click on the Set Block tool
 (Set tool in EQ5). The Sketchbook Blocks palette (Blocks palette in EQ5) appears.
 - You want to be on the second tab of the worktable and palette. So, click the Layer 2 tab at the bottom of your screen. And click the Motifs tab within the Sketchbook Blocks palette.
- Click to select the Snowflake in the palette.
- Hold down your keyboard SHIFT key. Move your cursor over the Winter (right) side of the border. Keep holding down SHIFT as you drag out a box shape on the quilt (it’s a click and hold as you move your mouse down and right). Don’t make the box too small.

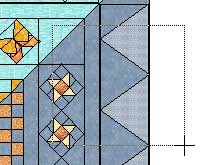 [Keyboard touchpad users: hold down SHIFT, click and hold the left mouse clicker, then stroke the touchpad diagonally down and right.]
 - Release the mouse and release the SHIFT key. The Snowflake will pop into the dotted box you made.
- Following steps 63 & 64, set three more Snowflake motifs in the same way. Don’t worry about size or placement yet. You should have 4 snowflakes total.
Resize & Reposition the Snowflakes Using the Graph Pad
- Click the Adjust tool
 .
. - Click one Snowflake on the quilt. This selects it with the Adjust tool.
- First, make sure you can see the Graph Pad. If you don’t see something like this at the top of your EQ6 window (below the Project toolbar):
 or something like this at the bottom of your EQ5 window (just above the START button):
then, on the menu bar, click VIEW > Graph Pad and click it to put a check next to it.
 The pair of numbers in the middle of the Graph Pad display the size (red circles). To change the motif’s size, you can either a) click the arrows beside the numbers or b) double-click on the existing number and type in the new number and press ENTER. Resize the selected Snowflake to 3.50″ x 3.50″ (8.89 cm).

- While this Snowflake is still selected, hold down the SHIFT key (on your keyboard) as you click on the other 3 Snowflake motifs. All will be selected.
- Click on the Same Size button
 on the Graph Pad. All your Snowflake motifs will now be the same size to match the initial Snowflake (because it was selected first).
 - Click in the center of each Snowflake one at a time and drag them (kind of staggered) into place in the border. (See picture at right.)
Set Clouds and Raindrops in Layer 2
- Click on the Set Block tool
 (Set tool in EQ5). The Sketchbook Blocks palette (Blocks palette in EQ5) appears.
 - You should still be on tab 2 of each (Layer 2 tab of the worktable and the Motifs tab of the palette).
- Click the Cloud (one cloud) in the palette.
- Hold down your keyboard SHIFT key. Move your cursor over the Summer (left) side of the border. Keep holding down SHIFT as you click, hold, and drag out another box shape on the quilt.
- Repeat step 76 to set one more Cloud.
- Click the Two Clouds motif in the palette.
- Hold down your keyboard SHIFT key as you set two motifs in the Summer border with the single clouds.
- Click the Raindrops motif in the Sketchbook palette. Set 4 Raindrops motifs on the quilt in the Spring (top) border using this same method.
Resize Two Clouds and Raindrops Using the Graph Pad
- Click the Adjust tool
 .
. - Click on a Raindrops motif in the quilt.
- Change the motif’s size using either a) the arrows beside the numbers or b) double-click on the existing number and type in the new number and press ENTER. Resize the selected Raindrops motif to 3.00″ x 3.00″(7.62 cm).
- While this Raindrops motif is still selected, hold down the SHIFT key (on your keyboard) as you click the other Raindrops and the 2 Two Clouds motifs.
- Click on the Same Size button
 on the Graph Pad. They will now all be 3.00″ (7.62 cm).
 - Release the SHIFT key.
Resize the Cloud Motifs Using the Graph Pad
- Click on one of the single Cloud motifs.
- Change the motif’s size to be 2.50″ x 2.50″ (6.13 cm).
- Hold down the SHIFT key and click the remaining Cloud motif so they are both selected.
- Click on the Same Size button
 . They will both be 2.50″ (6.13 cm).
 - If necessary, click the Rotate Block tool
 (Rotate tool in EQ5) and click on to rotate your motifs to match the direction they appear below:
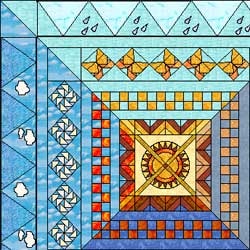
Set the Leaf Motifs in Layer 2
- Click on the Set Block tool
 (Set tool in EQ5). The Sketchbook Blocks palette (Blocks palette in EQ5) appears.
 - You should still be on tab 2 of each (Layer 2 tab of the worktable and the Motifs tab of the palette).
- Click on one of the 4 leaves in the palette.
- Hold down your keyboard SHIFT key. Move your cursor over the Fall (bottom) side of the border. Keep holding down SHIFT as you click, hold, and drag out another box shape on the quilt.
- Repeat step 95 to set one of each of the 3 leaves.
- Click the Adjust tool
 .
. - Click on a Raindrops motif in the quilt. (It is already 3.00″ (7.62 cm).)
- While this Raindrops motif is still selected, hold down the SHIFT key (on your keyboard) as you click all four leaf motifs.
- Click on the Same Size button
 on the Graph Pad. The leaves will now all be 3.00″ (7.62 cm).
 - Release the SHIFT key.
Position the Motifs
- Click in the center of each motif one at a time and drag them into place in the border. (See picture below.)
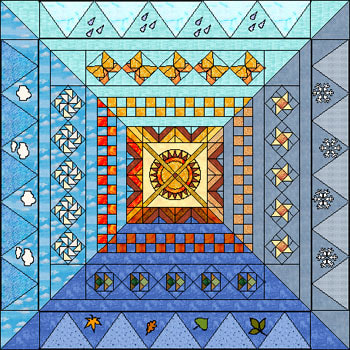
Color the Motifs
- Click on the Paintbrush
 tool.
tool. - Color the motifs (from Layer 2).
- Click the Add to Sketchbook
 button (Save in Sketchbook in EQ5) to save your quilt coloring.
EQuinox color and fabric tips
If you are sewing along with us during the lessons, remember EQuinox is a scrap quilt. It uses a large variety of colors and values. The Sun is the quilt’s center block.
For the borders around the Sun, think in terms of sun rays, slightly varying the colors and values in each border strip to reflect seasonal color and light changes:
- Top Border = Spring
- Right Border = Winter
- Bottom Border = Fall
- Left Border = Summer
For the new Mitered border, cut 1 strip for each season that is 2.25″ x 42.50″ (maybe a little longer). Sew to quilt center and miter using your preferred technique.
We recommend printing Templates for the Points. Do this from Layer 1.
Click the Select tool ![]() .
.
Click on a triangle in the border to select it.
From the menu bar, choose FILE > Print > Templates.
Be sure you put a check in “size from quilt”.
You need 2 templates: one for the points and one for the half point next to the corner square.
For each season, pick two different colors. Cut 5 full points of one color. From the other color cut 4 full points and 2 half points.
You also need 4 different Half-Square Triangle blocks for the corner squares of the outer border. You can use Templates, Rotary Cutting or Foundation Piecing for these.
To print the motifs (rain, snow, clouds, leaves), we recommend printing Templates from Layer 2.
Click the Layer 2 tab.
Click the Select tool ![]() .
.
Click on a motif in the border to select it.
From the menu bar, choose FILE > Print > Templates.
Be sure you put a check in “size from quilt”.
Use your preferred method of appliqué to sew these pieces down. You can also use raindrop fabric, cloud fabric, leaf fabric, or snowflake fabric as your background triangle to add to the effect.
- On the menu bar, click FILE > Exit.

