As far as pieced blocks go, you can draw any block with EasyDraw. Sometimes though, it is easier to draw certain types of blocks in PolyDraw, particularly those that can be aided by using one of the grids. PolyDraw has automatic snapping based on the grid on which you are working. The PolyDraw tools are your only sources for drawing this type of block. With the PolyDraw tools, you’ll notice that with each click, your line will snap to the closest grid point or arc. Click here to learn more about the PolyDraw tools.
You may also notice two layer tabs at the bottom of the drawing board: PolyDraw and Applique. The PolyDraw tab is for drawing pieced blocks using the PolyDraw tools, and therefore the patches cannot overlap. The Applique tab is for adding applique patches on top of your piecing. You do not need to do anything on this tab if you do not want to. You can completely ignore it.
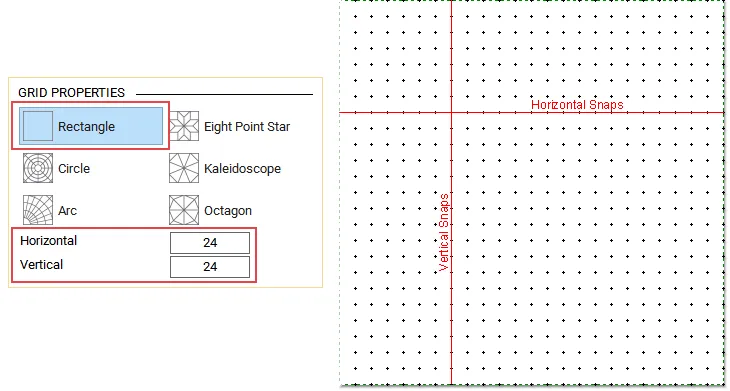
There are six PolyDraw grids for you to use to create pieced blocks.
Rectangular Grid -In this example, the grid snap dots are set to 24 and 24. Notice that there are 24 dots horizontally, and 24 dots vertically. PolyDraw Rectangular Grid is capable of drawing the same types of block as EasyDraw. It is just be a preference which you prefer to use.
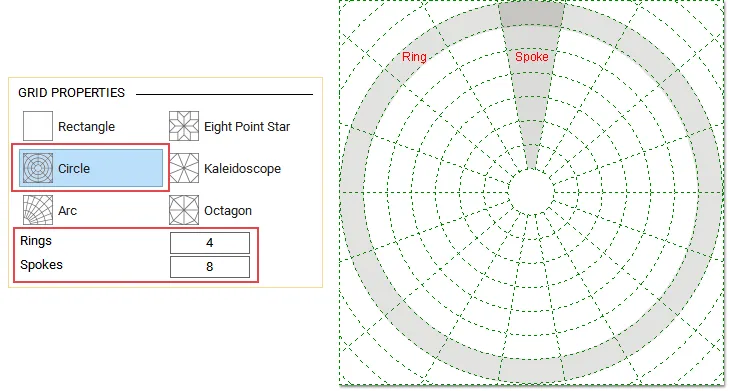
Circle Grid – In this example, the rings and spokes are set to 8 and 18. Notice that there are 8 complete rings, including the center circle all the way out to the shaded ring. There are also 18 spokes surrounding the center circle.
Arc Grid – In this example, the rings and spokes are set to 4 and 6. Notice that there are 4 complete rings, including the center circle all the way out to the shaded ring. There are also 6 spokes surrounding the center circle.

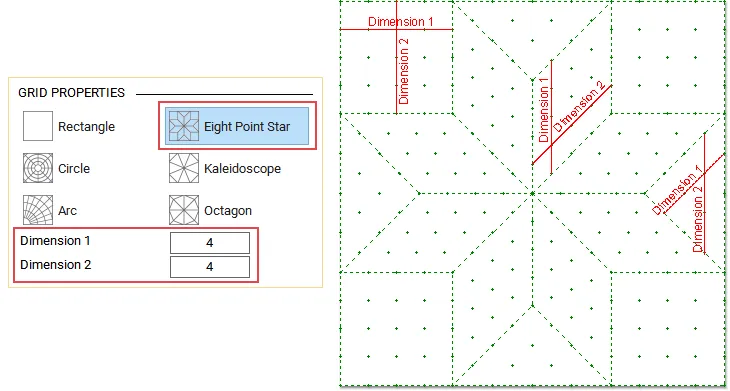
Eight Point Star Grid -To count the grid points, find the largest/widest area of each shape and count across from gridline to gridline of that shape. In this example, the grid snap dimensions are set to 4 and 4. Notice that there are 4 dots for each dimension shown. The first and last dots fall on the grid lines, so don’t forget to count those.
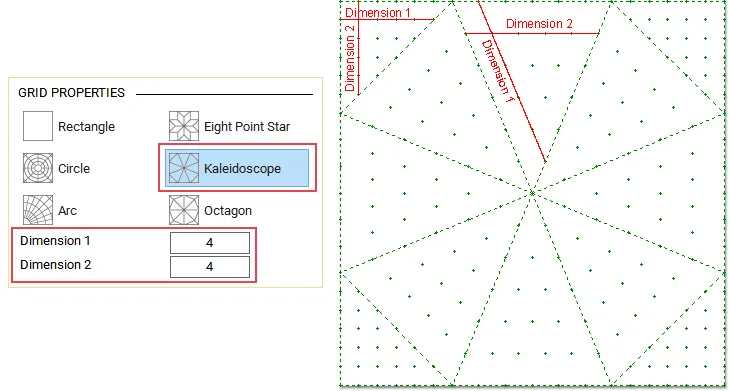
Kaleidoscope Grid – To count the grid points, find the largest/widest area of each shape and count across from gridline to gridline of that shape. In this example, the grid snap dimensions are set to 6 and 6. Notice that there are 6 dots for each dimension shown. The first and last dots fall on the grid lines, so don’t forget to count those.
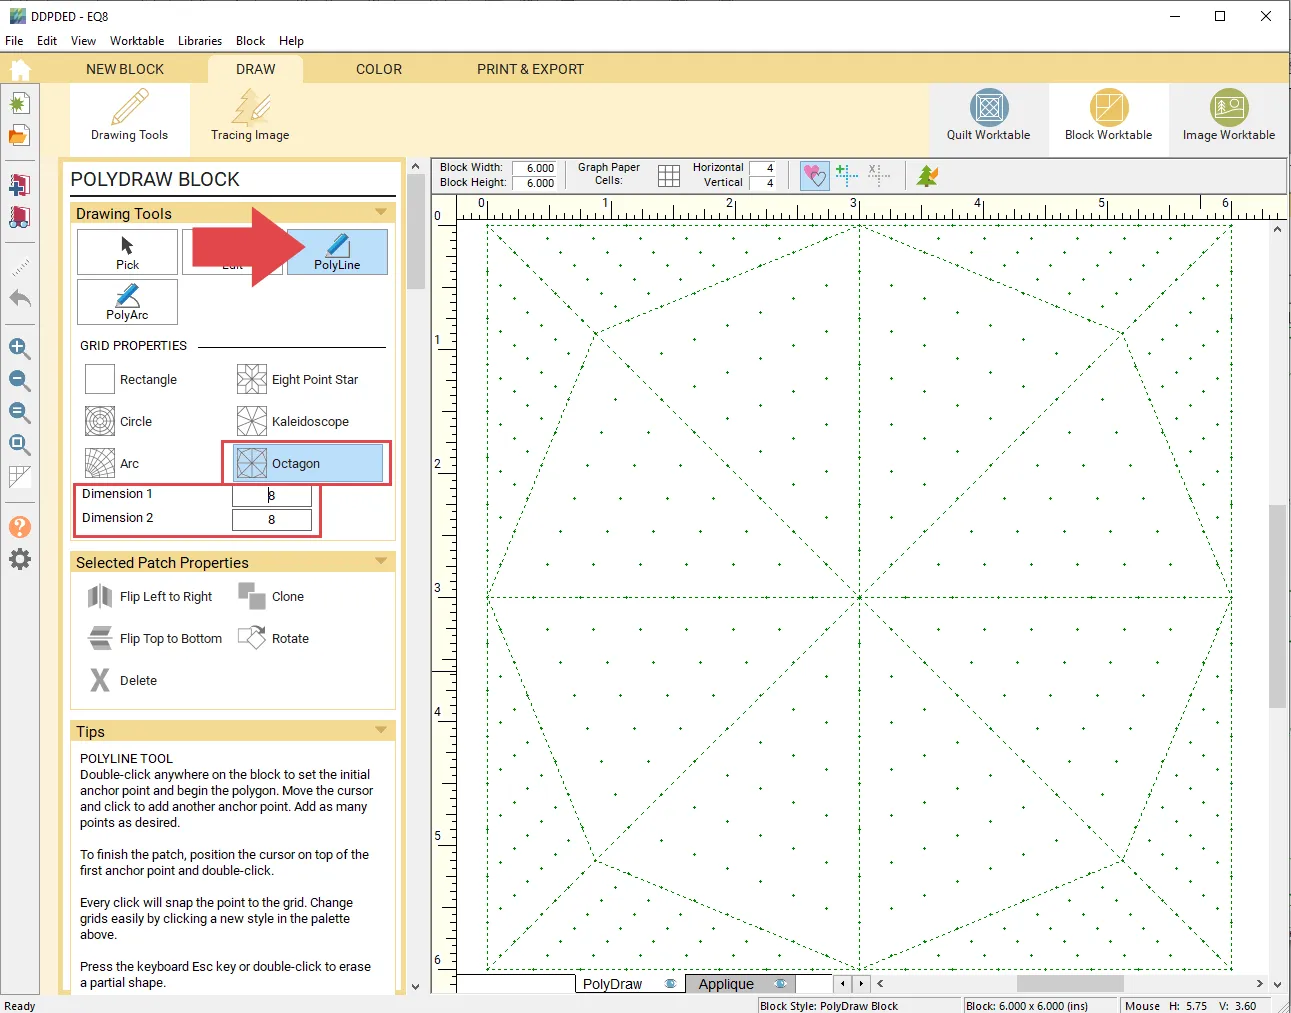
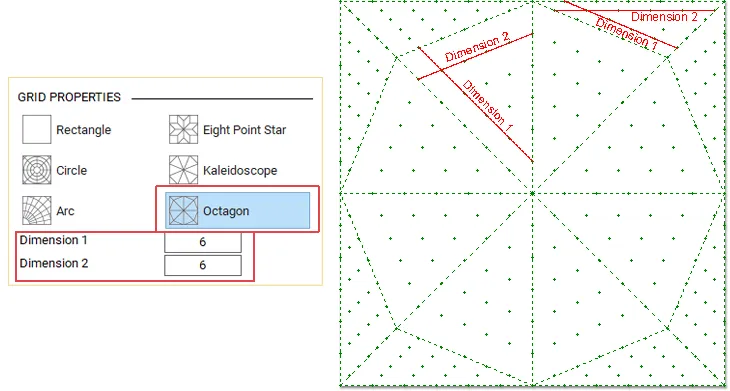
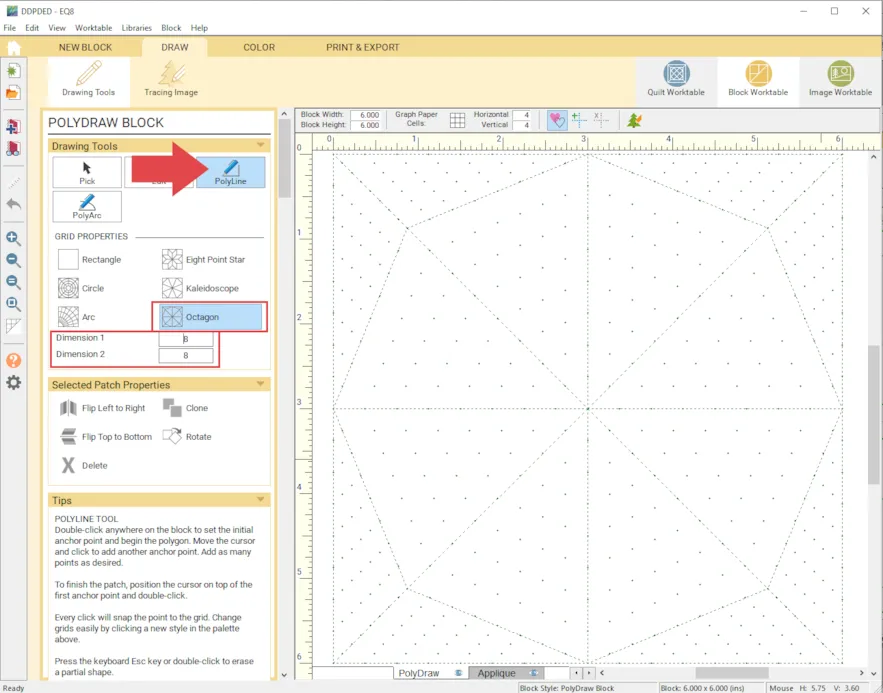
Octagon Grid – To count the grid points, find the largest/widest area of each shape and count across from gridline to gridline of that shape. In this example, the grid snap dimensions are set to 6 and 6. Notice that there are 6 dots for each dimension shown. The first and last dots fall on the grid lines, so don’t forget to count those.
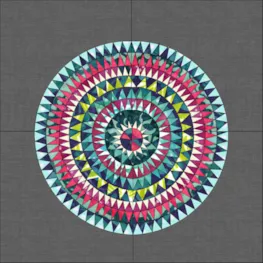
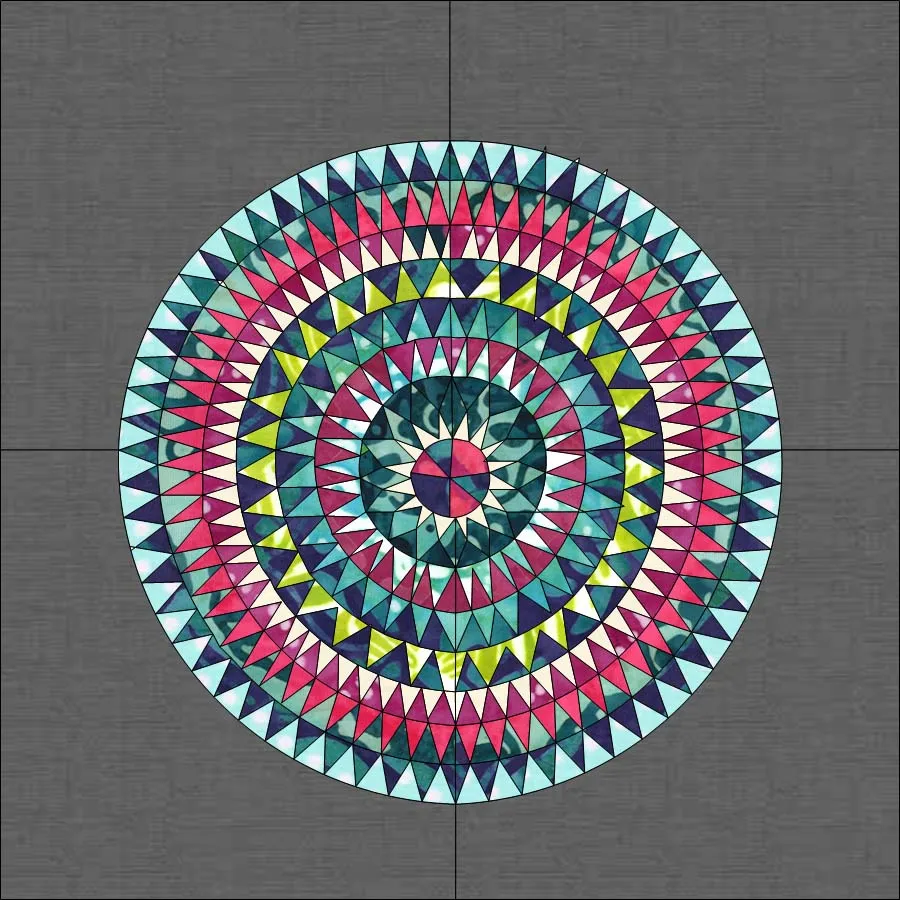
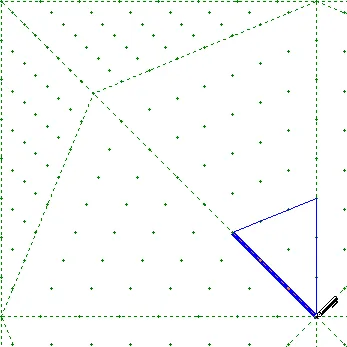
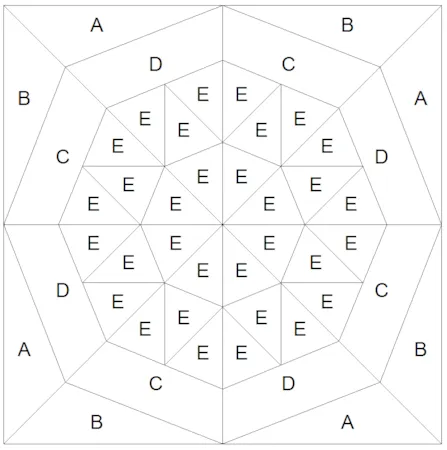
So for example, this block…It can be drawn in PolyDraw or EasyDraw but it is easier and (possibly, depending on how you draw it) more precise in PolyDraw.

Let’s start with PolyDraw.
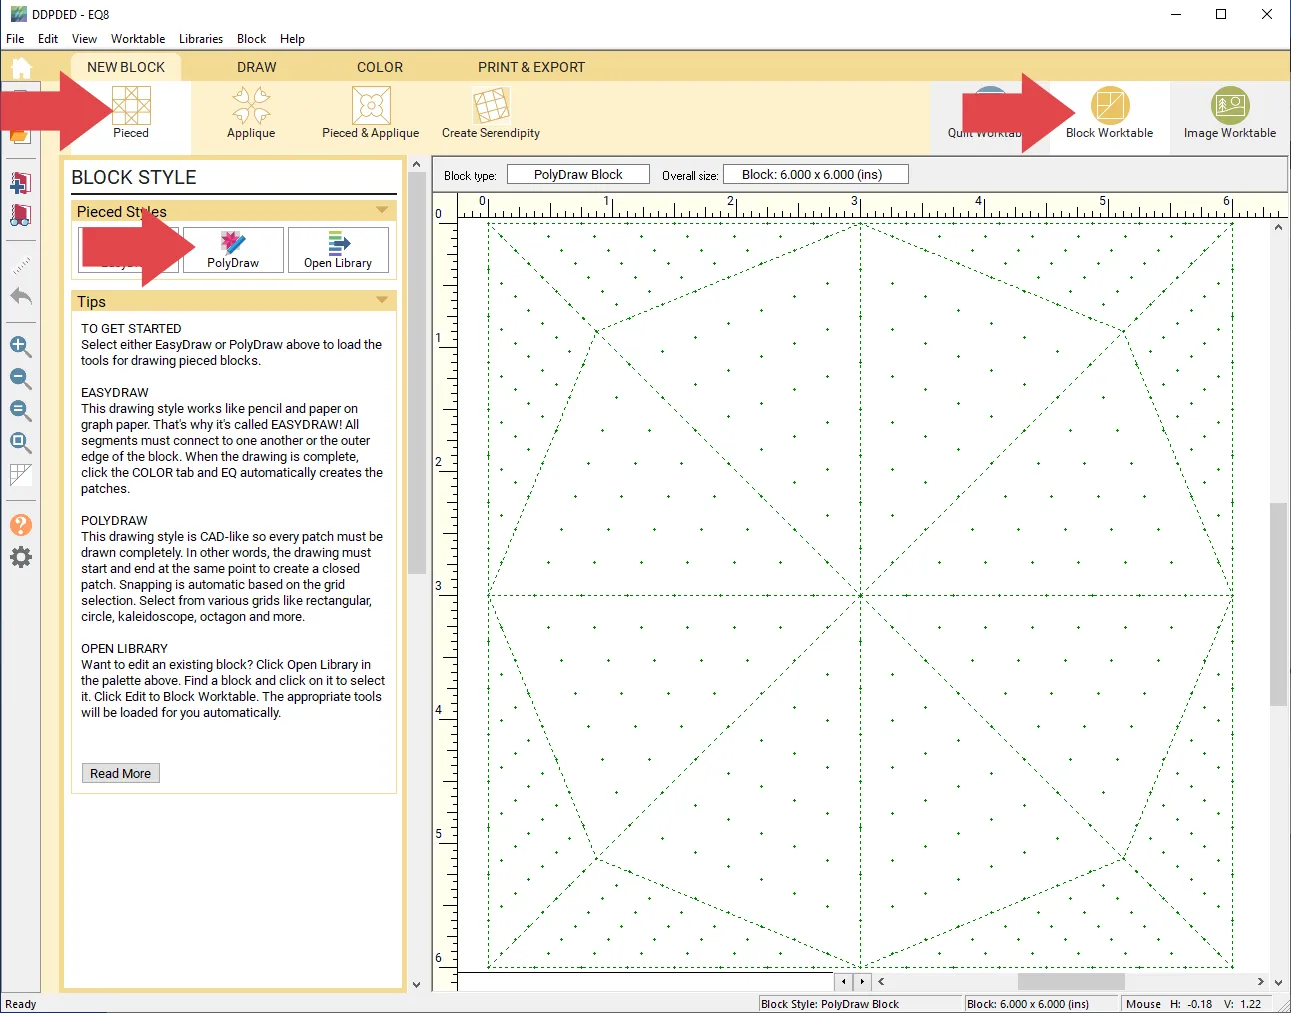
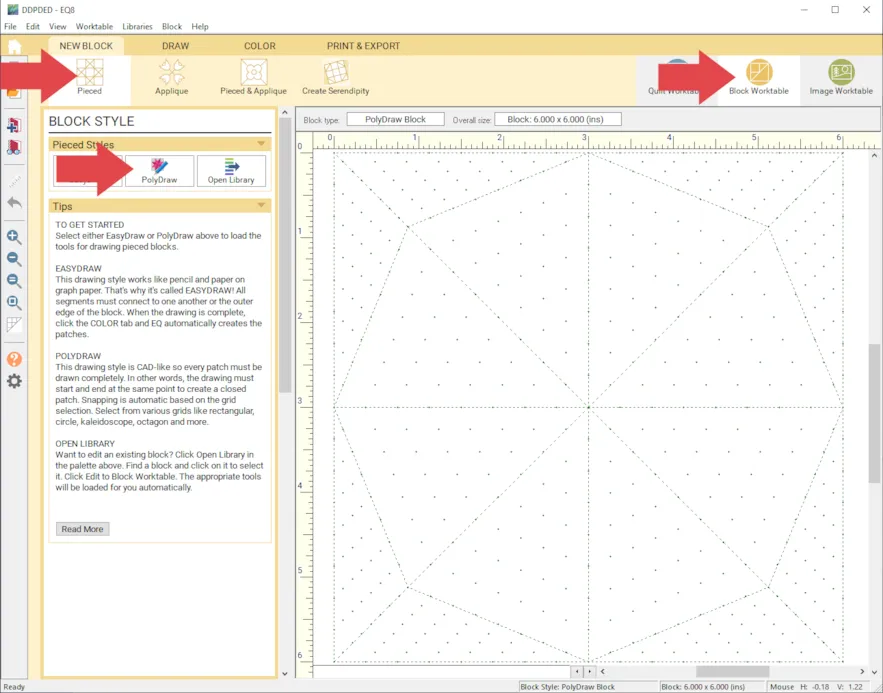
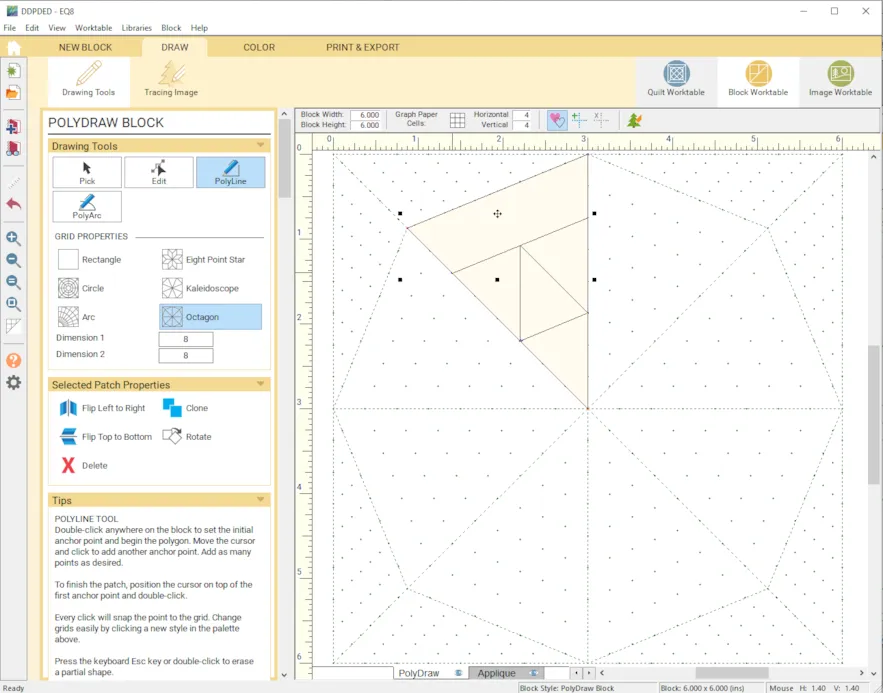
- Click Block Worktable > NEW BLOCK > Pieced > PolyDraw
- Click the Octagon
- Make Dimension 1: 8
and Dimension 2: 8
(Block size doesn’t matter since the grid is predetermined.) - Click the PolyLine tool
- Click to show Hide/show Auto Fill on closed patches

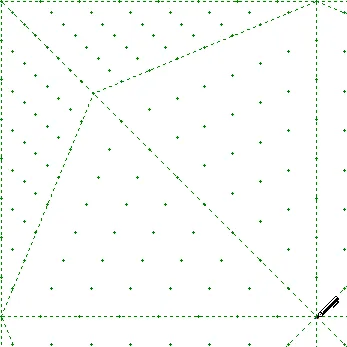
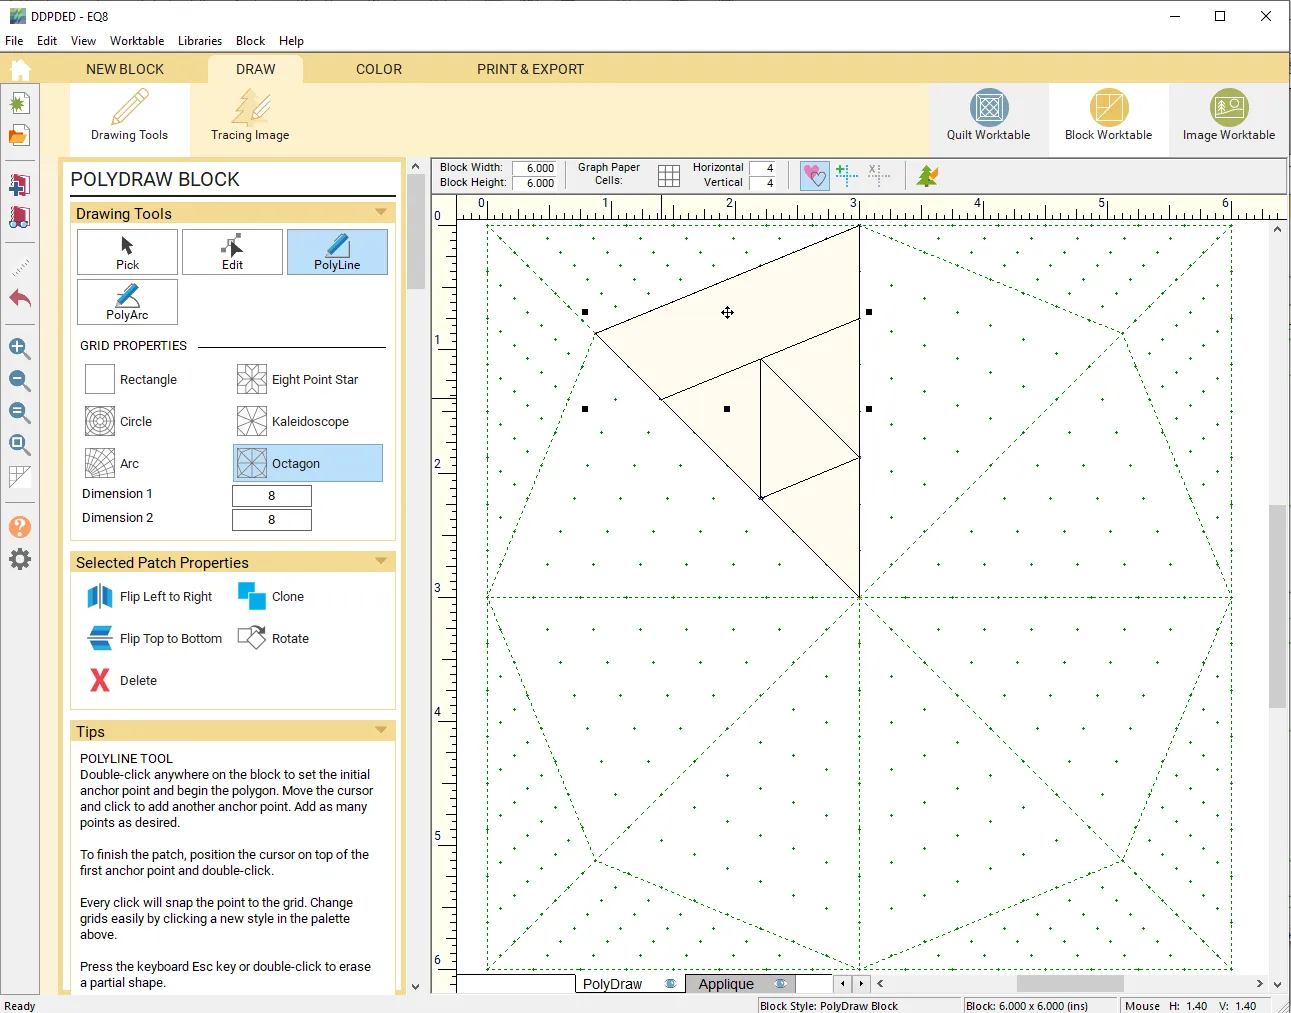
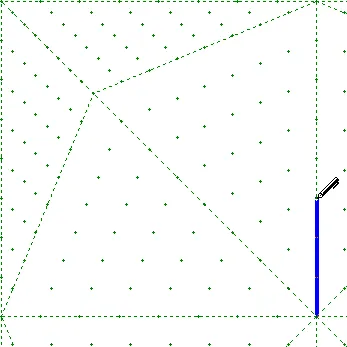
- Move your cursor to the center point of the block and double-click to anchor your line. As you move your cursor you’ll now see a blue line connected to it.

- Move your cursor up (without holding down the mouse) vertically three grid points and single-click to place a node.
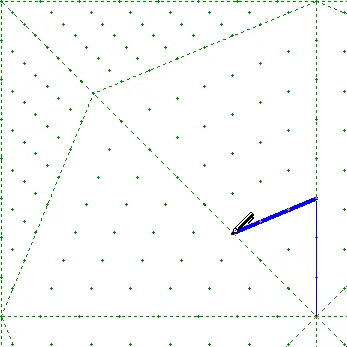
- Move your cursor to the other side of the “wedge” and single-click to place another node.
- Move your cursor back to the start point and double-click to finish the patch.
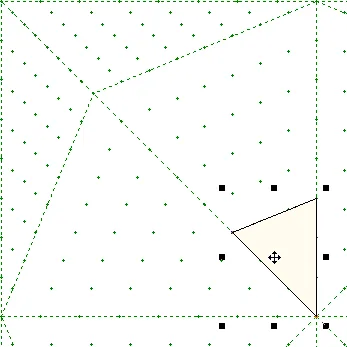
You’ll know that the patch is closed because it will fill with a cream color and become selected with a crosshair in the middle.

- Repeat this process until you have 1/8 of the center. Remember to make complete patches. (The top line of the first patch cannot be the bottom line of the triangle patch on top of it.)
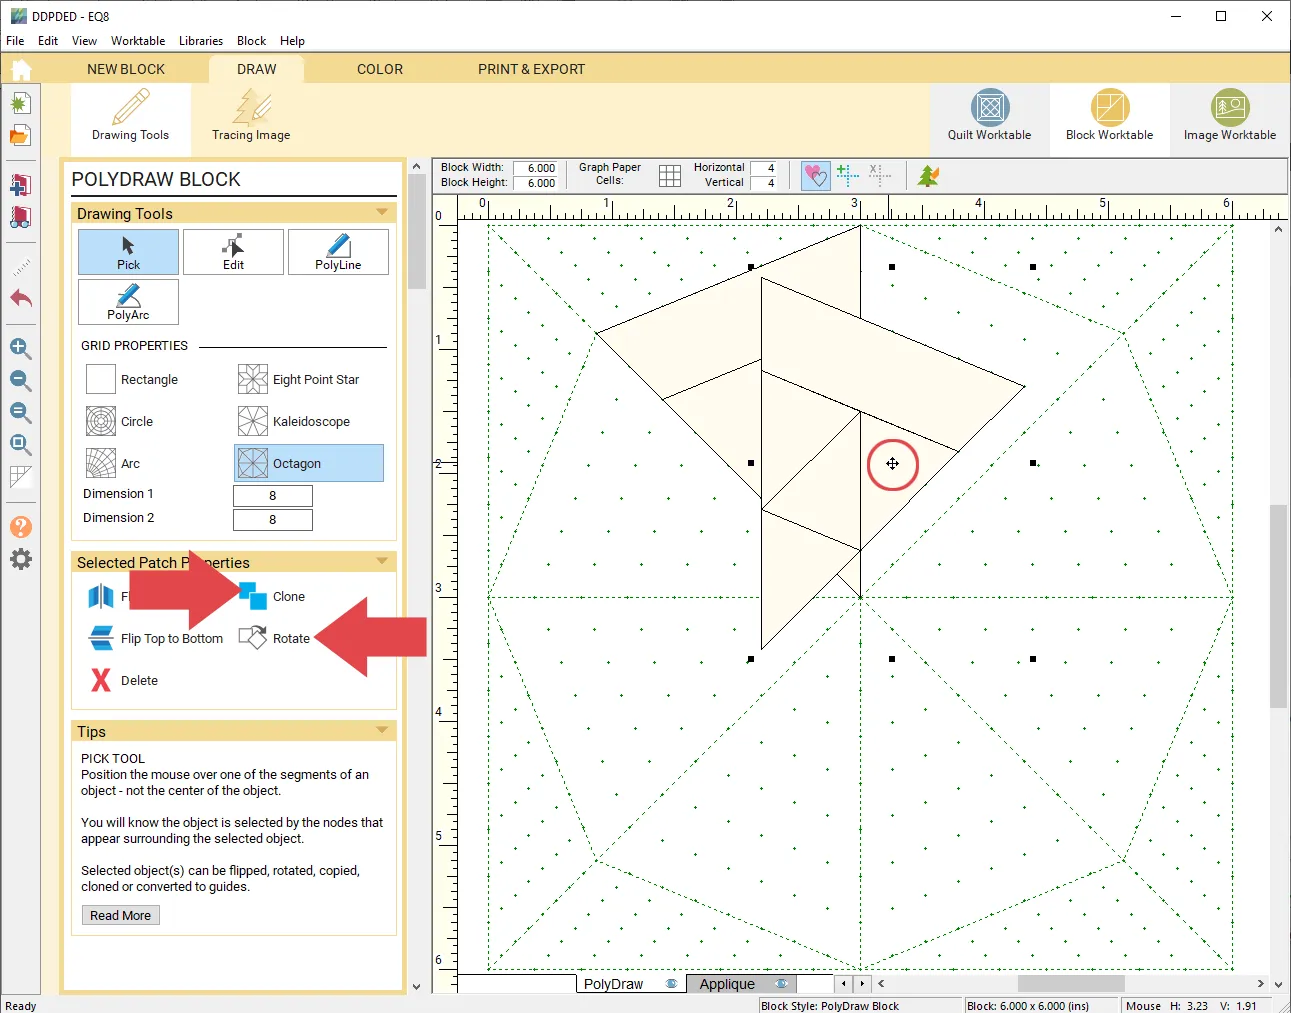
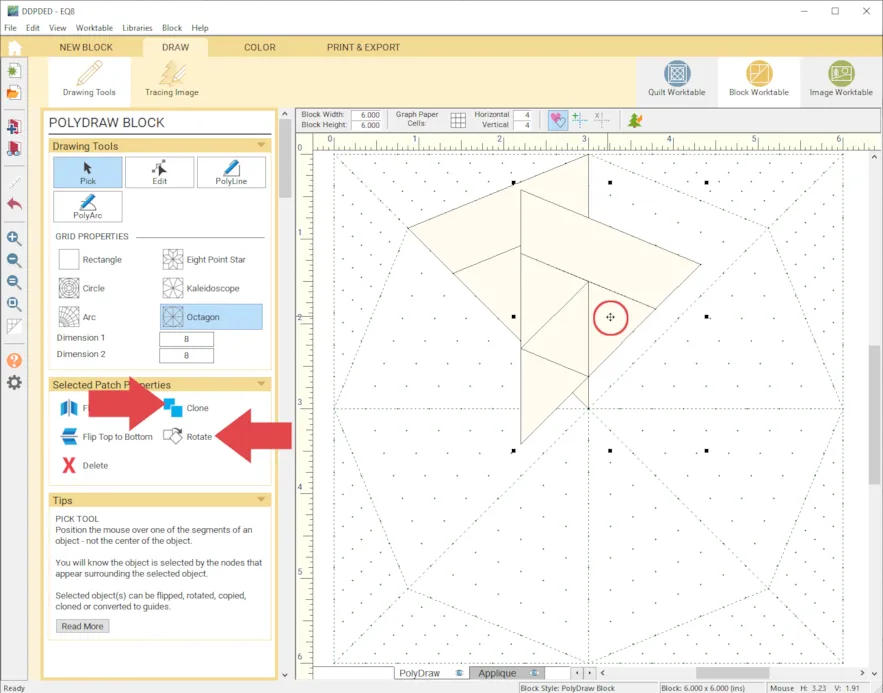
- Hold Ctrl + A/Command + A on your keyboard to select all.
- Click Clone
- Click Rotate
The Rotate button works differently for each of the PolyDraw grids. When using the Octagon grid, each click of the Rotate button will rotate the selected patch(es) by 45 degrees. - Position your mouse over the crosshair and click and drag the selected patches into place.
- Repeat steps 12-14 until the center of the block is complete.
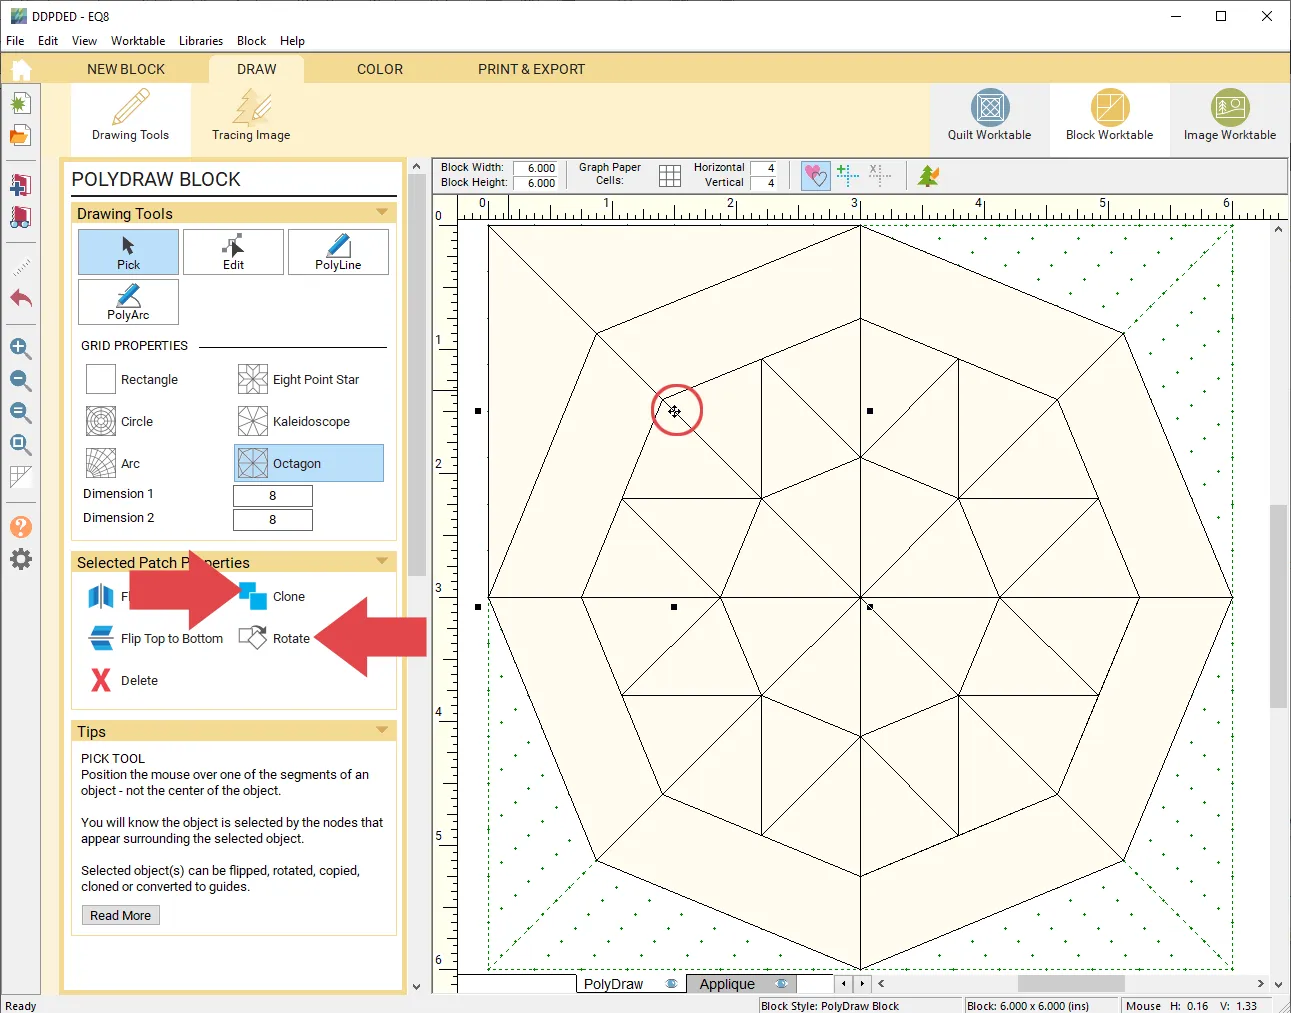
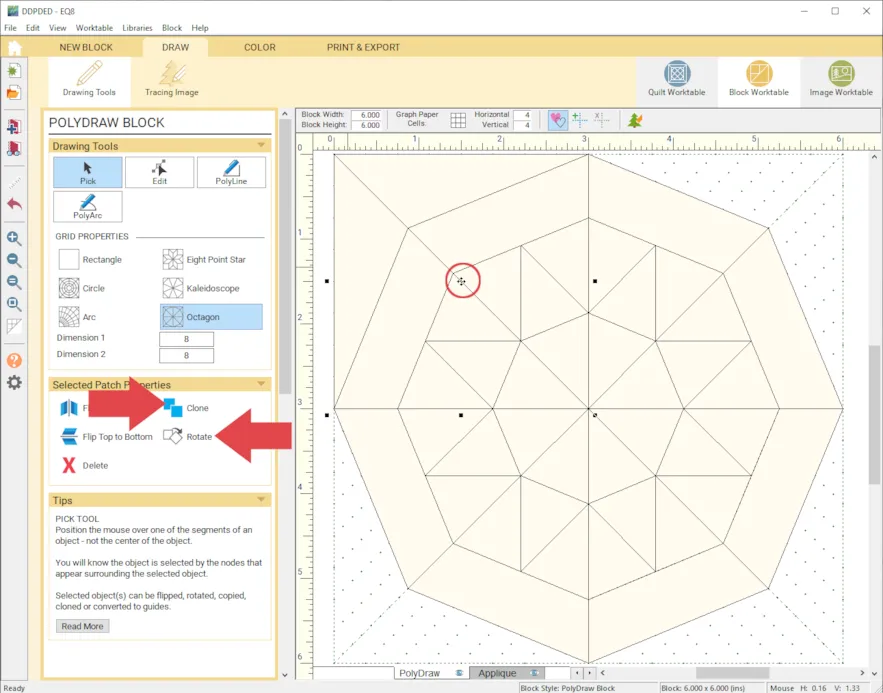
- Using the PolyLine tool, draw two corner sections.
- Hold down the Shift on your keyboard and click both corner sections to select them.
- Click Clone
- Click Rotate twice
- Position your mouse over the crosshair and click and drag the selected patches into place.
- Repeat steps 18-20 until the block is complete.
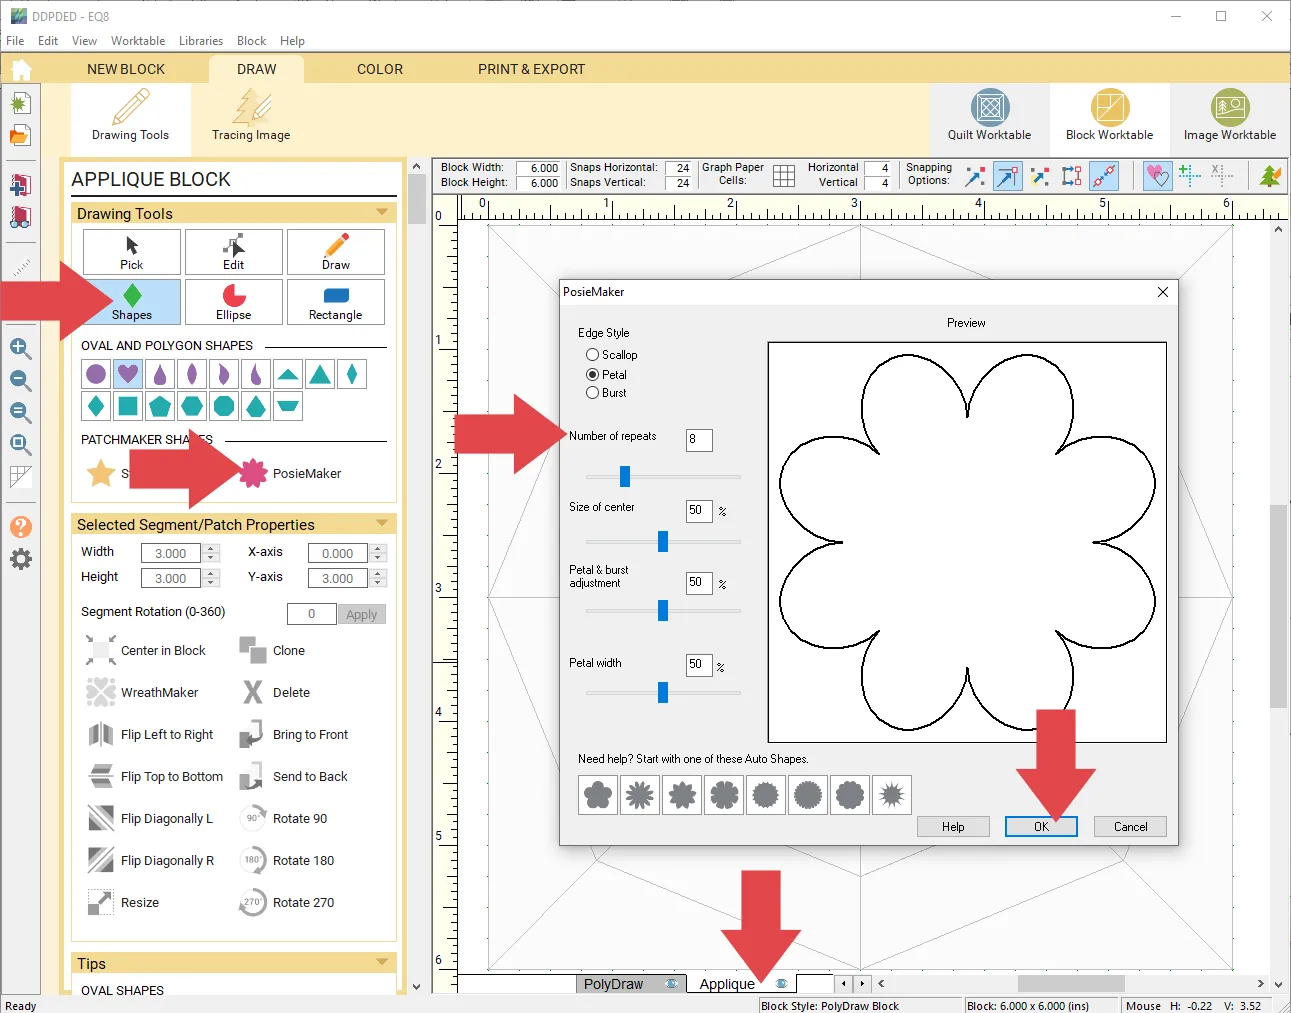
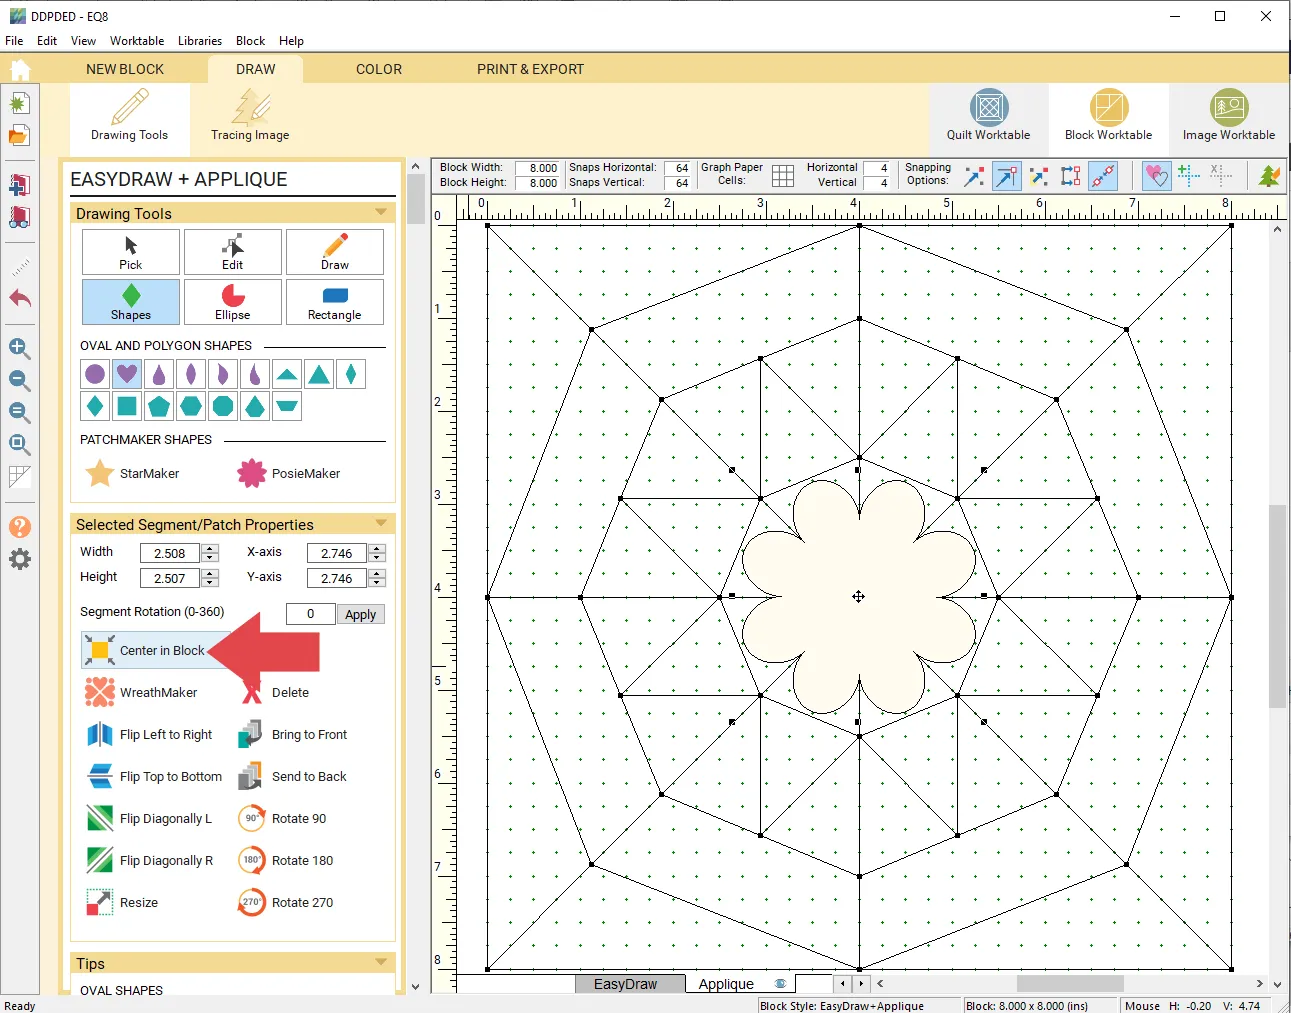
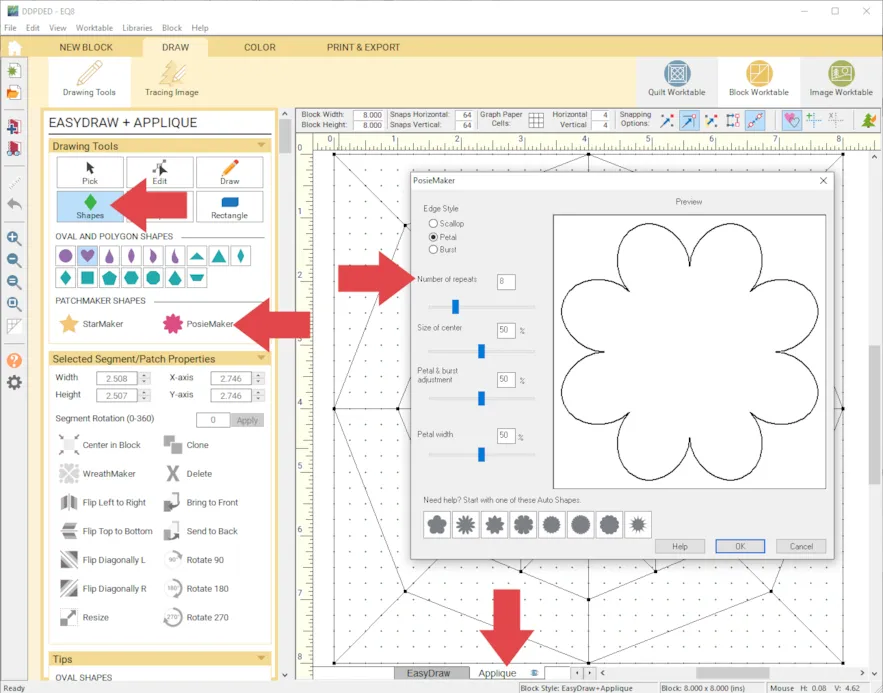
- Click the Applique tab
- Click the Shapes tool
- Click PoiseMaker
- Make the Number or repeats: 8
- Click OK
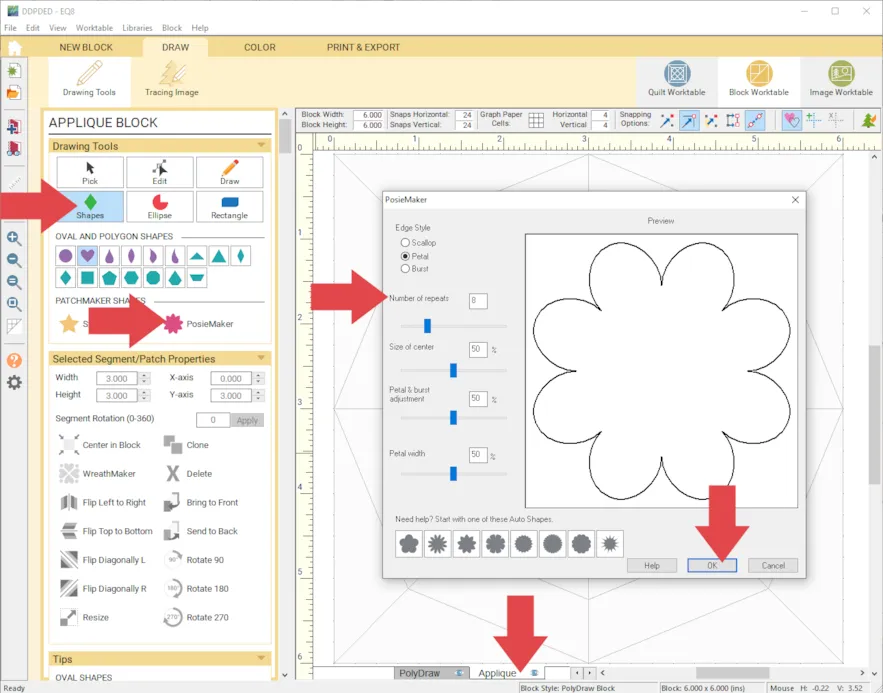
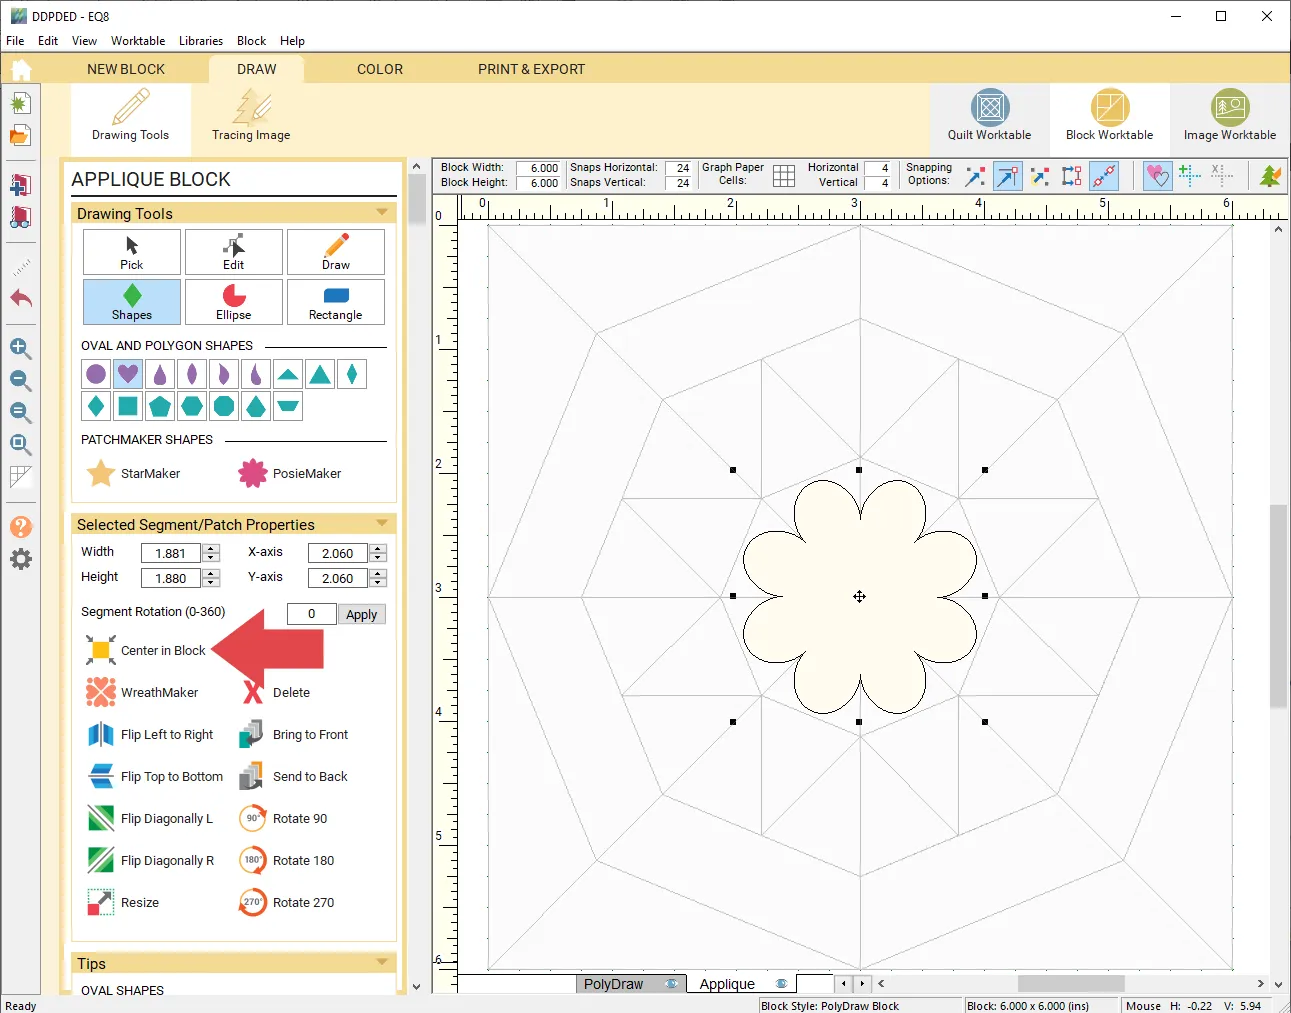
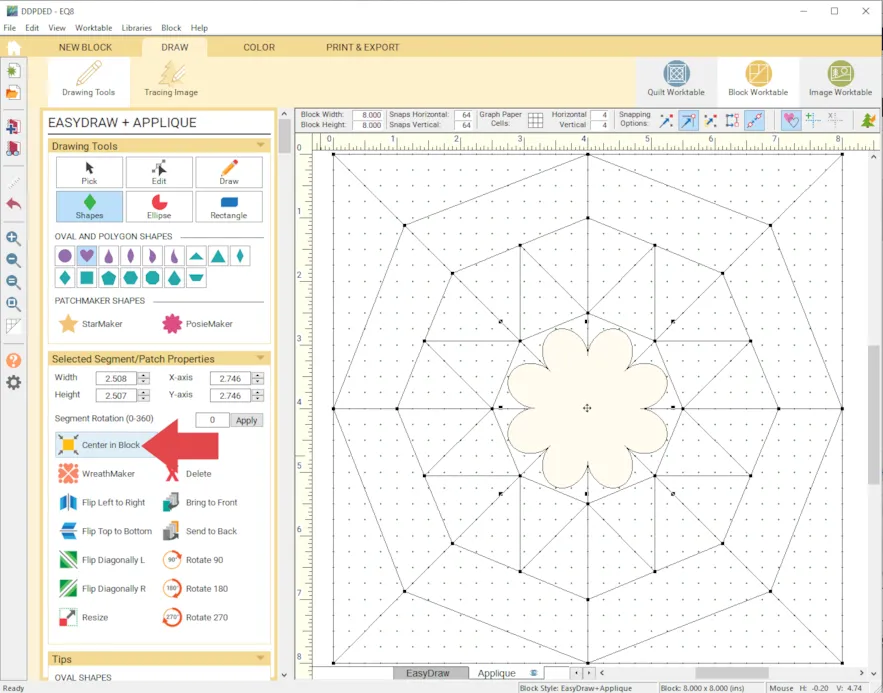
- Click Center in Block

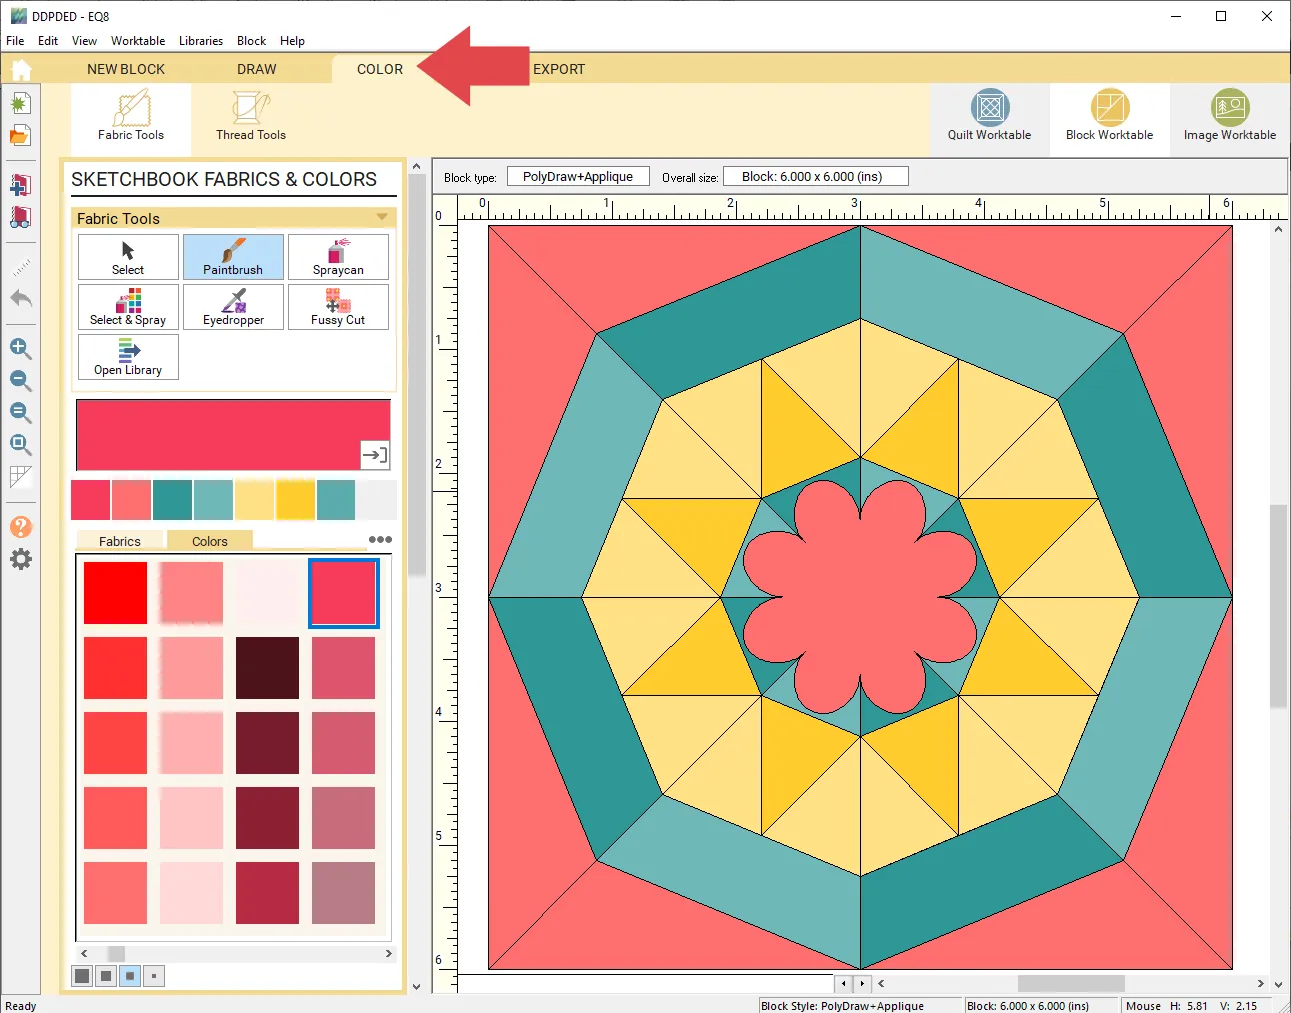
- Click the COLOR tab and color the block as you would like.
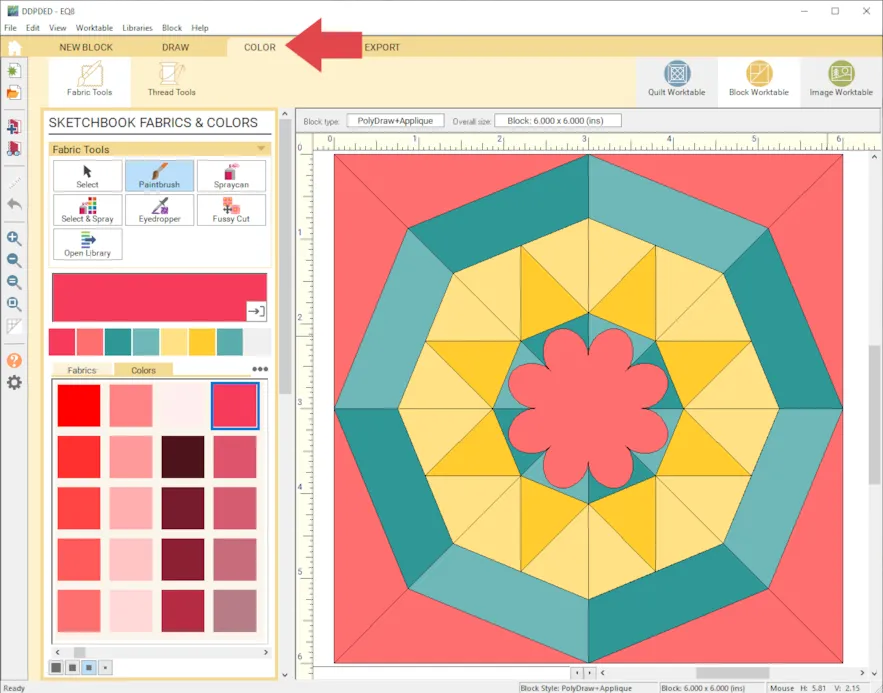
- Click Add to Project Sketchbook
 . If you haven’t named your project yet, EQ8 will prompt you to do so. (To be saved, your item needs to be in the Sketchbook AND your project needs to be named. Here is more information.)
Now, let’s try to draw that same block in EasyDraw.EasyDraw is like drawing with pencil and paper. Blocks drawn with the EasyDraw tools are constructed from simple lines and arcs. When you draw these segments, nodes are placed at the start and end of each segment. The main “rule” of EasyDraw is to make sure that your lines and arcs touch one another. Here is a more in depth lesson on EasyDraw.
OPTIONAL: If you’d like you can use the PolyDraw block as your guide. Here is how to do that…(or skip to step 30)
Click View Project Sketchbook
Click on the block and click Edit.
Click the PRINT & EXPORT tab.
Click Export > Image
Name and save your file.
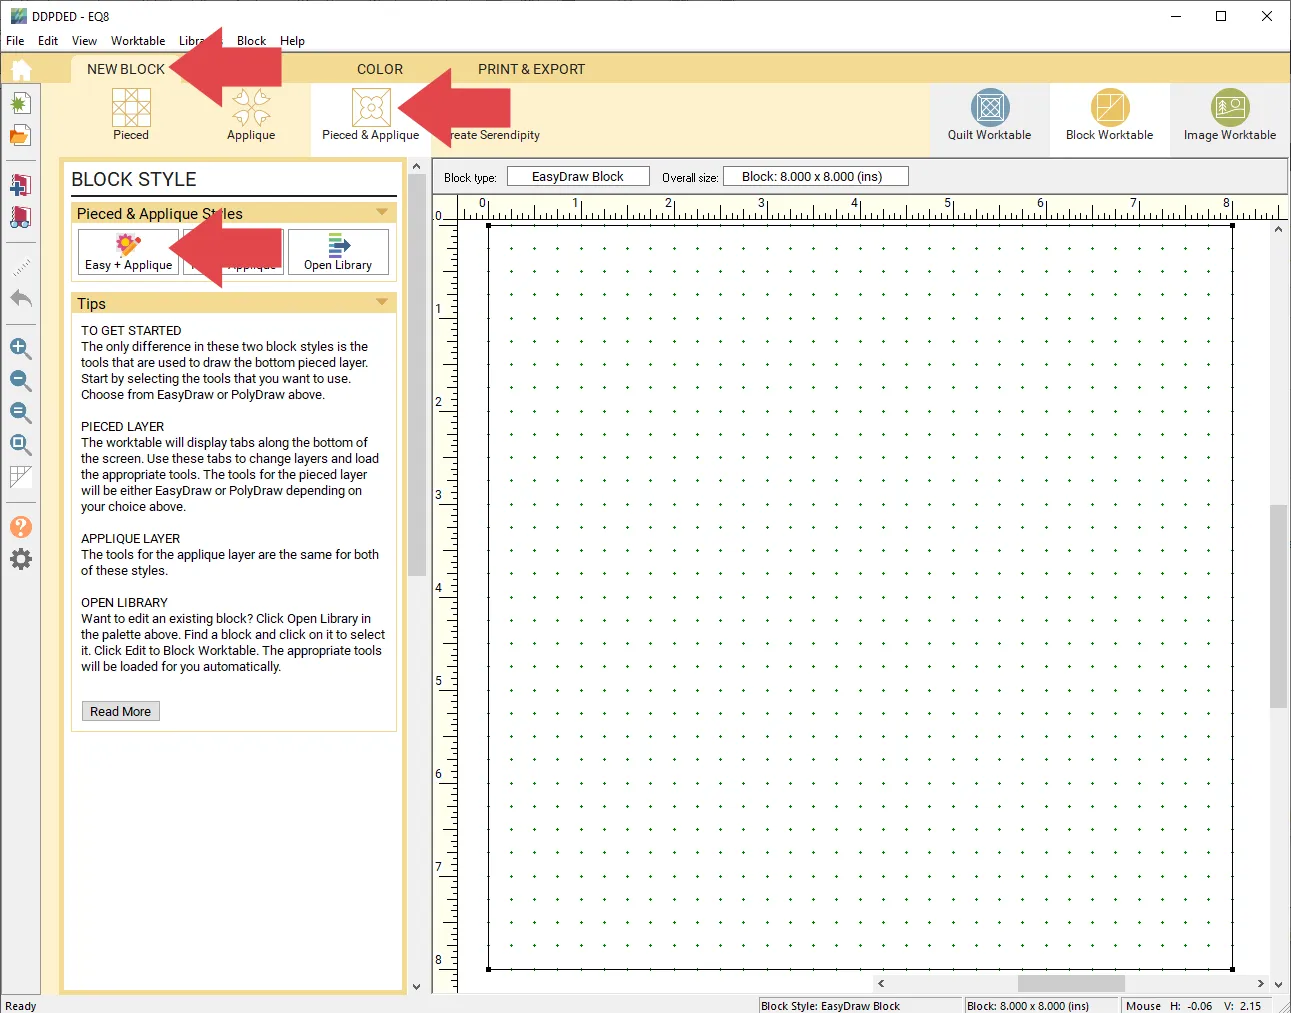
Click NEW BLOCK > Pieced & Applique > Easy + Applique
Click Tracing Image
Click Import Image
Navigate to your file
Click Open
Click OK
Click Drawing Tools - Click NEW BLOCK > Pieced & Applique > Easy + Applique

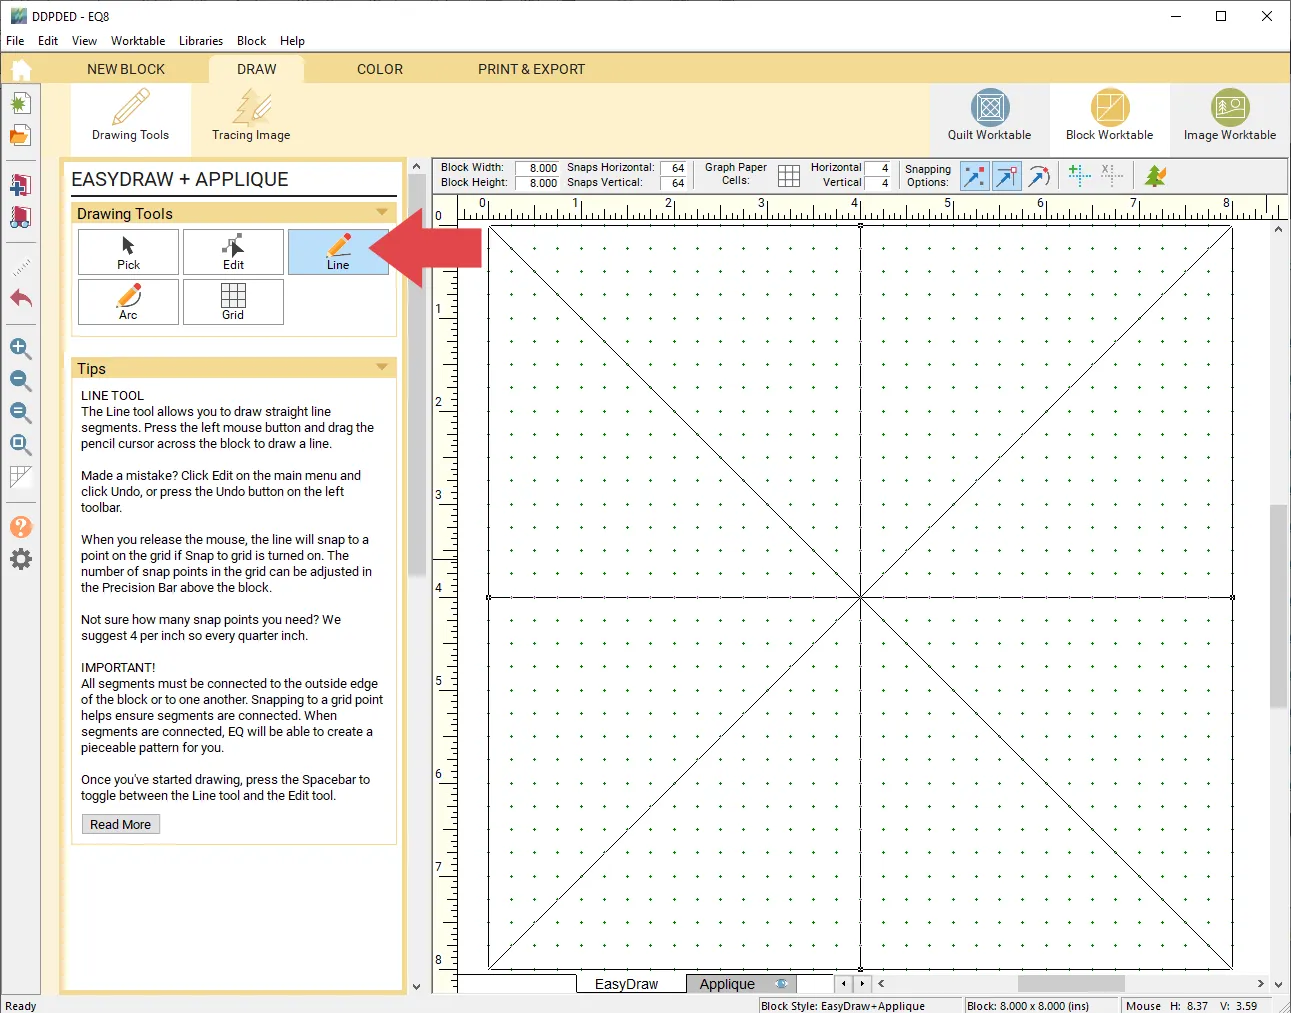
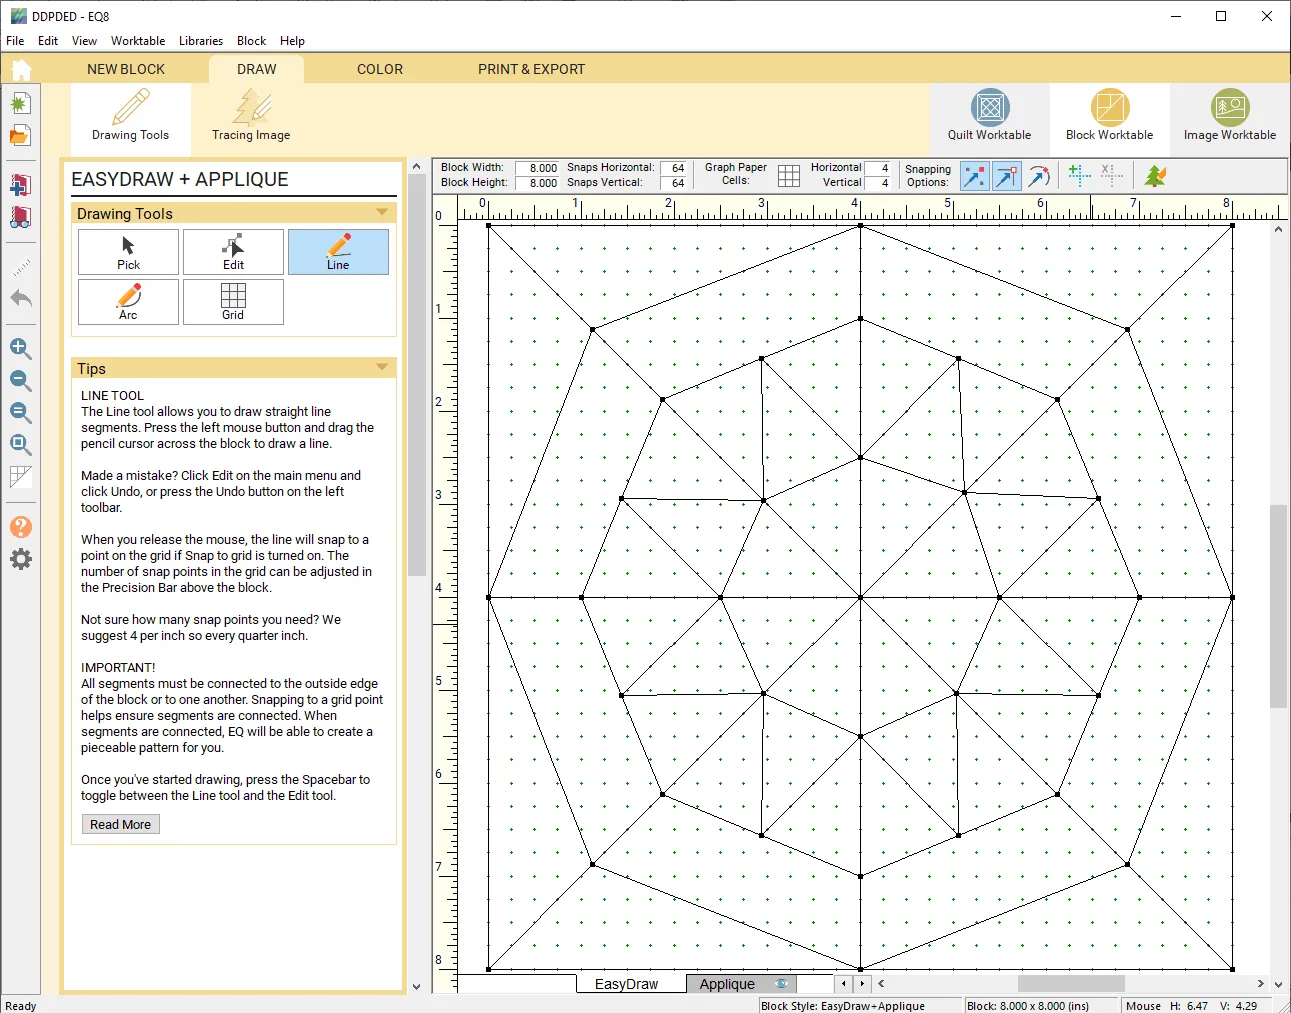
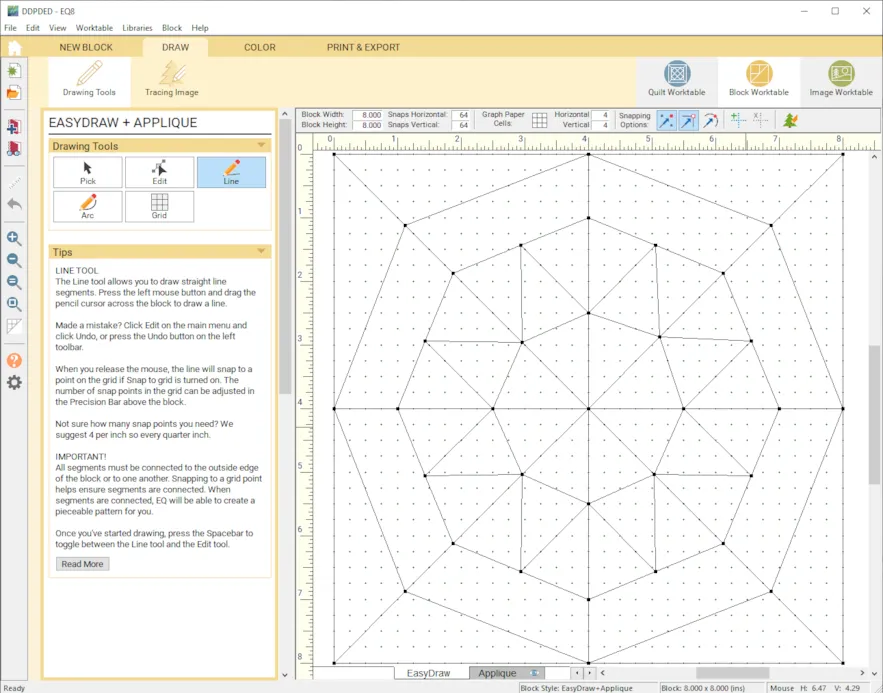
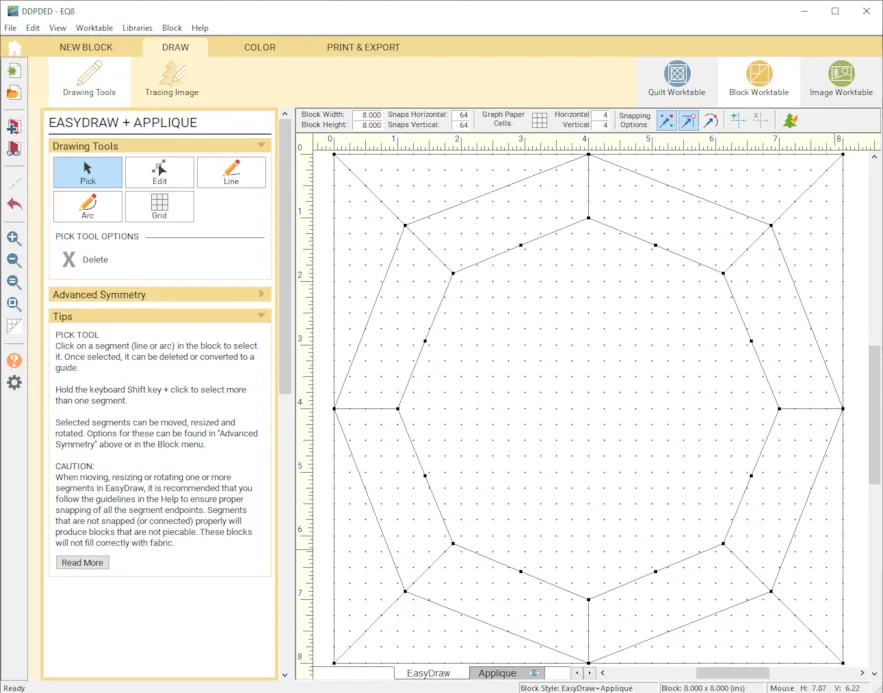
This block doesn’t have a clear horizontal/vertical grid. (Unlike a block based on a Four Patch, where you would make your block size/snaps a multiple of four. Here is more information on determining blocks size and snaps for EasyDraw.) I guessed at what to set my snap settings at. I made the block 8 x 8 with the snaps set to 64 x 64. - Click the Line tool and start drawing in the lines.

- Keep drawing lines to form the block.
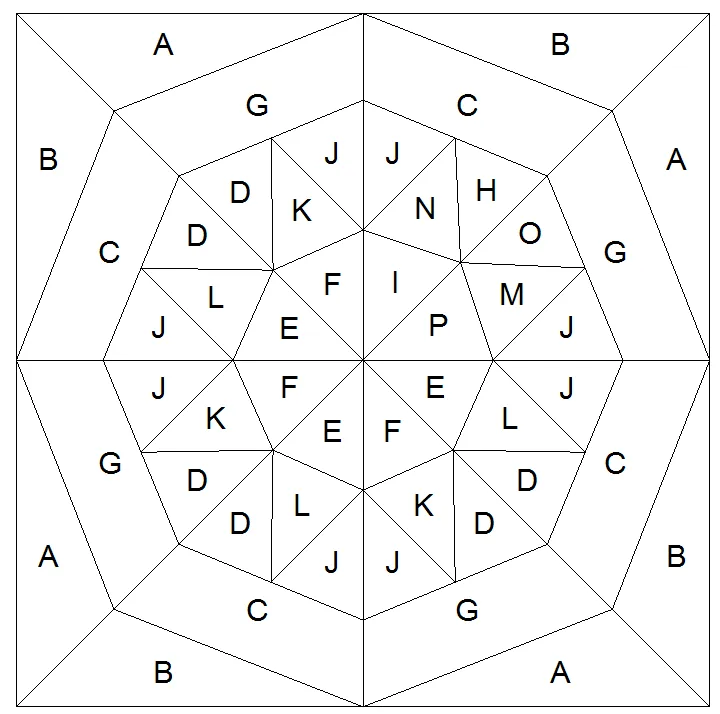
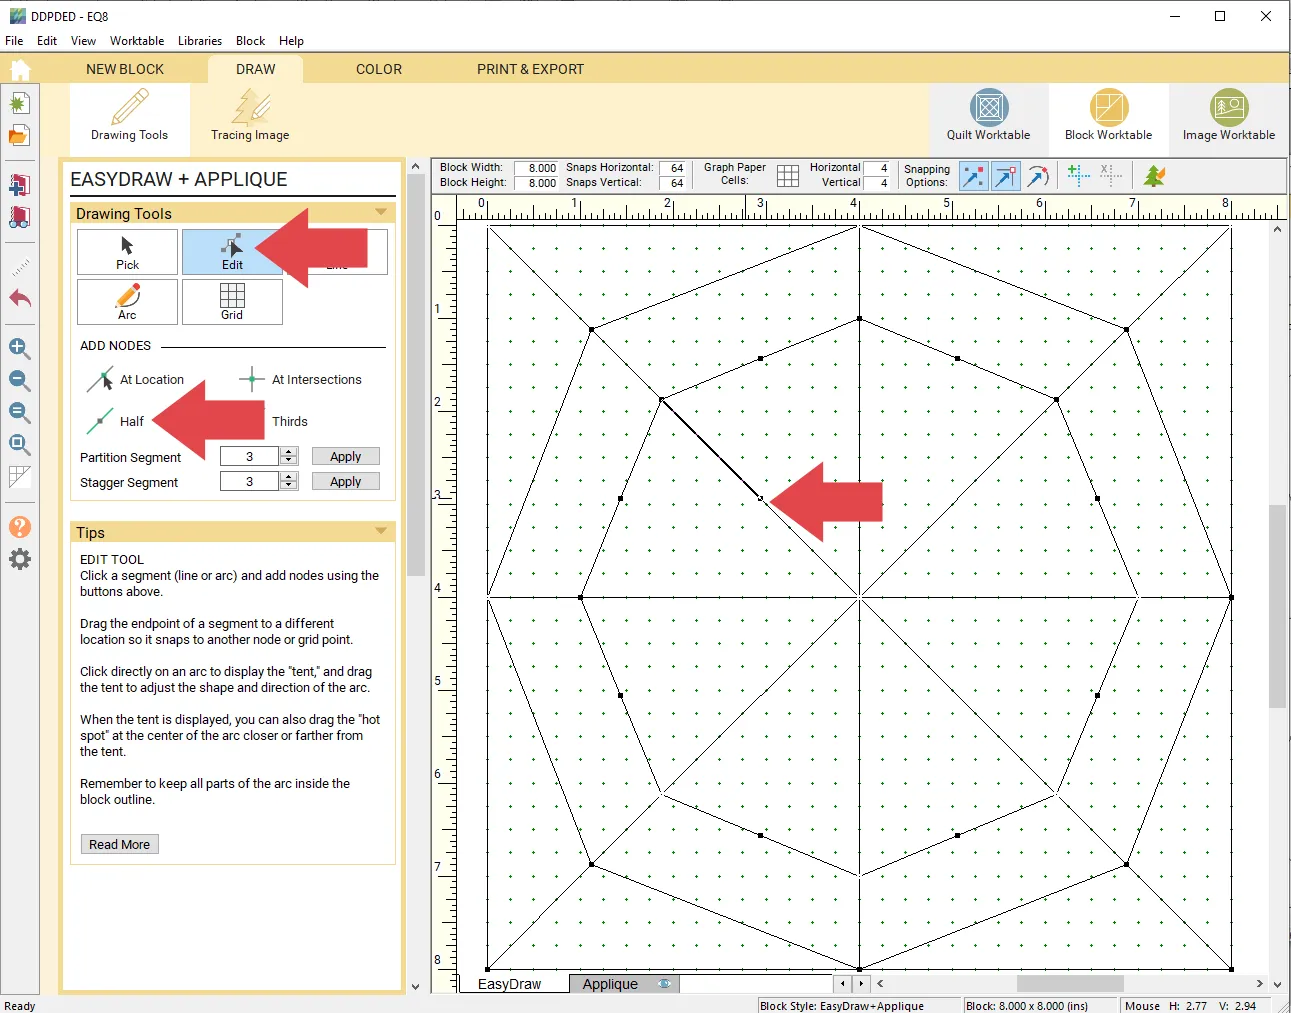
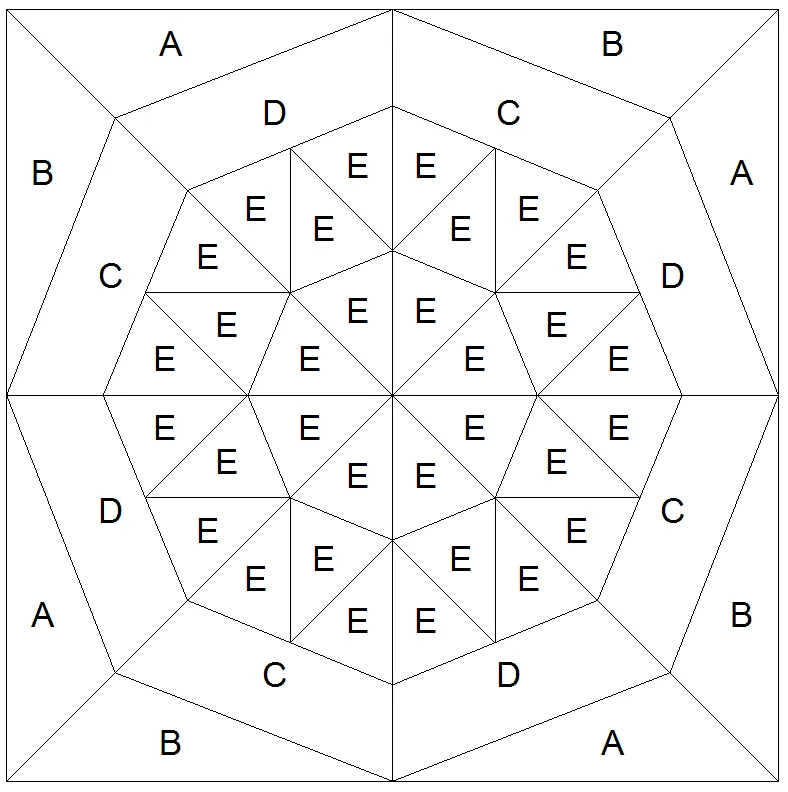
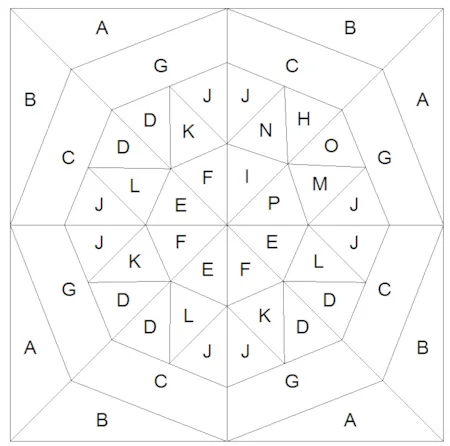
However, you may notice that the lines don’t snap exactly right. One way to check to see if all your shapes are the same is to preview your Rotary Cutting Chart. The center triangles are all different letters which shows that the block is not drawn correctly.
Let’s make the outer ring of triangles and the inner ring of triangles all the same. - Delete all the center lines.
- Redraw the center lines
- Click the COLOR tab
- Click back to the DRAW tab (this segments the lines…you’ll now see a node in the center)
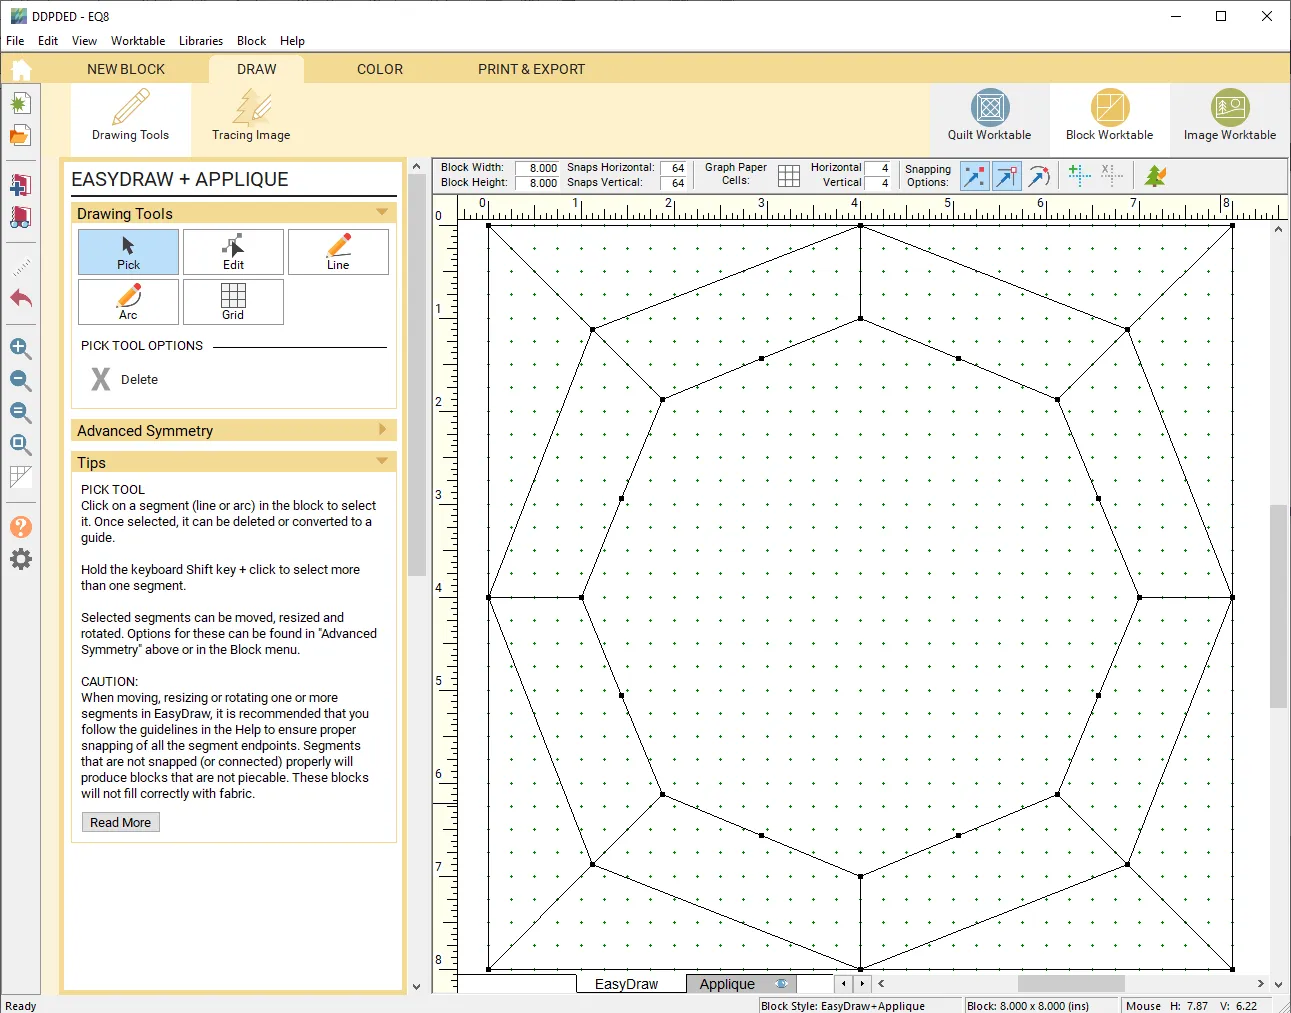
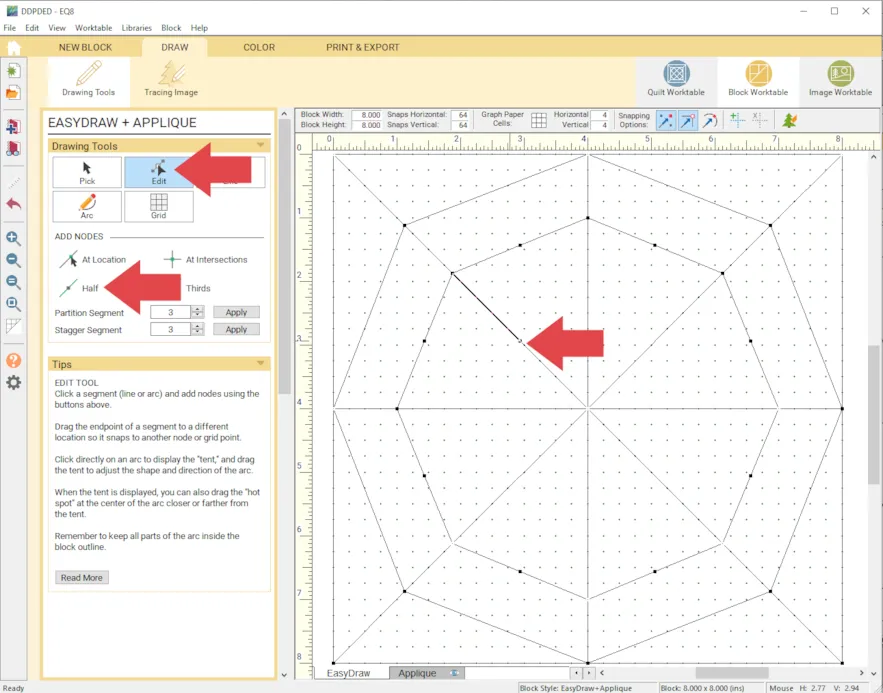
- Click Edit
- Click Half
- Click on all the center lines
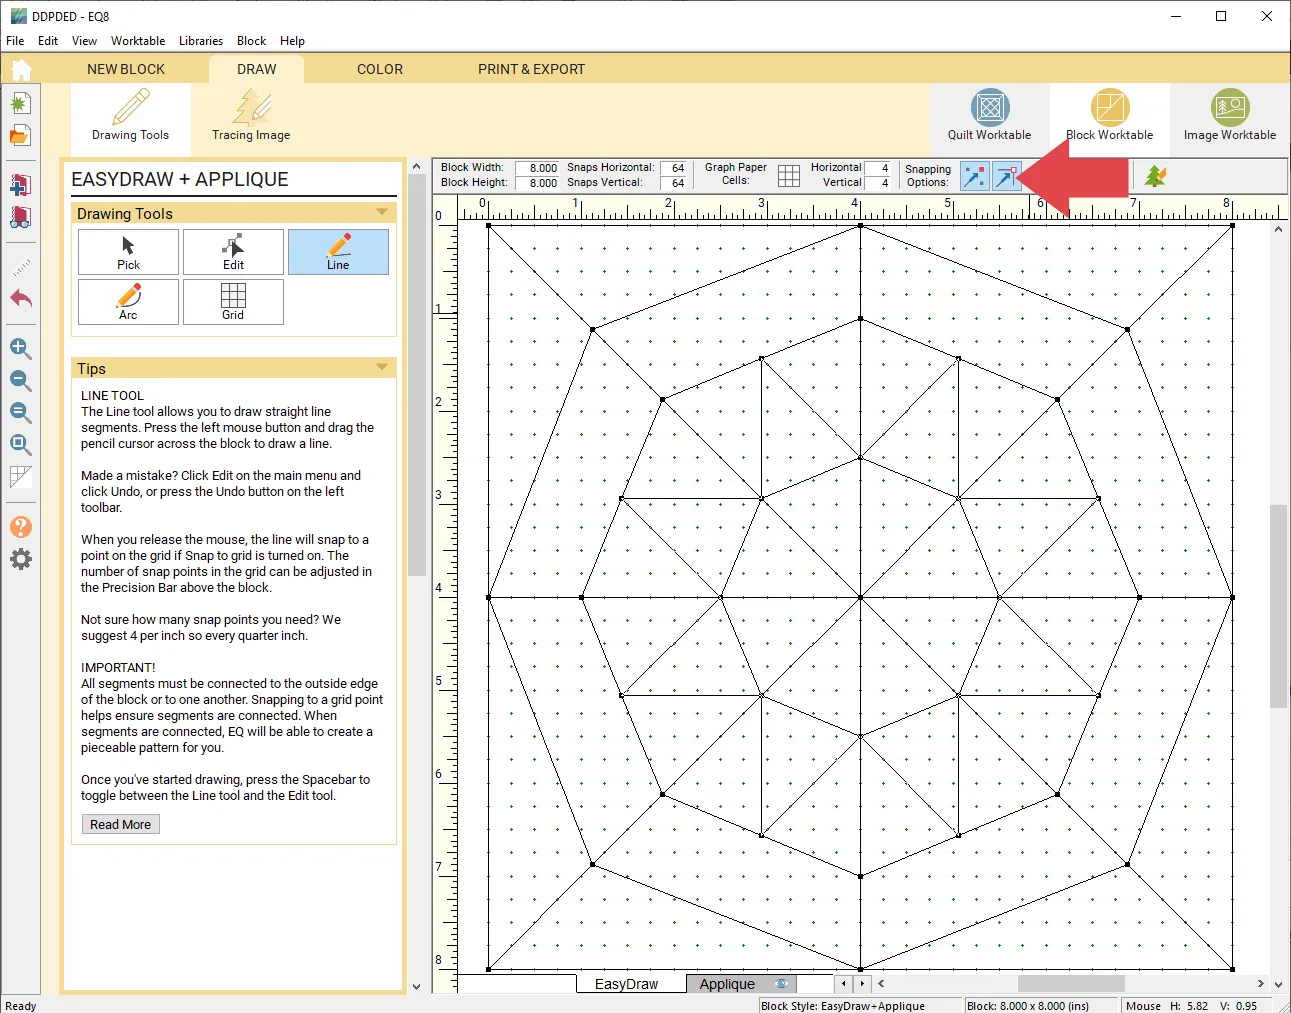
- Turn Snap to Nodes of Drawing on
- Continue drawing the block.
Now in the Rotary Cutting Chart you can see all the triangles are the same.
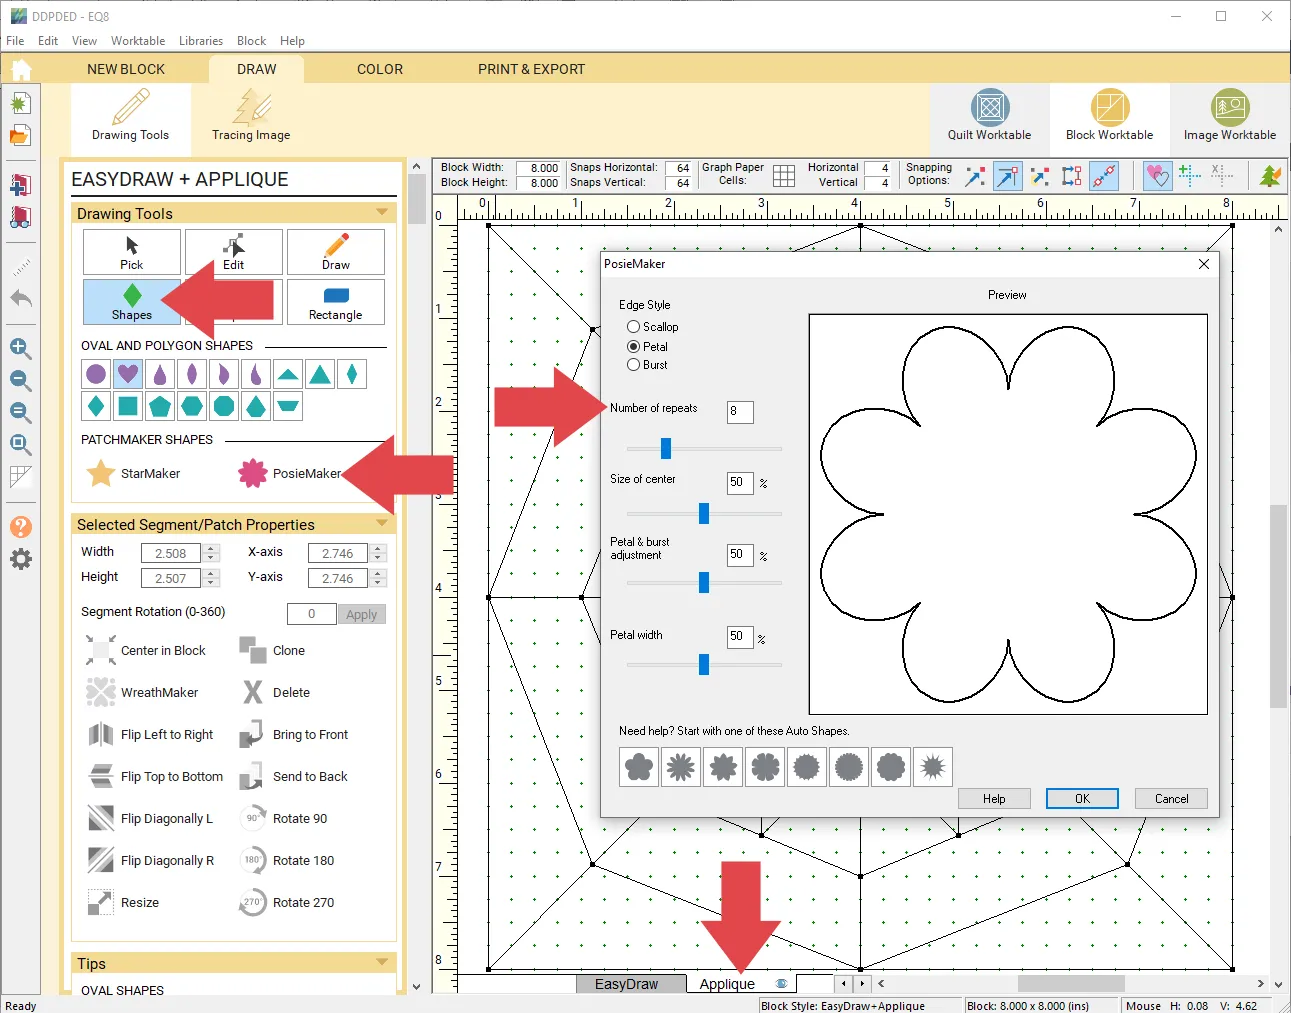
- Click the Applique tab
- Click Shapes
- Click PosieMaker
- Make the Number or repeats: 8
- Click Center in Block
- Click the COLOR tab and color as you wish.
- Click Add to Project Sketchbook
Drawing this particular block in PolyDraw is easier because the horizontal and vertical snaps are not obvious. So you would need to figure out how to make it work in EasyDraw. In PolyDraw the work is done for you!
If you want to post images of your blocks, here is how to export the images. They don’t have to be from this lesson but be sure to include if they were drawn in EasyDraw or PolyDraw.
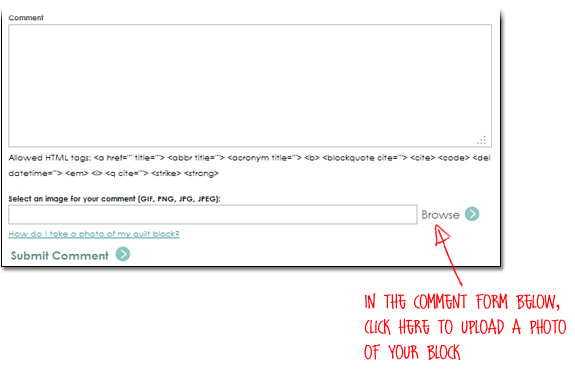 To post your image click to comment on this post. Fill in your info and then click Browse.Go to: Documents\My EQ8\Images
I can’t wait to see what you’ve done! I hope you enjoyed the lesson!
If you have questions about the lesson feel free to post them below.If you have questions about something else EQ related, please contact techsupport@electricquilt.com. If you have suggestions for new Design & Discover lessons feel free to comment below or email Heidi@electricquilt.com