
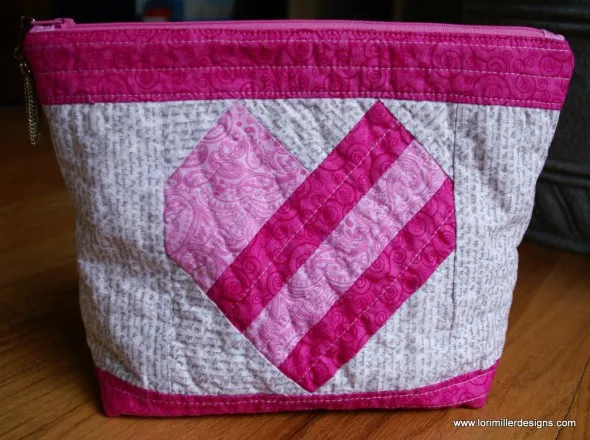
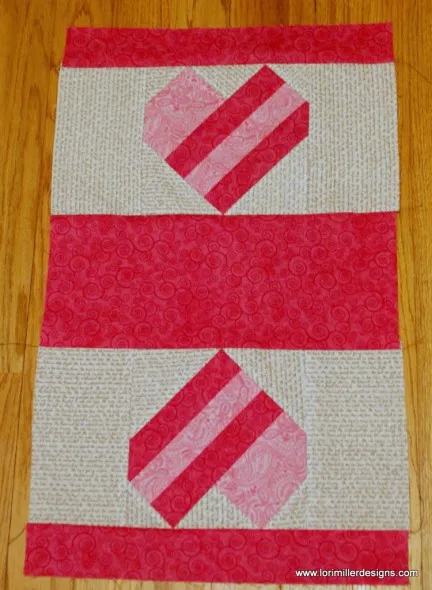
EQ Mini can be used to design so much more than just a quilt. Using your creativity and EQ Mini Software, you can design any quilty project. This month, EQ Mini was used to stitch this generous Sweetheart Quilted Zip Pouch. Using a smaller size and scale in the EQ Mini design creates a fun way to build the outside of the pouch. Based upon a horizontal quilt layout, we play with size, scale and heart blocks to create this lovely pouch. It is perfect to make for someone you love for Valentine’s Day or any special day.
Sweetheart Quilted Zip Pouch
Skillset: Beginner
Size: 11″ x 8″
Skill Builders:
- Working with horizontal strip layout
- Editing a strip quilt
- Working with blocks
- Adding blocks
- Rotating blocks
- Using half drop blocks
- Working with Size and Scale
On to the design!
- Open EQ Mini.
- If it asks you to take a quick tour, click Close.
- Read the tip of the day and click Close.
- Let’s name the Project. The project name will appear at the very top of the EQ Mini Window. Right now the project says Untitled. On the top toolbar click the Save button.
 The Save As box will display.
 - Save your project file in the default folder which is projects. Hint: You can then find it under Documents > My EQ Mini > Projects later. Now in the file name box type Valentine Zip Pouch.
- Click Save. The box will close. Notice the project name Untitled has been replaced with Valentine Zip Pouch.
- Select the Quilt Style
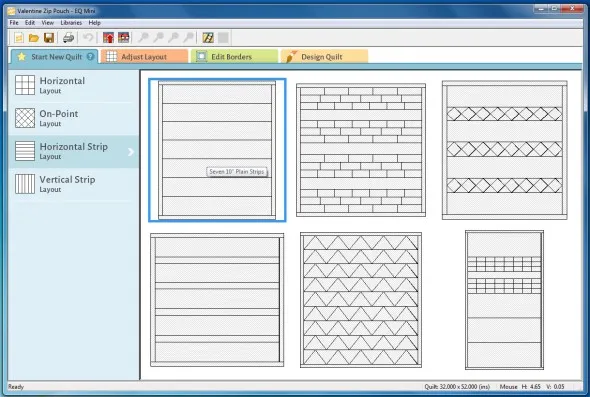
- On the Blue Start New Quilt Tab, select the Horizonatal Strip Layout..
- Select the Seven 10″ Plain Strips. It should be in the top left corner. If you move the mouse and hover over the layouts, it will tell you the name of them.

- Select the Orange Adjust Layout tab. The layout palette will display.
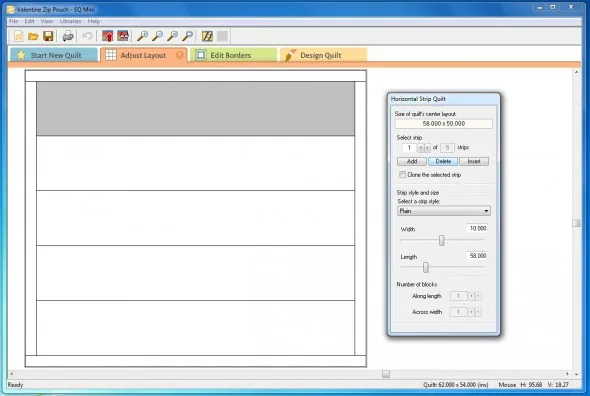
- Under select strip, go to the first strip and click Delete. Delete the first and second strip. You should have 5 strips remaining.
- Select the first strip. Keep strip style as Plain.
- Change the strip width to 1.5″ and the strip length to 12″.

- Select the second strip. Change the strip style to Half Drop Blocks. (Note: Half drop blocks start the row with half of a block. This will give us a whole center block.)
- Change the number of blocks across the length to 2.
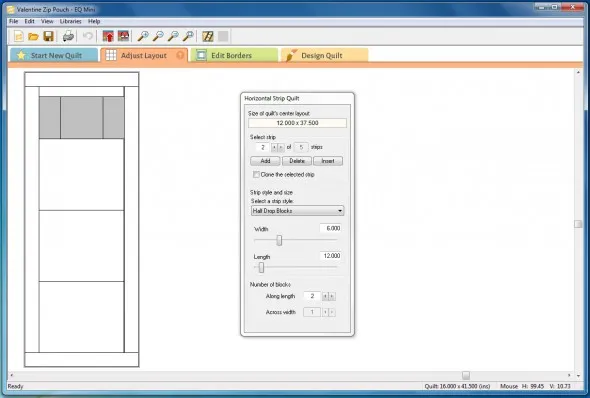
- Adjust the remaining strips as follows:
Strip Style Width Length Number of Blocks across Width 3 Plain 5.5″ 12″ 1 4 Half Drop Blocks 6″ 12″ 2 5 Plain 1.5″ 12″ 1 
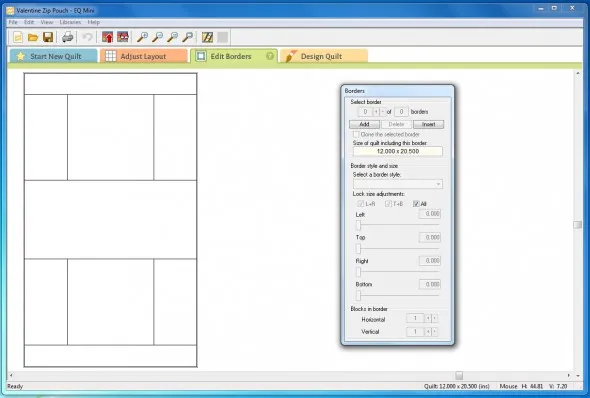
- Select the Green Edit BordersTab.
- Select Border 1 of 1 and Delete it.

- Select the Orange Design Quilt tab.
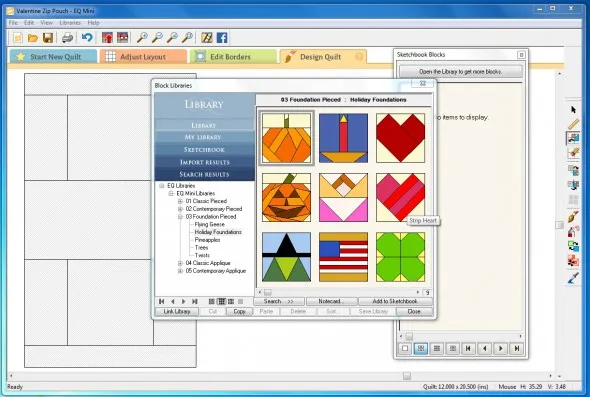
- Under Sketchbook blocks, click to open the library to select more blocks.
- Under the block libraries, open 03 Foundation Pieced. Then select Holiday Foundations.
- Select the Strip heartand and click add to sketchbook.
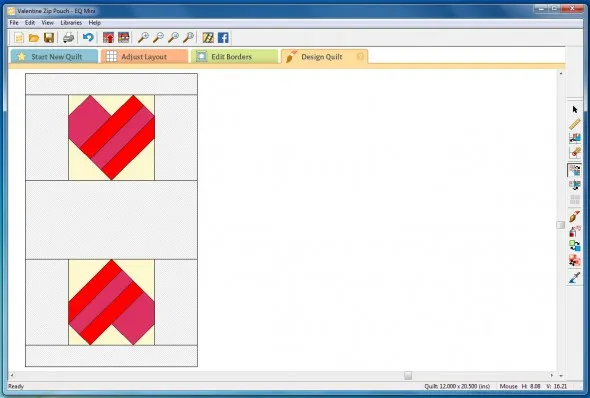
- Click and drag the Strip Heart block to the center block of strips 2 and 4.
- Close Sketchbook blocks.
- Rotate the Strip heart block in strip 4 using the
 Rotate Block tool located on the tool bar. This tool rotates blocks 90 degrees with each click of the mouse. With the Rotate Block tool selected, hover your mouse over the block you wish to rotate. Each click will rotate the block 90 degrees. Click the block 2 times so that the heart is displaying upside down. This will allow the heart to display right side up when we fold this quilted outside of the pouch in half to stitch it up.
 - Click the Paintbrush tool
 on the right hand toolbar.
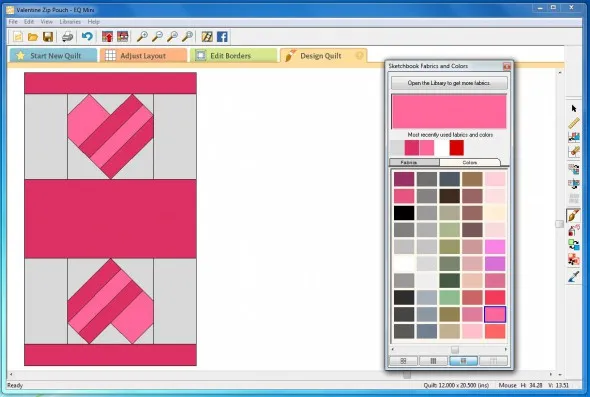
- Using the fabrics and colors, color your quilt design. Select the fabric or color and then click on the area you want to color on the quilt. I used shades of pink and grey.
- Once you have the coloring how you like it, save the quilt design to your sketchbook.

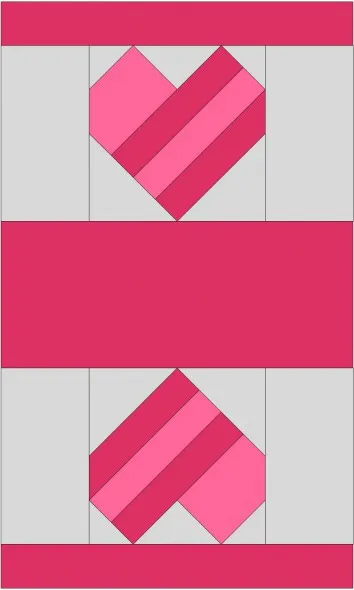
Congratulations, you have designed a Sweetheart Mini quilt that will serve as the quilted outside of your pouch! This scaled down mini quilt is a great way to create smaller designs with EQ Mini.
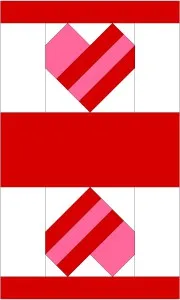
Design alternative
This design also looks great with traditional red and white. Or make one in your favorite color!
Now that you have your design, here are Tips and Help Articles to help you get ready to sew up your lovely design.
How to print the fabric yardage estimates required to piece the top
How to print the cutting instructions
Ready to Quilt?
Now that you have designed this in EQ Mini, why not stitch up this cute little zip pouch? You can find a detailed tutorial for this quilted pouch on my Lori Miller Designs blog.
Questions or Feedback?
Please share your ideas, questions and feedback in the comments. Thanks!
Lori J. Miller lives in Troy, Michigan, where she designs, stitches and sews quilts and quilty things. She loves experimenting with fun colors and designs to make playful and clever products for the modern stitcher. Sewing since age 11, Lori has deep roots in sewing and quilting traditions that add a unique dimension to her designs. She loves designing using Electric Quilt 7, Electric Quilt Mini and EQ Stitch. You can follow her quilting adventures on her blog at lorimillerdesigns.com or on instagram @lorimillerdesigns


01-27-2017
6:48 pm
Cute project, Lori! It’s nice to see piecing and quilting on something besides a quilt. Keep up the good work!
01-27-2017
8:09 pm
Thanks Val. It really makes up a sweet little zip bag.
01-27-2017
10:02 pm
Could this also be done with EQ 7.
01-27-2017
10:11 pm
Carole,
Yes, you can also design this in EQ7. The heart block is in the library and although you do not have the step by step tabs as in EQ Mini, You can still build it pretty much in the same way. Go to the quilt work table, choose Quilt, New Quilt, Horizontal Strip Quilt and work with the design layout, borders and layer1. Let me know if you can follow along with my instructions, they should be pretty similar once you get into the sections. Good luck!