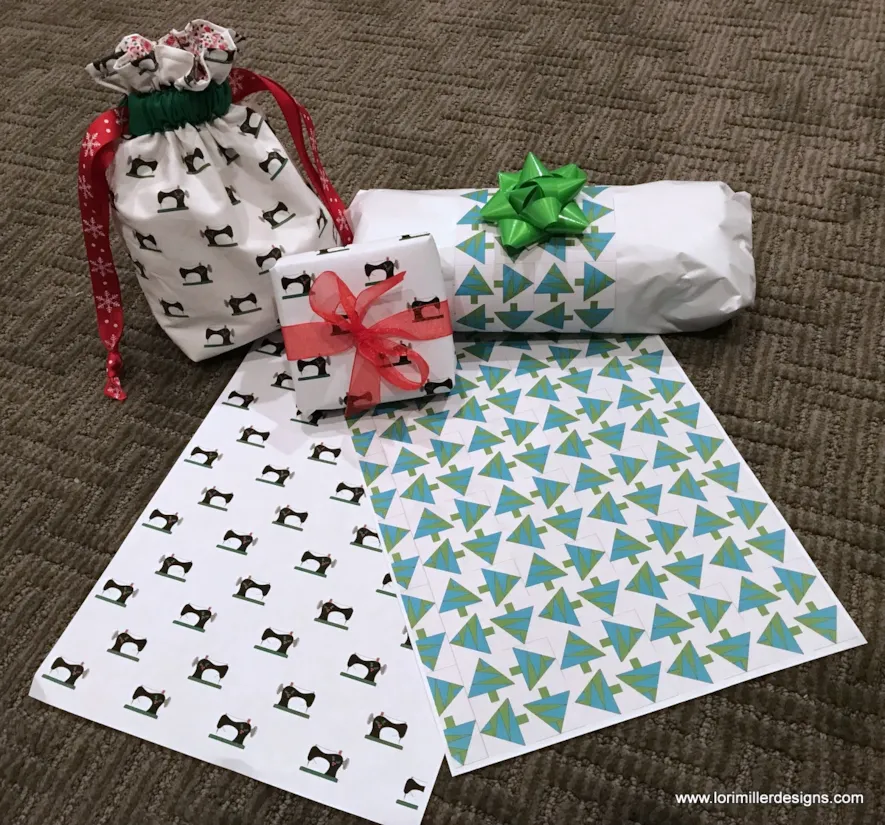
Let’s get in the holiday spirit and use EQ8 in new and creative ways! With the capability of the EQ8 Image Worktable and some clever steps, you can design and print fun wrapping paper! Using blocks and motifs from EQ8, a little editing and imagination, you can create designs that you can print out onto paper. (You can even print on EQ Printable fabric sheets to create printed fabric with this technique too!) The secret is using images and the Photo Layout tool on the Image Worktable. I designed some holiday paper, but you can create designs or fabric for any occasion.
DIY Wrapping Paper (or Fabric!)
Size: 8 1/2″ x 11″
Skill Builders:
- Working with the Image Worktable
- Exporting an Image
- Using Photo Layout and Scaling
- Open EQ8.
- Let’s name the Project. The project name appears at the top left of the EQ8 Window. Right now the project says Untitled – EQ8.
- On the left side toolbar, click the New Project button.

- On the Create a new project tab, type in the project name field Wrapping Paper.
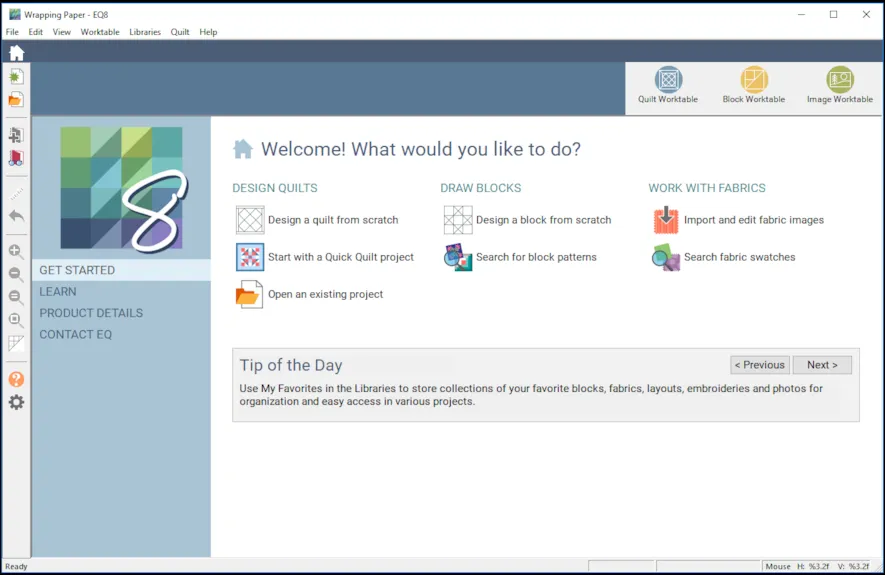
- Click OK. The box will close. Notice the project name Untitled has been replaced with Wrapping Paper.
- Select the Block Work Table. We are going to grab some images to use to create the wrapping paper.
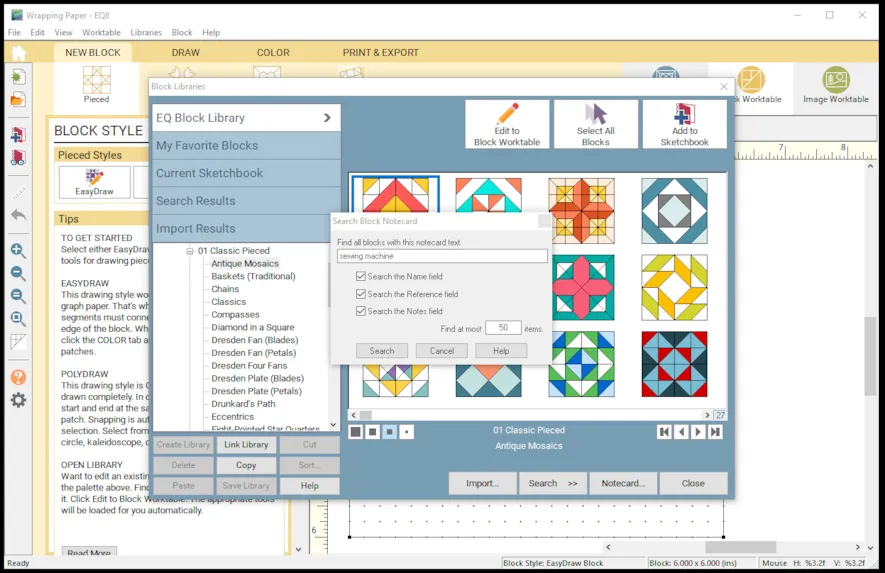
- New Block, Open Library. Search by Notecard for Sewing Machine. Click Search. Choose the black Vintage Sewing machine and Add to Sketchbook.
- Search again. Search by Category, Holiday, Christmas. Click Search.
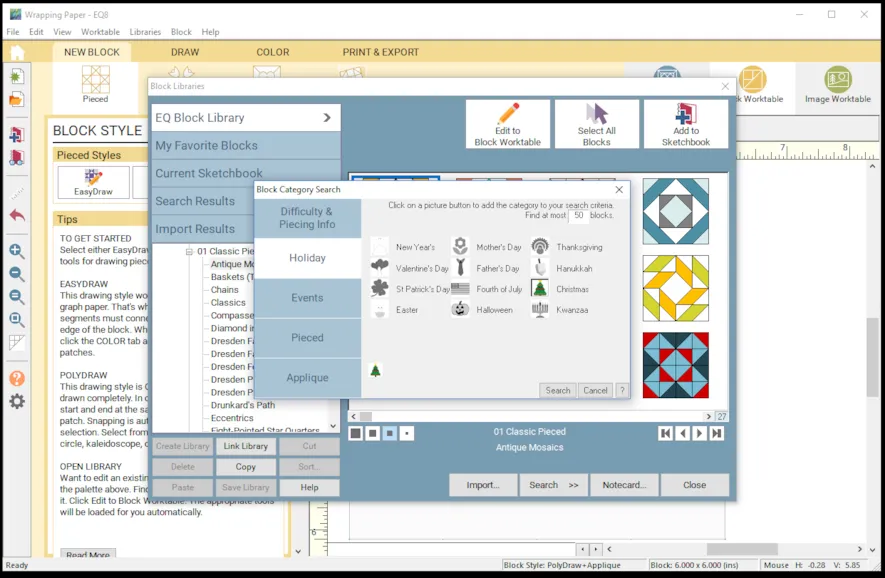
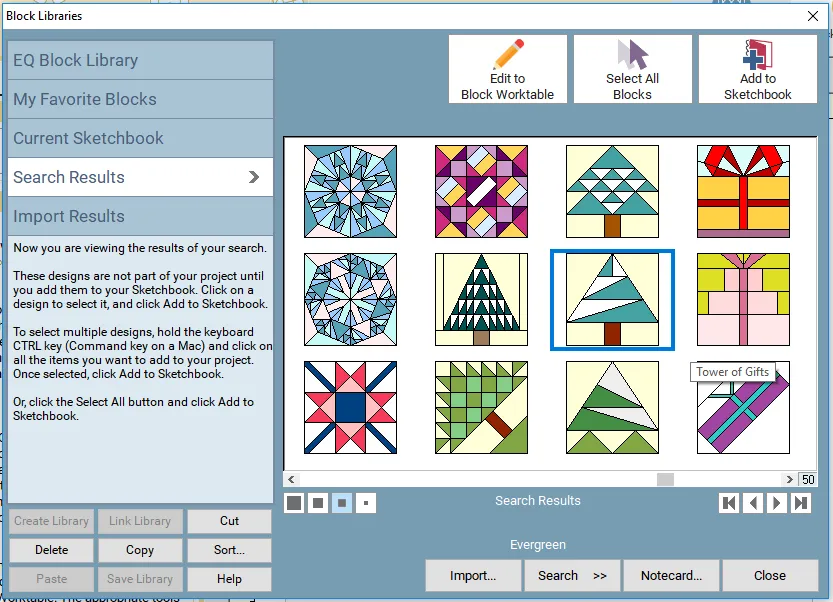
- Look for the modern pine tree called Evergreen, it is a turquoise color. Add to Sketchbook. Close Library.
- View Sketchbook, Blocks. Select the Vintage Sewing Machine and ClickEdit.
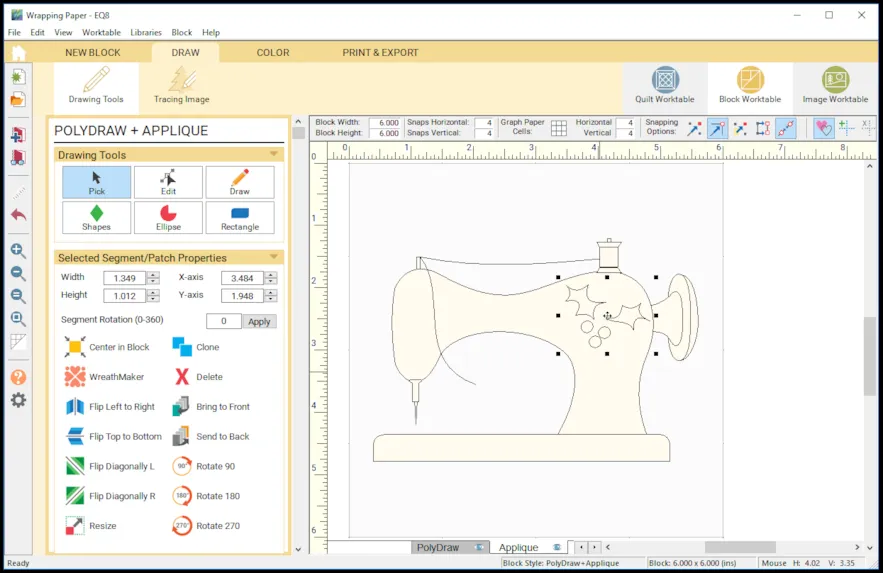
- Make sure you are on the Applique tab. Choose DRAW under the drawing tools and free hand draw some holly leaves. I used the circle under Shapes to create the berries.
- Use PICK to select the whole applique, then click Resize to 50%. Click OK. Move the smaller sewing machine to the top left of the block.
- While the sewing machine is still selected, click CLONE to get another machine. Move it to the bottom right of the block. Then click Flip Left to Right.
- Change block width and height to 2.
- Go to Color and color the block. You may need to zoom in to be able to color some of the smaller pieces. Add to Sketchbook.
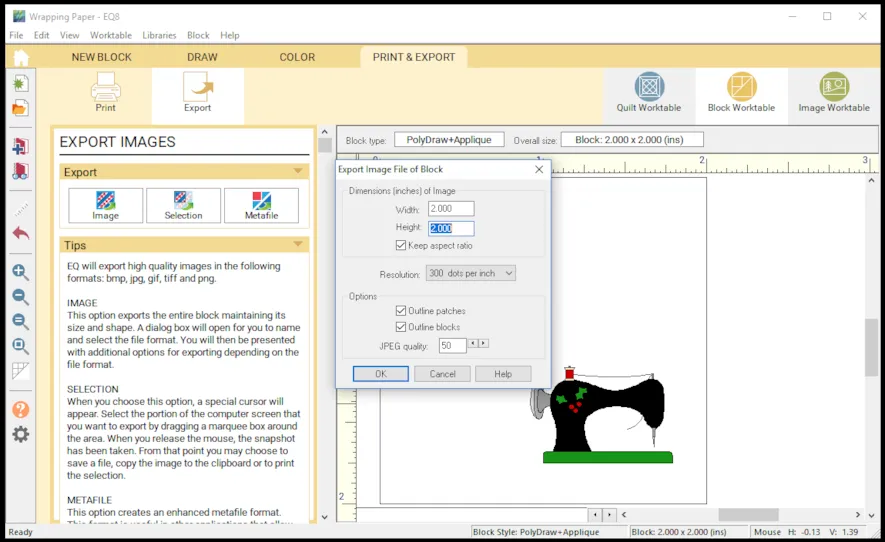
- Go to Print and Export, Export, Image and save the image as Vintage Sewing machine. Make sure the image width and height is 2″ and resolution is 300 dpi. Click OK.
- Select the Image Work Table by pressing on the Green Circle Button at the top right of the screen.
- The Image Worktable will open. It will be empty because we have not added anything to it yet.
- Select IMAGE, then EDIT
- Select Import Image

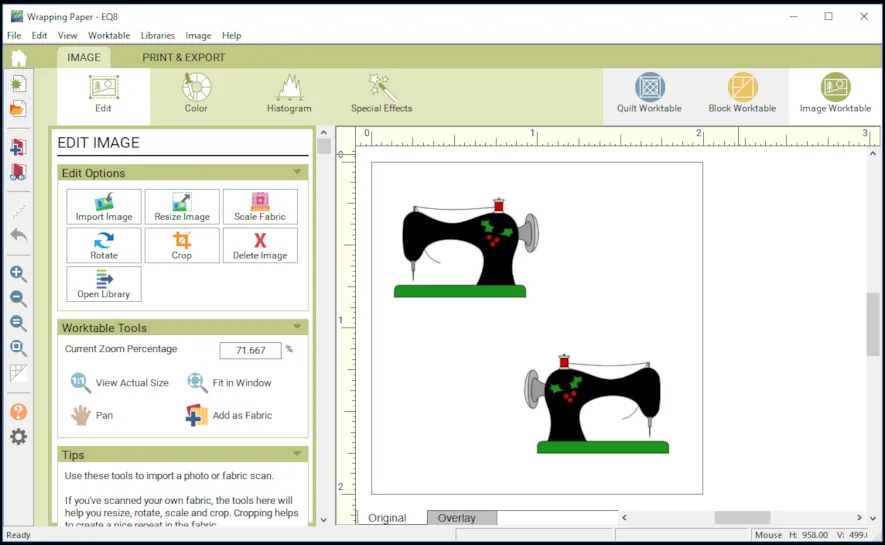
- Navigate through your files to find the Vintage Sewing Machine image that we exported, select it and click OPEN. The image will be imported and appear on the edit screen.
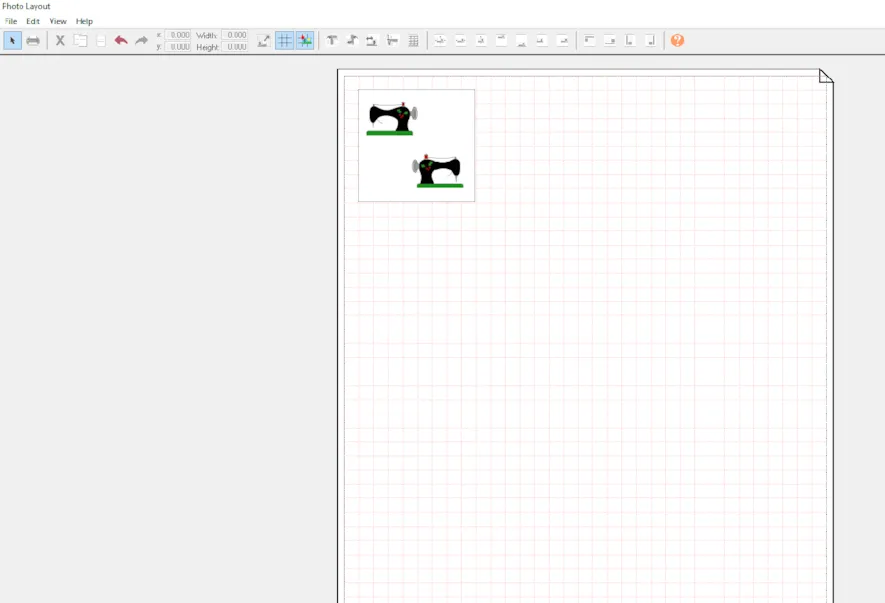
- Go to Print and Export, Print, Photo Layout. Your image will appear on the right side. Drag it onto the top left of the layout page.
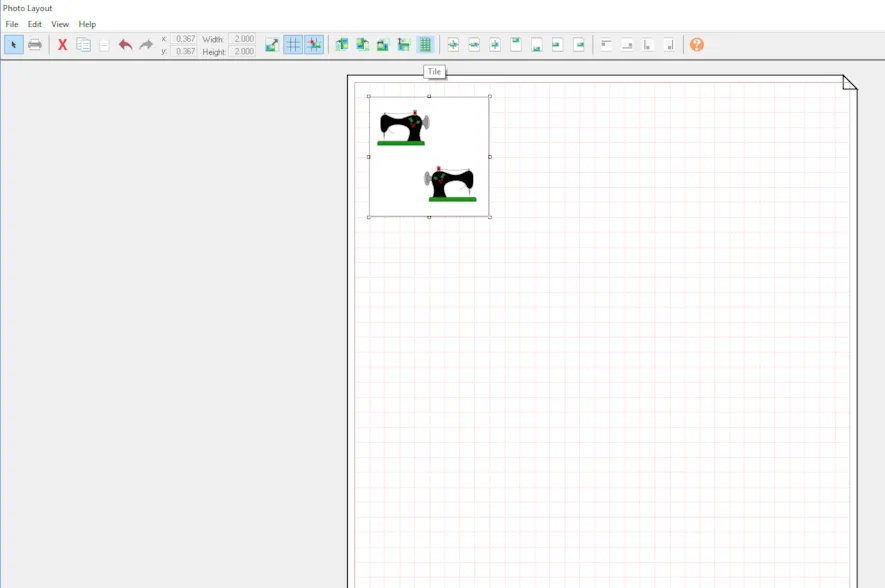
- In the top menu bar, select Tile. You can hover over the buttons to find it.
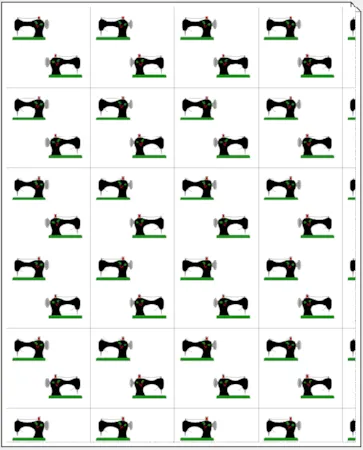
- Once you have tiled the image, you have created a design for your wrapping paper. Now you can print it. If you want to keep it, consider using a PRINT to PDF feature for your laptop. This where you can print to an EQ Printable Fabric sheet and create fun fabric as well.
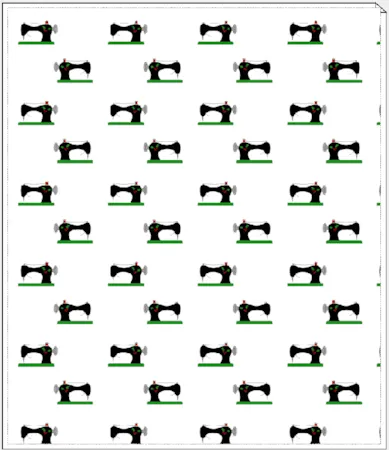
- As you can see above , we printed a block and it shows lines around the block. If you save the block as a motif, you won’t have the lines.
- Lets try another method for creating wrapping paper with our Evergreen tree.
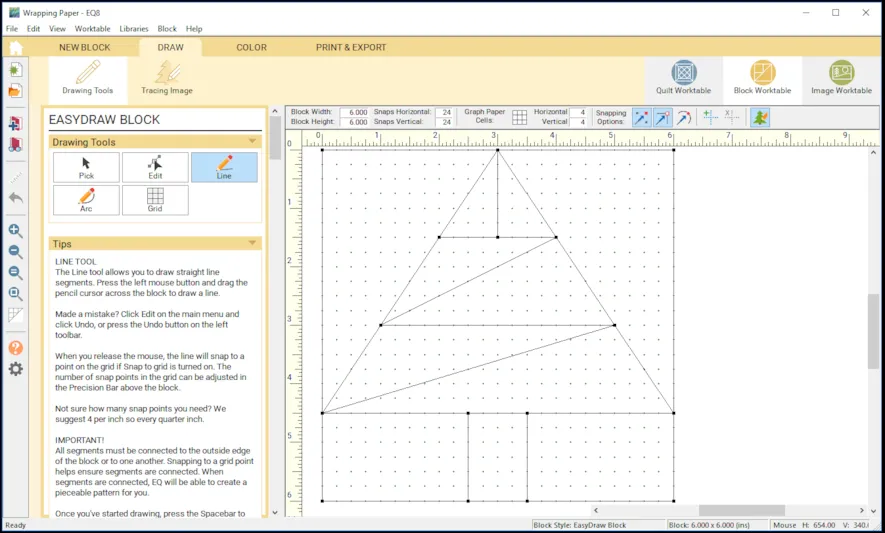
- View Sketchbook, Blocks, choose the Evergreen Tree and Edit to the block worktable.
- Go to the Color tab and color the tree. Add to Sketchbook.
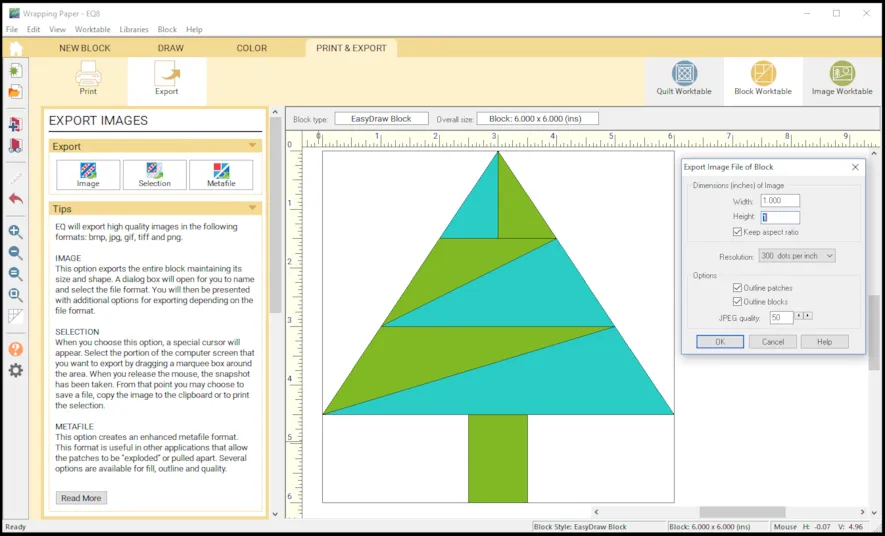
- Go to Print and Export, Export, Image and save as Evergreen tree. Make sure the image width and height is 1″ and resolution is 300 dpi. Click OK.
- Select the Image Work Table by pressing on the Green Circle Button at the top right of the screen.
- The Image Worktable will open.
- Select IMAGE, then EDIT

- Select Import Image

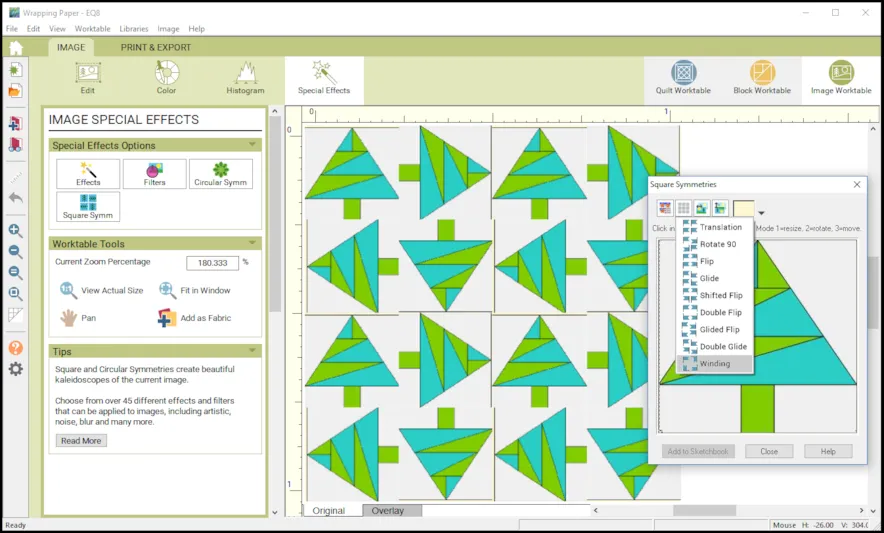
- Go to Special Effects and Choose Square Symmetries. Resize to capture the whole tree. Select the Winding style with the first button in the square symmetried dialogue box. Add to Sketchbook.
- Go to Print and Export, Print, Photo Layout. Your square symmetry image will appear on the right side. Drag it onto the top left of the layout page.
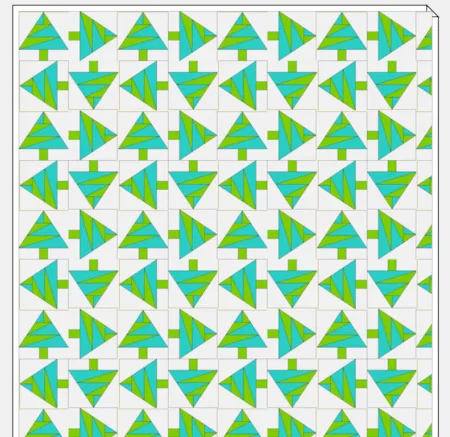
- In the top menu bar, select Tile. You can hover over the buttons to find it. It will scale or tile the trees across the whole layout.
- You can print it onto paper to create fun wrapping paper or to an EQ Printable fabric sheet.
Lori J. Miller lives in Oxford, Michigan, where she designs, stitches and sews quilts and quilty things. She loves experimenting with fun colors and designs to make playful and clever products for the modern stitcher. Sewing since age 11, Lori has deep roots in sewing and quilting traditions that add a unique dimension to her designs. She loves designing using Electric Quilt 8, Electric Quilt Mini and EQ Stitch. You can follow her quilting adventures on her blog at lorimillerdesigns.com or on instagram @lorimillerdesigns




12-12-2018
11:08 am
Absolutely love this idea!! Thanks for sharing Lori!
12-13-2018
3:22 pm
Thanks Yvonne! Hope you are keeping warm!
12-12-2018
1:40 pm
Wow! Very clever idea, thanks.
12-13-2018
11:32 am
I’ve done a similar thing to make gift tags. Make up a single block or multi block quilt. You could also import a photo. Go to layer 2 and add text (A persons name or greeting). Continue as Lori did to print it. Cut them up, punch a hole and add to the gift.
12-13-2018
3:23 pm
Great idea Barb! Lots of goodies you can make in EQ8!
12-13-2018
1:54 pm
How do I save as a motif?
12-13-2018
3:21 pm
Elizabeth, Here is a link to directions to save as a block as a motif. Don’t be confused as the directions are about half way down the article when you go to it.
https://support.electricquilt.com/articles/converting-a-motif-into-a-block/
Try it, it is really a copy and paste type of function.
12-13-2018
1:56 pm
When you say “scale” are you referring to the “tile” option?
Couldn’t find scale.
12-13-2018
3:24 pm
Elizabeth, yes the Tile option. I will double check but that is what I meant.
12-13-2018
5:17 pm
I am sooo glad you asked that questions. I was looking for a “scale” option and never found it. I copied the image and was pasting it. I had a difficult time getting everything to line up nicely without gaps.
After you mentioned the “tile” key, I deleted all the extraneous images, clicked on tile and perfection!
01-02-2019
11:13 am
I really enjoyed this lesson. I didn’t know about the tile option. I’m going to need to play with it some more, but I suspect this might be just the tool I need to create some fascinating tesselations.
03-07-2019
9:58 am
Yes indeed, you can design some great patterns using this tool.