
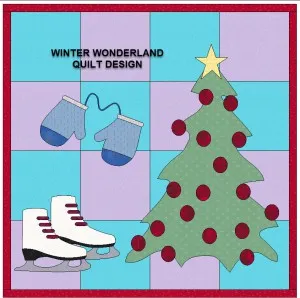
Christmas evokes all kinds of childhood memories for me. Some people think of the tree and decorations, some think of presents under the tree, some think of the amazing Christmas meal, but I think of Winter Wonderland. I love Winter. I loved being outside in the crisp clear air with the sparkle of snow surrounding me. I think of ice skating, making snowmen, sledding and tobogganing. I am 65 years old now and I tried ice skating a little while ago. It did not go well! But, I can relive my childhood with a Winter Wonderland quilt theme.
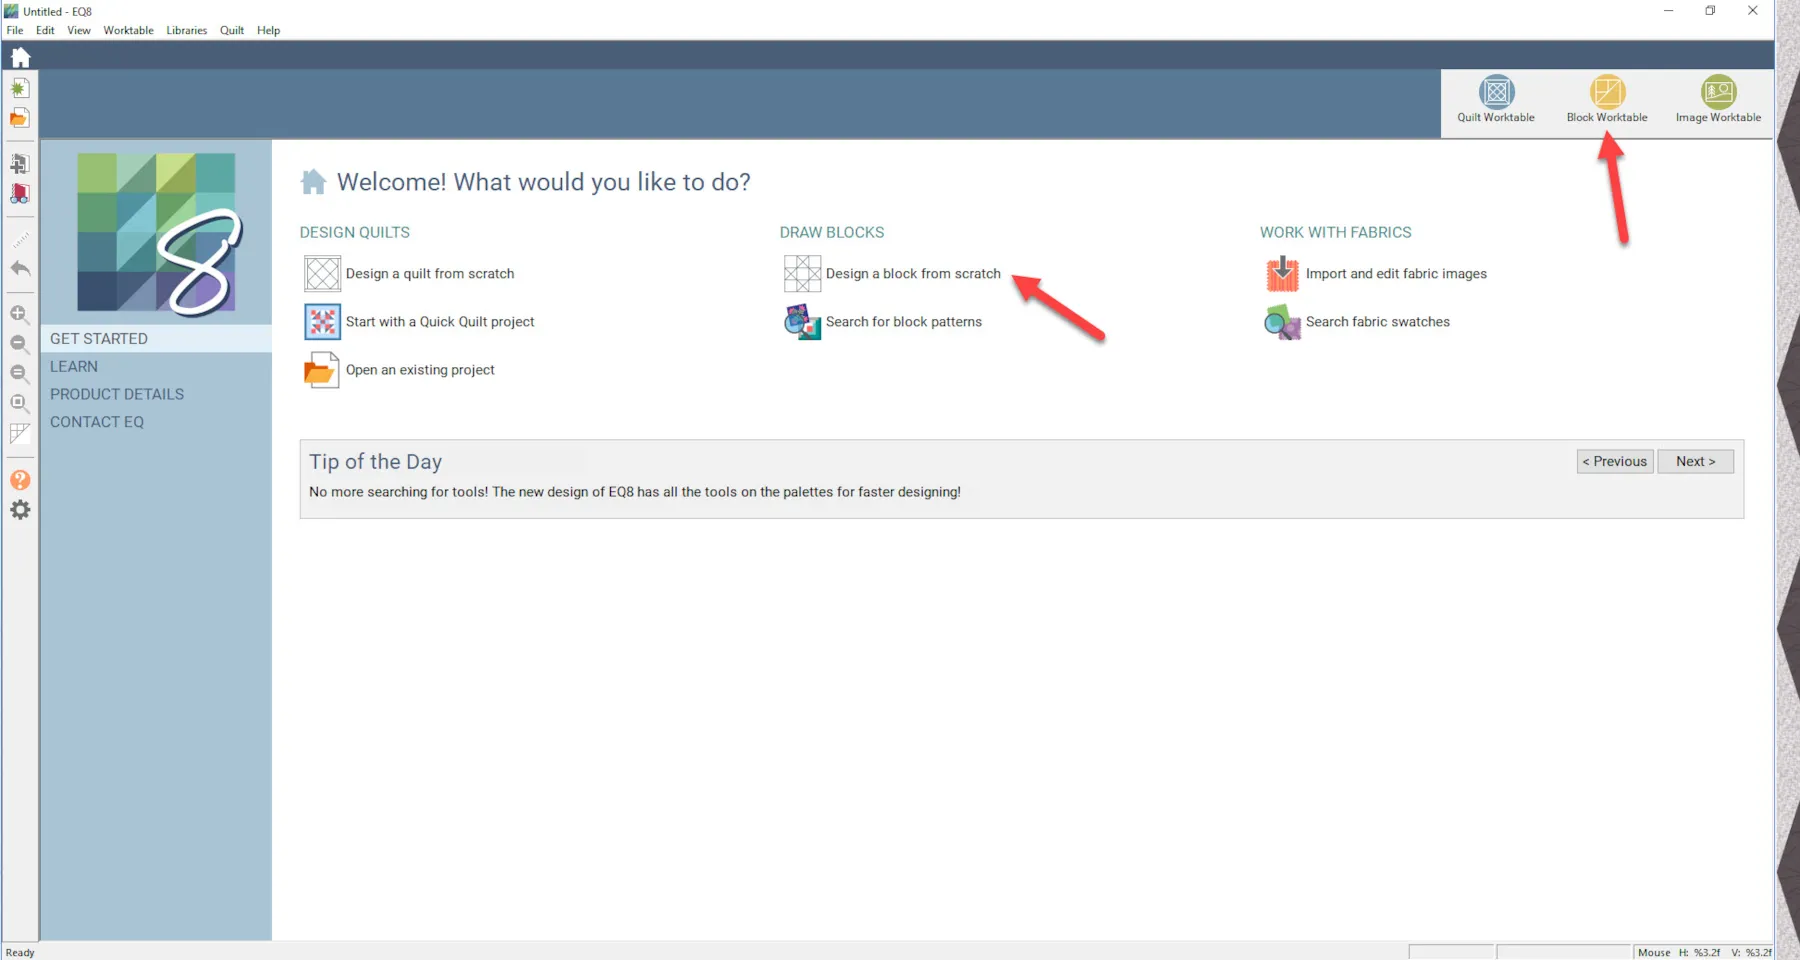
Open your EQ8 program. ![]()
On the opening page, click either on the ‘design a block from scratch’ or on the ‘block worktable icon’.
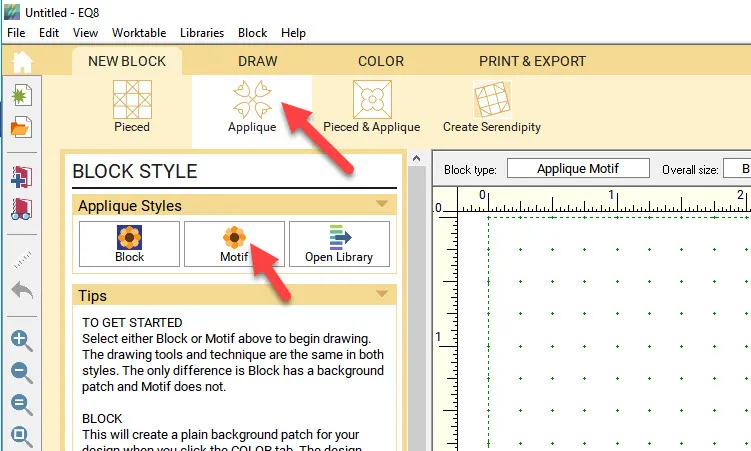
On the block worktable, under the ‘new block tab’, click on the ‘applique icon’ and then click on the ‘motif icon’.
NOTE: A motif is an applique without the background block attached. It is a free standing applique and therefore can be re-sized to any size you want on a quilt layout and can easily extend over multiple blocks rather than being confined to the block size defined. It is more flexible to use an applique motif than it is to use an applique block (has background attached to the applique).
You can use the shapes tools and the freehand drawing tools to create your own applique motif. I find it easier to see what is all ready in the EQ8 library and use the designs there or edit a design there to my own specifications.
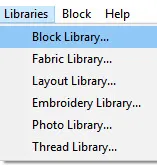
Click on LIBRARIES>Block Library at the top of the screen.
In the block library box you can navigate your way though the EQ8 library by clicking on the categories listed on the left or you can click on the word ‘search’ at the bottom of the box and enter in the note card the type of design you are looking for. I searched for Christmas, Skates, and Mittens. When I found a design I liked, I added it to the sketchbook.
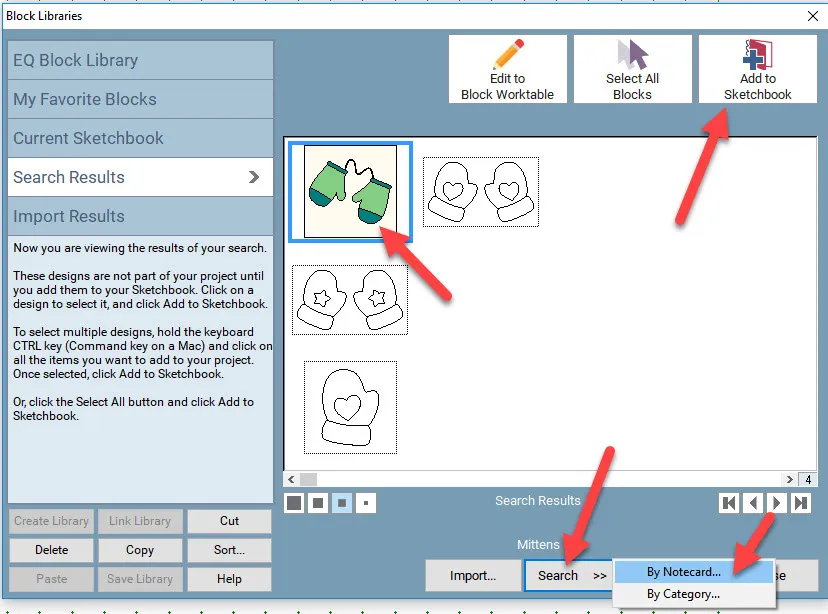
Click on the ‘view sketchbook icon’![]() to see the designs you added.
to see the designs you added.
The designs I added were not motifs. These were designed as applique blocks. You need to select the applique elements, copy them and then paste them onto a new motifs block to have just the motifs and not the block background.
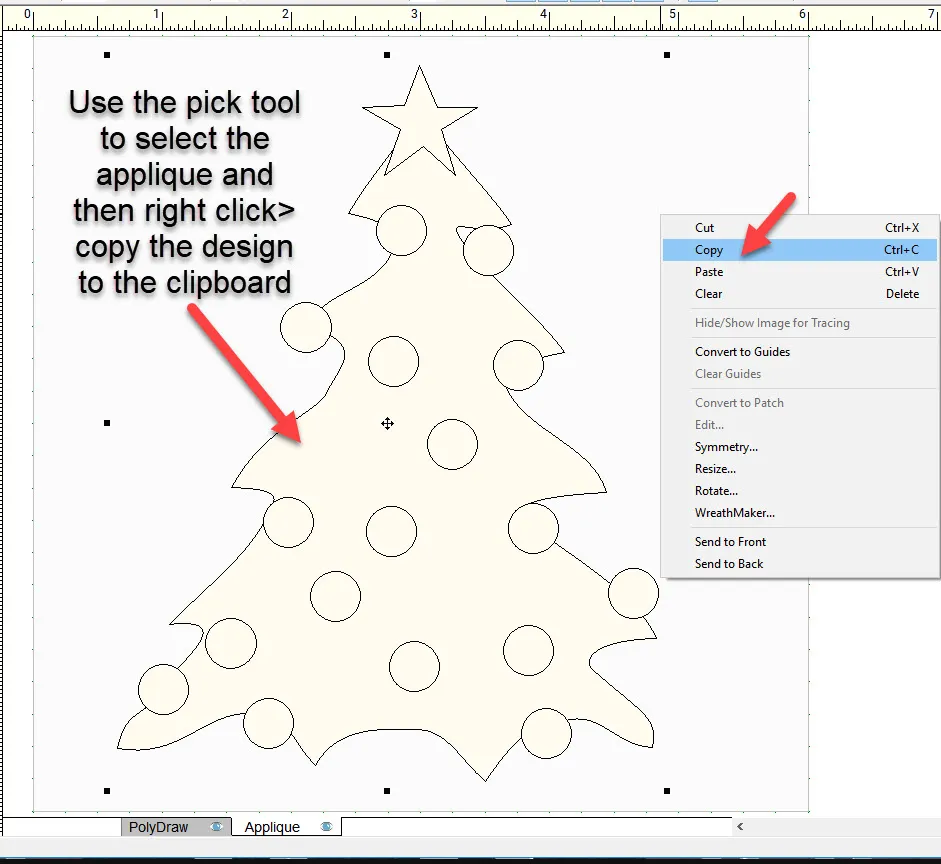
Click onto a new block>motif and then right click >paste to place the applique on the worktable. Use the center block icon on the left to center the applique.
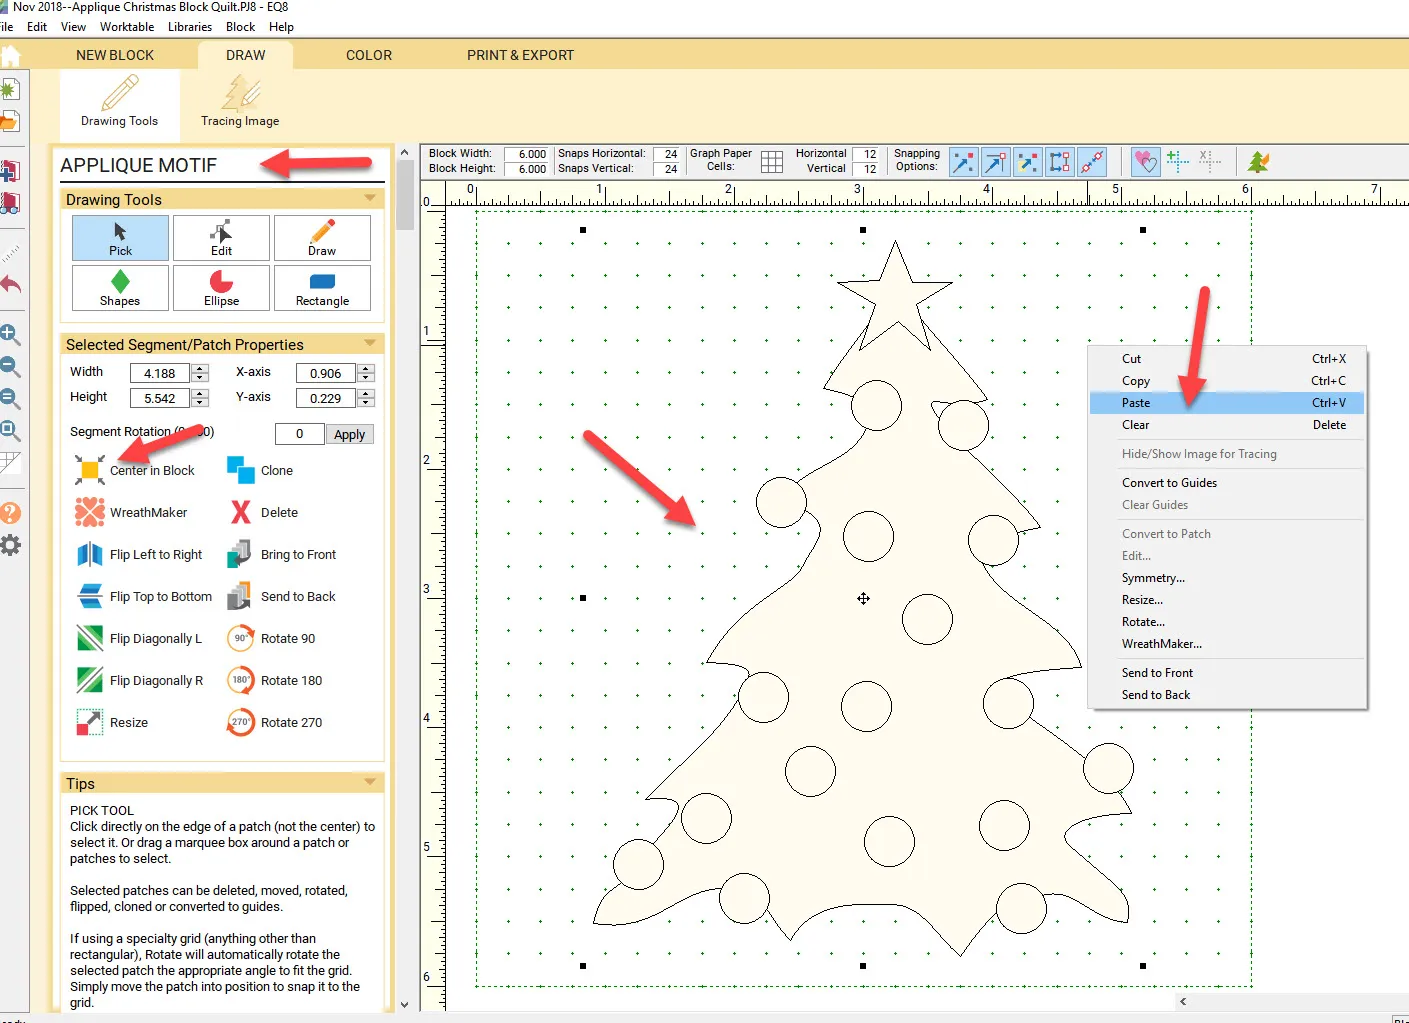
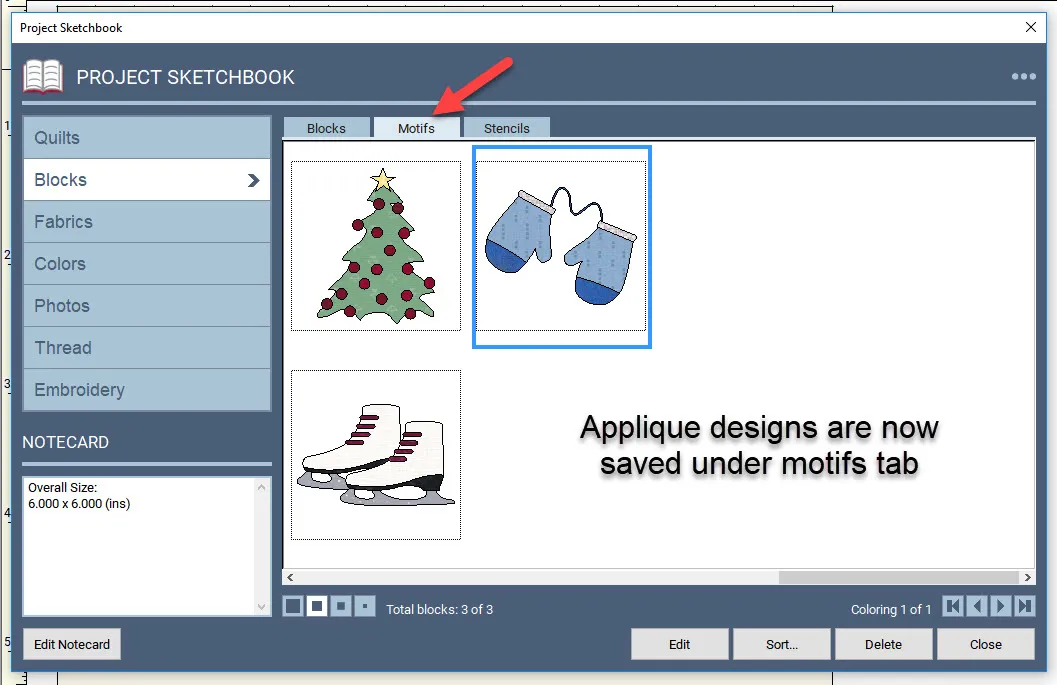
Do this step for each of your designs. Color them with the fabrics of your choice and add them to the sketchbook![]() . The designs will now be found under the motifs tab in the sketchbook.
. The designs will now be found under the motifs tab in the sketchbook.
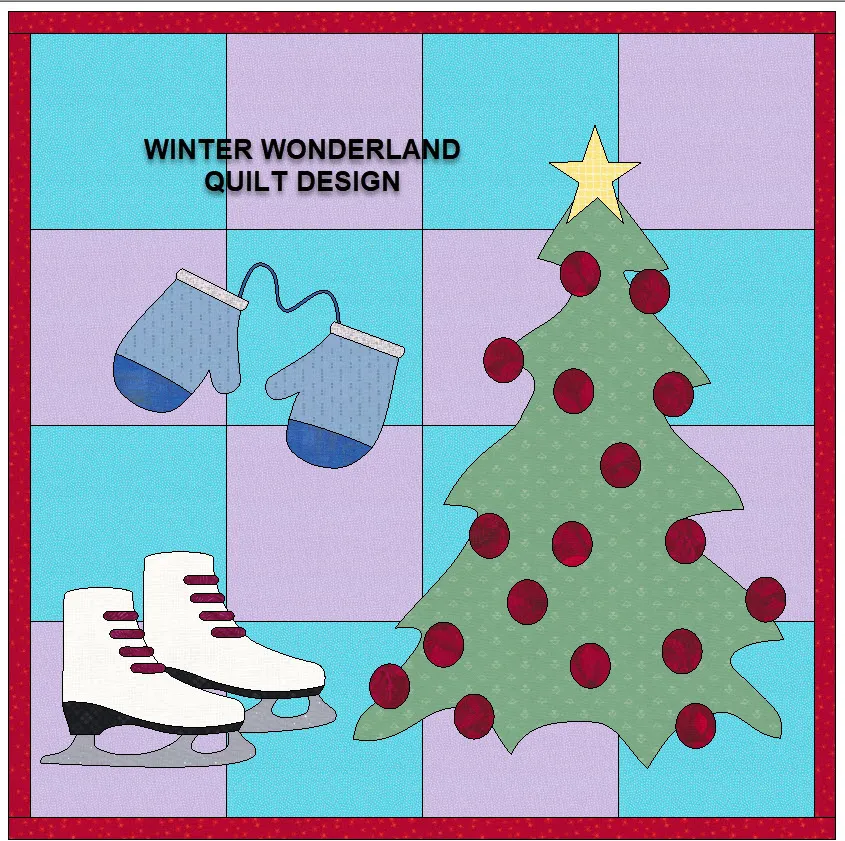
Now that you have your motifs created, you can choose the quilt layout of your choice and add the elements to the layout. You are free to use the adjust tool on layer 2 of the quilt layout to resize and place your motifs onto the quilt top. Add you completed quilt design to the sketchbook.![]()


11-18-2018
2:12 pm
Thank you for this. I’m an embroidery digitizer and just learning to use my EQ7. Don’t have 8 yet. Happy stitching
11-18-2018
5:51 pm
I am a digitizer for embroidery also. I often combine my quilting and embroidery together.
11-18-2018
8:25 pm
Great clarification on the difference between applique block and motif! Needed that.
11-20-2018
11:50 am
Barbara–There are so many little tips and tricks, work arounds, and multiple ways to use the tools that I could write an entire book just on that topic alone! Glad the clarification of motif vs. applique block helped you.
12-24-2018
8:47 pm
I would love it if you could write a book on drawing, applique and all the little tips and tricks, ect. I realize you have been doing this for a while and your a great artist but trying to scan in an image or picture and try and turn them in acurate blocks to then learn how to digitize them and use them. I have not been able to work on learning EQ8 or EQ Stich or Viking 5d because of hospitalations and treatment but there are books on how to create drawn blocks but none in detail on how to learn drawing. Your work is wonderful
12-25-2018
11:28 am
Irene thanks for you kind words. I am not artistic at all. I can’t draw. I do use geometric shapes and repeat them to create designs especially for EQStitch, but other than that I use the built in designs and edit them or bring in a background image and trace it with the drawing tools. It takes practice and time to learn but the finished project is amazing. Don’t give up. Use the reference tools in the program and the extra workbooks you can purchase from Electric Quilt to guide you along.