The fastest way to create your own New York Beauty block is on the PatchDraw Pieced worktable. Below shows you how to make a standard star. Use these techniques to create variations.
Setting up the worktable
- Click Worktable > Work on Block.
- Click Block > New Block > PatchDraw block.
- At the bottom of the worktable, click the Pieced tab.
- Make sure the Precision Bar is turned on by clicking VIEW on the main menu, and making sure there’s a check next to Precision Bar.
- On the Precision Bar, click the drop-down menu next to Grid and select Arc. A grid will display on the worktable.

Drawing the corner wedge
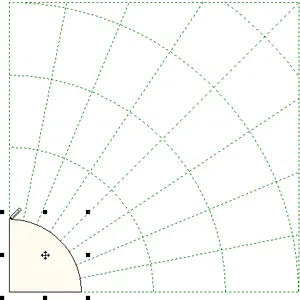
This technique is all about following the dots and lines on the grid.
- Click and hold your mouse on the PolyLine
 tool. A flyout will appear.
 - Click the PolyArc
 tool.
tool. - Start by drawing the large, corner wedge at the bottom-left of the block. Click and release the mouse at the top-left corner of the wedge to start drawing. You should see a blue line “stuck” to your cursor.
- Continue clockwise around the wedge, clicking at each intersection of the grid.
- Double-click at the starting point to close the patch.

Draw the the first spoke of the block
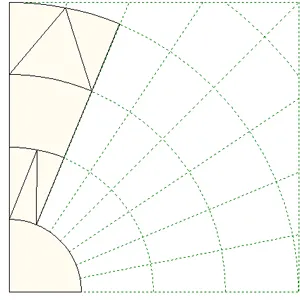
We’re going to combine spokes 1 and 2 to create a nice affect on our block. Draw the first section the way you want, then we can easily clone and rotate that section to quickly finish the rest of the spokes.
- Click the PolyArc
 tool.
tool. - Click and release the mouse at the top-left corner of the first wedge that was drawn.
- Continue to draw a patch in Ring 2 that is the width of Spokes 1 and 2 together. In the example, a point was created for added affect.
- Draw patches in Rings 3 and 4. The first section of patches is complete.

Clone and rotate
Now that you have your first section of patches, you can clone and rotate it to create the rest of the sections.
- Click the Pick
 tool.
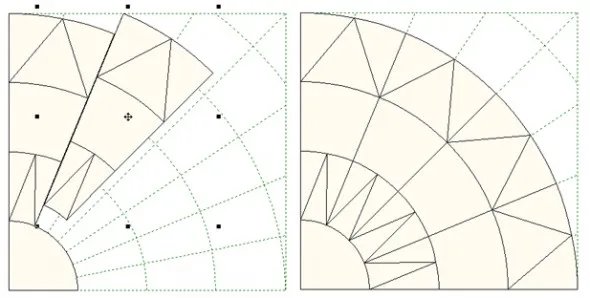
tool. - Click, hold and drag a box around the 3 rings of patches. Be sure to get all of the patches in this box. This will select all of the patches at once.
- On the Precision bar, click the Clone
 button.
 - On the Precision Bar, click the Rotate
 button twice. You must click twice because it’s once click per spoke. Our first section took up two spokes, so two clicks are necessary. Your new patch is now in the appropriate angle for the next section of the block.
 - Move your cursor over the selected patches. The cursor will change to a 4-headed arrow. Click in the center of the patches, hold and drag the patches to the second section location on the grid.
- Repeat steps 3-4 to fill the rest of the block sections with patches.

Draw the final corner patch to finish the block
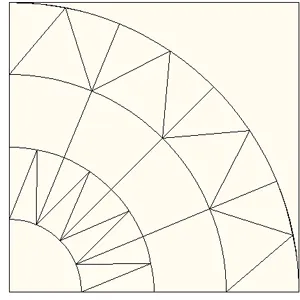
Even though your New York Beauty is drawn, you still have to finish the block.
- Click the PolyArc
 tool.
tool. - Starting in the top-left corner of the block, click around the outside edge at each point, then follow the curve back to the starting point, clicking at each grid intersection. Double-click to close the patch.
- Click Add to Sketchbook
 .
.

If you have questions about this, or anything else, please contact tech support and we will be happy to help!


01-10-2017
2:12 pm
I’ve managed to draw the star and saved it to sketchbook. I don’t know how to get it back to make a complete block or to color it. I can’t find it in my manual either. Please help. I’m still early learning process.
Thank you.
01-12-2017
2:32 pm
Hi Jacie,
If you saved it to your sketchbook and saved the project it should be in your sketchbook when you open your project. If you have any other questions please contact techsupport@electricquilt.com
Thanks,
Heidi
01-10-2017
3:59 pm
I have EQ7 on my Mac Book Pro. My mouse does not have a right and left side..do I need that? I am taking a class with Kimberley Einmo on a quilt cruise in Feb, so I wanted to make sure I can do everything with the MAC.I did print out the two free lessons, plus purchased PIECED DRAWING. I am not yet comfortable at all with the program..have to use it many more times. At any time will there be a “university” of classes in South Florida?
01-12-2017
2:39 pm
Hi Karen,
Most mice are capable of having a left click enabled. We are currently not planning an Academy in South Florida. If you have any other questions please contact techsupport@electricquilt.com Have fun on your cruise!
Thanks,
Heidi
01-10-2017
5:38 pm
I have followed the directions many times but the section after I double click the two boxes for adjusting the angle does not set the clone into the right space in the next two spokes. I have adjusted the snap, the size of block, etc., but nothing changes. Please help.
01-12-2017
2:42 pm
Are you saying you are having trouble with step 3 and 4 under Clone and rotate? Please email techsupport@electricquilt.com with the details and they will be happy to help.
Thanks,
Heidi
01-10-2017
9:22 pm
Great tutorial – thanks!!
01-12-2017
2:42 pm
Thanks Patti!