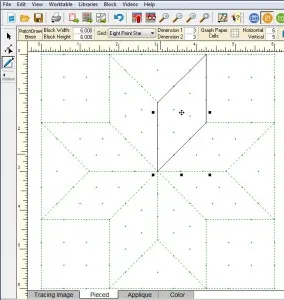
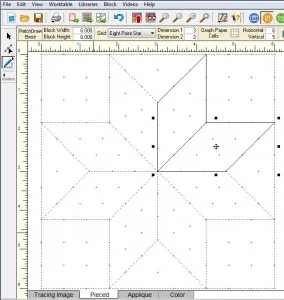
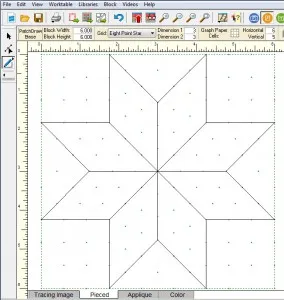
The fastest way to create your own eight-pointed star block is on the PatchDraw Pieced worktable. Below shows you how to make a standard star. Use these techniques to create variations.
Setting up the worktable
- Be on the Block worktable.
- Click BLOCK > New Block > PatchDraw block.
- At the bottom of the worktable, click the Pieced tab.
- Make sure the Precision Bar is turned on by clicking VIEW on the main menu, and making sure there’s a check next to Precision Bar.
- On the Precision Bar, click the drop-down menu next to Grid and select Eight Point Star. A grid will display on the worktable.

Drawing the first patch
This technique is all about following the dots and lines on the grid.
- Click the PolyLine
 tool.
tool. - Starting at the top-left diamond shape, click and release the mouse at one of the four points of the diamond to start drawing. You should see a blue line “stuck” to your cursor.
- Click three more times at the other corners of that diamond, then double-click at the starting point to close the patch.

Clone and rotate to finish the star
Now that you have your first diamond shape, you can clone and rotate it to create the rest of the diamonds for the star.
- Use the Pick
 tool to select the patch.
 - On the Precision bar, click the Clone
 button.
 - On the Precision Bar, click the Rotate
 button. Your new patch is now in the appropriate angle for the next diamond shape of your star.
- Move your cursor over the patch. The cursor will change to a 4-headed arrow. Click in the center of the patch, hold and drag the patch to the second star location on the grid.

- Repeat steps 2-4 to fill the rest of the star spaces with patches.

Draw the corner squares and side triangles to finish the block
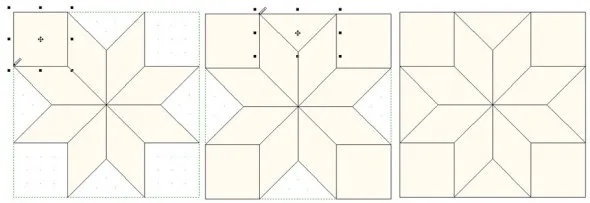
Even though your star is drawn, you still have to finish the block.
- Click the PolyLine tool.
- Click at each corner of the first corner square remembering to double-click to close the patch.
- Use the clone/rotate/move technique to create the other three corner squares.
- Draw one of the side triangles.
- Use the clone/rotate/move technique to create the other three side triangles.
- Click Add to Sketchbook

We are here to help! If you have questions about this, or anything else please contact tech support.


01-03-2017
12:13 pm
Why aren’t there pictures above & below the last part about the corners?? Most confusing.
These tips are very helpful to me. Thank-you.
01-09-2017
3:04 pm
Sorry! It has been corrected!
01-03-2017
2:24 pm
What are the advantages to drawing an eight pointed star when there are already templates available in the program? New to EQ and using EQMini. Thanks!
01-09-2017
3:07 pm
Well, you can only draw blocks in EQ7, not EQ Mini. But, if you know how to draw them then it is easier to make modifications or get inspiration for other ideas
01-03-2017
8:52 pm
Found my e.g. Mouse newsletters I have kept them get look down memory lane Happy 25th and future years ahead
01-09-2017
3:08 pm
Thanks! We’re glad you like the Mouse