Want a great idea to inspire children at Christmas? Consider stitching linear designs with the embroidery machine and have the children paint in the design areas with fabric pens. You could easily make a series of designs in a theme that your child loves (dolls, toys, trains, trucks, etc.). You can use the artwork from the EQ7 libraries and bring them into EQStitch to use for the coloring pages of a special sewn book of coloring created just for them. You could also use the stitch files all ready created in the EQStitch library. It could not be any easier! What a great keepsake item this would be for the special child in your life.
Launch you program from the desktop ![]()
On the embroidery worktable, click on the drawing board options box
 ![]() to open it.
to open it.
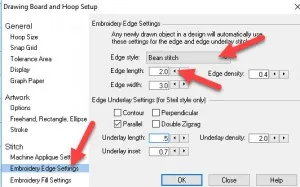
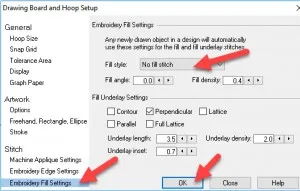
Set the embroidery edge stitch to a ‘bean stitch’ with an edge stitch of 2.0 mm length and the embroidery fill to ‘no fill’. Be sure to click the OK in the bottom of the box to set the new properties.
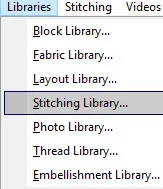
Click on LIBRARIES>Stitching Library.
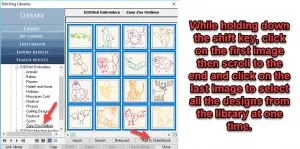
In the stitch library menu, select the zany zoo designs. While holding the shift key, click on the first image and then scroll to the last image and click. All the images in the library are selected and surrounded by a blue box. Click on the ‘add to sketchbook and close’ at the bottom of the box.
Click on the view sketchbook icon![]() at the top of the screen.
at the top of the screen.
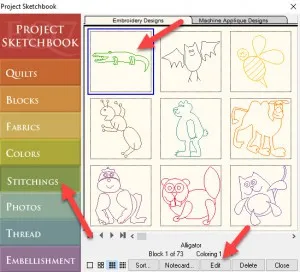
In the sketchbook, click on the Stitchings heading and then click on the alligator to select it. Click on the word ‘edit’ at the bottom of the box to send the artwork to the hoop area.
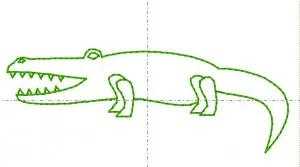
The design is all ready drawn for us. Click on the stitch tab at the bottom of the screen.
These designs have been digitized to be a 3mm edge stitch. We want a bean stitch at 2 mm as we entered in the drawing board options box.
Click on the set edge stitch icon ![]() on the toolbar.
on the toolbar.
On the properties bar at the top of the screen, click on the arrow with the blue circle behind ![]() to restore the settings to be what we set in the drawing board box.
to restore the settings to be what we set in the drawing board box.
Move the cursor over to the drawing and click on each of the lines of stitches to set the new stitch properties.
Add the design![]() with the new stitch properties to the sketchbook.
with the new stitch properties to the sketchbook.
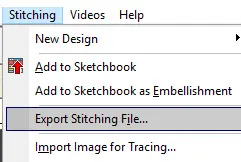
Click on STITCHING>Export stitch file.
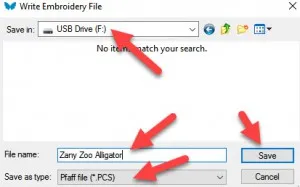
In the export box, name your design and the file extension you require and send it to the USB stick on your computer to transfer the design to your machine.
Stitch the design onto white fabric. Create the entire collection of Zany Zoo animals this way and place them into a project. A cloth coloring book with the pages the Zoo animals would be a good gift for a child. Use permanent ink fabric pens to color in the shapes any way the child wishes. They now have their own coloring book that they helped to create!




11-21-2016
1:20 pm
May I ask how do you take clip art from someplace other than EQ Stitch and turn it into a stitch file like above?
11-21-2016
1:29 pm
Hello Linda. Usually we use an applique block to transfer to the EQStitch worktable. Open any EQ7 applique block on the block worktable. EDIT>select all, then EDIT>Copy to place the applique artwork on the Windows clipboard. Open the EQStitch embroidery worktable. Move the cursor over to the hoop area and right click>paste. Center the selected elements as they tend to come in off center. Now the artwork is there for you to edit if you need to. Click on the stitch tab at the bottom of the screen and apply the stitch properties of your choice.