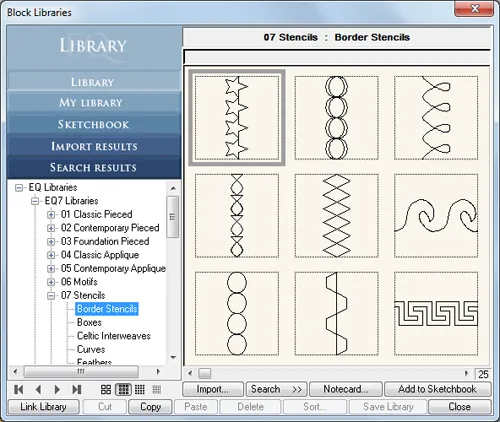
Stencils can be found in the Block Library under EQ7 Libraries > 07 Stencils. You can also draw your own stencils on the Block Worktable!
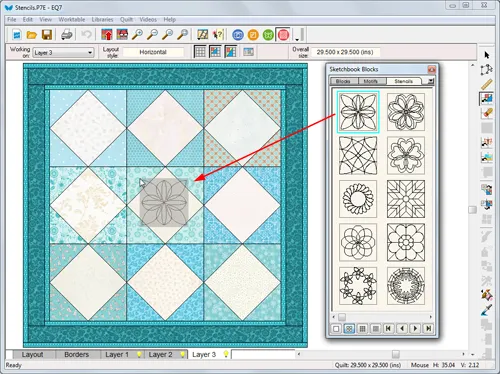
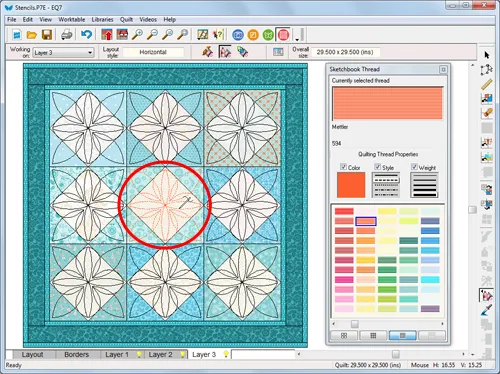
When designing quilts, you should place your quilting stencils on Layer 3 of the Quilt Worktable.
Use the Set Block tool ![]() to set stencils on Layer 3. Drag-and-drop makes setting stencils super easy! Any block that you set on Layer 3 will appear as a stencil and can be colored with the Set Thread tool.
to set stencils on Layer 3. Drag-and-drop makes setting stencils super easy! Any block that you set on Layer 3 will appear as a stencil and can be colored with the Set Thread tool.
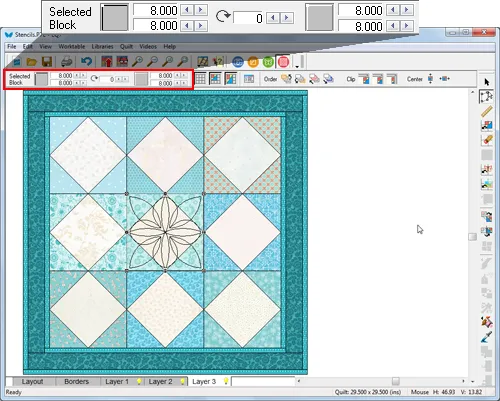
After placing the stencil on the quilt use the Adjust tool ![]() to select the stencil. Then use the Graph Pad above the Quilt Worktable to fine tune the placement and sizing of the stencils.
to select the stencil. Then use the Graph Pad above the Quilt Worktable to fine tune the placement and sizing of the stencils.
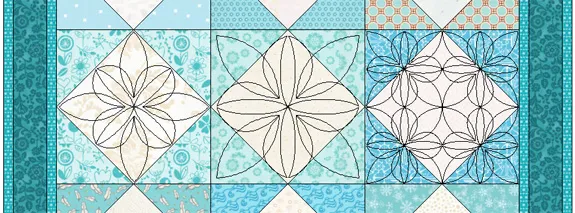
Try rotating the stencil 45 degrees (below, left) or reducing the size and repeating multiple times in the same block (below, right).
Use the Set Thread tool ![]() to make changes to the color, style and weight of the stencils’ thread.
to make changes to the color, style and weight of the stencils’ thread.
The stencil used in the illustrations above is from Quilting Designs, Vol. 8.




05-24-2016
11:22 am
I’ve tried to set some stencil designs onto the sashing areas of my quilt (layer 3) but without success. Can this be done and if so is the method the same as for blocks? Thanks.
05-24-2016
11:39 am
You might need to use pieced borders, but it should work.
05-24-2016
12:57 pm
You can set stencils anywhere on Layer 3, so it works the same whether you’re setting the stencil over a block or over a sashing space. If you need further assistance, you can contact Tech Support at techsupport@electricquilt.com and they’ll be happy to help!
05-24-2016
11:22 am
I do this a lot, especially when I design a quilt on-point. Glad you added this tip to your blogs. Ann
05-25-2016
3:22 pm
I just spent hours creating something like this on my own and here it was in my program all along!
My biggest struggle with templates is how to transfer the pattern to multi-colored fabric in an easy and removable manner. I ended up using a tracing wheel and changing color sheets – then going over it in a chalk colored pencil to get it to show up clearly when stitching. I also tried printing it on adhesive plastic wrap but that gummed up my needle and the thread broke often even with frequent cleaning. Any one have a better way to try? There has to be a way that isn’t so labor intensive!
05-26-2016
1:01 am
I print mine out onto regular printer paper, then pin 10-12 layers of Golden Threads paper or ungreased lunch wrap under it and stitch it with no thread to perforate. Safety pin it where you want it on quilt top and stitch with thread then pull paper away OR if only 1 copy is needed, pounce over the printer paper once perforated immediately before stitching the area. The paper does not seem to dull the needle, but I keep an old 90/14 for just this purpose.
05-26-2016
10:46 am
Here’s another option, but it has to be done before sandwiching the quilt together:
Use a light box (or a window on a sunny day) and put your printout behind the quilt top and trace.
05-29-2016
4:59 pm
Thanks Jenny and Shiree – those are good ideas!
06-10-2016
10:04 am
I must be the only person not using EQ -I didn’t know you could do so much with this software until I started reading and seeing what others are doing with it