 The Twist Tool
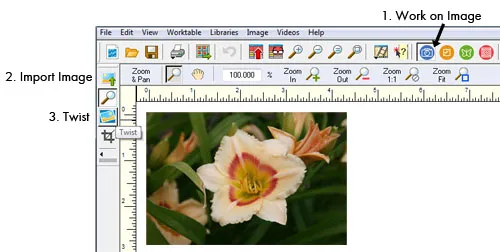
The Twist Tool is only available on the Image Worktable. You also must have an image imported for it to be available.
The Twist tool loads the Precision Bar with buttons for flipping, rotating and shearing. Be sure your Precision Bar is turned on (VIEW > Precision Bar).
Note: Whenever you use one of the tools on this Precision Bar, the image is required to display 1-to-1. This means that your image may become larger than the screen. You’ll need to use the Zoom tool to adjust the display so it fits the screen.
Rotate 90 degrees clockwise: Rotate the image right with each click.
Rotate 90 degrees counter-clockwise: Rotate the image left with each click.
Flip left and right: Click to mirror the image horizontally.
Flip top and bottom: Click to mirror the image vertically.
Rotate by degrees: Enter a number for degrees in the box. A negative number will rotate counter-clockwise. Click to rotate the image by the designated number. (This tool will be disabled until a number is entered.) The selected Canvas color will become part of the image. If you want the image to be cropped, place a check in the box.
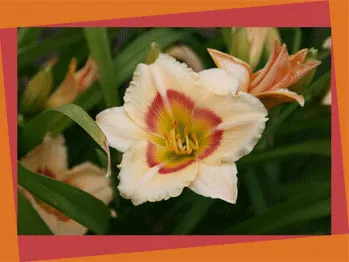
Shear horizontally by degrees: Enter a number for degrees in the box. A negative number will shear counter-clockwise.Click to shear the image horizontally by the designated number. (This tool will be disabled until a number is entered.) The selected Canvas color will become part of the image.
Shear vertically by degrees: Enter a number for degrees in the box. A negative number will shear counter-clockwise. Click to shear the image vertically by the designated number. (This tool will be disabled until a number is entered.) The selected Canvas color will become part of the image.
Note: Each time you use the Rotate button (with no check in Crop) or the Shear button, a new larger image is created that includes canvas colors. You may need to use the Zoom tool to fit the new larger image to your screen.
Choosing the Canvas Color
In the Precision Bar, click the down arrow next to the Canvas Color selector.
This will display the Create a Color dialog. Here, you can create any color you’d like to use for the background of your image as you Rotate by degrees or Shear by degrees.
Color wheel: Drag the small yellow dot control to adjust the color. Drag it around the circle to change to the matching color on the wheel. The newly created color will appear along the bottom of the dialog.
Saturation shift: When the slider is at the maximum value, 255, all the colors will be fully saturated with ‘pure’ hues. The colors will be very intense. When the slider is at the minimum value, 0, the colors are desaturated so no hue is dominant. The colors will look grayscale.
Lightness shift: Dragging the slider to the right increases the lightness. The maximum value creates totally white colors. Dragging the slider to the left decreases the lightness making the colors darker and darker. The minimum value creates totally black colors. Values range from 0 to 255.
Note: Once you’ve moved the dot, it’s not possible to cancel out of the dialog to get the original color back.
- If you’d like a reminder of this and other tools in EQ7, check out the
Display Dynamic Help tool.
- To print this: Click the title (Tool Tip Tuesday! - The Twist Tool) and then print as normal.


10-20-2015
12:53 pm
I cannot find this twist tool anywhere. I read the blog, help and the manual and still cannot find it. Is this for EQ7 or EQ stitch?
10-20-2015
2:21 pm
Hi Cheryl,
You’re right, that wasn’t very clear. I’ve updated the post. Let me know if you have any other questions. Thanks for reading!
Heidi
10-22-2015
2:24 am
korean version
http://blog.naver.com/yuishow/220516278921
10-22-2015
9:15 am
Thanks