
How many of you are ‘Cross over Crafters’? By this I mean, how many of you do more than one type of crafting and use the elements of one type of craft in another type of craft. I suspect many of you are like this. It is great that our EQ program allows us to be quilters and machine embroidery enthusiasts and combine the two loves in one program. But, I do more than that. I often use the artwork in the EQ7 side of the program and capture it to use in other programs. I often just print the artwork onto fabric and then use that as the guidelines for my free motion thread painting.
EQStitch allows me to create designs that I use in quilting, home decor, clothing, and crafting of all sorts. A very simple design can add an impressive expression to other projects. Have you ever stitched on card stock? Did you know you can stitch right through the paper to create a one of a kind special card for someone?
1. Open your EQStitch program and click on the ‘stitch worktable’![]() icon.
icon.
Click on the ‘drawing board options’ icon ![]() on the properties bar at the top of the screen.
on the properties bar at the top of the screen.
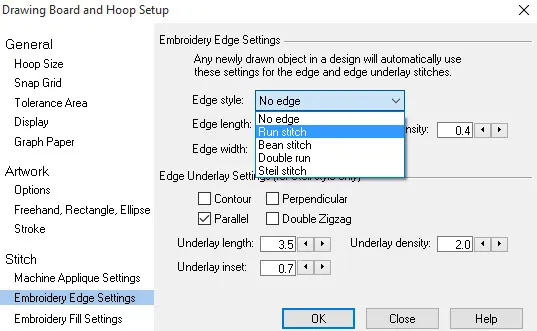
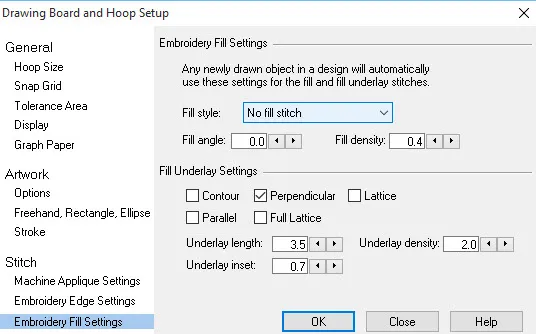
In the drawing board options box, set the embroidery edge setting to be a running stitch and the embroidery fill setting to be a no fill property. Be sure to click the ‘OK’ in the bottom of the box to set the new drawing board properties.
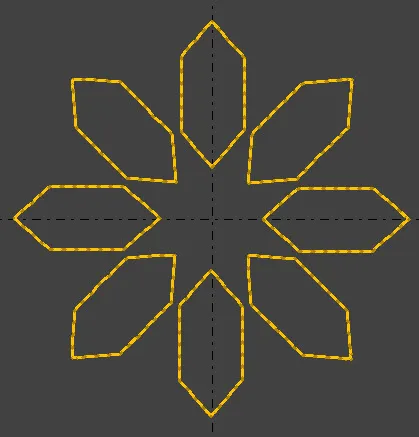
2. Click on LIBRARIES>Block Library>EQ7 Library>07 Stencils>Wreaths. Scroll all the way to the end of the selections and locate the ‘Petals Stencil’ and click on it to select it.

Click on ‘add to sketchbook’ in the bottom of the box. Click on the word ‘close’ to close the library box.
Click on the ‘view sketchbook’ icon ![]() at the top of the screen.
at the top of the screen.
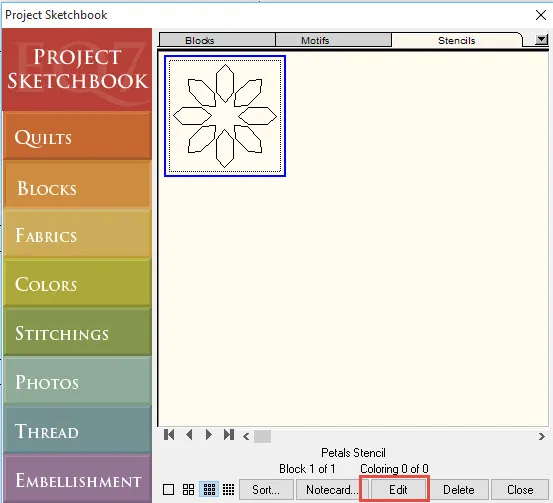
Click on the Blocks tab on the left and then click on the stencil tab at the top of the sketchbook box. Click on the word ‘edit’ in the bottom of the sketchbook.
3. The design will open on the block worktable because that is where it was created. We need to copy the artwork to use it on the stitch worktable.
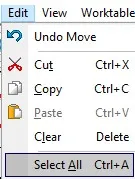
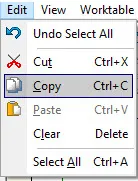
Click on EDIT>Select all and the click on EDIT>Copy to place a copy of the artwork onto the windows clipboard.
Click on the stitch worktable icon ![]() at the top of the screen.
at the top of the screen.
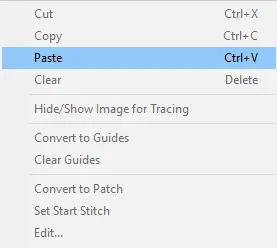
Mover the cursor over to the drawing board area and RIGHT CLICK>Paste to place the design artwork onto the stitch worktable.
Click on the ‘center selected objects’ icon ![]() on the property bar at the top of the screen.
on the property bar at the top of the screen.
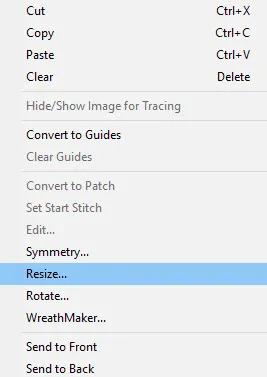
While the design is still selected, RIGHT >Resize.
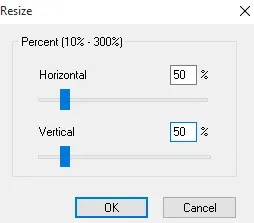
In the resize box, set the size to 50% horizontal and vertical. Be sure to click the ‘OK’ in the bottom of the resize box.
4. Click on the stitch tab at the bottom of the screen.
Click on the ‘set thread’ icon![]() on the toolbar.
on the toolbar.
Click on any thread color to select it and then click on each element to color the design.
Add the design to the sketchbook.![]()
5. Click on STITCHING>Export Stitching file.
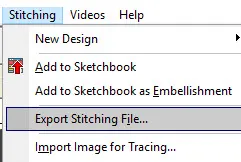
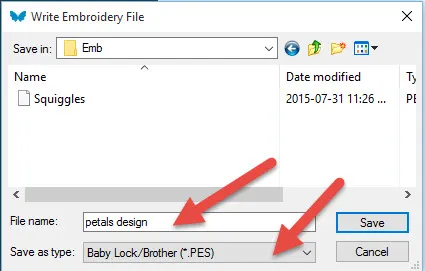
In the export box, type the name for the design and select the file format you need for your machine.
AT THE MACHINE--Fold an 8 x 11 inch card stock piece of paper into quarters. Apply sticky back stabilizer to the back side of the lower right quadrant of the card stock paper. This will prevent the needle from punching out the design area of the paper with the needle. Hoop sticky back stabilizer with the protective paper removed and the sticky side facing up in the hoop. Lay the card stock onto the hooped stabilizer with the lower right quadrant of the paper centered in the hoop and apply pressure to the card to adhere it to the stabilizer. Stitch the Petals design with a sparkly metallic thread for a shimmering snowflake type of design. Remove the design from the hoop and remove the excess stabilizer. Fold the card back into the quadrants. Now the back of the stitches are covered with the card stock and you can hand write a message on the inside.
Congratulations! You just combined scrap booking/card making with machine embroidery by using a quilt stencil design!


