There is an old expression ‘The Devil is in The Details’. Loosely translated, if applied to machine embroidery, it means that the finished project may look good, but the process of the stitching may not be satisfactory. The details of how you digitized a design are as important as the finished project.
Think of a red work design. It is all one color and ideally will stitch from one element to the next without a lot of tie off stitches or jumps. The back of the work will look as smooth and finished as the front of the work. Yet, we have all come across designs that look great but stitch very erradically jumping from one spot to another. How annoying! The smoothest stitch out considers the ‘pathing’ of the design. With EQStitch we can use basic shapes and set them to path correctly to avoid these jump stitches.
1. Open your EQStitch program and click on the stitch worktable icon ![]() on the properties bar at the top of the screen.
on the properties bar at the top of the screen.
2. Click on STITCHING>New Design>Embroidery to select the stitch worktable we want to use.
3. Click on the ‘drawing board options’ icon ![]() on the properties bar to open it.
on the properties bar to open it.
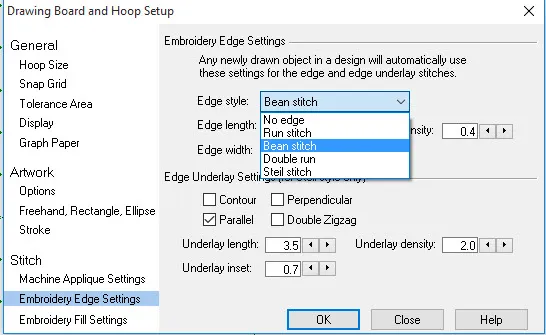
Click on the heading ‘embroidery edge setting’ and set them to be a ‘bean stitch’.
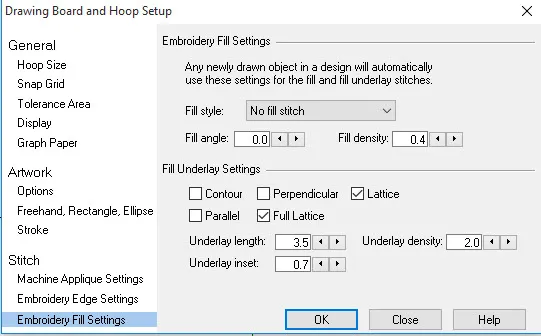
Click on the heading ‘embroidery fill setting’ and set them to the ‘no fill stitch’ option.
Be sure to click the ‘OK’ in the bottom of the box to set the new preferences for your artwork design.
4. Click on the ‘polygon’ tool ![]() on the toolbar and hold the cursor down for a second to see the fly out menu. Select the square box shape from the fly out menu.
on the toolbar and hold the cursor down for a second to see the fly out menu. Select the square box shape from the fly out menu.
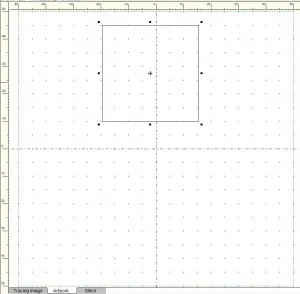
Move the cursor over to the drawing board area and while holding down the control key (CTRL) on your keyboard, click/hold/drag/release to form a box in the upper portion of the drawing board area.
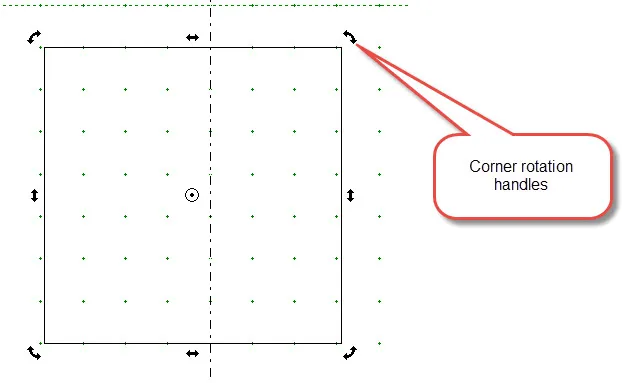
5. Click on the ‘pick tool’ ![]() to select it. While holding down the control key (CTRL) on the keyboard, click once on the center cross hairs of the square shape to get the rotation handles to appear in the corners of the square.
to select it. While holding down the control key (CTRL) on the keyboard, click once on the center cross hairs of the square shape to get the rotation handles to appear in the corners of the square.
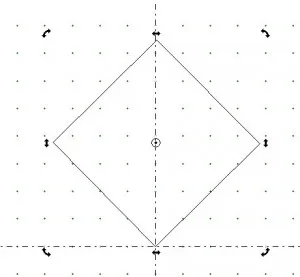
Move the cursor over to a rotation handle and click/hold/drag/ release the handle to rotate the square so one point of the square is on the vertical line of the drawing board.
Using the pick tool![]() , click and drag the rotated square so the tip of the square is exactly on the center point of the drawing area.
, click and drag the rotated square so the tip of the square is exactly on the center point of the drawing area.
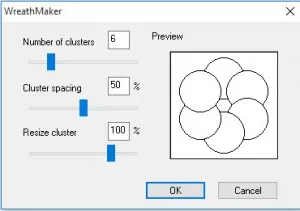
6. Click on the ‘WreathMaker tool’ ![]() on the properties bar at the top of the screen. In the pop up box, set the number of units to 6, cluster spacing to 50% and resize cluster to 100%.
on the properties bar at the top of the screen. In the pop up box, set the number of units to 6, cluster spacing to 50% and resize cluster to 100%.
Click ‘OK’ in the bottom of the box to set the new design property.
Click on the ‘center selected segments’ icon ![]() on the properties bar to center the entire design.
on the properties bar to center the entire design.
7. Click on the stitch tab at the bottom of the screen. If you set your drawing board properties correctly, you will have your squares show with bean stitches only.
8. Click on the ‘simulate sewing’ icon ![]() (sewing machine) at the top of the toolbar to select it.
(sewing machine) at the top of the toolbar to select it.
Click on the ‘play sewing forward’ arrow ![]() on the properties bar and watch the design ‘stitch’.
on the properties bar and watch the design ‘stitch’.
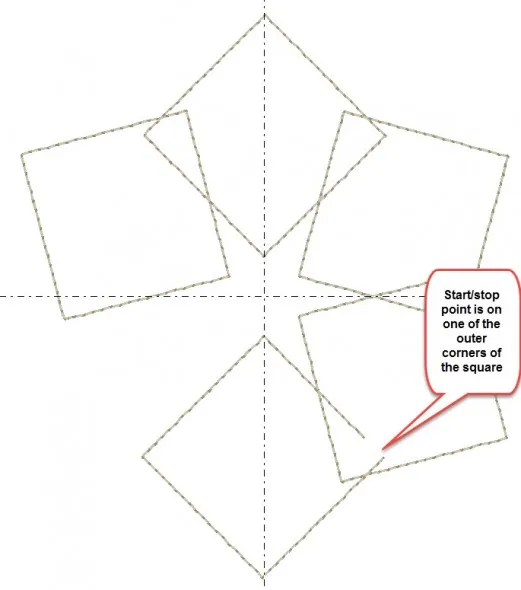
Pay close attention to where the design starts and stops for each segment. Mine started on the outermost edge point. This means lots of jump stitches at the machine!!! I do not want this.
9. Click on the artwork tab at the bottom of the screen.
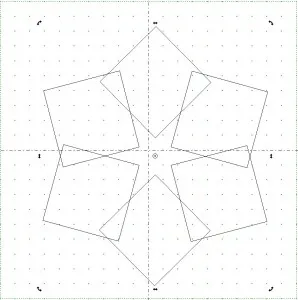
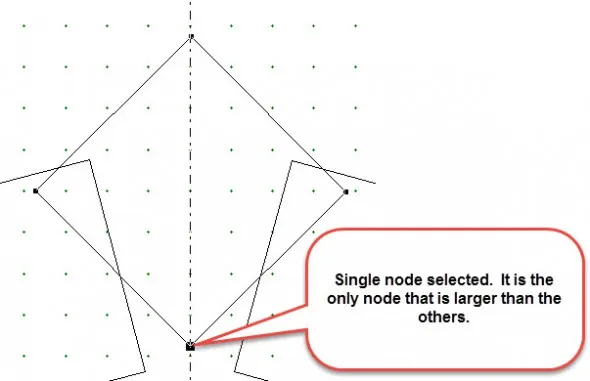
Click on the ‘shape tool’ ![]() to select it. Move the cursor over to the square shapes and click once on the innermost corner to select the edit node. Be sure you only have one node selected and not the line segment.
to select it. Move the cursor over to the square shapes and click once on the innermost corner to select the edit node. Be sure you only have one node selected and not the line segment.
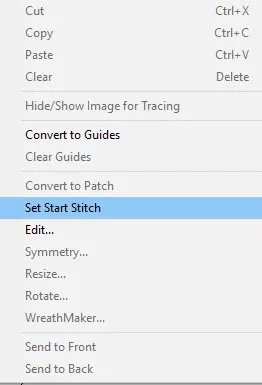
Once the inner node point is selected, right click to get a second menu.
Click on the words ‘set start stitch’. This will move the starting point to the inside of the shape.
Repeat this step for each of the square shapes.
10. The start point is now in the center area of the design, but it is still not a continuous sew pattern. The jump stitches are shorter, but still not eliminated.
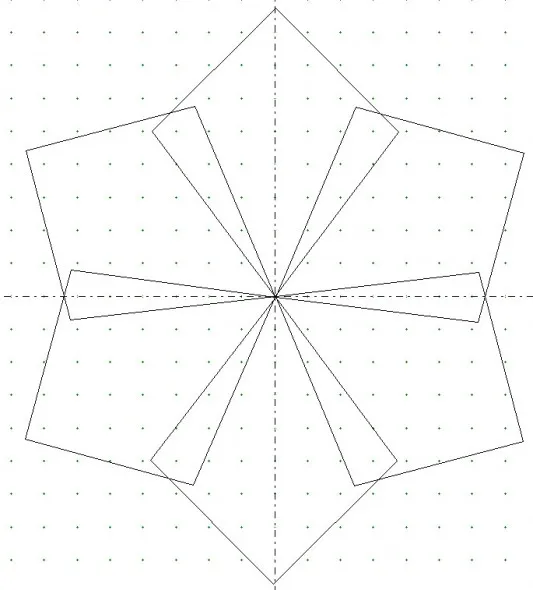
Use the ‘shape tool’ ![]() to select each of the inner points of the squares and click/hold/drag/release the point so it lands directly in the center of the drawing board.
to select each of the inner points of the squares and click/hold/drag/release the point so it lands directly in the center of the drawing board.
11. Click on the stitch tab at the bottom of the screen. Click on the ‘simulate sewing’ icon ![]() on the toolbar.
on the toolbar.
Click on the ‘play sewing forward’ icon ![]() on the properties bar and watch the design stitch.
on the properties bar and watch the design stitch.
Add your completed design to the sketchbook.![]()
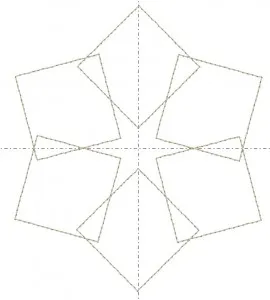
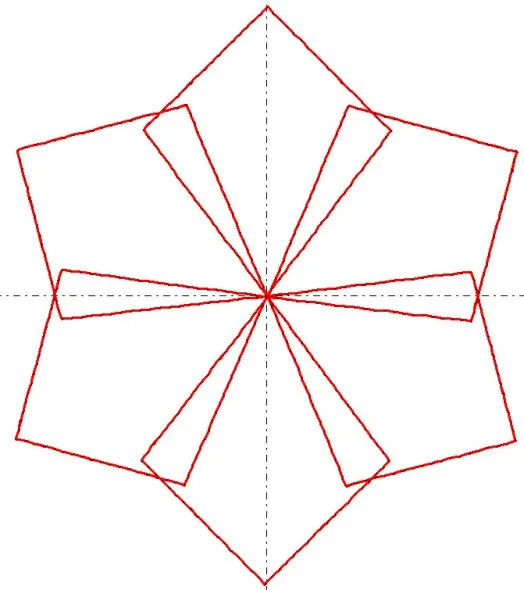
You can now see you have a continuous stitch design with no jump stitches. These details will allow you to have a smooth stitch out of your design and it will look good both on the back and the front of the fabric.




09-13-2015
5:38 pm
Thanks so much for this helpful tutorial! I’m learning so much from ‘Sunday Stitch’ and rediscovering the enjoyment of using EQStitch!
Best wishes,
Linda
09-13-2015
6:17 pm
Thanks Linda. I am glad you are rediscovering your EQStitch. It may be a simple little program but it can indeed do mighty things.
08-09-2017
4:34 pm
I’m trying to combine a freehand line with a heart shape. I have fixed it so the heart starts where I need it to BUT, I still seem to have some (what appears to be tie down stitches) at the end of the freehand line and at the beginning of the heart. I have used the magnify tool and have tried to make sure that the lines connect perfectly. Do you have any suggestions or a video that I’ve overlooked?
Thanks,
Patty
08-09-2017
5:24 pm
Yes Patty that is exactly what is happening. Instead of using a heart shape tool, freehand draw the shape and then continue to your freehand line from the point where you finished the heart shape. The program sees the heart as one shape with a start/stop point and the freehand line as a second shape that needs to start and stop. Also, if they are 2 different colors, the machine will stop and tie off before going to the next shape. Make them the same color and the machine will carry on stitching without a start/stop tie off.