Welcome to the Block 3 post for the EQ7 Summer Drawing Series! We’ll start each month with a drawing lesson that focuses on one of the drawing styles available on the Block Worktable. Then, at the end of the month, we’ll have a link up post where everyone can show off a photo of their sewn block. That’s right, we’re not just drawing in this series, we’re SEWING too!
Block 3 is drawn on the PatchDraw Block Worktable, just like Block 2. However, this time we’re going to work on the Appliqué tab. On the Appliqué tab, patches can be closed or open. Closed patches can be filled with fabric or solid colors. Open patches will be treated as thread, and can be colored with the Set Thread tool.
For this lesson, we’ll be using the default drawing tools on the Appliqué tab. There are more drawing tools available (by clicking Customize Toolbars > Add/Remove Buttons), and I encourage you to try them out yourself.
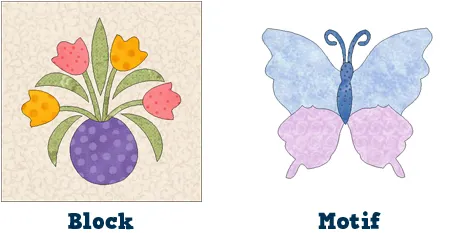
The Appliqué tab and the appliqué drawing tools work the same on both PatchDraw Blocks and Motifs. So what’s the difference between a PatchDraw Block and a PatchDraw Motif? A PD Block gives your appliqué pieces a background (it can be a plain square or a pieced block). PD Motif does not have a background, so these appliqué pieces can “float” on Layer 2 of a quilt.
Let’s get started with our block!
(Want an easy-to-print version of this lesson? Click here to download the Block 3 Lesson PDF file.)
- Open EQ7.
- Click the Open an existing project tab in the Project Helper window and open your sew along project file, which we named EQ7 Summer Drawing Sew Along in the first lesson. Most likely, your project will be listed under Most recently used projects (unless you’ve designed lots of projects since our last lesson!). Click on the project file name to select it, then click OK. The Sketchbook will appear, click Close to put it away.
- Click the Work on Block tool
 . You are now looking at the Block Worktable.
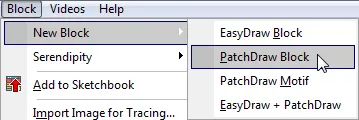
 - Click Block > New Block > PatchDraw Block.
- Click the Applique tab.

- Click the Pick tool
 .
. - Make sure your Precision Bar is visible by clicking VIEW and then looking for the checkmark next to Precision Bar. If there isn’t, click to put a checkmark there.
- Now we’ll set up the Precision Bar. Input the following settings:
Block Width and Height: 12
Snaps Horizontal and Vertical: 12
Graph Paper Cells: ON
Graph Paper Horizontal and Vertical: 2

Snapping Options: Auto Join Segments ON (the 5th button), turn the rest of the snapping options OFF

Flower #1
- We’ll draw a different flower in each of the four quadrants of the block. On the left toolbar, click and hold on the Oval tool. In the flyout menu that appears, click the petal (fourth shape).

- Starting at the center of the upper left quadrant, click hold and drag to the right creating the petal shape.
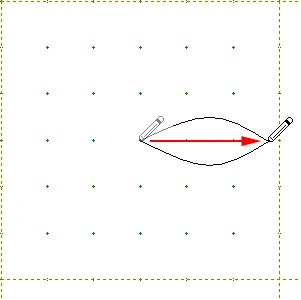
When you release the mouse the shape will fill to a solid cream color (if Auto Fill is pressed in on the Precision Bar).
 - Continue drawing petals to finish the flower.
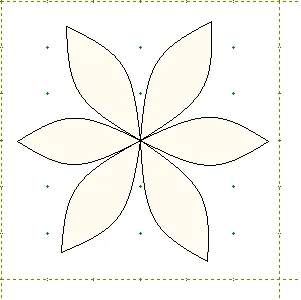
The first flower is finished, but the petals are not uniformly sized or spaced (not that real flowers are perfectly shaped!). Let’s try another method that will create perfectly spaced petals.
Flower #2
- Click and hold on the Oval tool and click the heart on the flyout menu.

- Draw the next flower in the upper right quadrant. Place your cursor on the top center grid point of the quadrant and drag down to the center grid point.
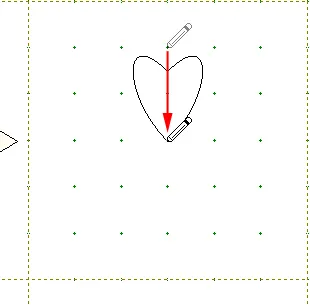
- Click the Pick tool
 on the left toolbar. The heart shape will remain selected.
 - On the Precision Bar, click the Wreathmaker tool
 .
. - In the dialog box, input these settings:
Number of clusters: 6
Cluster spacing: 5%
Resize cluster: 100%
Click OK.
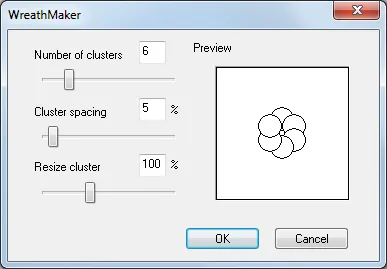
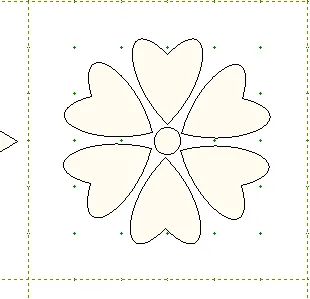
- A “wreath” of hearts will appear in the center of the block. Position your cursor on the black crosshair in the center of the wreath and drag it to the top right quadrant.
- Click and hold on the Oval tool and click the circle on the flyout menu.

- Draw a center for your heart petals. You may need to drag the circle into position after you’ve drawn the circle. Just position your cursor over the black crosshair and drag.
Flower #3
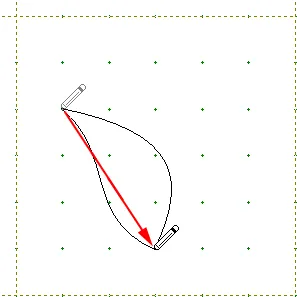
- Click and hold on the Oval tool and click the curved teardrop shape (second from the right).

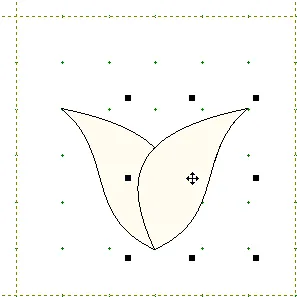
- In the lower right quadrant, draw a teardrop as illustrated below.
- Click the Pick tool
 .
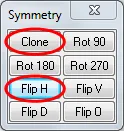
. - Click the small red box on the Pick tool to make the Symmetry box appear. Click the Clone button to make another teardrop shape, then click the Flip H button. The second teardrop is now a mirror image of the original teardrop.
- Position your cursor over the black crosshair and drag the second petal to the right so that the bottom points of the two petals match up.
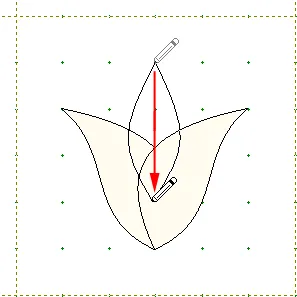
- Click and hold on the Oval tool and click the petal on the flyout menu.

- Place your cursor on the top center grid point of the quadrant and drag straight down.
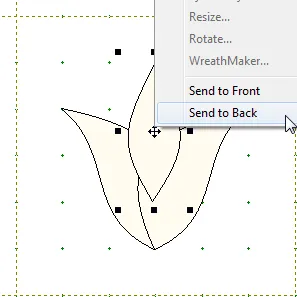
- While the new petal is still selected, right-click and choose Send to Back from the menu.
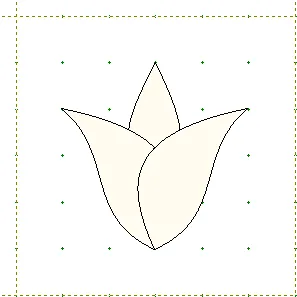
And there’s our finished tulip.
Flower #4
- Click and hold on the Polygon tool. Click the hexagon on the flyout menu.

- In the lower left quadrant, position your cursor near the top center and drag straight down to create the hexagon.
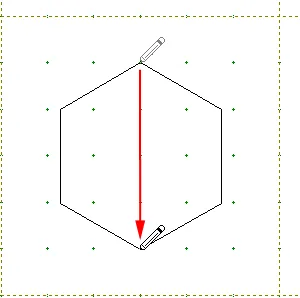
- We’ll be changing this hexagon quite a bit, so let’s zoom in to get a better look at the shape. Click the Zoom In tool
 and drag a marquee box around the hexagon.
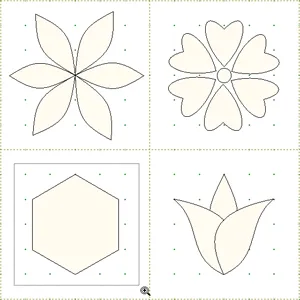
- Click the Shape tool
 on the left toolbar. Click the small red box on the Shape tool to make the Edit Arc box appear.
 - Click on one of the lines of the hexagon to select it.
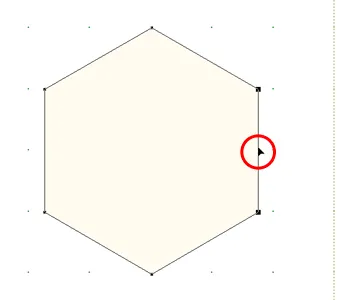
- Click the toCurve button in the Edit Arc box.
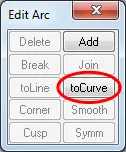
- There are now “handles” attached to this line that we can drag to create a curve. Click on the blue square at the end of the handle and drag away from the hexagon to pull out a curve. Repeat for the second handle.
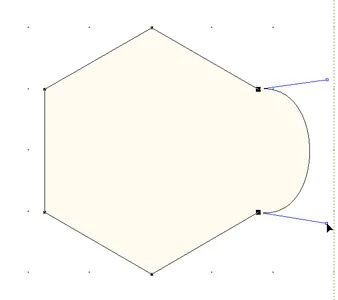
- Repeat this process (select line, toCurve, drag handles) for the remaining straight lines of the hexagon.
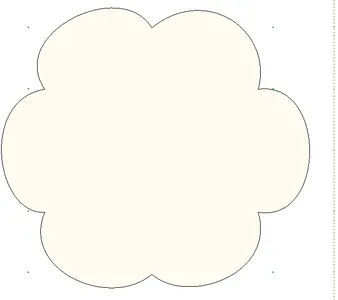
- Click on the Pick tool
 , clicking on the small red box as you do so, to open the Symmetry box.
 - Click on the edge of the flower, to select it.
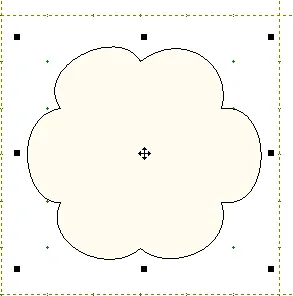
- Click Clone in the Symmetry box.
- While the new flower is still selected, right-click and choose Resize from the menu.
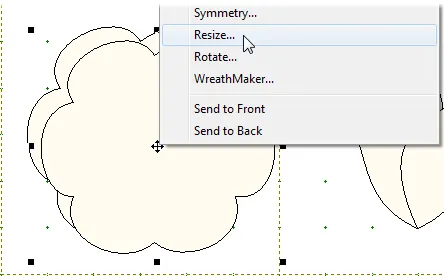
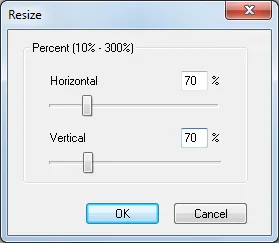
- In the Resize box, type 70 in both boxes. Click OK.
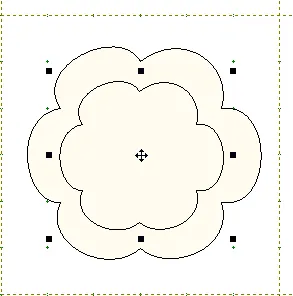
- Drag the smaller flower to center it over the large flower.
- Right-click and choose Rotate from the menu.
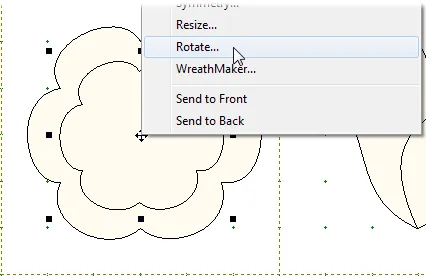
- In the Rotate box, type 30 and click OK.
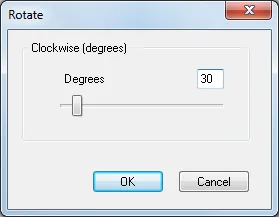
Now the small flower petals line up nicely between the large flower petals!
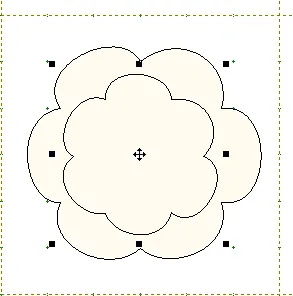
- Repeat steps 38-43 to make another smaller flower.
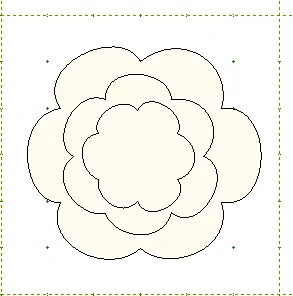
- We’ve completed all our flowers! Click Add to Sketchbook
 . EQ7 automatically adds a plain background square to the block when we Add to Sketchbook.
 - Click Fit to Worktable
 to see the whole block again.
 - Click the Color tab at the bottom of the screen.

- Use the Paintbrush tool
 to color your block. You can use fabrics or solid colors.
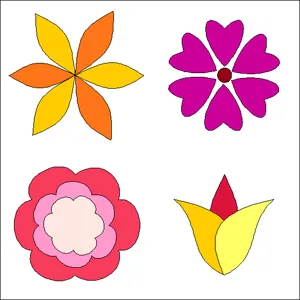
- Click Add to Sketchbook
 .
. - Click View Sketchbook
 . Click the Blocks section on the left and click the flower block to select it.
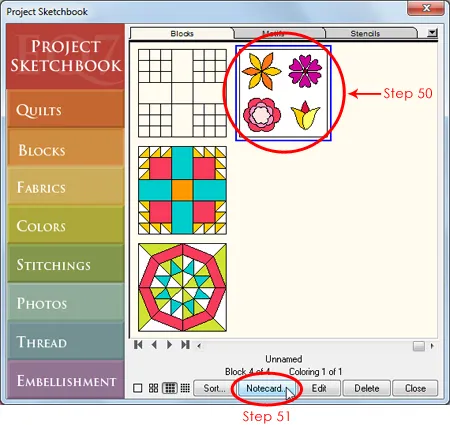
- Click the Notecard button. Your cursor should be blinking on the first line of the notecard next to Name. Type “EQ7 Summer Drawing: Block 3”. If you’d like to add more info to the Notecard, click beneath the word Notes to move your cursor there and type.
Adding information to a block’s notecard helps to keep us organized, especially if you keep lots of in-progress drawings in your Sketchbook. The name that you type on the notecard will appear on your pattern printouts too!
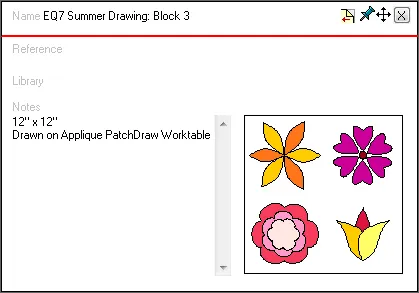
- Click the X in the top right corner of the notecard to close it. Then click Close to close the Sketchbook.
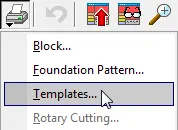
- Now we need to print our pattern so that we can get to the best part of the design process—sewing! Click the Print button
 .
. - The menu appears with the available printing options for this block. Click Templates.
- The Print dialog box appears. Remember that in EQ7 you are working in finished sizes (the final size of your block after all the seams have been sewn).
For this sew along we’ll be drawing all the blocks at 12” and that’s the size I’ll be sewing my blocks too. But you can choose to print and sew your blocks at any size. Type in the finished size for the width and height. - Depending on your appliqué technique, you may want to change the seam allowance settings. You could type in a different width for the seam allowance or uncheck Print seam allowance to not have it print at all. Because I will be machine appliquéing my templates, I have chosen to turn the seam allowance off.
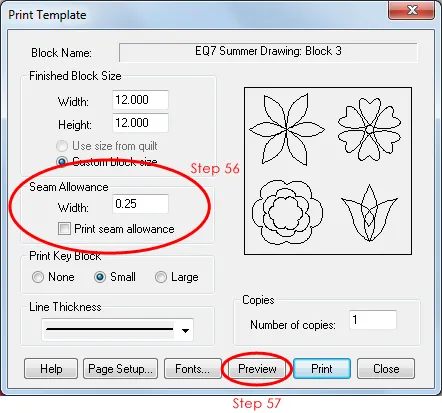
- Click the Preview button.
- You’ll see that the template pattern includes the large background square. Because most of us would prefer to cut a square with a rotary cutter, rather than a template, we can delete this template.
Click the the Delete button at the top. Then click the square template to select it (it will have a red outline).
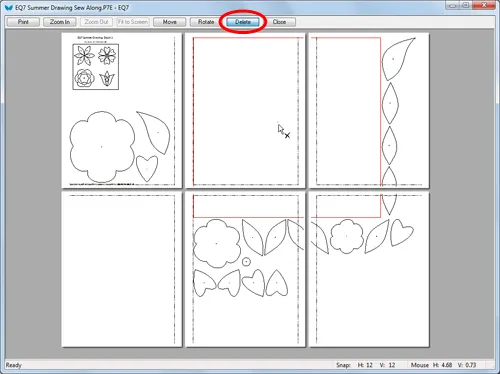
Hit the Delete key on your keyboard and the square will disappear. - Now we can move the templates around to conserve even more paper. Click the Move button and then drag the templates around on the pages.
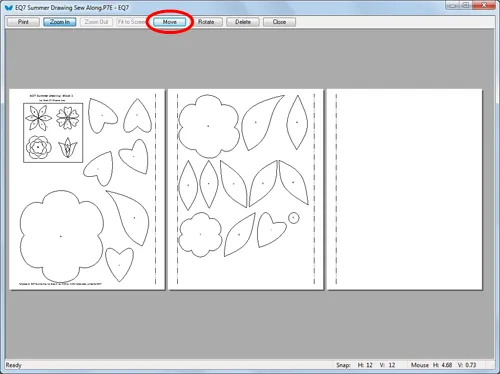
- You can click Print to print the templates, or Close to return to the Print dialog box (click Close again in the dialog box to return to the Block Worktable).
- After you’ve printed your patterns, click Save
 to ensure all your work is saved. Now close EQ7 and start sewing!
If you’re not excited about stitching all four of these flowers, visit the blog on July 15 for the Block 3 Mini Lesson. I’ll talk about ways to use these four flowers to create a block variation more to your liking!
Come back on July 31 to post a photo of your sewn block!
Want to see this lesson in action? Watch the video below!








07-01-2013
10:47 am
Thank for taking the time to present these very helpful lesson.
I really appreciate it.
Carla
Quilted Frog
07-01-2013
2:12 pm
Merci ! Je vous remercie ! Je suis vraiment contente d ‘avoir l’opportunité de faire ces exercices très utiles
Françoise
07-01-2013
4:20 pm
This has been fun and I am glad I decided to do the lessons.
07-01-2013
5:11 pm
Great video! Thanks.
07-01-2013
9:38 pm
I thought I knew EQ inside and out. I’m wrong, lol! I can’t find how to put snapping options on the tool bar, Help!
07-01-2013
9:43 pm
Never mind, I found it *blushing*
07-03-2013
6:56 pm
In Step 31, when I click on the Shape tool on the left tool bar, then click the small red box on the shape tool to make the edit arc box appear nothing happens and I cannot continue to make curves on this block. I have gone over the lesson five times to this point and still cannot get the edit arc box to appear. Can you help? Thanks.
07-04-2013
4:00 pm
Hi Mary,
You have a couple of options:
1. After clicking the Shape tool, move your cursor over to the worktable, then right-click and choose Edit from the pop-up menu. This will also make the Edit Arc box appear.
2. After clicking the Shape tool, the Precision Bar will change to say “Edit Object” followed by some buttons. These buttons are the same options available in the Edit Arc box. You could use these buttons rather than those in the Edit Arc box (this is shown in the video around the 10 minute mark).
07-10-2013
10:49 am
I just found that so fun and helpful – thank you so much!!!
07-12-2013
7:10 pm
Jenny,
In the preview templates section at the end of the lesson, after deleting the large box and rotating and moving the applique pieces to conserve paper, suppose you don’t wish to print the templates at that time. Is there any way to save your work for later? Thanks.
07-22-2013
10:26 am
Hi Terri,
I apologize for the delayed response- I was out of the office last week.
Unfortunately, there is no way to save your arrangement on the Print Preview. Sorry!
07-14-2013
3:02 pm
Jenny, just saw your response to my problem. Took me a while to get back to your blog. Thanks for much for all of your help. I’m looking forward to the mini lesson on 7/15 as I’m not sure if I have time to hand applique all of the shapes by the end of the month.
07-16-2013
4:11 am
Jenny,
I am having a problem… when I get to step 27 in lesson three, I can’t find the send to back button. On my menu, the options stop at resize, rotate and wreathmaker. I even tried to do a second and third one using a different shape. That didn’t seem to solve the problem either. Any clues to what is happening and why?
Kathy
07-22-2013
10:19 am
Hi Kathy,
I apologize for the delayed response- I was out of the office last week.
When you right-click on the shape, are the Send to Front and Send to Back options grayed out at the bottom of the menu? Or do you not see them at all? They are at the bottom of the menu, so maybe you are zoomed in so close that you can’t see all the options.
Another way change to the stacking order of patches would be to use the Send to Back button on the Precision Bar (you must have the shape selected with the Pick tool for these buttons to appear). The Send to Back button has two grey rectangles and one green rectangle with an arrow pointing to the back.
07-21-2013
8:24 am
I am having the same problem as Kathy: I can’t find the send to back button.
07-22-2013
10:22 am
Hi Sally,
See my response above to Kathy’s question. Make sure you have the shape selected with the Pick tool, then you can either right-click on the shape and choose Send to Back from the menu. OR you can use the Send to Back button on the Precision Bar.
07-26-2013
8:49 am
Thanks Jenny! I don’t even have the option of the go to back on my menu, but what you suggested is perfect! It worked well for me. i will have to make a note of that so I don’t go crazy the next time I want to use it.
08-10-2013
9:12 am
On the tulip I cannot get the last petal to “send to the back” I have tried both the dropdown menu and the buttons on the P. bar. It is selected and nothing happens–any idea what is wrong?
08-12-2013
9:32 am
Hi Ellen,
Do you see the small black squares around the tulip petal, indicating it is selected? The Send to Back option won’t work if the shape isn’t selected.
If you do have the petal selected, when you right-click to bring up the pop-up menu, is Send to Back greyed out?
09-03-2013
9:14 pm
Thanks for the comeback–gardening got in the way of my working on EQ7. It was selected and I found that when I looked at it later in the steps to work with it, it was moved to the back. It just doesn’t show at the point where you tell it to move to the back. I had assumed you would see it move at that point.
01-11-2014
4:19 pm
Thank you! I was trying to follow a lesson in EQ Drawing for EQ5 to design a tree skirt, though I have EQ7, and couldn’t figure out how to delete the outline of the block….your reference to the Patchdraw Motif was the answer to my problem!
Now to figure out how to make a round tree skirt….
Linda
07-11-2014
5:57 pm
I have the same question as Mary. Every time I use the shape feature in a block, it seems frozen and the edit shape button wont pop up. I can create a new block and use a new shape from there, but again, it freezes at one. I tried the suggestion to gave to Mary, but unfortunately, the edit button is grayed out. HELP! I only bought the software yesterday so I’m a bit frustrated with all of these glitches that I keep finding. Your tutorial is great…just wish the software worked.
07-14-2014
9:50 am
Hi Rachel,
When you say “the edit shape button won’t pop up” do you mean you can’t select the Shape tool on the left toolbar? Or do you mean that you can’t get the Edit Arc box to appear by clicking on the red box of the Shape tool?
If it’s just a matter of not being able to get the Edit Arc box to appear, you can access the same options on the Precision Bar (right above the worktable). After you click on the Shape tool, the Precision Bar will change to say Edit Object. All of the little buttons after it will be greyed out until you have a line or node selected. Once you have selected an item with the Shape tool, the appropriate options will be enabled on the Precision Bar.
What operating system are you using?
07-21-2014
7:59 pm
I guess I wasn’t very clear! I meant that I can select the shape tool, but the pop out that lets you change the shape doesn’t show up when I click the little black arrow. It only appears the first time I chose a shape, but will not each subsequent time.
I’m using OS X Mavericks on an iMac with the new mac version of EQ7.
Thanks so much for your help, Jenny!
07-21-2014
9:04 pm
ohh. I see what I’m explaining wrong. Its not the shape tool, its the oval tool.
07-23-2014
10:38 am
Hi Rachel,
The flyout menu not appearing is an issue we are aware of are currently trying to fix. It only happens for a handful of Mac users and we are in the process of trying to pinpoint the problem. Thank you for sharing your operating system, as that will help our programming team!
The temporary solution we have right now is to save your project, close EQ7, and then re-open to get the flyout menu to appear.
Best wishes,
Jenny @ EQ