
Your quilt may have a focal point where the eye rests (like in a medallion quilt) or it may have movement where your eye travels over the entire quilt top to discover many pleasing features built into the design. Movement can be created with color repeats and with curved elements that cause you to travel over the quilt to take in the entire project. In this blog we will discuss movement created with curved blocks. There is more than one way to create the illusion of curves and movement.
The easy way to create curves is to make a block with applique on it. Placing the applique elements in a somewhat random placement that is slightly curved will create an overall curved design when added to the quilt layout.
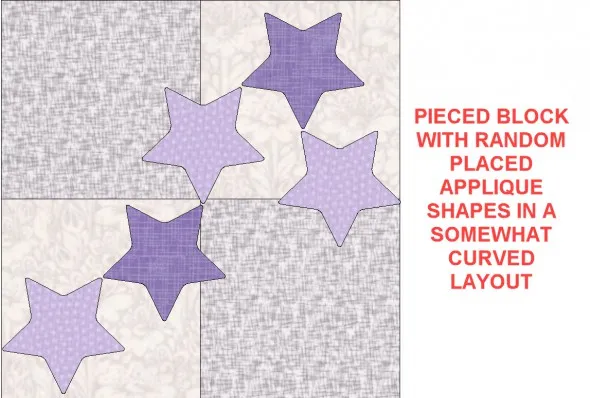
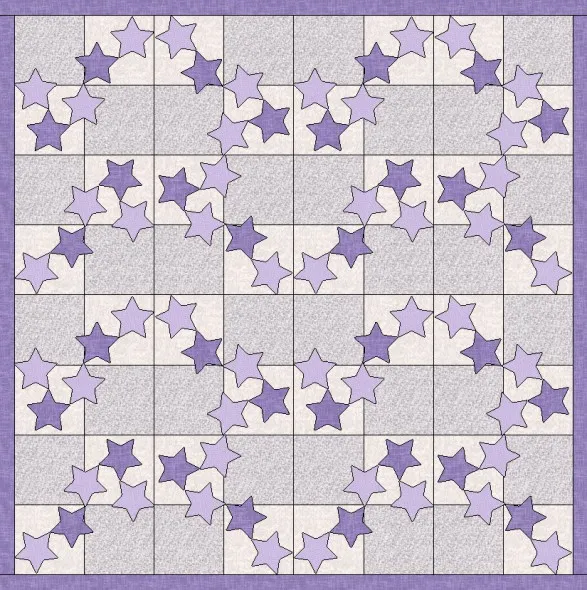
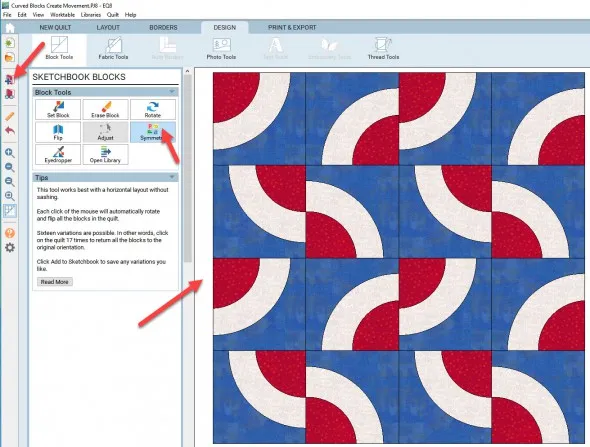
This does not really looked curved. When placed onto a quilt layout and then having the blocks rotated with the symmetry tool , you can begin to see a curved design.
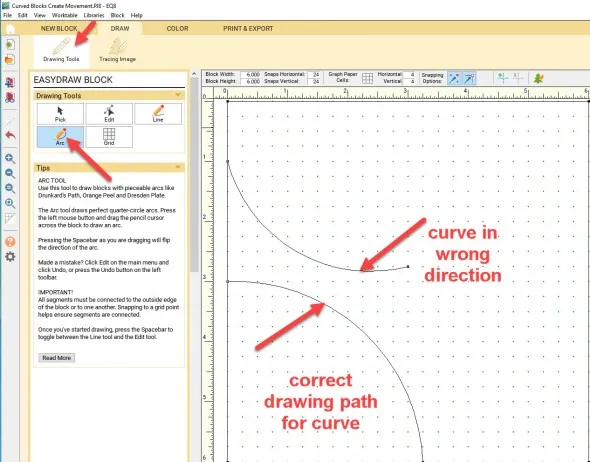
Another way to create a curved block is to draw it as an Easy Draw block using the Arc tool![]() to draw curved lines. This tool can be a little tricky because sometimes your arc will be in the wrong direction because of the way you are dragging your mouse across the block. Simply hit the space bar on the keyboard while drawing the arc and the curve will flip to the correct direction for you.
to draw curved lines. This tool can be a little tricky because sometimes your arc will be in the wrong direction because of the way you are dragging your mouse across the block. Simply hit the space bar on the keyboard while drawing the arc and the curve will flip to the correct direction for you.
Once you complete drawing your arcs you can color the block add it to the sketchbook. Click on the quilt worktable icon on the upper right side of the screen and select a layout (default is for a horizontal layout). Use any layout you want for this. I chose to set my blocks into a traditional horizontal quilt layout.
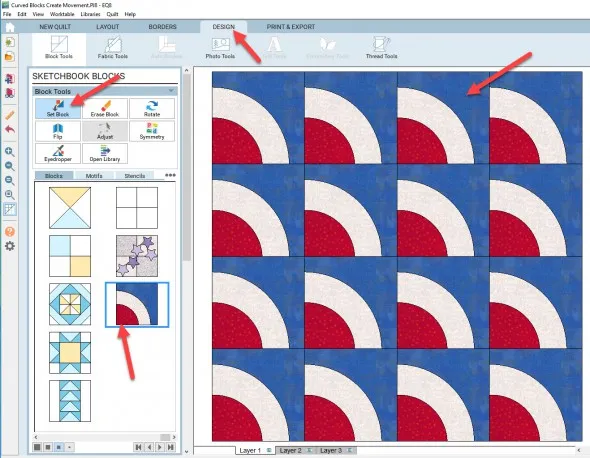
After setting the blocks I can use the symmetry tool to click onto the quilt layout worktable up to 16 times to see different variations of the layout and add the ones I like best to my sketchbook.
![]()
My most favorite curved block patterns to make utilize the powerful built in tools in EQ8. I love this way to design because I don’t have to do so much work. The program has all ready aided me with the block information I need to be creative with curved piecing.
Open the program and click on the block worktable icon on the upper right side of the screen. From the menu bar at the top of the screen click on the new block tab and then select the pieced block type. In the box block style select the poly draw block option.
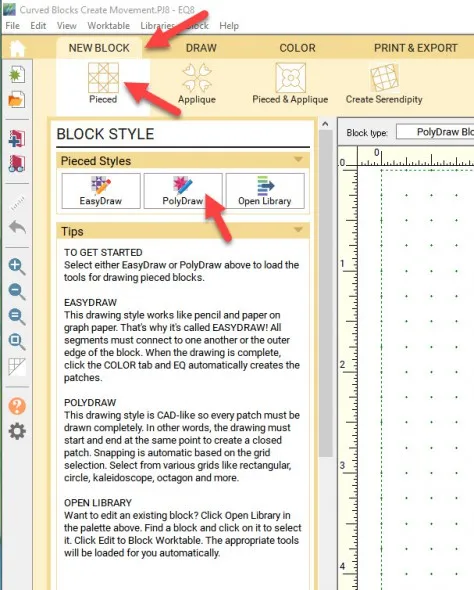
NOTE: There is an excellent tutorial on how to use the PolyDraw block on the EQ website. It can be found here . https://support.electricquilt.com/articles/draw-a-pieced-block-polydraw/
From the Polydraw Block box, select the polyarc tool![]() and the click on the arc layout option in the box. The layout design will appear on the worktable.
and the click on the arc layout option in the box. The layout design will appear on the worktable.
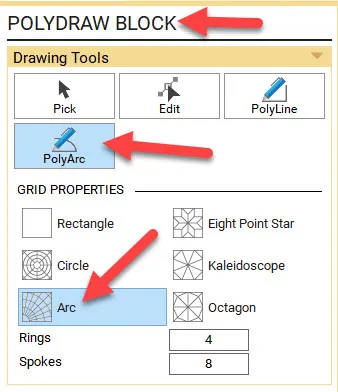
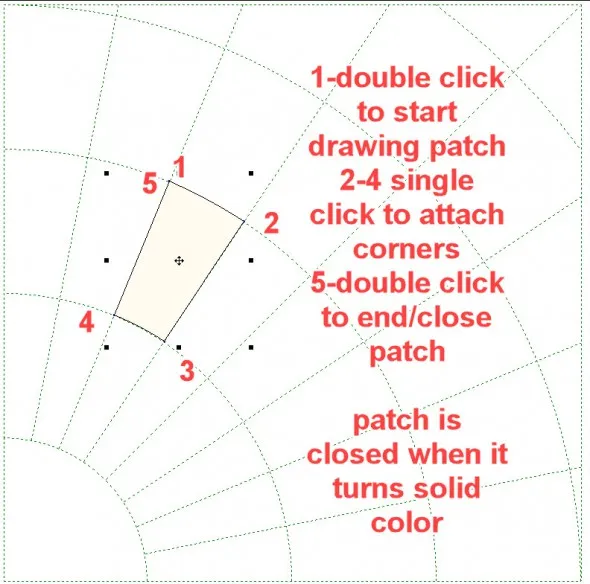
This tool will draw the shapes for you while snapping to the background lines of the layout. You must complete a closed patch for each segment. You will know the patch is closed properly when it shows a solid color area against the background layout..
Begin by double clicking on a corner of the patch then click on each corner once to draw the patch outline and double click on the point of the area where you first started drawing to release the PolyArc patch drawing tool.
Create a patch for an arc of the design. Now while it is still selected, clone>rotate>drag to the next position. It will snap into place for you. This is a great way to make your patches. You can always draw each patch individually if you choose, but the tools in EQ8 make it quick and easy.
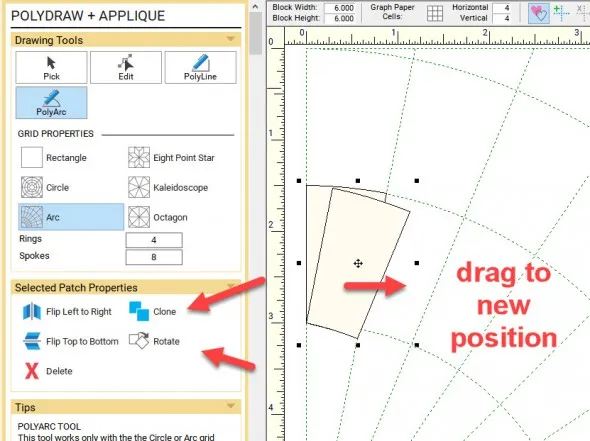
Continue drawing and cloning and rotating your pieces until the block is full.
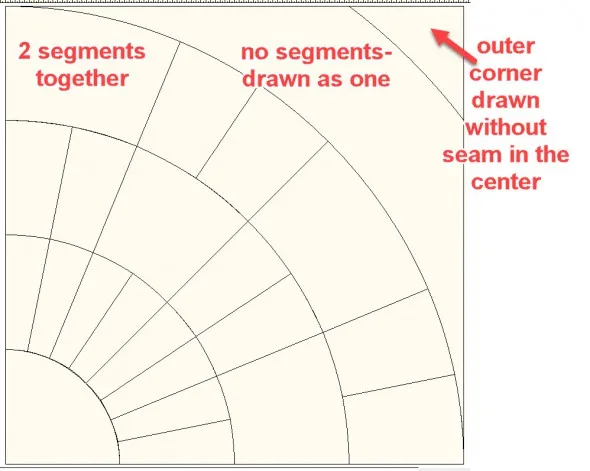
TIP You can draw over several blocks at once to make larger and smaller segments. I don’t like to have a seam line into a corner so I make the corner patch one large piece to avoid the seam line in the corner of the block.
 Add to sketchbook
 ![]()
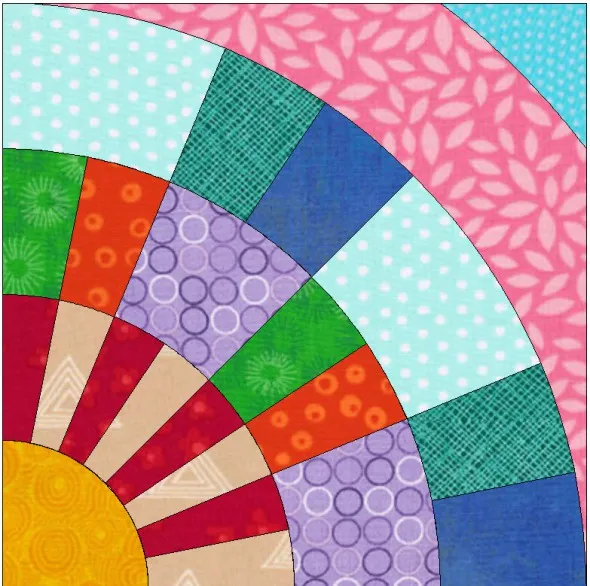
Once all the patch elements are drawn to your satisfaction, click on the color tab at the top of the screen and click on colors of your choice then click on the patch to fill the color elements.
 Add to sketchbook
![]()
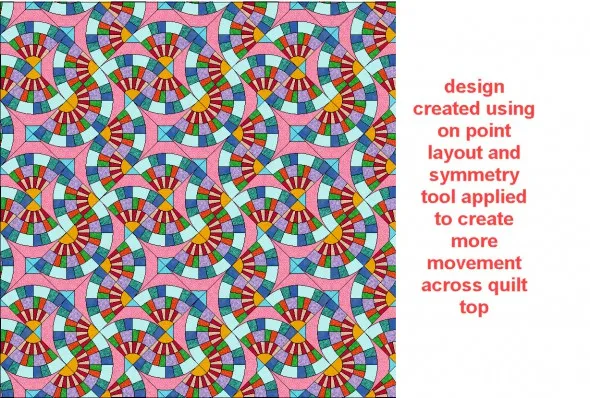
Click on the quilt worktable icon at the upper right side of the screen. Choose whichever layout type you want to use and add your block to the layout. Add more interest by using the symmetry tool
  to see up to 16 different variations of your new layout.
 Add to sketchbook
 ![]()
Be sure to play with the tools for the layouts and the blocks to see what wonderful curved elements you can create for your EQ8 quilt design. WARNING–This is addicting!!


07-15-2018
11:38 am
Why does the busy print fabrics show up in tiny scale on my screens, hardly can tell it is a print and your fabrics are showing up lovely ?
07-16-2018
3:09 am
Make the block size smaller in your quilt and see if this helps.
07-16-2018
3:11 pm
Kay thanks for your question. When I showed the block with the fabrics you can indeed see the print of the fabric. When I take the same block and place it into to quilt layout it is scaled down so you see the color of the block fabrics but not the prints on the fabrics so much. I don’t know what work table you are on when you say you can’t see the print on your fabric. Can you give me some more information about where you are in the program when you can’t see the fabric?
08-28-2018
10:00 pm
Kat, are you designing using fabrics from the EQ fabric library or fabrics you have imported into the program yourself? When importing fabrics yourself, EQ does not know whether you are giving it a picture of a 5″ square of fabric or a 25″ square of fabric unless you use the Scale Fabric tool found on the Image Worktable. Instead of uploading that fabric image straight to the fabric library, open your Image Worktable, choose Import Image, and then Scale Fabric to tell EQ how big that fabric swatch is. Then EQ will be able to make the fabric print appear exactly the right size in the patches and blocks of your quilt.