


Welcome back. This is Part 2 of designing the octagon shaped Stardrop Table Topper with Electric Quilt 8. In our first lesson, we used the polydraw drawing tools and features including the Octagon drawing tool to create the Stardrop block. In Part 2, we will set the block into a quilt and learn how to print the foundation pieced pattern. If you missed the first lesson, you can find it at this link, Stardrop Table Topper – Part 1. On to creating our quilt!
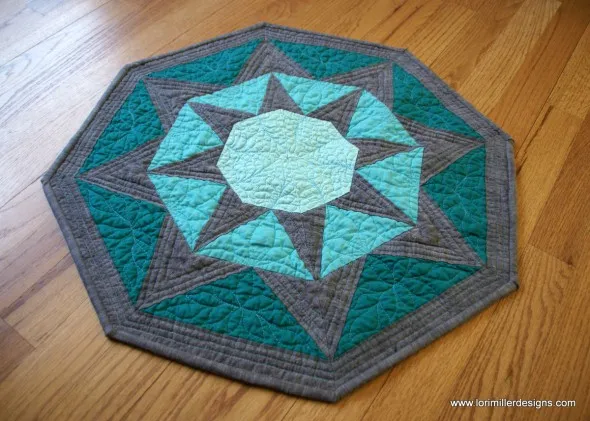
Stardrop Table Topper – Part 2
Size: 24″ x 24″
Skill Builders:
- Creating an irregular shaped quilt
- Printing foundation pieced patterns
On to the design!
- Open EQ8.
- On the left side toolbar, click the Open project button.

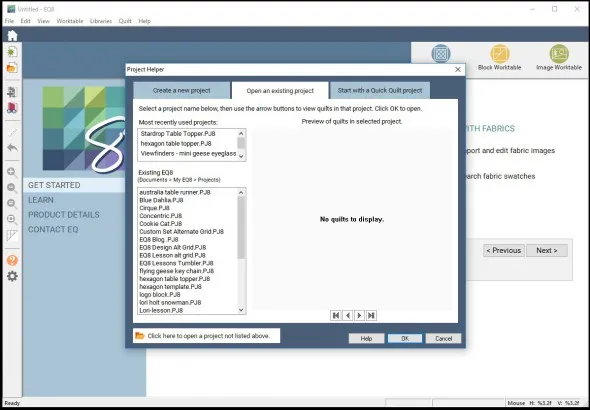
- Select the Project we already saved from Part 1, Stardrop Table Topper and click OK.
- Select the Quilt Worktable.

- Select DESIGN QUILTS, and choose the NEW QUILT tab.

- Under the NEW QUILT tab, select Horizontal.


- Under LAYOUT, Update the Horizontal Layout Palette.
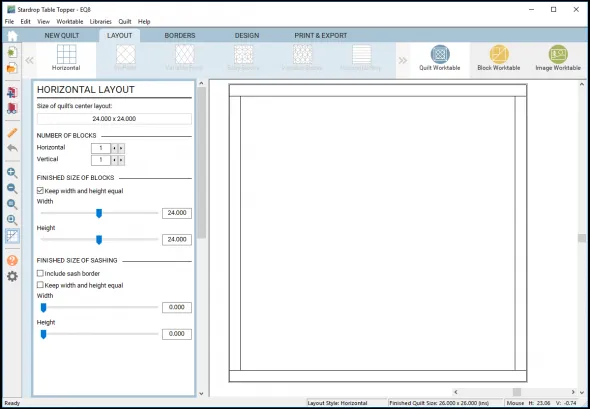
- Under Number of Blocks, Change both Horizontal and Vertical to 1.
- Under Finished Size of Blocks, check to keep width and height equal. Change to 24 inches.
- Keep Sashing at 0.

- Select the Borders tab to display the Borders Palette.
- Under Lock size adjustments, select all and move the borders to zero.

- Select the Design tab.
- Select BLOCK TOOLS
 on the ribbon bar.
 - In the Sketchbook blocks palette, choose the Set Block Tool.
 You should see the Stardrop Table Topper Block you created in Part 1.
 - In the quilt drawing area, choose the Layer 2 tab at the bottom.
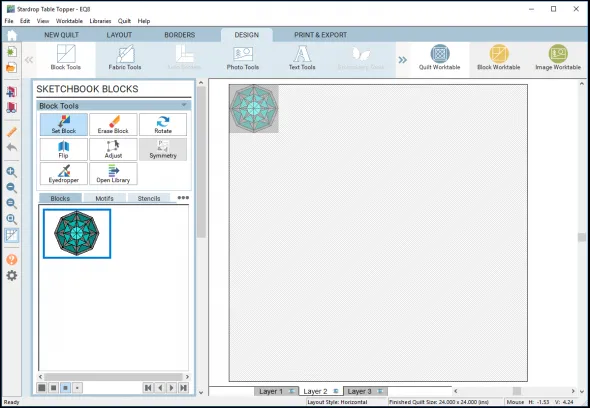
- Click and drag your Stardrop Block to the top left corner of the quilt drawing space and let go. The block should drop right into the quilt.
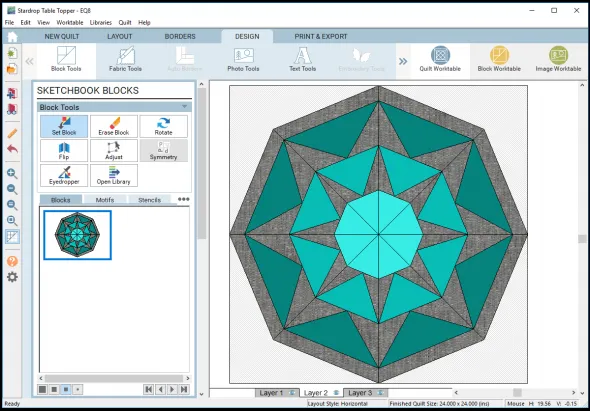 Note: Because you used layer 2, you are able to keep the Octagon shape of the quilt.
 - Add it to the Sketchbook.

- From here you can print your yardage estimate and print out your foundation paper piecing pattern.
How to print the foundation pattern for the block to make the quilt.
![]()
- Select the PRINT and EXPORT tab.
- Select Print
 in the ribbon bar.
 - Make sure you are on Layer 2. (Remember we placed the block on Layer 2)
- Click on the block to select it, you will see a green highlight around the whole block. Once you select it, the foundation tool will be available.
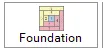
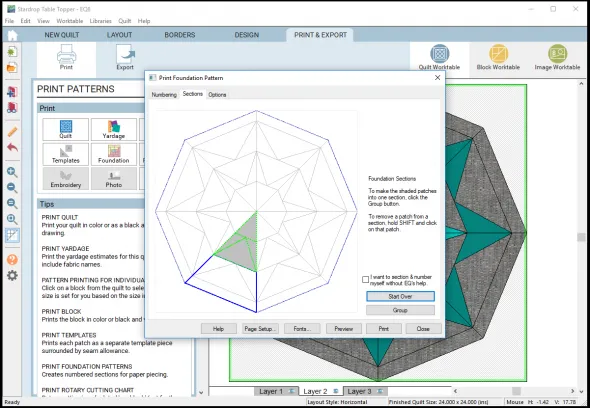
- Under the Print Patterns Palette, choose the FOUNDATION TOOL.
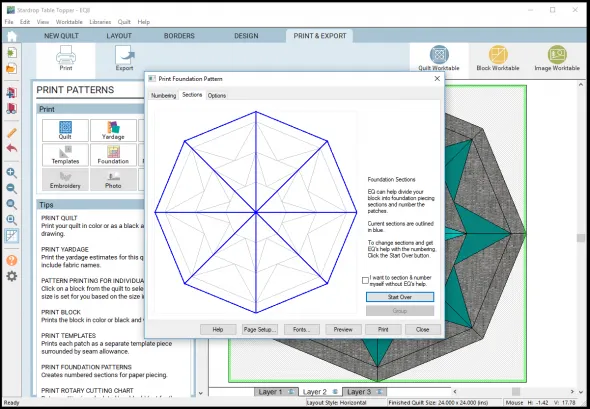
- EQ8 will do its best to group your foundation paper piecing pattern. In this case, each wedge could be stitched out as a single paper piecing pattern. However, the wedge will not all fit onto an 8 1/2″ x 11″ piece of paper, so we will break it up into two pieces.
- Under the Sections tab, choose Start Over. Since all of the wedges are the same, we are only going to create foundation paper piecing templates for one of the wedges. Some of this is trial and error if you are doing it yourself, but I have already figured out how to split up the design for you. You select the pieces in the order you want to sew them.
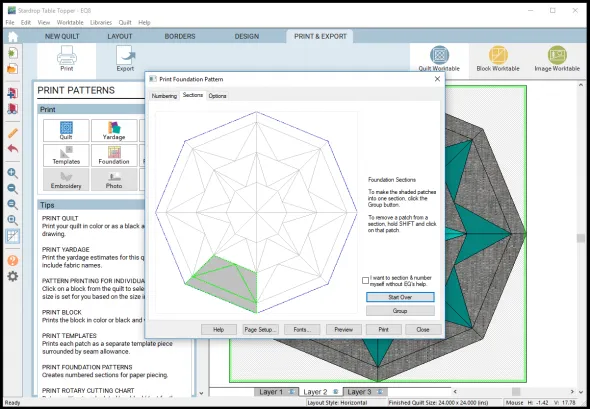
- Start with the bottom triangle and select it, then select the background on the right and left sides, then the bottom band. Click the Group Button to make that one group for a template.
- Next, Select the middle triangle, then the right and left background pieces, then select the top triangle. Click the Group button to make that another template.
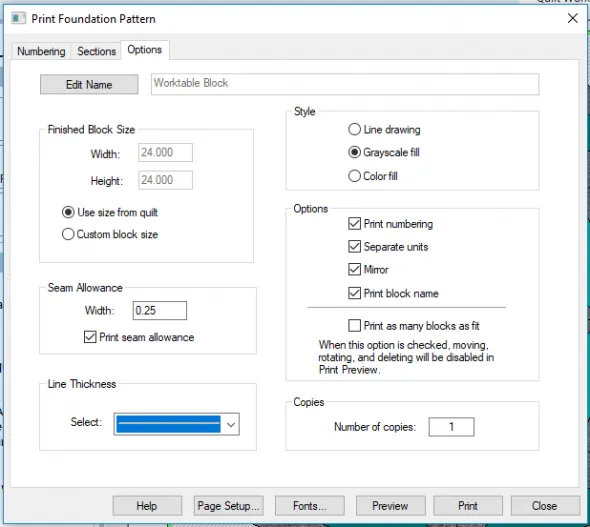
- Next, lets look at the Options tab.
- From the Options tab you can customize how the foundation templates will print. We are using the Style of Grayscale fill, but there are option for just a line drawing or a color fill.
- You can change the Line Thickness and even the font size of the number under the Fonts button at the bottom. Take a few minutes to look at these options.
- Finally, we will check the numbering of the pieces, select the Numbering tab.
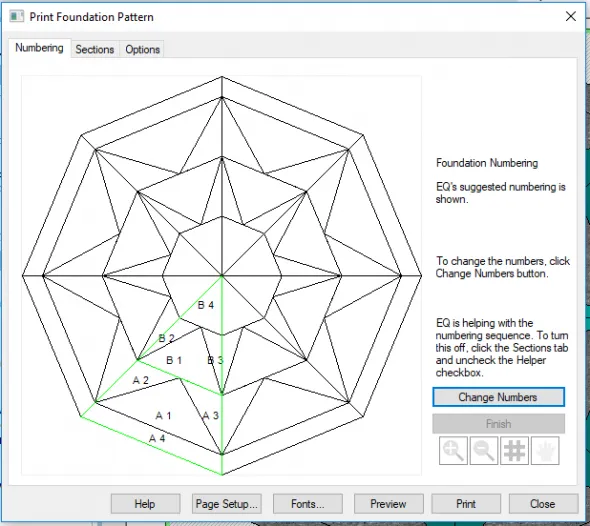
- The numbering looks good and to be in the right order. Lets look at a print preview to see how it will print. Select the Preview button in the bottom row.
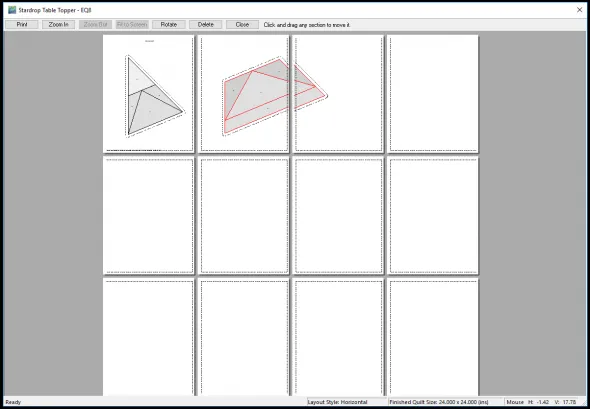
- The two templates need to be moved to fit on regular printer pages. Click and hold to highlight and drag the template pieces to the top two pages. The larger template is still going across two pages.
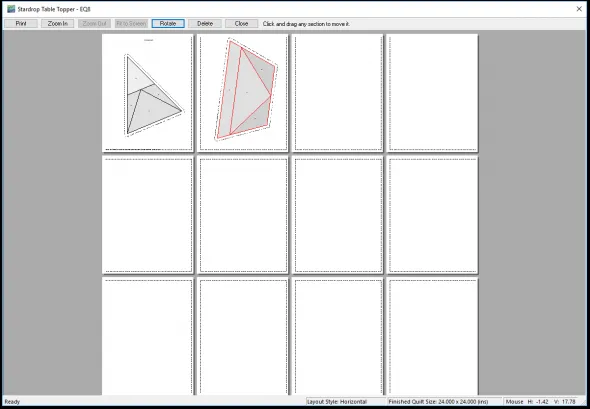
- Click the larger template to select it and then use the Rotate button to rotate it until it fits onto the page. Now you are ready to print your templates onto foundation paper.
HINT: Have you tried printing on EQ Printables Foundation Sheets? EQ has 25 sheet packages of special nonwoven material that you can run through your printer just like paper. It tears away easily, is translucent and won’t dull machine needles. If you don’t want to print, you can also use a pen, pencil or marker to draw your template onto the paper.
Here are Tips and Help Articles to help you get ready to sew up your design.
How to print fabric yardage estimates
Ready to Quilt?
Now that you have designed this with EQ8, why not sew this beautiful Stardrop Table Topper? You can find a Detailed Tutorial for this quilted topper on my Lori Miller Designs blog.
Please share your ideas, questions and feedback in the comments. I would love to hear from you. Thanks!
Lori J. Miller lives in Troy, Michigan, where she designs, stitches and sews quilts and quilty things. She loves experimenting with fun colors and designs to make playful and clever products for the modern stitcher. Sewing since age 11, Lori has deep roots in sewing and quilting traditions that add a unique dimension to her designs. She loves designing using Electric Quilt 8, Electric Quilt Mini and EQ Stitch. You can follow her quilting adventures on her blog at lorimillerdesigns.com or on instagram @lorimillerdesigns


04-13-2018
6:57 pm
I have followed the directions for Part 1 and Part 2 but am not able to print foundations – it isn’t an option when I go to the print tab. Are there settings somewhere that I need to change in order to do this step?
04-15-2018
7:07 am
Faye, I have added clarification to the blog post and a quick hint in this comments section that should get you going, you CAN print from the Quilt Worktable.
04-13-2018
7:20 pm
I can’t select Foundation from the Quilt Worktable; I had to go back to the block itself to create the pattern.
04-15-2018
7:05 am
Thanks for the feedback, see my comments on the post or the updated blog post. You CAN print it from the Quilt Worktable.
04-14-2018
7:00 am
I’m having the same problem with the printing options. Quilt, Yardage & Quilt Setup are the only 3 options available, the others are greyed out. Not sure if I’ve missed something? (I’m really enjoying the project though thanks)
04-15-2018
7:08 am
Kate, Thanks so much for following along. I have updated the post and added tips in these comments to help you get to the foundation pattern.
04-14-2018
1:02 pm
This all went fine until I got to the printing part. The Foundation button is grayed out and I can’t select it. You show printing from the Quilt Worktable, but I can only select Foundation at the Block Worktable.
04-15-2018
7:09 am
Chris, That was a good catch. I have added clarification to the post and a quick overview in this comments section to help you keep going on the Quilt Worktable.
04-14-2018
1:13 pm
Thank you so much for these lessons. I am learning a lot.
04-14-2018
1:40 pm
Thank you for this cute table topper pattern and lesson. This is one I’ll be making soon.
04-14-2018
3:57 pm
I am not able to click on Foundation in the Print Patterns menu. The only ones not greyed out are Quilt, Yardage and Print Setup. I’m sure there’s a fix for this, so I’ll be watching for more information. Thanks!
04-15-2018
7:11 am
Shari, I just added some clarification so you are in the right place to get there. So the blog is updated but there is also an explanation for everyone I added in the comments
04-14-2018
4:41 pm
Mine is grayed out also. Along with block, templates, rotary cutting. What is the problem?
04-15-2018
7:12 am
Barbee, I have added some clarification to the post and also in the detail in the comments below. Thanks for designing along with me.
04-15-2018
7:04 am
Thanks everyone, I added a few updates for clarification on the post.
Here is what you need to know.
You can do it from the Quilt Worktable.
Go to Print and Export, Print,here is the important part that needed clarification
Make sure you are on Layer 2 because that is where we placed our block
Now click on the block to select it, you will see a green highlight bar around it
Once you select it, the foundation tool becomes available and you should be able to follow along. Some of the tools are only AWAKE when you have something selected that it can be used with, and this was one of those times.
Sorry for the confusion but I am thrilled you are following along and are such smart cookies to catch this. Try it out!
04-15-2018
12:38 pm
Thanks so much Lori! That extra step did the trick I actually should have remembered that to print something, it had to be selected!!! Thanks for such a fun project. I can’t wait to go shopping for some fabrics to make this table topper.
04-15-2018
1:43 pm
Thank you so much, Lori! It did indeed work! Thank you also for this great tutorial! Looking forward to many more!
04-15-2018
2:47 pm
Problem! This extra step did not work on some other quilt projects! Do not know what I am doing wrong. Followed your directions. Any ideas on what is wrong?
04-15-2018
4:14 pm
Barbee,
Double check to see which layer you are on. Make sure it is the layer where you placed your blocks and see if that might help.
04-16-2018
7:14 pm
Thanks for the tutorial. It worked great for me after I outlined the blank areas after the first three triangles when constructing the block in part 1. I missed that part in the instructions the first time through. Reading carefully helps!
04-17-2018
6:05 am
Thank you for that wonderful lesson!
I am normaly the learning-by-doing type, but this project flashed me. Created and printed in 30 minutes, and now it lies here waiting for me to quilt it.
Lots of thanks, and I watch out for new projects:))
04-23-2018
9:31 pm
Thank you. Wonderful, straight forward lesson. Makes me want to do more with EQ8
05-09-2018
2:44 am
Thanks for the tutorial. Is there a way to keep the group and numbering without going through the same process?
03-07-2019
9:54 am
Tea,
You will have to number each time in EQ8, but you can print it to a pdf file and you will have it saved to use again. That is an option I often use.
07-22-2018
10:59 pm
I envision a new tab coming “Tutorial Archives” where we can download and save these great instructions in our EQ8 much like the fabric downloads and can look them up while we’re in the program (instead of switching back and forth to the e-mail or help). Thanks!
02-10-2019
4:28 pm
great! thanks for the eq tutorial. I am brand new to the software and you lesson on the star drop table topper was perfect and I learned some things that had been puzzling me! Thankyou.
03-07-2019
9:55 am
Sandy, Glad to have helped. It is nice to hear that these tutorials are making a difference in learning the software. Happy Designing!