
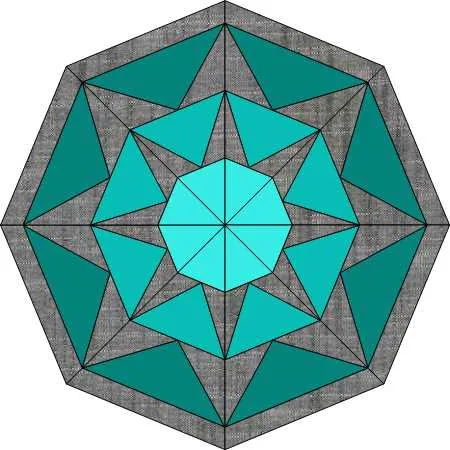
This month we explore a detailed design to create this sophisticated Stardrop Octagon Block. Its much easier than it looks! This lesson is a two parter. First, we will explore using the polydraw drawing tools and features including the Octagon drawing tool to create the stardrop block. In Part 2 we will set the block into a quilt and learn how to print the foundation pieced pattern. Let’s design!
Stardrop Table Topper – Part 1
Size: 24″ x 24″
Skill Builders:
- Working with Polydraw Octagon Block
- Learn to clone and rotate wedges
On to the design!
- Open EQ8.
- Let’s name the Project. The project name appears at the top left of the EQ8 Window. Right now the project says Untitled – EQ8.
- On the left side toolbar, click the New project button.

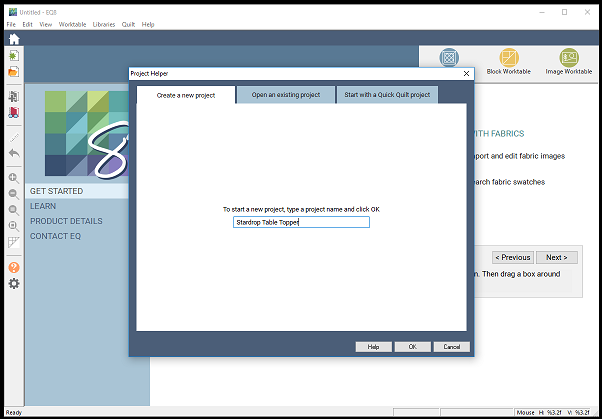
- On the Create a new project tab, type in the project name field Stardrop Table Topper.
- Click OK. The box will close. Notice the project name Untitled has been replaced with Stardrop Table Topper.

- Under DRAW BLOCKS select Design a block from scratch.

- Under the NEW BLOCK tab, select the Pieced Block.

- Under Pieced Styles, select Polydraw.


- Under the DRAW tab, select Drawing Tools.

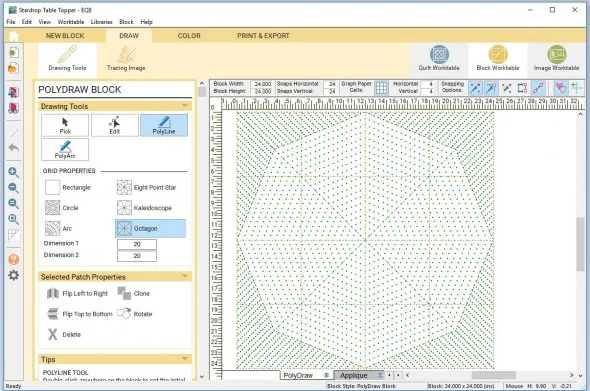
- Under Grid Properties, Select octagon. Set dimension 1 and 2 to 20.
- Set Block width and height to 24.
- Click the Zoom In tool
 on the left tool menu, then select one of the octagon wedges to zoom in on. Position your cursor over a spot in the top-left area you want to enlarge. Click, hold and drag to the bottom-right of the area, creating a box, then release the mouse. This will show a larger work area on the screen so we can draw a block design.
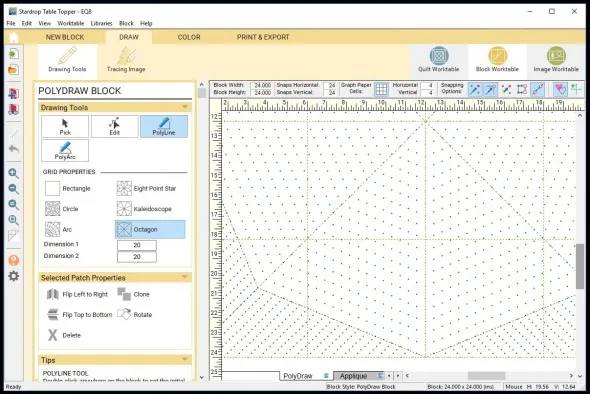
- Select the Polyline tool

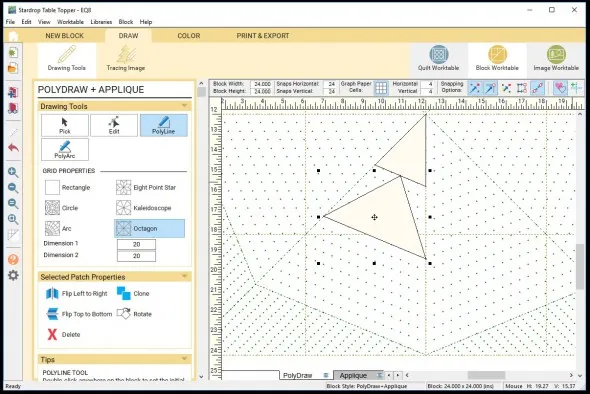
- Double click on the center top dot of the triangle wedge, count down SIX rows on the left side and click, go straight across and click the right side, then back up to where you started and double click to form a solid triangle.
- Double click on the center bottom dot of the triangle above, count down SIX rows and on the left side and click, then go straight across and click the right side, then back up to where you started and double click to form a solid triangle.
- Again, double click on the center bottom dot of the triangle above, count down SIX rows and on the left side and click, then go straight across and click the right side, then back up to where you started and double click to form a solid triangle.
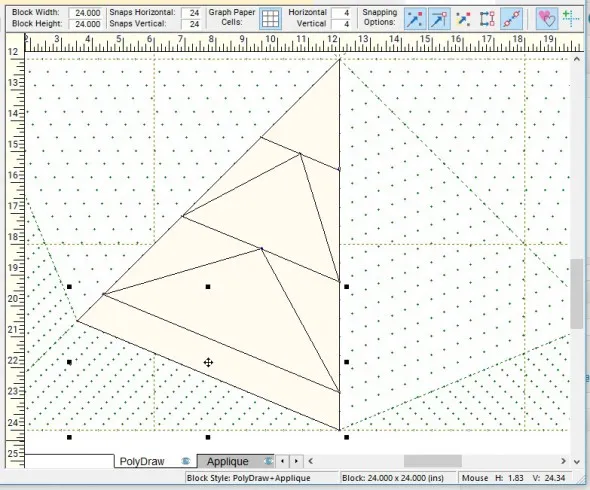
- Using the same polyfil technique, fill in the open shapes.
- Using the Pick tool
 , completely select the wedge.
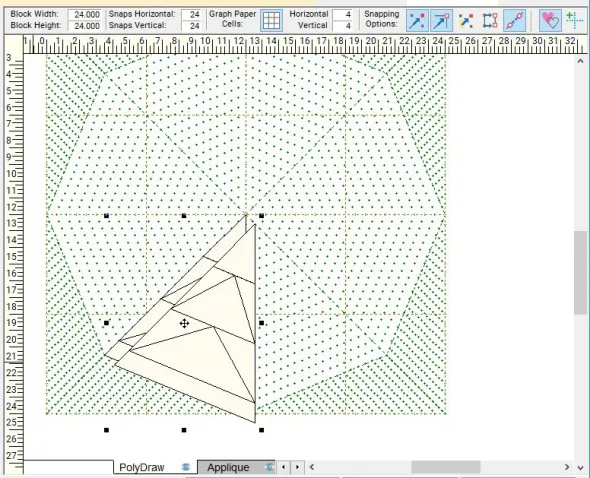
- The fun begins, Click Clone
 to make a copy.
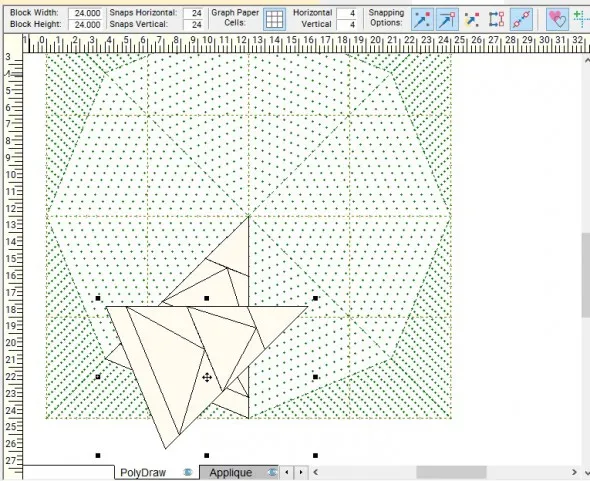
- Click Rotate
 to rotate it once to perfectly fit in the next wedge position. Use the crossed arrows to pull it into the next wedge space. While it is still highlighted, click clone and rotate.
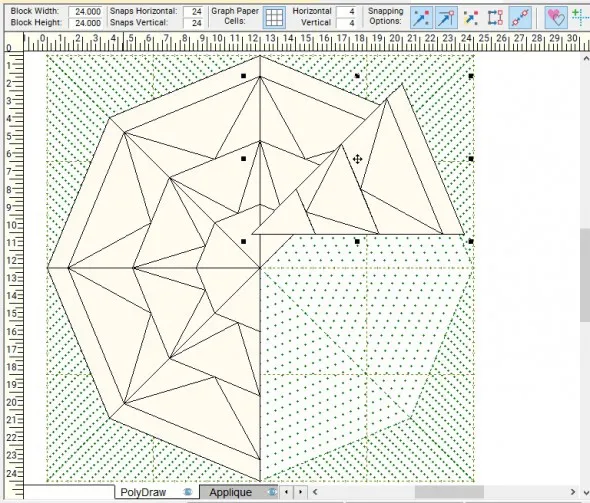
Pull the clone into the next wedge space and continue until the complete Octagon shape is filled.
- Select the COLOR tab. Choose the Paintbrush
 fabric tool.
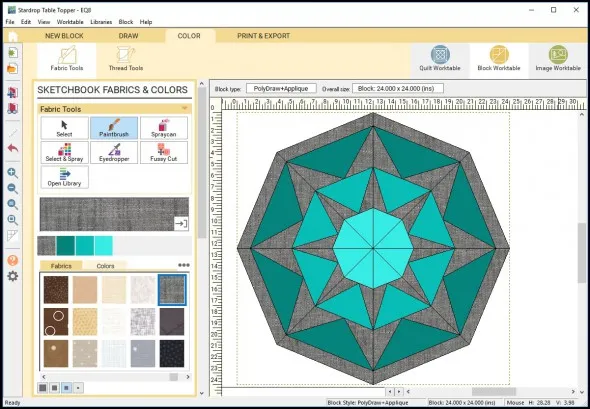
- Choose fabrics or colors and click on the block areas to color your block.
- Once you have the look you want, save it to the Sketchbook.

Now that we have the block designed, stay tuned for Stardrop Table Topper – Part 2 where we will drop this block into a quilt! The next post will include tips and tricks to create an octagon shaped quilt, along with tips and help to print the foundation paper pieced pattern and yardage estimates.
Please share your ideas, questions and feedback in the comments. I would love to hear from you. Thanks!
Lori J. Miller lives in Troy, Michigan, where she designs, stitches and sews quilts and quilty things. She loves experimenting with fun colors and designs to make playful and clever products for the modern stitcher. Sewing since age 11, Lori has deep roots in sewing and quilting traditions that add a unique dimension to her designs. She loves designing using Electric Quilt 8, Electric Quilt Mini and EQ Stitch. You can follow her quilting adventures on her blog at lorimillerdesigns.com or on instagram @lorimillerdesigns




04-06-2018
11:34 am
This is gorgeous, Lori! Your instructions are crystal clear, and I can think of many uses for this beautiful topper. Looking forward to your tips for an octagon shaped quilt!
04-06-2018
6:09 pm
Thanks for the kind words, Part 2 is only a week away!
04-06-2018
12:14 pm
Fun project! I’ve not used this drawing option before, so I enjoyed following your tutorial. Thank you so much for sharing the information and I’m looking forward to completing this quilt!
04-06-2018
6:10 pm
The clone and rotate feature is ingenius and makes it so easy. The topper itself was easy to make as well. Thank you!
04-06-2018
2:33 pm
Love this block and your instructions are so easy to follow. Thank you thank you.
04-06-2018
3:06 pm
Loved it! Can’t wait to set it into a quilt!
04-06-2018
8:11 pm
Laura, it is super easy. Part 2 comes out next week.
04-06-2018
7:01 pm
Love the instructions & the step by step pictures. So easy to understand, thanks!
04-06-2018
7:20 pm
I successfully followed the instructions up through making the first full wedge. When I click clone, it makes a plain triangle the size of the wedge without the smaller triangles in it. I wish I could figure out how to include a screen shot.
I love these tutorials for learning how to use the fancier features, but I can’t figure out why this isn’t working.
04-06-2018
8:10 pm
Kelly, Yes, it is hard to diagnose , but here are a few things to try. I would suggest trying to draw it again, it goes pretty fast so why not? Don’t draw around the entire wedge, just the pieces that make up the wedge design. Then make sure you have selected the whole wedge, sometimes you can miss pieces if you did not select an area a bit larger than the wedge. Good luck!
04-07-2018
12:36 am
Thank you great lesson
04-08-2018
8:17 pm
Thanks for the easy instructions to follow. I love learning new tools in the program!
04-09-2018
12:13 pm
Thanks for the lesson. I have a question..after I have completed the block and go to color, the only triangles that show are the large main wedge triangles. How do I make the little ones appear in the color option? Thanks
04-09-2018
2:44 pm
Corei,
Did you clone and rotate the drawn wedge shape so that you have all eight wedges drawn? Are all of the wedges snapped in to the grid so they are aligning from the center points outward? Every shape should be outlined and filled in, if you see the dots from the drawing background, you have missed a shape. After you drew the three main triangles in a wedge, did you also then go back and fill in the shapes around them? I hope some of these suggestions will help. Thanks, Lori
04-15-2018
3:01 pm
I can do the three triangles, but when I try to enclose them in the surrounding triangle I can’t get the lines to stay. I go around and double click and then the lines disappear. Can you give me a hint as to what I may be doing wrong?
04-15-2018
4:11 pm
Kathy,
You have to actually create each individual patch. So you have to do each triangle on the side of the main triangles you already drew. Double click at the start, hit each point and double click when you get back to where you started. You can’t just click around the outside, you have to do each little piece of the pie. I think that might be your issue.
04-20-2018
1:01 pm
Is there a way to print the lesson without printing all the ads and junk?
Thank You
06-30-2018
12:50 pm
Evelyn, EQ has now added a button to print the article. I hope this helps.
04-24-2018
2:17 pm
I am also wanted to print out the lesson. If there is a way please let me know. Thank you
06-30-2018
12:50 pm
Check out the new print article button that was added to the blog posts so you can print.
05-05-2018
7:33 pm
I would like to print off these instructions so that I can study them and use them at a future time, but there doesn’t seem to be an easy way to do that, is there a reason for it? I am fairly new to this software and don’t know.
Thanks
06-30-2018
12:51 pm
Rosanne, We now have a button that allows you to print the article, see if that works for you.
07-22-2018
9:03 pm
I also had trouble using the pick to select the whole triangle so I went up to edit and clicked on “select all”.
11-07-2021
1:55 pm
Vielen herzlichen Dank für die gute Anleitung.
Freue mich auf die Fortsetzung.
Liebe Grüsse Margrit Pistor