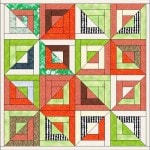
Electric Quilt 7 has a number of ways you can explore colorways in your quilt, both with fabrics and with solid colors. One fast and easy way to play with color is by designing a one block quilt.
Step 1: Open EQ7. Name a new project Colorways (unless you want to play without saving). Make sure you are on the quilt worktable. Click Quilt > New Quilt > Horizontal. We’ll use the default layout size.
![]()
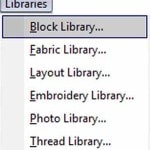
Step 2: Click Libraries > Block Library. Choose a few blocks that would be fun for color changing, for example, like Log Cabin, Quarter Log Cabin or Chains. Click Add to Sketchbook when you have a block selected. Close the Block Library.
Step 3: Now let’s choose some extra fabrics for the fabric palette. We’ll use these at the end. Click Libraries > Fabric Library. Choose as many fabrics as you like. You can search by manufacturer or color. To add them to your palette, select them and click Add to Sketchbook. Make sure you get a large color range.
Step 4: On the Layer 1 tab, click the Set Block tool, choose a block from the palette and then CTRL+ Click in any square on your quilt. This will fill the whole quilt with the same block.
Step 5: Click the Paintbrush ![]() tool and color your quilt with solid colors. (Hint: use CTRL+ click to color all identical patches in the blocks at the same time). Feel free to vary colors from block to block, as per our example.
tool and color your quilt with solid colors. (Hint: use CTRL+ click to color all identical patches in the blocks at the same time). Feel free to vary colors from block to block, as per our example.
Step 6: Click Add to Sketchbook ![]() to save this original quilt colorway.
to save this original quilt colorway.
Step 7: Click the Symmetry ![]() tool. CTRL + click on any block in the quilt. Click up to 16 more times. Watch as the blocks rotate to create different visual effects. Easy! Do this again but stop on the design you like best. Now that you’ve seen how easy it is to change the visual effect by rotating the blocks, let’s play with different colorways.
tool. CTRL + click on any block in the quilt. Click up to 16 more times. Watch as the blocks rotate to create different visual effects. Easy! Do this again but stop on the design you like best. Now that you’ve seen how easy it is to change the visual effect by rotating the blocks, let’s play with different colorways.
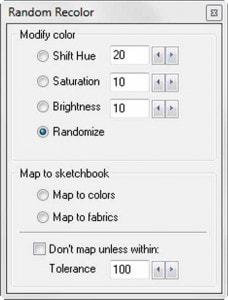
Step 8: Click the Random Recolor ![]() tool (If this tool is not on your right-side toolbar, right-click the toolbar and add the button for Random Recolor). You will see a dialog box appear giving you many color modifying options. Let’s play with these settings and see what happens.
tool (If this tool is not on your right-side toolbar, right-click the toolbar and add the button for Random Recolor). You will see a dialog box appear giving you many color modifying options. Let’s play with these settings and see what happens.
This quick little lesson introduces you to playful coloring tools you may not have used — one of them even recolors the whole quilt for you. Expect the unexpected!
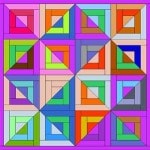
Step 9: Let’s select the Randomize option first. Now slowly click on your quilt five times. Watch as the quilt randomly changes to new colorways! Continue to do this until you find one you like. Each time you find one you like, click Add to Sketchbook ![]() to save the colorway for later. Then choose your Random Recolor tool and keep going until you feel you have enough.
to save the colorway for later. Then choose your Random Recolor tool and keep going until you feel you have enough.
Step 10: In your Random Recolor box choose Shift Hue and leave the settings at 20. Click on your quilt and see how this changes your coloring. Neat huh? When you have found a variation you like stop or click Add to Sketchbook ![]() and continue exploring hues.
and continue exploring hues.
Step 11: Now choose Saturation and leave the setting at 10. Click on your quilt and watch it change.
Step 12: Finally, choose Brightness and leave the settings at 10. Slowly click on your quilt to see how it changes.
Step 13: Play with these settings until you’ve found just the solid color combination you love! Remember, you saved the original colorway in your sketchbook so if at any time you want to go back to where you started simply click View Sketchbook, search your Quilts until you’ve found it and choose Edit. Or use the Paintbrush tool to recolor your quilt and start fresh from there. You could spend hours just having fun watching the color combinations appear!
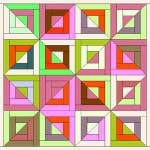
Step 14: When you are done and have chosen a colorway you want to move forward with choose the Random Recolor ![]() tool and select Map to fabrics. Click on your quilt. EQ7 will automatically pull fabrics that match your solid colors and replace them in the quilt. Couldn’t be easier! Click Add to Sketchbook
tool and select Map to fabrics. Click on your quilt. EQ7 will automatically pull fabrics that match your solid colors and replace them in the quilt. Couldn’t be easier! Click Add to Sketchbook ![]() to save this quilt.
to save this quilt.
Step 15: Let’s go back to solid colors by selecting the Map to colors option and clicking on the quilt.
Step 16: Click the Eyedropper ![]() tool. Click on any color in the quilt to select it in your color palette (note: your cursor will then automatically change to the most recently used coloring tool).
tool. Click on any color in the quilt to select it in your color palette (note: your cursor will then automatically change to the most recently used coloring tool).
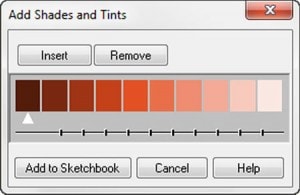
Step 17: Right-click on the color swatch you selected inside the palette and choose Add Shades and Tints.
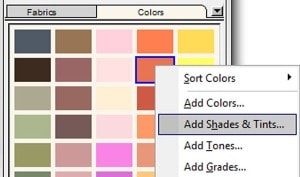
Step 18: A color bar will appear showing you the shades and tints of this color. Simple! Now click the Add to Sketchbook ![]() button in the dialog box to add these new shades and tints to your solid color palette.
button in the dialog box to add these new shades and tints to your solid color palette.
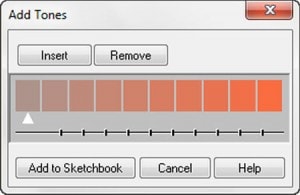
Step 19: Using the Eyedropper ![]() tool again, select a different color from your quilt. In your palette, right-click on the selected color and choose Add Tones. A color bar will appear showing you the tones of the selected color. Click the Add to Sketchbook
tool again, select a different color from your quilt. In your palette, right-click on the selected color and choose Add Tones. A color bar will appear showing you the tones of the selected color. Click the Add to Sketchbook ![]() button.
button.
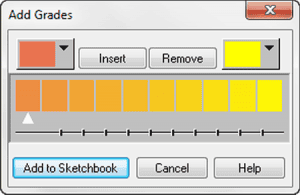
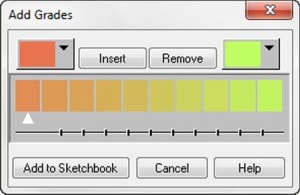
Step 20: With the Eyedropper tool choose another color from your quilt. In the palette, right-click on the selected color and choose Add Grades. A color bar of color grades will appear.
Step 21: In the color selector box on the top right, click the drop down arrow. Using the slider bar scroll to find another color you like and select it. Watch as the grade color bar adjusts to show you the blending colors. Using the Add Grades feature is a great way to experiment with transparencies.
Step 22: Click the Add to Sketchbook ![]() button to add these grades to your palette.
button to add these grades to your palette.
Step 23: Click the Paintbrush ![]() tool. Using the new coordinating solid colors you have created, re-color your quilt to create a whole new colorway or visual effect.
tool. Using the new coordinating solid colors you have created, re-color your quilt to create a whole new colorway or visual effect.
Step 24: Click the Random Recolor ![]() tool and choose Map to Fabrics. Click on your quilt. Tada! You are ready to begin quilting!
tool and choose Map to Fabrics. Click on your quilt. Tada! You are ready to begin quilting!
Your colorway possibilities are easy to explore and literally endless with the tools and features EQ7 offers. Have fun spending hours creating different variations with your quilts!

