This “easy enough for beginners” lesson shows you how to make a new block out of an old block.
- Open EQ6 or EQ7
- Name a new project: Ocean Waves
Get a Block from the Library
- Click Libraries > Block Library > 01 Classic Pieced > Antique Mosaics.
- Scroll to find the block “Mosaic, No. 17” > click to select the block > click Add to Sketchbook.
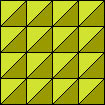
- Click Close to close the Library.NOTE: Just FYI – these “Antique Mosaic” blocks were among the first quilt block designs ever published. We drew them from a copy of an 1895 Lady’s Art Company block pattern catalog. (The company went out of business in 1970.)
Erase Lines from the Block
- Click the View Sketchbook button > click the BLOCKS section > click the block to select it.
- Click the Edit button (on the bottom) to send the block down to the BLOCK worktable, so you can edit it.
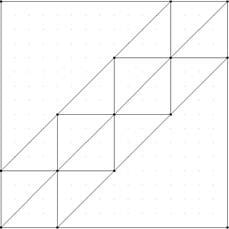
- Click the Pick tool. We’re going to erase a few lines, turning the “Mosaic, No. 17” into an “Ocean Waves” block.
- Looking at the picture as a guide, click each line not needed, to select the line. Then press your keyboardDelete key. (If you mistakenly delete a line you still need, click EDIT > Undo immediately and the line will return.)You want to leave the two rows of triangles running diagonally across the block’s center, as shown.
Color the Block
- Click the Color tab.
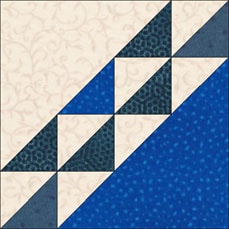
- Color your block with your choice of lights and darks, as shown.
- Click the Add to Sketchbook button.
Create an Ocean Waves Quilt
- Click WORKTABLE > Work on Quilt.
- Click QUILT > New Quilt > Horizontal.
- Click the Set Block tool.
- Click the “Ocean Waves” block you just made.
- Use CTRL+ click to set your block into each of the 16 block spaces.
Next we’re going to rotate. But instead of using the Rotate tool, we’ll rotate all blocks at once using the Symmetry Tool. - Click the Symmetry tool.
- Hold down your keyboard CTRL key as you click (CTRL+click) any block in the quilt. All blocks will rotate and/or flip at once.
- Repeat this. CTRL+click, again and again, noticing different designs form. Click the Add to Sketchbook button to save any designs you like.
The Symmetry tool cycles through 16 different designs as you CTRL+click repeatedly, before you see the starting design again.
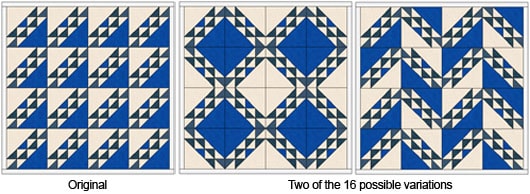
This simple lesson shows how easy it is to create new blocks by modifying an already existing block.
CHALLENGE: Create a “Hunter’s Star” block from your “Ocean Waves” block
- Click WORKTABLE > Work on Block.
- Click the EasyDraw tab at the bottom. You’re now back on the Block worktable, looking at the “Ocean Waves” block you made.
- Click the Pick tool. Looking at the 2 pictures below, click on each unneeded line and press your keyboard Delete key to erase all unneeded lines. You want your block to look like the picture of the “Hunter’s Star” block. Hint: You will be deleting 8 lines.
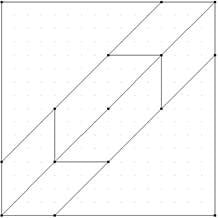
Remember: Click EDIT > Undo immediately if you mistakenly erase a needed line. - Click the Add to Sketchbook button when you are done.
- Click the Color tab at the bottom of the screen. Don’t worry if you see color from your previous colorings. We’ll recolor.
- Color your block with your choice of lights and darks, as shown.

- Click the Add to Sketchbook button.
- Click WORKTABLE > Work on Quilt.
- Click the Set Block tool.
- Click your “Hunter’s Star” block.
- Use CTRL+ click to set your block into each of the 16 block spaces, replacing the “Ocean Waves” blocks.
- Click the Symmetry tool.
- CTRL+click as often as you’d like to create different designs.

- Click the Add to Sketchbook button to save any designs you like.Since you named a new project before you added anything to the Sketchbook, all your designs are saved in yourOcean Waves project file.


