by Andrea Bishop
Welcome to the club! If you have EQ software and the Kaleidoscope Collection add-on installed, you’ll be able to follow along.
This is the eighth of twelve Kaleidoscope lessons.
Download the Project
- Download the project and open the file.
- Then from within EQ, choose FILE > Save As and save the file in your project folder: My Documents > My EQ7 > PJ7
Blocks from the Library
- Click LIBRARIES > Block Library.
- Go to Kaleidoscope Collection > Square Corners > 07 Snow.
- Click on the first block Lotus 2 and click Add to Sketchbook.
- Go to Square Corners > 11 Traditional-Looking.
- Click on the 2nd block Merry Go Round 2 and click Add to Sketchbook.
- Click Close to put the library away.
Start a new Quilt
- Click WORKTABLE > Work on Quilt.
- Click QUILT > New Quilt > Horizontal.
- Click the Layout tab at the bottom-left corner of your screen.
- Set the number of blocks to be horizontal: 1 and vertical: 2.
- Set the finished size of blocks to be 8.
- Set the finished size of sashing to be 1.
- Click the Layer 1 tab.
Set the Blocks in the Quilt
- Click on the Set Block tool
 . The Sketchbook Blocks palette appears.
 - Click the first block and click in the top block space.
- Click the second block and click in the bottom block space.
- Click the Paintbrush
 tool, so the palette appears.
 - Right-click the first stripe (if you can’t right-click use the black arrow that is at the same level as the tabs in the palette to bring up the menu).
- Point to Add Symmetry and click on Rotate 90.
- A new swatch will be added to the palette and it will be selected.
- Right-click the ORIGINAL first stripe and choose Add Symmetry > Rotate 180.
- Right-click the ORIGINAL first stripe and choose Add Symmetry > Rotate 270.
- Repeat steps 20-24 for the 45 degree version of this fabric.
- Repeat steps 20-25 for the stripe that is more toward the end of the palette. You should have 8 swatches for each stripe.
Color BLOCK #1

- Click on the Paintbrush
 tool.
tool. - Click the first stripe into all 8 large wedges of the top block.
- If the Rotate Fabric
 and Fussy Cut
  tools are not on your toolbar, right-click the toolbar, choose Add/Remove Buttons.., put a check next to Rotate Fabric and Fussy Cut, then click away from the list.
- Click the Rotate Fabric
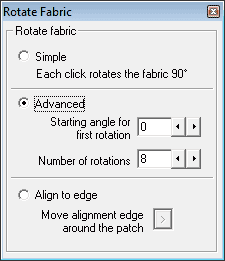
 tool on the toolbar. Set the Rotate Fabric box to be “Advanced” and change the number of rotations to 8.
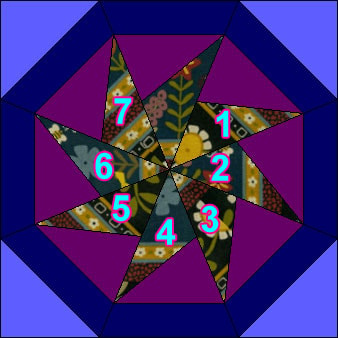
(TIP: If you miscount – just click the fabric with the Paintbrush back over itself to undo the rotations and click then rotate the fabric the right number of times.) - Click on each spot in the block where that fabric is the number of times indicated in the image below.
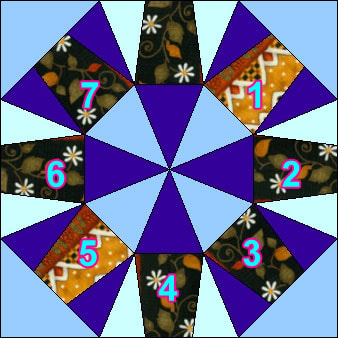
- Click the Fussy Cut
 tool. Grab the fabric in the block and drag it so you see the stripe clearly in the wedge. Do this for all 8 wedges. Make sure you see the same part of the image in all the wedges.
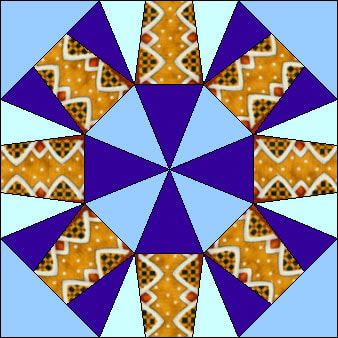
- Click on the Paintbrush
 tool.
tool. - With the other fabrics or colors in the palette, color the rest of the block.

- Click the Add to Sketchbook
 button to tie this coloring to the block.
Color BLOCK #2

- Click on the Paintbrush
 tool. This time we’re going to color the large center pinwheels.
 - Click the second stripe into all 8 large wedges of the bottom block.
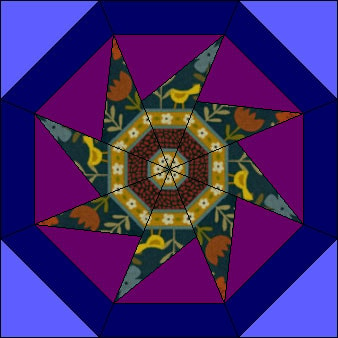
- Click the Rotate Fabric
 tool on the toolbar. Make sure the Rotate Fabric box is still set to be “Advanced” and number of rotations = 8.
- Click on each spot in the block where that fabric is the number of times indicated in the image below.
- Click the Fussy Cut
 tool. Grab the fabric in the block and drag it so you see the stripe clearly in the wedge. Do this for all 8 wedges. I made the birdie show up in half and the red flower show up in the other half of my block.(TIP: If you hold down your CTRL key, you can use the Arrow keys on your keyboard to tap the selected fabric in small increments left, right, up or down.)

- Click on the Paintbrush
 tool.
tool. - With the other fabrics or colors in the palette, color the rest of the block.
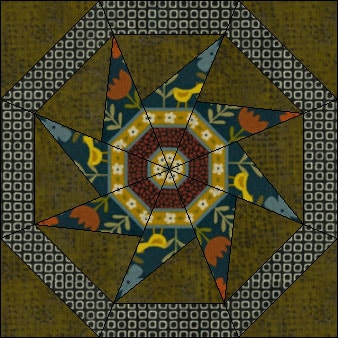
- Click the Add to Sketchbook
 button to tie this coloring to the block.
Homework:
So remember how I said EQ7 can rotate fabric even when you don’t know the degree?
With the blocks still on your screen, use the Rotate Fabric tool set to “Align to edge“.

- Click the swatch in the block to select it.
- SHIFT+click on the same swatch to make the white edge line match the image below.
- Release the SHIFT key.
- Click on the swatch to line up the fabric parallel with the white line. Click on the swatch again to make it perpendicular. Doesn’t matter which one you choose.
- Fussy cut the fabric to show the part you want to see.
- Repeat these steps one swatch at a time to make a second variation of this block
OPTIONAL MYSTERY SIDE PROJECT – SEWING INVOLVED
MONTH 7 of Sewing Project
Go find your wedges! (Keep them together in their groups of 8.) We’re going to do the reveal now!
This month there’s a lot to do. Next month we’re planning (but not sewing) our borders. So don’t worry if it takes you until August. We’re 2 pieced blocks short and we need a whole bunch of plain wedges. You can do the 2 pieced blocks now without going to the next page, or you can peek and plan the last 2 pieced blocks to tie some of the others together.
For the 2 pieced blocks, repeat the steps from May’s sewing project… just pick a different, fun, asymmetrical, star-cornered block than what you did last month.
For the plain wedges, find the plain Star-Cornered Kaleidoscope.
Go to LIBRARIES > Block Library > Kaleidoscope Collection > Star Corners > Basics.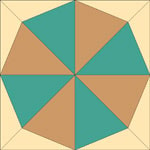
Click the first block and Add it to the Sketchbook.
Close the Library.
View the Sketchbook > Blocks section.
Edit the block.
We need 40 plain wedges
I printed mine onto Freezer Paper fitting two on each sheet and used 20 sheets total. I am by no means a sewing guru… in fact this is only my second solo-quilt. I just found that it was very, very helpful leaving the freezer paper on to help me match things up when I went to sew everything together. That’s why I’d advise against just one template and not having the seam allowance marked on the 40 pieces you’re cutting. It’s up to you, I just know what worked for me.
Choose FILE > Print > Foundation Pattern.
Go to the Sections tab.
Click the Start Over button.
The two wedges I’ve chosen in the image below are grouped separately. They fit nicely on the page together when you look at the Preview. I recommend choosing the same two as in the image below.
Click on one wedge and click the Group button.
Click on another wedge and click the Group button.

Click the star corner that goes with your first wedge and click Group. Then click on the star corner that goes with your second wedge and click Group.
Go to the Options tab.
Make your block size 15.00 by 15.00.
Set the number of copies to 20.
Make sure the options are as follows:
Print as many as fit unchecked.
Separate units CHECKED.
Grayscale is unchecked (you don’t need all that extra ink for one piece).
The rest don’t matter for this block.
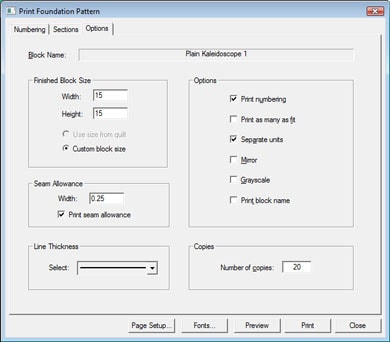
Click Preview.
Click the Delete button at the top of your screen.
Click on the first star corner you grouped and press your keyboard DELETE key. Repeat for the second star corner.
What remains are two plain wedges.
Click the Move button at the top of your screen.
Drag each wedge to fit cleanly on one page with no tiling onto the next page.
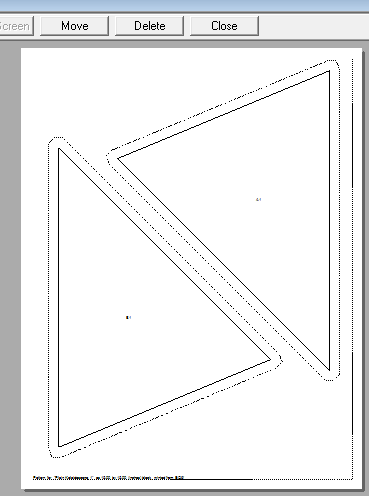
Click Print at the top of your screen.
20 copies of this printout will come out.
I did these out of my background fabric (black). They work in 8′s, so if you’re going scrappy do 8-8-8-8-8, or 16-16-8, or 16-24, etc.
I rough-cut out the 40 pieces and ironed them down to my background fabric.
Then I cut exactly on the seam allowance (dotted) line to get the 40 finished pieces.
Remember
I want a picture! I think it will be so fun to see everyone’s works-in-progress and then show the updated/finished quilts or quilt tops this fall.
If you would like to send in a picture, email it to webmaster@electricquilt.com and I’ll do before and afters in the kaleidoscope gallery. I’d like to include your name and a blurb too.
Next month we’ll start playing with borders. Just make sure that if you’re a beginning sewer and you’re terrified of Y-seams like I am, that you stop this month where I tell you to stop. Some borders may be easier if you don’t have the center done.

