Someone asked on Info-EQ last month how to draw a filler design. My answer was … it’s hard… really hard… and I have to do about 15 of them for Volume 7 of Quiltmaker Quilting Designs.
They asked me to post how I got the perfect tracing image to create continuous Allover quilting designs, once I figured it out. It’s difficult to get the “repeat”. There are ways to do this if you’re working with an existing image (using Photoshop) and there are ways to do this natively in EQ, if you’re drawing from scratch. I’ll show the basics of both ways.
Making the Image in Photoshop
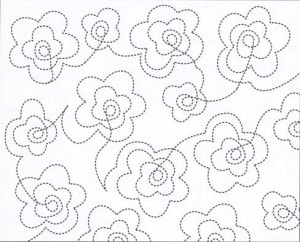
Start with an image.
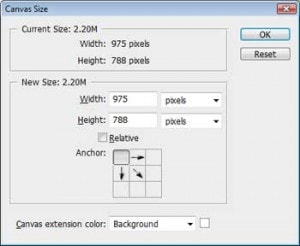
Increase the Canvas size to give yourself some work room. I usually switch from pixels to inches at this point and make is something nice and even… like 15″ wide by 13.5″ high (instead of 14.917 by 12.634).
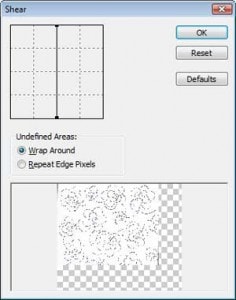
Choose FILTER > Distort > Shear. Drag the bold ends of the line to the left edge of the square. This will wrap the image in half so you can see (in the middle) where the edges used to be and are supposed to join.
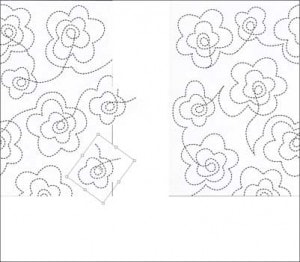
Fill in the gaps. Draw lines if necessary to make one connect into the next. Flatten all your layers before the next step.
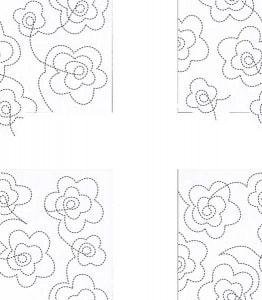
Rotate the entire canvas 90 degrees. Shear again. Fill in the rest of the gaps.
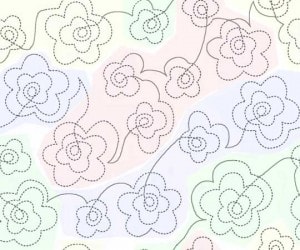
Add color if you want to make sure you know that one line is going into the next and that you’re not accidentally creating 2 loops.
When you shear this image over and over, you will not notice gaps or a break in the line if you did it right.
This image will import into a block of the same size. Just trace the image and then use some of the tips in the steps below to tweak it once you’ve traced it.
BUT, you still have to trace it in EQ to get the printable pattern. Some might have more luck just drawing it in EQ in the first place.
Making the Pattern in EQ
1. Start a new PatchDraw Motif. Set up the Block width and height.
2. Switch over to the Quilt Worktable. Start a new Custom Set quilt with lots of wide open space.
3. Switch back over to your drawing worktable.
4. Draw a bunch of designs in the center (away from the block edge) that connect in one big continuous design.
5. Turn on Snap to Grid temporarily. Draw some lines (perfectly horizontal or vertical) and convert them to guides.
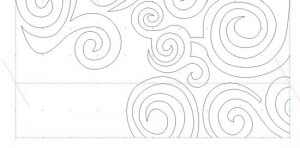
6. Add some more designs or even half-designs that come in and out of those guides.
7. Add your design to the Sketchbook.
8. Switch over to the quilt worktable and SHIFT+click and set your design into the quilt. Use the Adjust tool and Graph Pad to make it the exact size needed. Copy and paste the exact block and line them up side by side exactly to get the basic layout. Save this quilt.
9. Zoom in to see how the intersections meet at the block edge.

10. Switch back over to the block worktable and tweak the angles if necessary. Remember to make the handles form tangent lines. You can use an X and paste it at the same height at both ends of the block and convert it to guides to help you line your handles up with something if you need it.
11. If you’re working from a tracing image, at some point you may want to update it using this trick. On the quilt worktable. Zoom in to see the entire block and maybe some of the next. SHIFT+click on the two adjacent stencils so their outlines turn green. Use Export Marquee Selection to export an image (and save it). Make your export snapshot line up with 3 sides of the full block and go partially into the next.
12. Import this new BMP behind your existing drawing worktable. Choose to have it fill the block. Three sides will match, but it will be skewed. On the Image tab, pull it out so the green line matches the block edge.
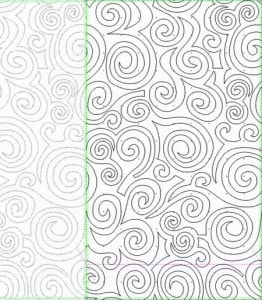
This will show you an updated image of where you need to tweak.
13. It’s just a matter of switching back and forth between the block worktable and quilt worktable tweaking a few lines each time. If all the blocks are set in the quilt, all you have to do is CTRL+click on top of them to try a newly saved version of the block.
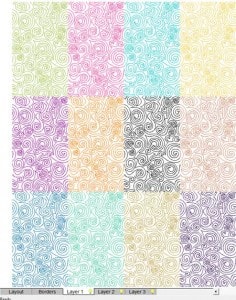
If you have trouble seeing which stencil is which, use the Brush Thread tool to color adjacent blocks different colors.


