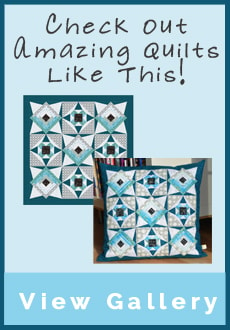
In this lesson we’ll design a layout perfect for random applique blocks.
Start a New Project and Gather Some Blocks
- Click FILE > New. Type the project name: STAR SETTING. Click OK.
- LIBRARIES > Block Library > 1 Classic Pieced > Diamond in the Square.
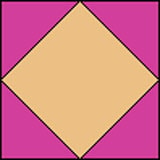
- Click Add to Sketchbook. The Diamond in the Square block is already selected for you, so you don’t need to select it. This block will form our star layout.
- Scroll down and click on the category: 4 Classic Applique.
- Browse through the styles and choose a dozen or so you’d like to work with. Be sure to choose one for the center of your quilt. Click any block you want, then click Add to Sketchbook.

- Click Close to close the Library when you have finished. These blocks will be used in the layout.
Recolor and Edit the Diamond in the Square Block
- Click View Sketchbook > Blocks section.
- Click the Diamond in the Square block, to make sure it is the selected block.
- Click the Edit button (bottom of the Sketchbook). The block will be sent down to the Worktable. First we’ll recolor it. Then we’ll create a new block, simply by deleting one line, and color that.
- Click the Colortab (at bottom)
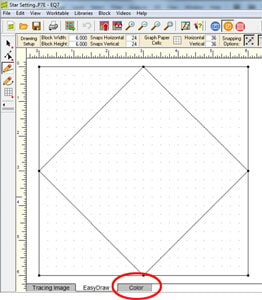
- Color the two top triangles a medium color; color the bottom two triangles a darker color. Color the center a light color.

- Click Add to Sketchbook.
- Click the EasyDraw tab (at bottom). Now we’ll change this block design, to create a new block.
NOTE: Modifying a block from the LIBRARY is a quick, easy way to create new blocks. You can move, delete or add lines. Then save your new block in your Project and also in My Library. The original LIBRARY block won’t change.
- Click the Pick tool.
- Click the lower-right diagonal line in the block’s on-point square. You’ll see it darken, as it is now selected.
- Press your keyboard DELETE key. The selected line disappears.
NOTE: Using a Mac? Use the FN+DELETE key.

Color the New Block
- Click the Color tab (at bottom). Don’t worry if you see colors out of place. We’re recoloring.
- Color the 3 outer triangles the same “dark” color you used on the original block. Color the “inside” design your “light” color.
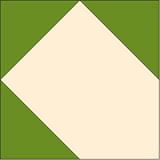
(You’ll be able to recolor later, when you fine-tune your design.) Tip: the “most recently used colors” show atop your palette.
- Click Add to Sketchbook. Your new block may not look like much, but you’ll soon see it helps form an interesting overall design in the layout.
Design the Layout
- Click WORKTABLE > Work on Quilt.
- Click QUILT > New Quilt > Horizontal.
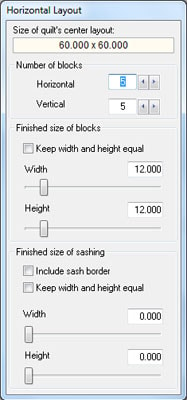
- Click the Layouttab (at bottom). To give the quilt a central focus, we need an uneven number of blocks. Make:
- Number of blocks: Horizontal: 5 and Vertical: 5
- Finished size of blocks: 12.00
- Sashing: 0.00
- Click Layer 1 (at bottom).
- Click the Set Block tool.
- Click the Diamond in the Square block (since it’s the first block, it should already be selected).
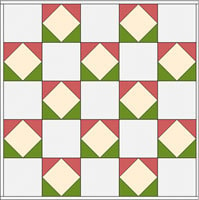
- Hold down your keyboard ALT key as you click on the second blockin on the top row. This sets a block into every other square in the quilt.
Set Blocks into the Corners
- Click the new block you just made, in the palette, to select it. (It is the block we made by deleting a line.)
- Click the top-left, top-right, bottom-left, and bottom-rightblock in your quilt. This sets the new block into each of these corner areas.
Rotate Blocks
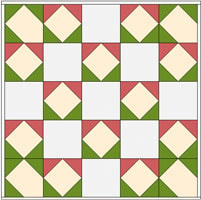
- Click the Rotate Block tool.
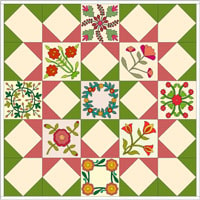
- Looking the the picture below, rotate blocks so the triangles around the edge are all dark, and a dark star appears in the center, as shown.
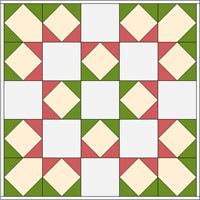
This is your basic layout – versatile for setting all sorts of blocks, but especially nice for applique. This would be a perfect layout for applique blocks from a block swap, perhaps.
- Click Add to Sketchbook.
Set More Blocks
- Click the Set Blocktool. Set some of the applique blocks, into the blank block spaces, as shown. Feel free to revisit the Block Library and try out different blocks, until you get a look you like. (You can click the Paintbrush tool and recolor blocks as well.)
Use the Automatic Borders to Try Out Border Effects
If you’ve not used this tool (Set Auto Borders) before, you’ll love it. It makes a fancy border with a few clicks. To use it, you must first add it to your toolbar.
- Right-click on the right-hand toolbar > choose Add/Remove Buttons> click the Set Auto Borders
 tool. The tool will now be on your toolbar.
 - Click the Borders tab (at bottom).
Make your border size 6″ wide on all sides. (Since your blocks are 12″, a 6″ border will be proportionately graceful. )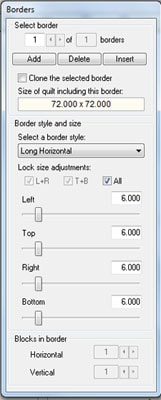
- Click Layer 1 (at bottom).
- Click the Set Auto Borderstool. A palette appears, showing a few border styles.
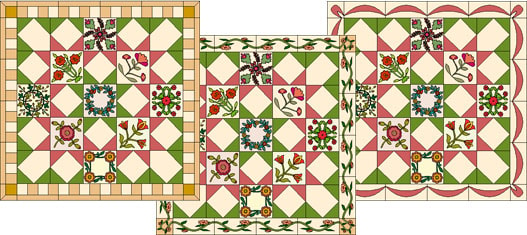
Playtime (also known as “Coffee Breaks”)
- Click Add to Sketchbook to save any quilts you like.
- Click the Paintbrush tool and recolor any you want to recolor. (Use CTRL+click to speed-color.)
- Click the Eyedropper tool then click the quilt to find any color in your quilt.
The design idea for this lesson came from Barbara Brackman’s wonderful Material Culture blog. Thanks, Barbara!


