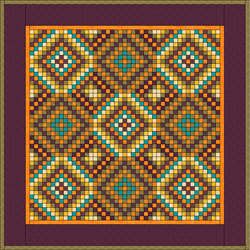
Sunshine and Shadow is a simple pattern that, nevertheless, has a great deal of visual movement. It is traditionally constructed of small squares of fabric arranged by color and turned on point to form alternating rows of light and dark triangles. Colors expand in a “round” and each round may be a different color or the quilter can repeat favorite colors. Extremely popular with the Mennonites and the Amish, it is often created using brilliant reds, blues, pinks, and aquas as well as darker colors. It has been seen on Lancaster County, Pennsylvania, quilts made as early as 1890. The name and design suggest that human life itself is touched by both sunshine and shadow, the physical and the spiritual, birth and death, and that these elements often intersect. The pattern is also called Trip Around the World, Checkerboard, and Grandma’s Dream.
Start the Sunshine and Shadow project
- Open EQ7 or EQ6.
- Start a new project and name it Benni-Sunshine.
Setting the Drawing Board Setup
- Click WORKTABLE >Work on Block.
- Click BLOCK > New Block > EasyDraw Block.
- On the Precision Bar set the following numbers:
• Block Width and Height: 15
• Snap Horizontal & Vertical: 15
• Graph Paper Cells > click it up so you see no graph paper

Drawing the Grids
- Click the small red square in the bottom right corner of the Grid
 tool.
tool. - The Grid Setup box will appear. Set both to 3.

- Start in the upper-left corner of the block, click and drag all the way down to the bottom-right corner of the block. This will turn your block into a 9-Patch.
- Change the grid setup to be 5 and 5. (If necessary, click the small red square in the bottom-left again to bring up the box.)Tip: There is usually more than one way to bring up a dialog box in the program. In the case of the Grid
 tool, you can reach the Grid Setup box by:
- • Clicking the small red square in the bottom-left of the tool.
- • Right-clicking on the worktable and choosing Grid Setup.
- • Going up to the BLOCK menu and choosing Grid Setup.
- Now that your Grid setup is 5 x 5, drag a grid within each of the 9 spaces of your 9-Patch.
- You will be left with a 15″ x 15″ block with a line at every inch mark.

You drew this in 10 steps, not the 30 it would have taken you to draw each line one by one. Good job! - Click the Add to Sketchbook
 button to make this block part of your project.
Collecting Fabrics
- At the bottom of your screen, click to the Color tab.
- We need some fabrics, but first go to LIBRARIES > Fabric Library > click the Sketchbook section (blue on the left). Hold down the CTRL key and press your keyboard A key [CTRL+A] to select all of the fabrics.
- Click the Delete button.
- Click the Library section (blue on the left).
- Go to By Color and find and add to the Sketchbook 3 – 5 Yellow fabrics you like.
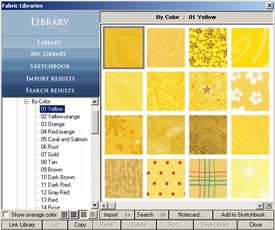
- Add 3-5 Orange fabrics to the Sketchbook.
- Add 3-5 Rust fabrics to the Sketchbook.
- Add 3-5 Gold fabrics to the Sketchbook
- Add 3-5 Dark Red fabrics to the Sketchbook.
- Add 3-5 Red fabrics to the Sketchbook, then click Close to put the Library away.
Coloring the Sunshine and Shadow Block
- Click the Paintbrush
 tool.
tool. - It’s easier to work with gradients when your colors are organized, so let’s sort the fabrics first. Right-click on top of the fabrics in the Fabric Palette and choose Sort Fabrics.
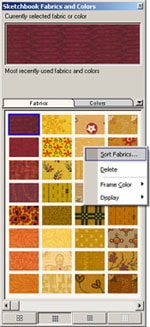
- In the new box that appears, click on all the dark reds. Each fabric will disappear once it has been sorted.
- Click on all the reds and rusts then the oranges, gold, then yellows.
- Click Close when you’re done. Scroll in the palette to see the sorted fabrics.
- Pick your first fabric. (I chose an orange.)
- Find the middle square (at 8, 8). And click in the square to color it.
- Pick your next fabric and color the four squares to either side of the center square. Let’s call this ring 2.
- Pick your next fabric and continue the diamond around the center two fabric. (Ring 3).
- With that same fabric, skip the next ring around the center and do ring 5.
- Pick your next fabric and color the ring you skipped.
- Continue coloring in this manner. There is no absolute pattern to follow when repeating fabrics (as in rings 3 and 5), just let the fabrics influence when you repeat a ring.

- When you’re done coloring click the Add to Sketchbook
 button to make this coloring of the block part of your project.
Setting up the Quilt
- Click on WORKTABLE > Work on Quilt.
- Click on QUILT > New Quilt >Horizontal.
- Click on the Layout Tab at the bottom.
- Set the Number of blocks: Horizontal & Vertical: 3
- Set the Size of blocks: Width & Height: 15
- Set the Sashing: Width & Height: 1 x 1
- Click the Borders Tab.
- Make your first border this way:
Style: Long Vertical
Size: 1 - Click the Add button to make another border.
- Make your second border this way:
Style: Long Vertical
Size: 5 - Click the first border. Check Clone the selected border. Click the Add button.
Set the Sunshine and Shadow block
- Click the Layer 1 tab.
- Click the Set Block
 tool
tool - Click on the Sunshine and Shadow block in the palette.
- Point your cursor to an empty block space in the quilt.
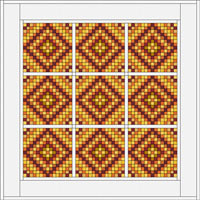
- Hold down your keyboard CTRL key and click to set the block in every space.
Color the rest of the quilt
- Click the Eyedropper
 tool.
tool. - Point your cursor to a red fabric in one of the blocks in the quilt and click. This will suck up the red fabric and switch you over to the Paintbrush
 tool automatically.
 - Hold down your keyboard CTRL key and click on the vertical sash strips, the horizontal sash strips, then the outer 1″ border.
- Release the CTRL key.
- Click the Eyedropper
 tool again and pick up an orange inside one of the blocks.
 - Hold down your keyboard CTRL key again and click on the large inner border.
- Use the Eyedropper
 tool to pick up a rust from one of the blocks and CTRL+click that color into the sash cornerstones (the tiny blocks where the sashes cross.)
 - Use any of the color tools to adjust the fabrics used in the quilt.
- Stop when you are happy with the coloring.
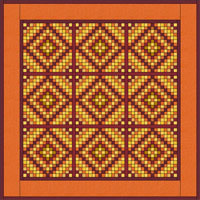
- Click the Add to Sketchbook
 button
 - Click the View Sketchbook
 button and click the QUILTS tab > Notecard button.
 - In the top Name field, type: “My Sunshine and Shadow quilt”.
- Your Sunshine and Shadow project is now complete, and saved on the hard drive.
- Close the Sketchbook.
Print the blocks (optional)
- To print a rotary cutting chart for the blocks click the Select
 tool. Click on the block on the quilt.
 - Click FILE – Print – Rotary Cutting. Click the Size from quilt box. Click Print.
Here’s what another variation could look like if you colored the block differently a second time and set them using the ALT key.
to be continued with another Benni Harper mystery quilt
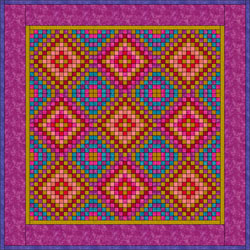
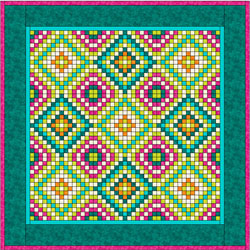
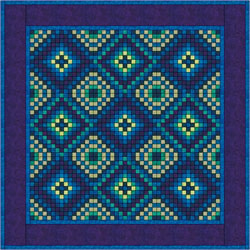
Here are some examples without sashing:
 |
 |
 |
 |


