Quilt artist Margaret Fleisher created a 100 day challenge for herself of making quilt blocks to match books, and the results were amazing! Here are just a few examples…

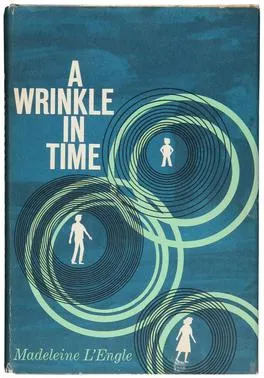
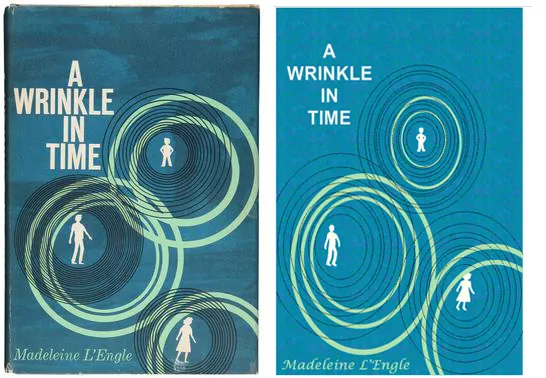
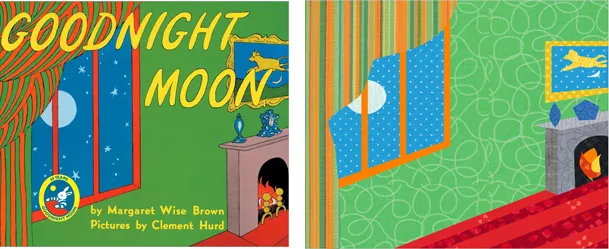
I think that is a good way to stretch your EQ8 design muscles and learn to think about how to design elements you may not include otherwise. The first example we’re going to do is this book cover of A Wrinkle in Time.

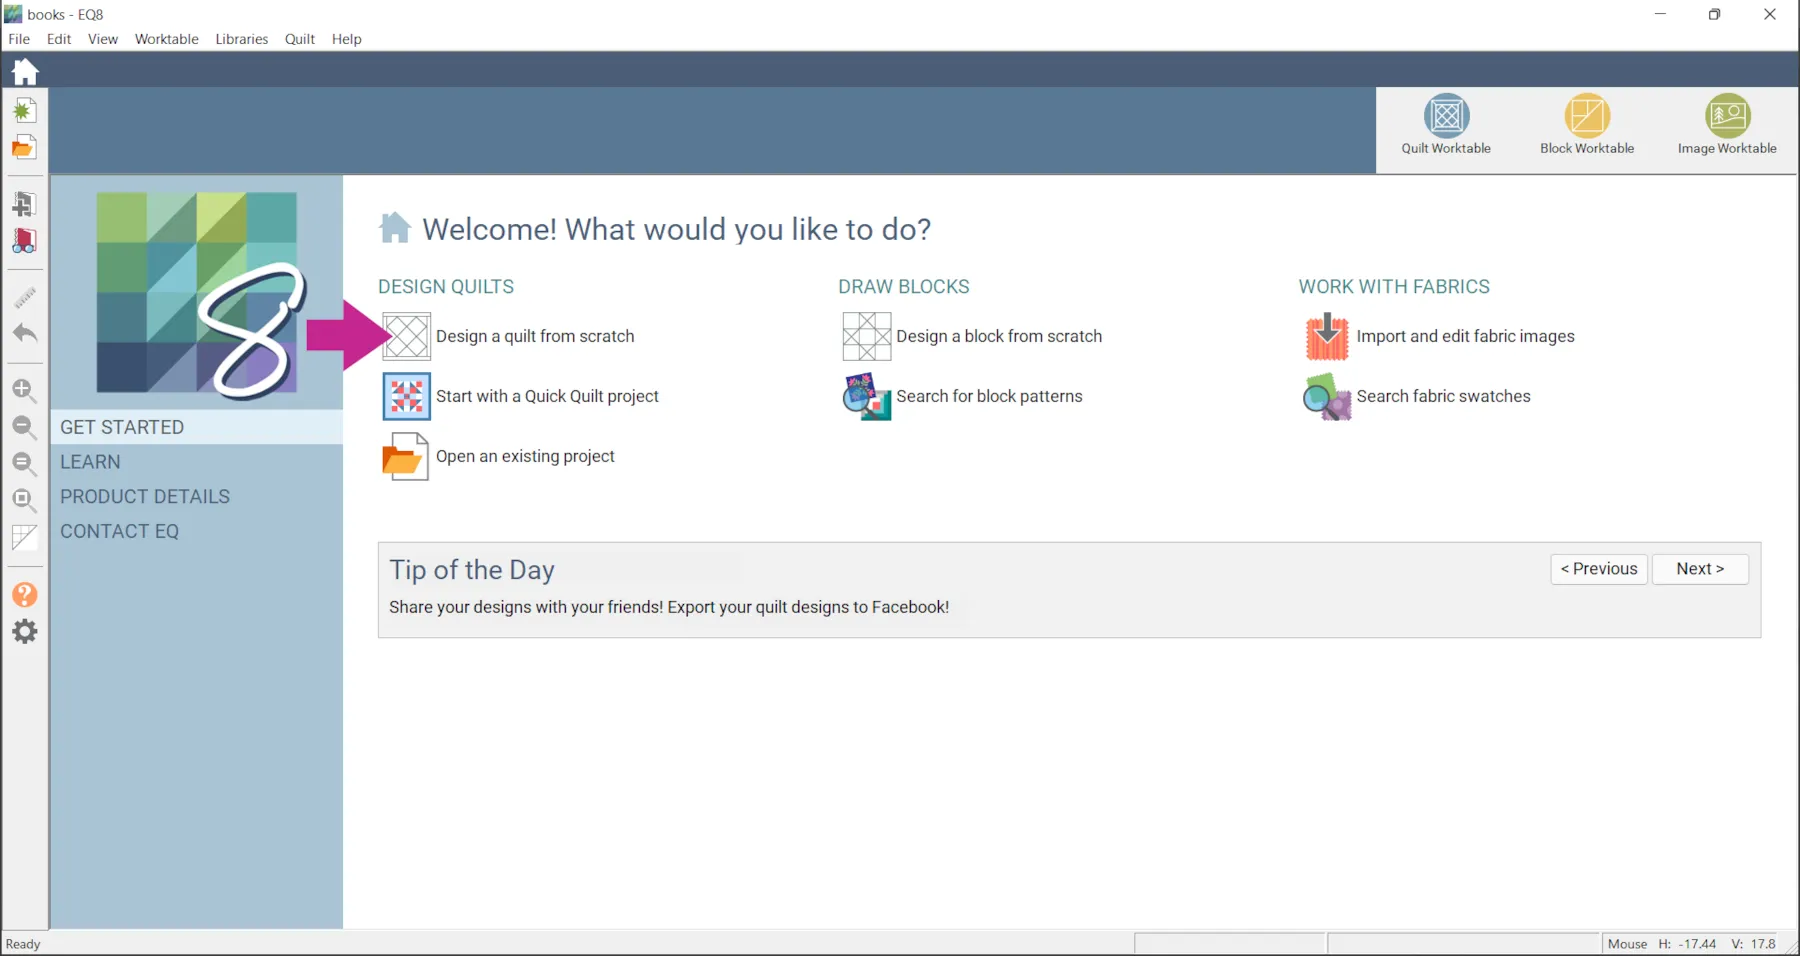
- Open EQ8 and click Design a quilt from scratch

- Click the NEW QUILT tab > Horizontal
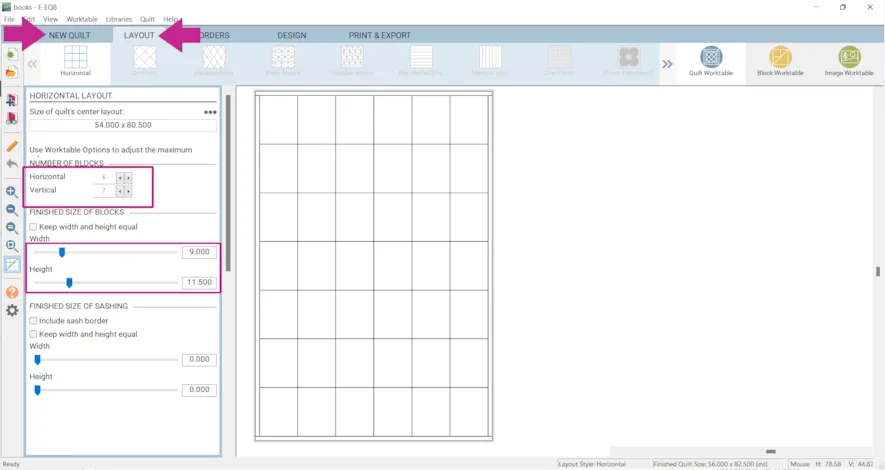
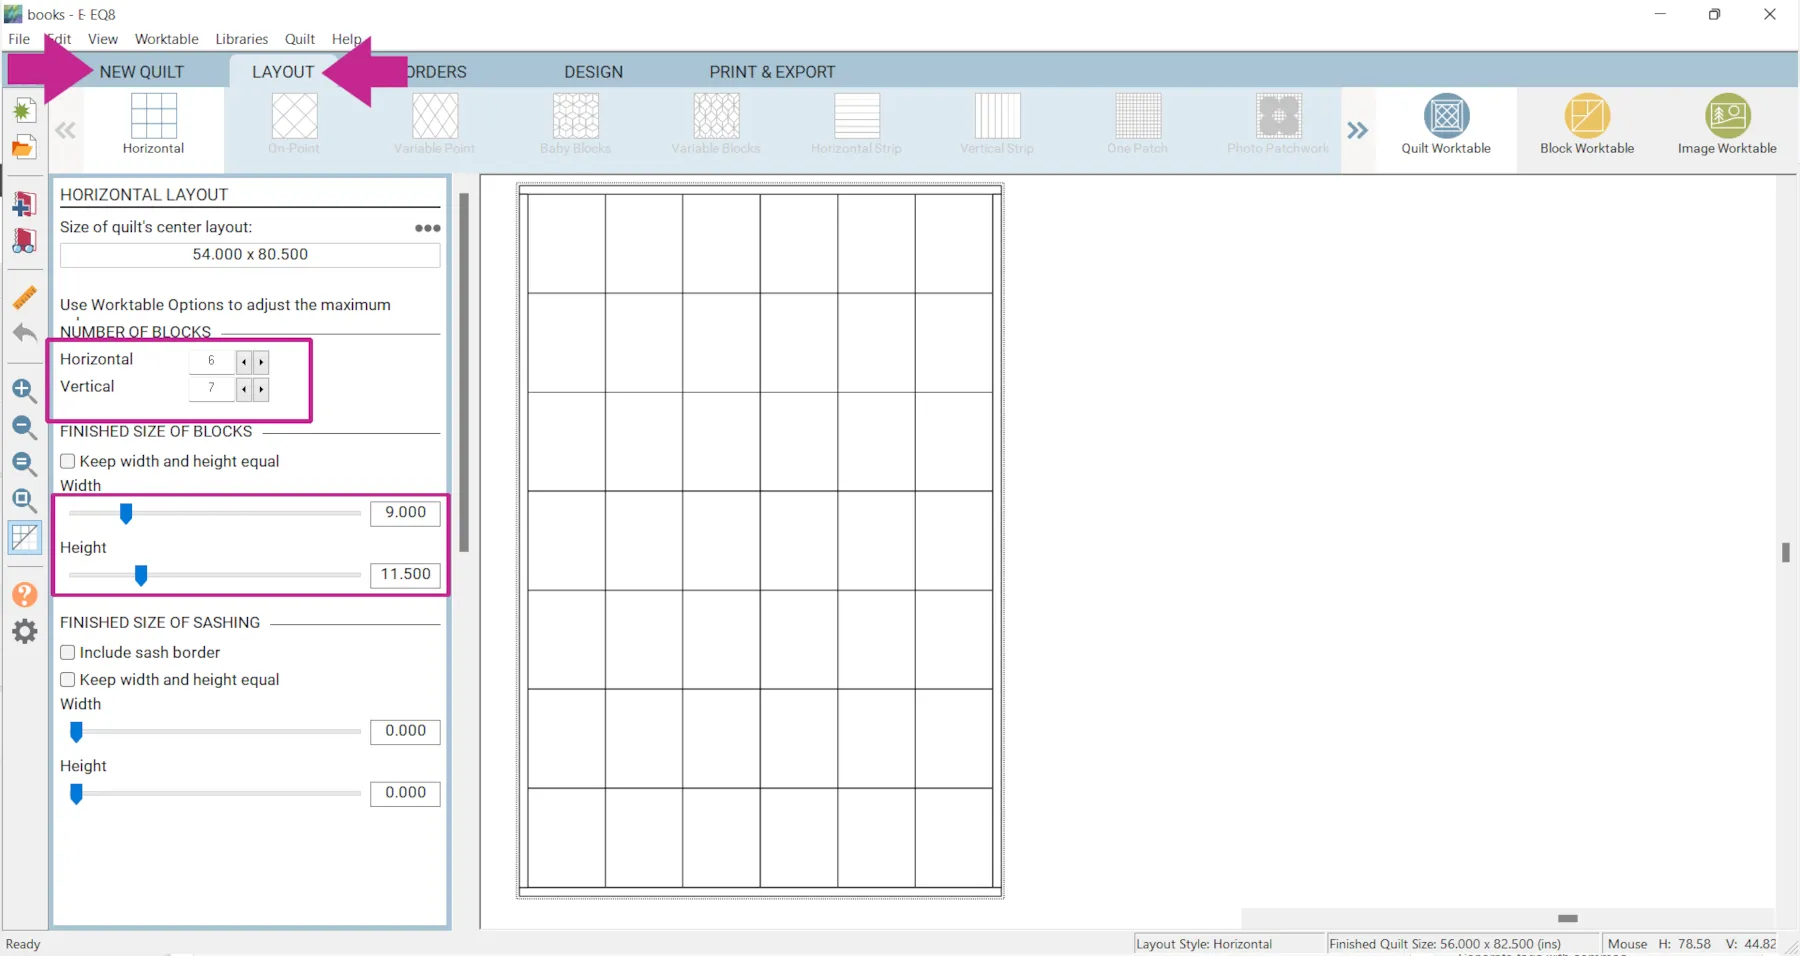
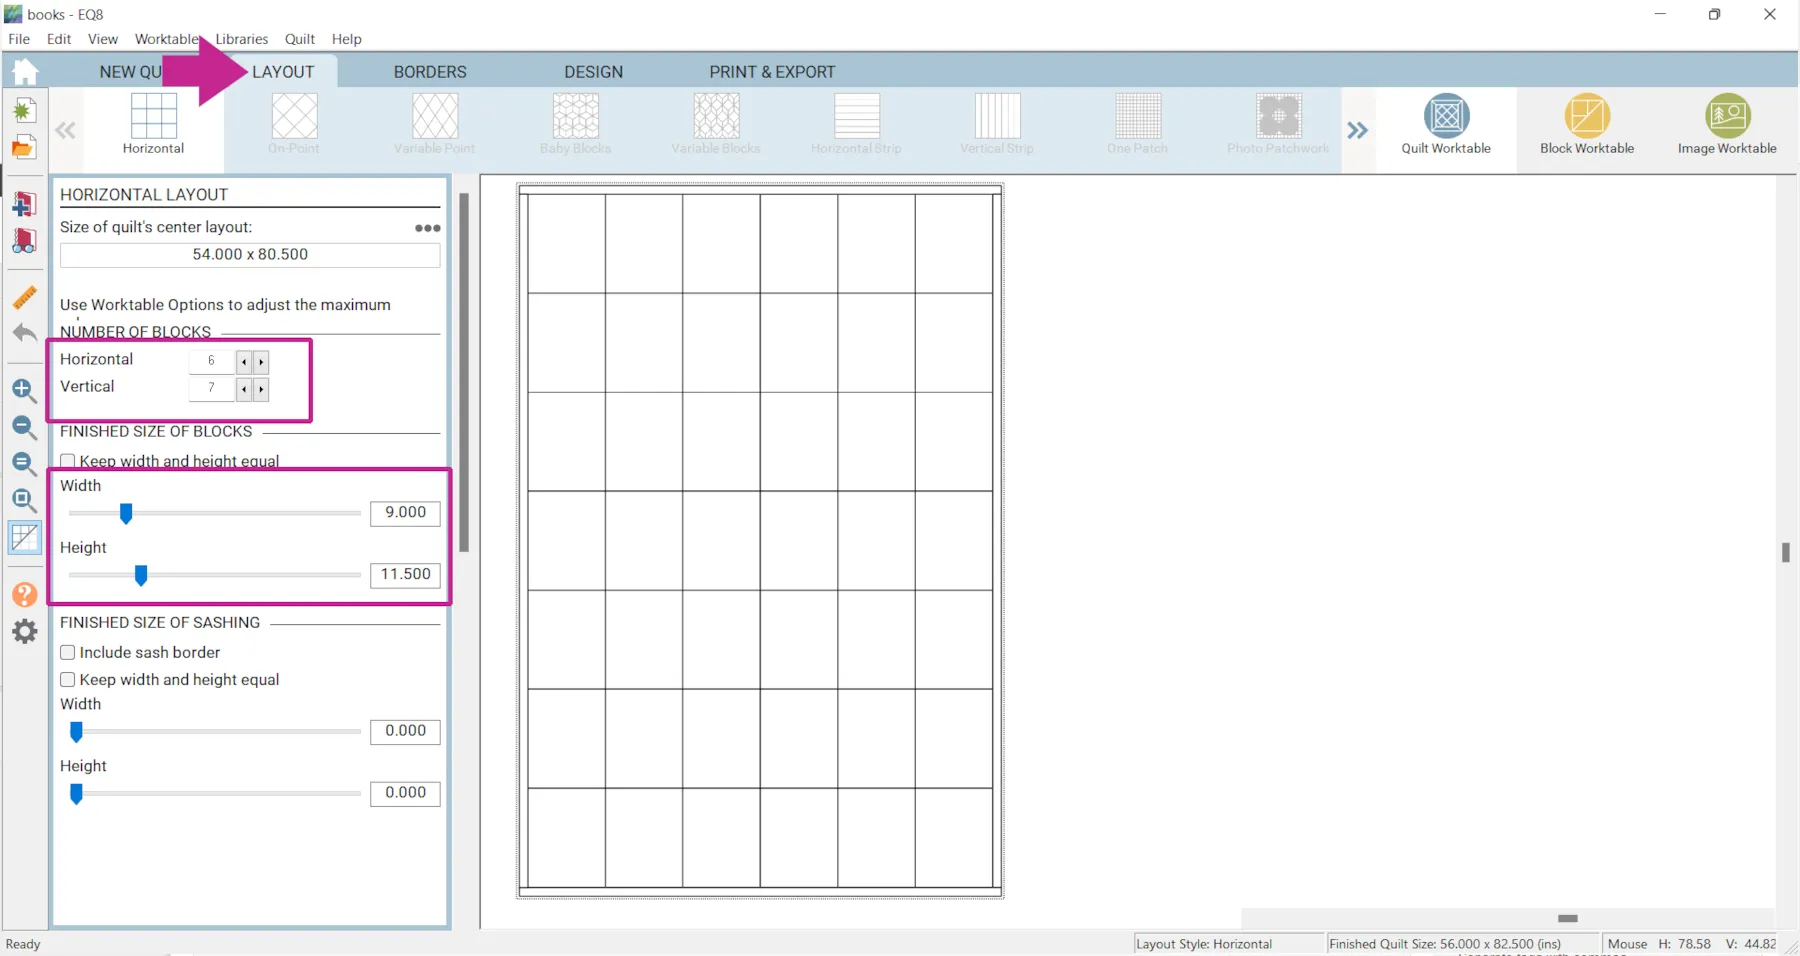
- Click the LAYOUT tab
- Under NUMBER OF BLOCKS enter:
Horizontal: 6
Vertical: 7 - Under FINISHED SIZE OF BLOCK enter:
Width: 9
Height: 11.5
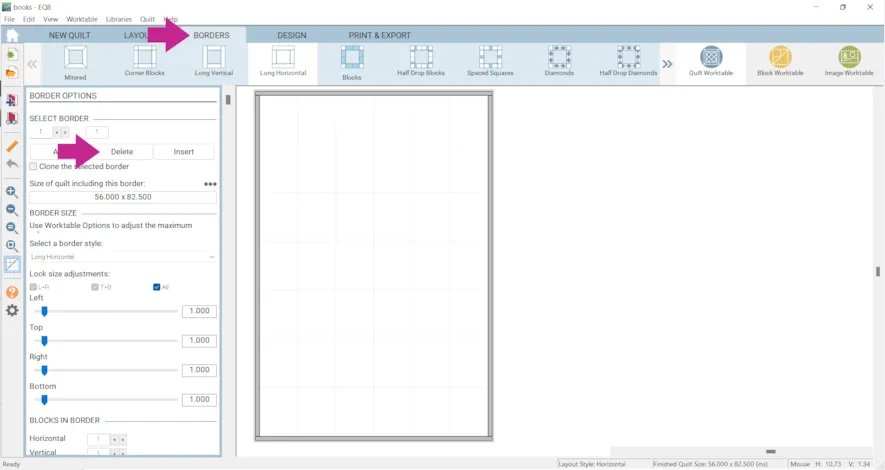
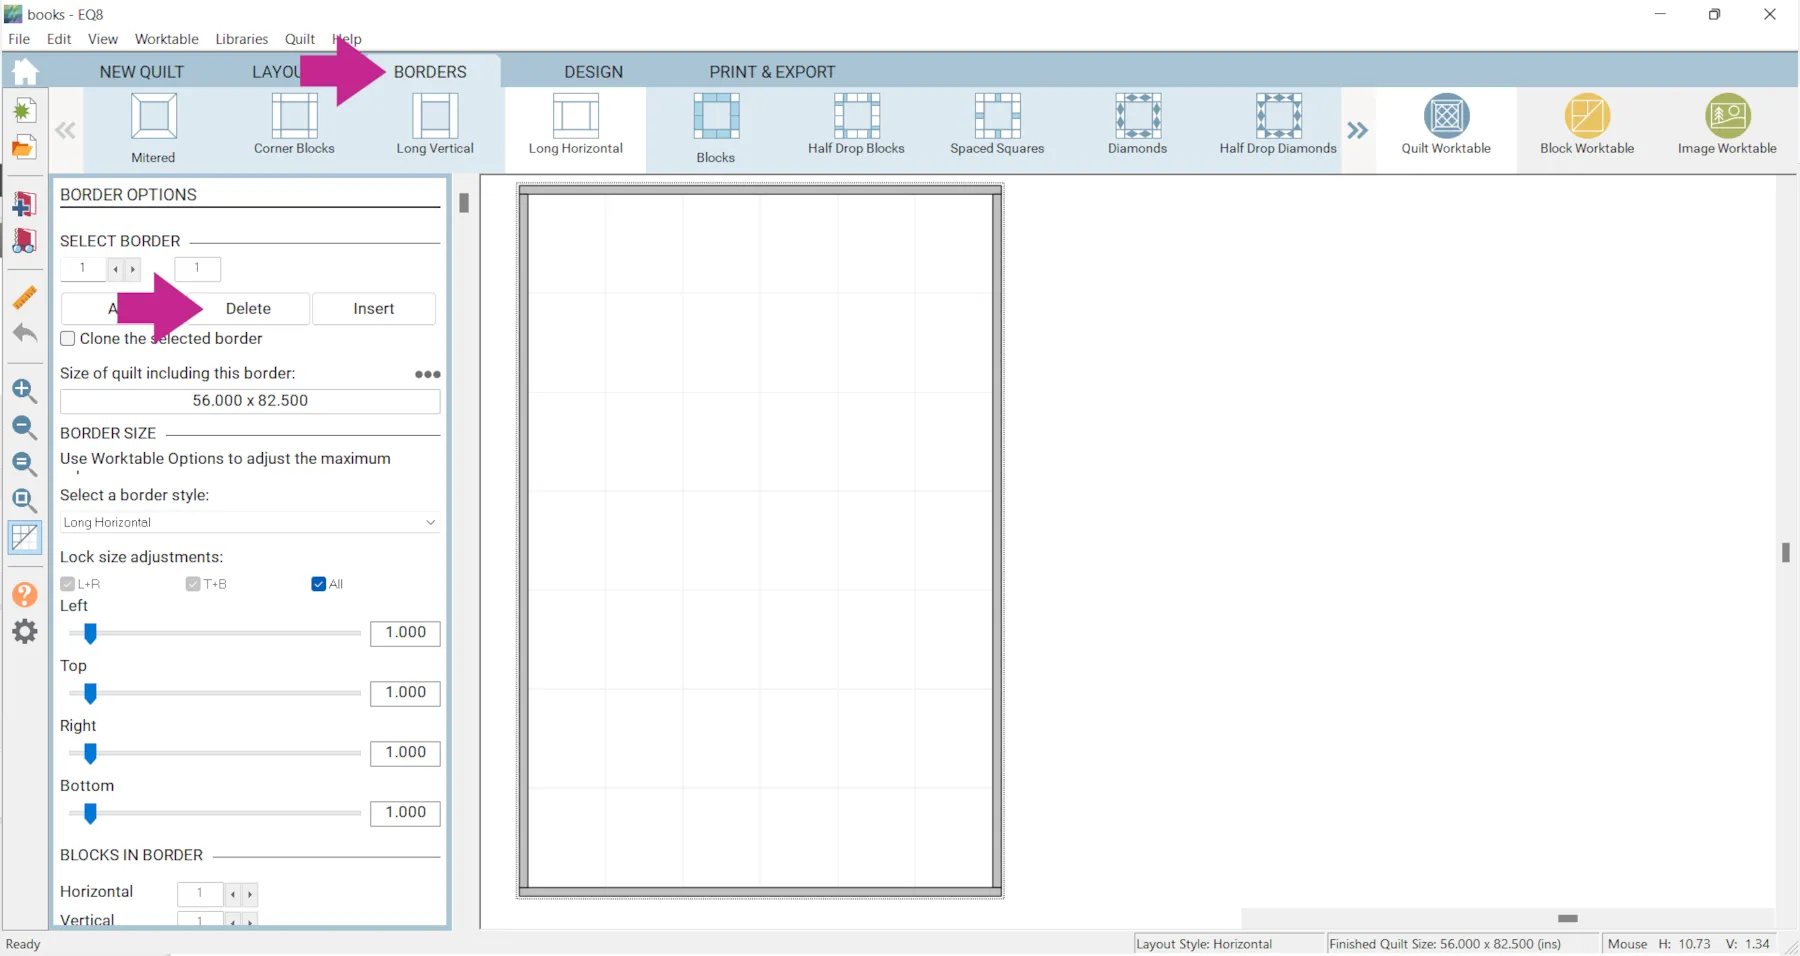
- Click the BORDERS tab
- Click the Delete button
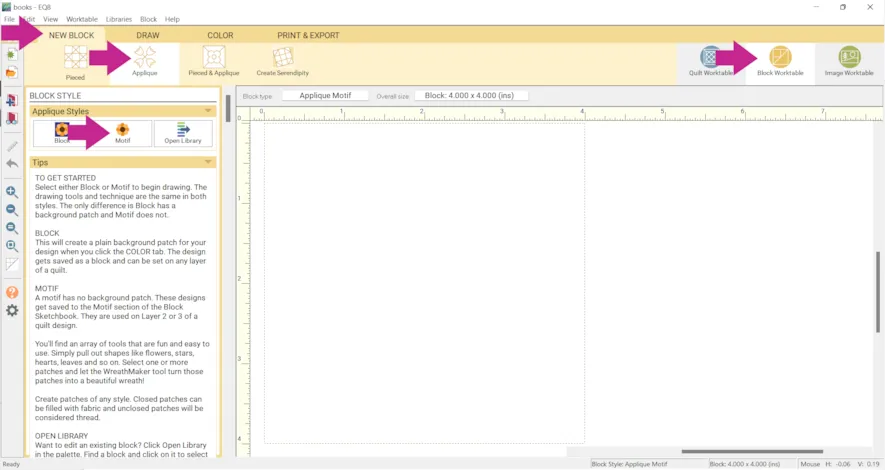
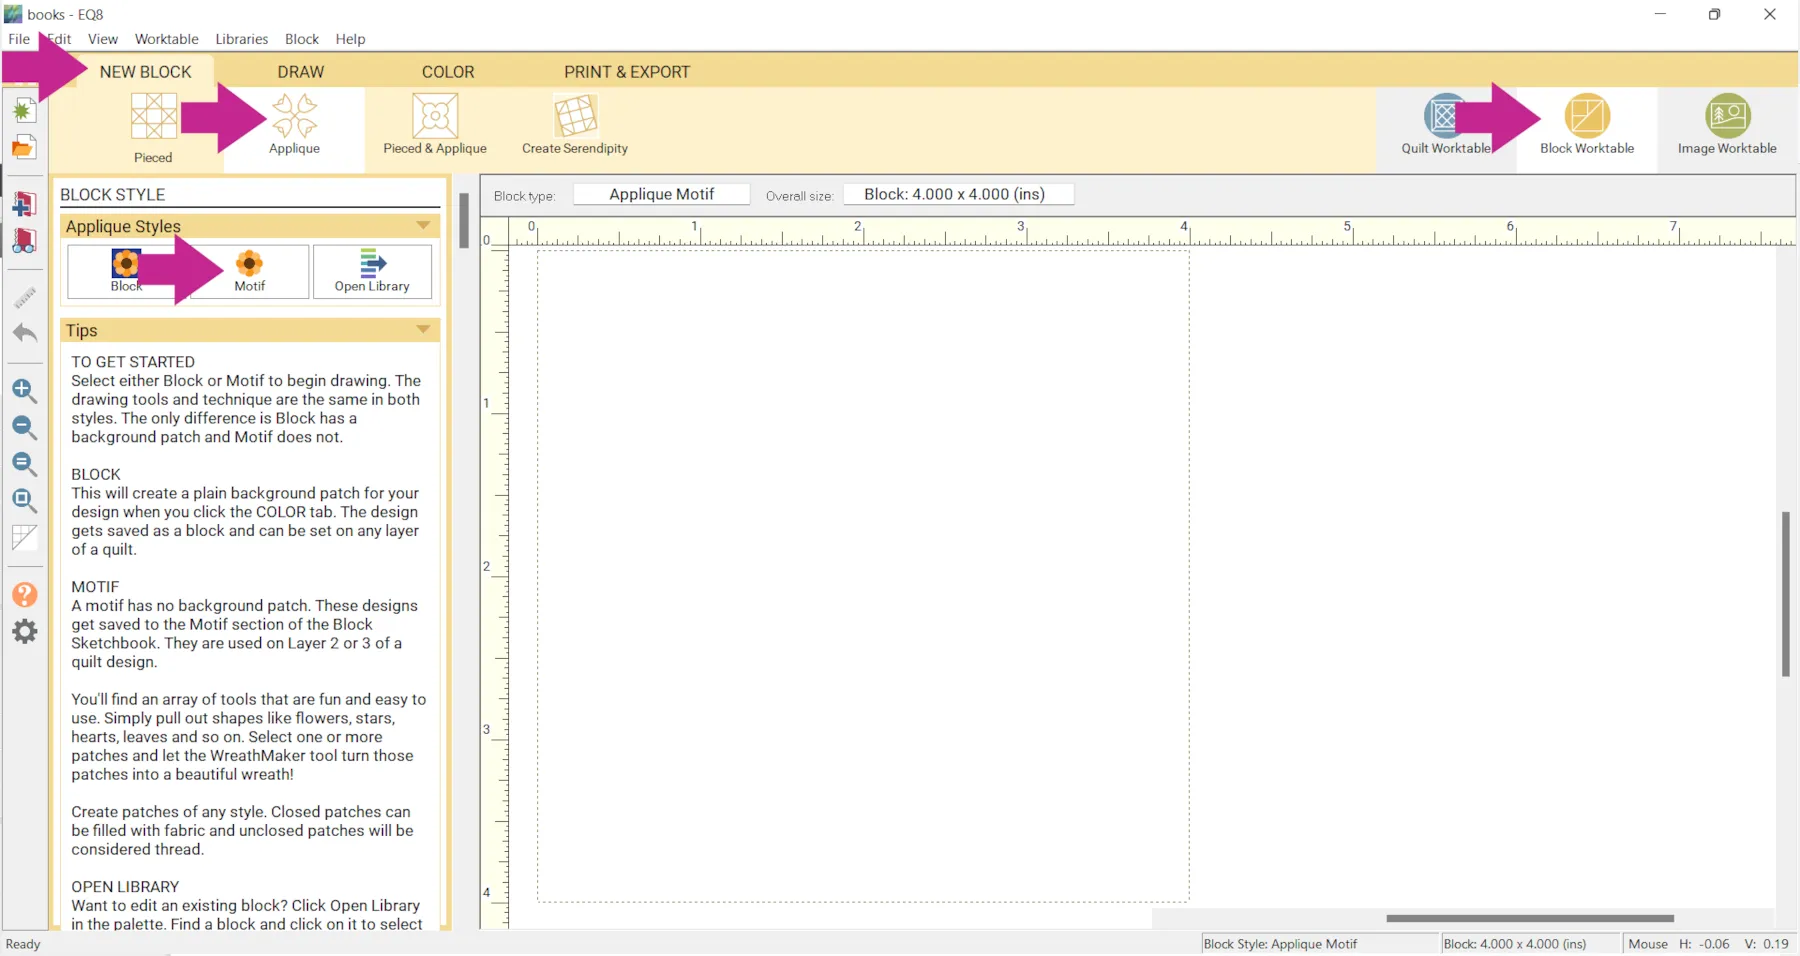
- Click Block Worktable
- Click NEW BLOCK > Applique > Motif
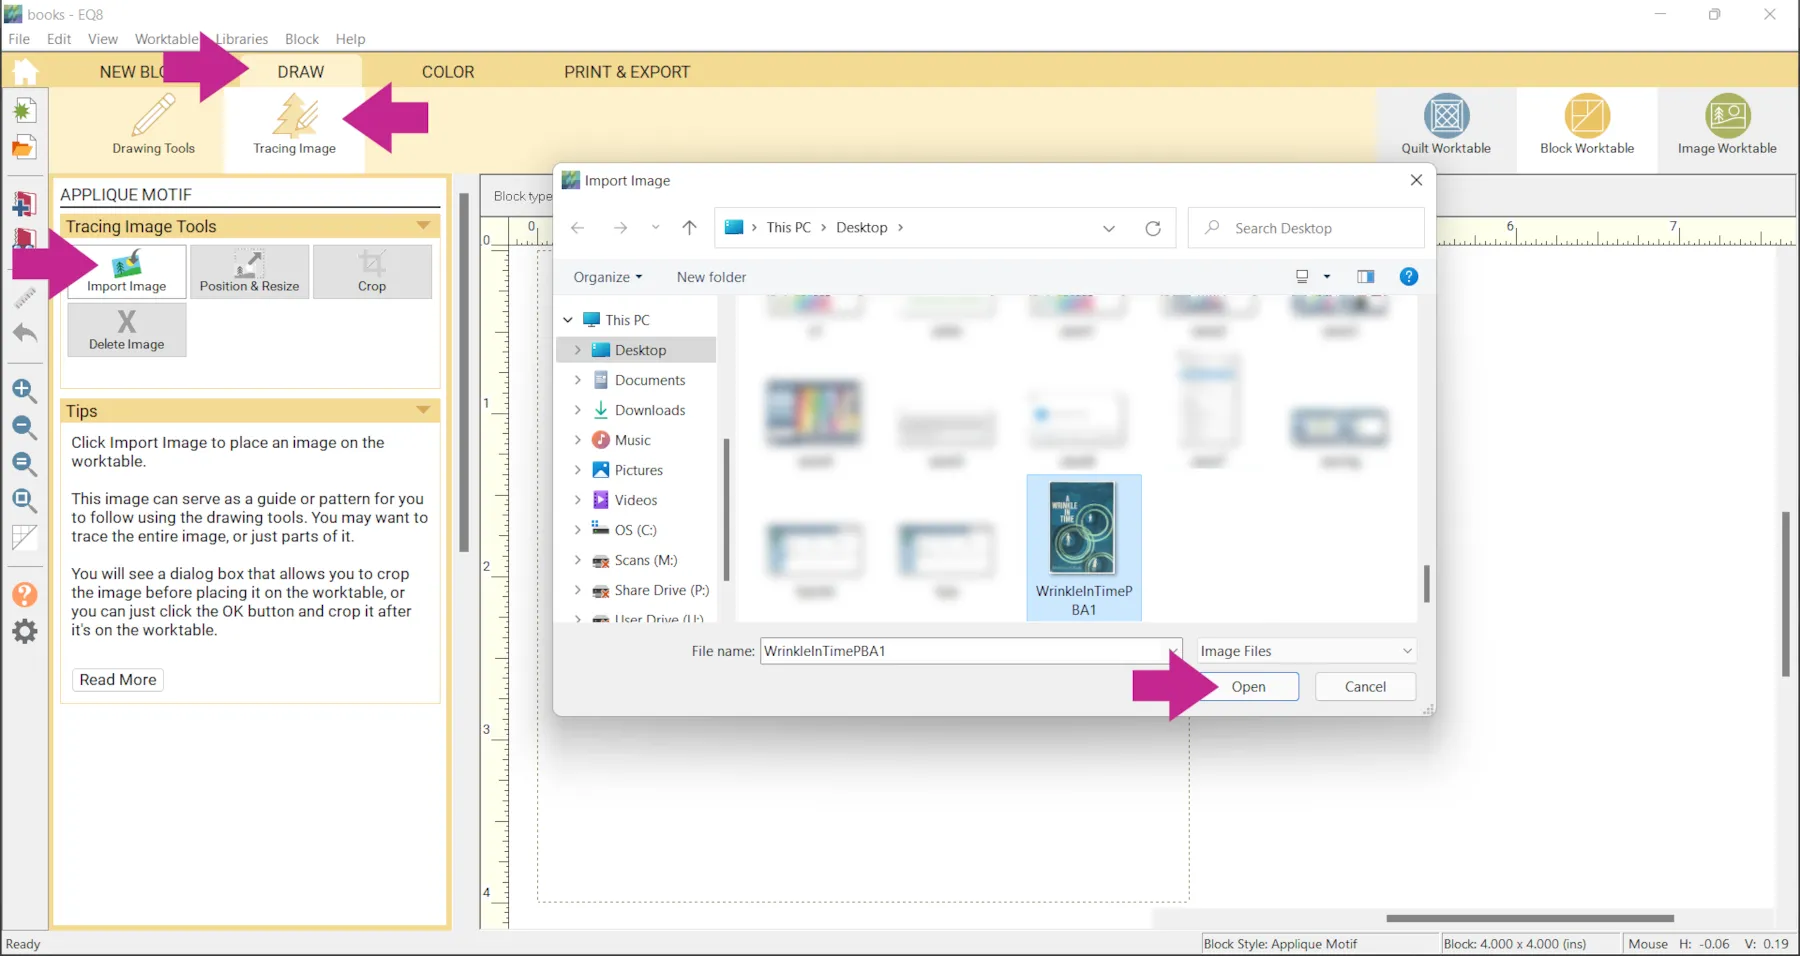
- Next, we’ll be importing an image to trace. In the example I’m using the cover to A Wrinkle in Time. If you would like to use this image, right click on the image below and click Save Image As and navigate to where you would like the file saved on your computer, and click Save. You can also use one of your own images.
- Click the DRAW tab > Tracing Image > Import Image > navigate to your image > Open

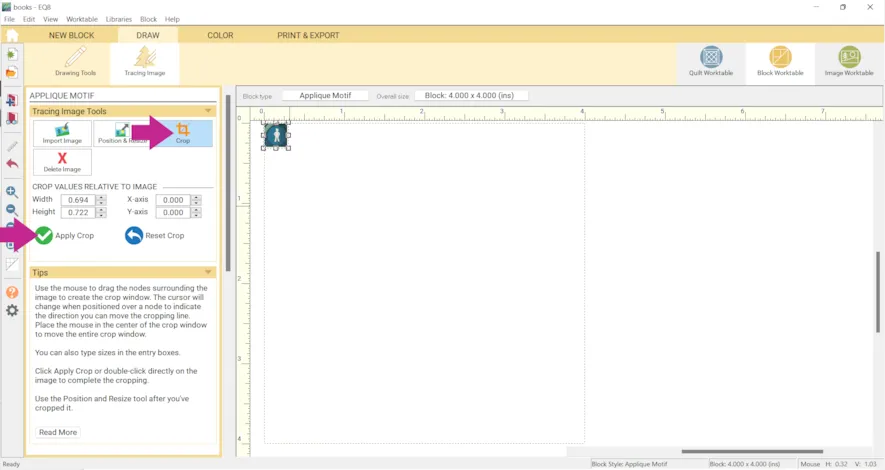
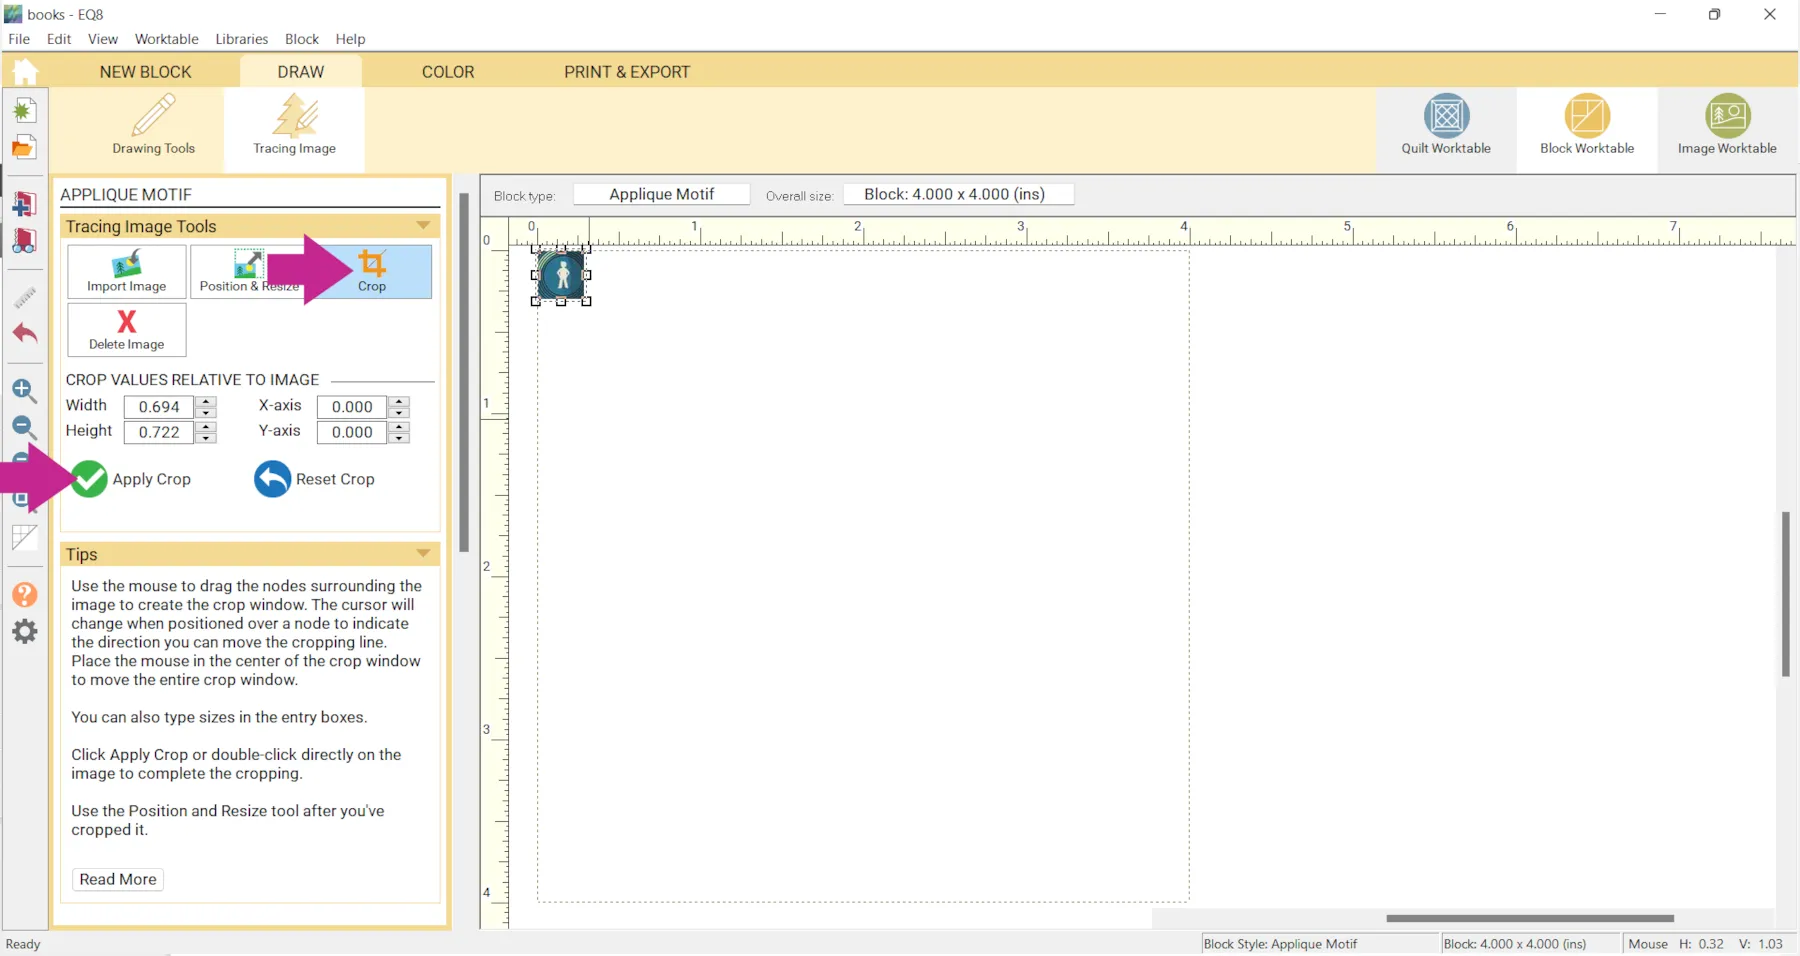
- Click Crop and drag the selection box around the first person (Charles Wallace, in this case).
- Click Apply Crop.
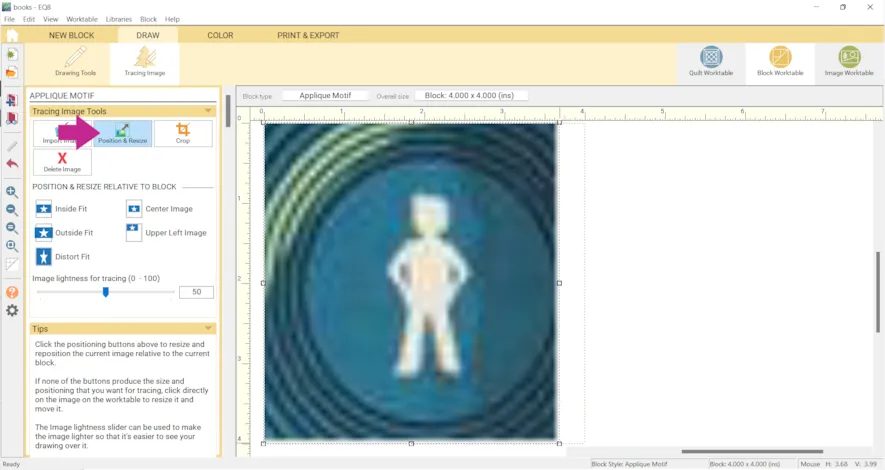
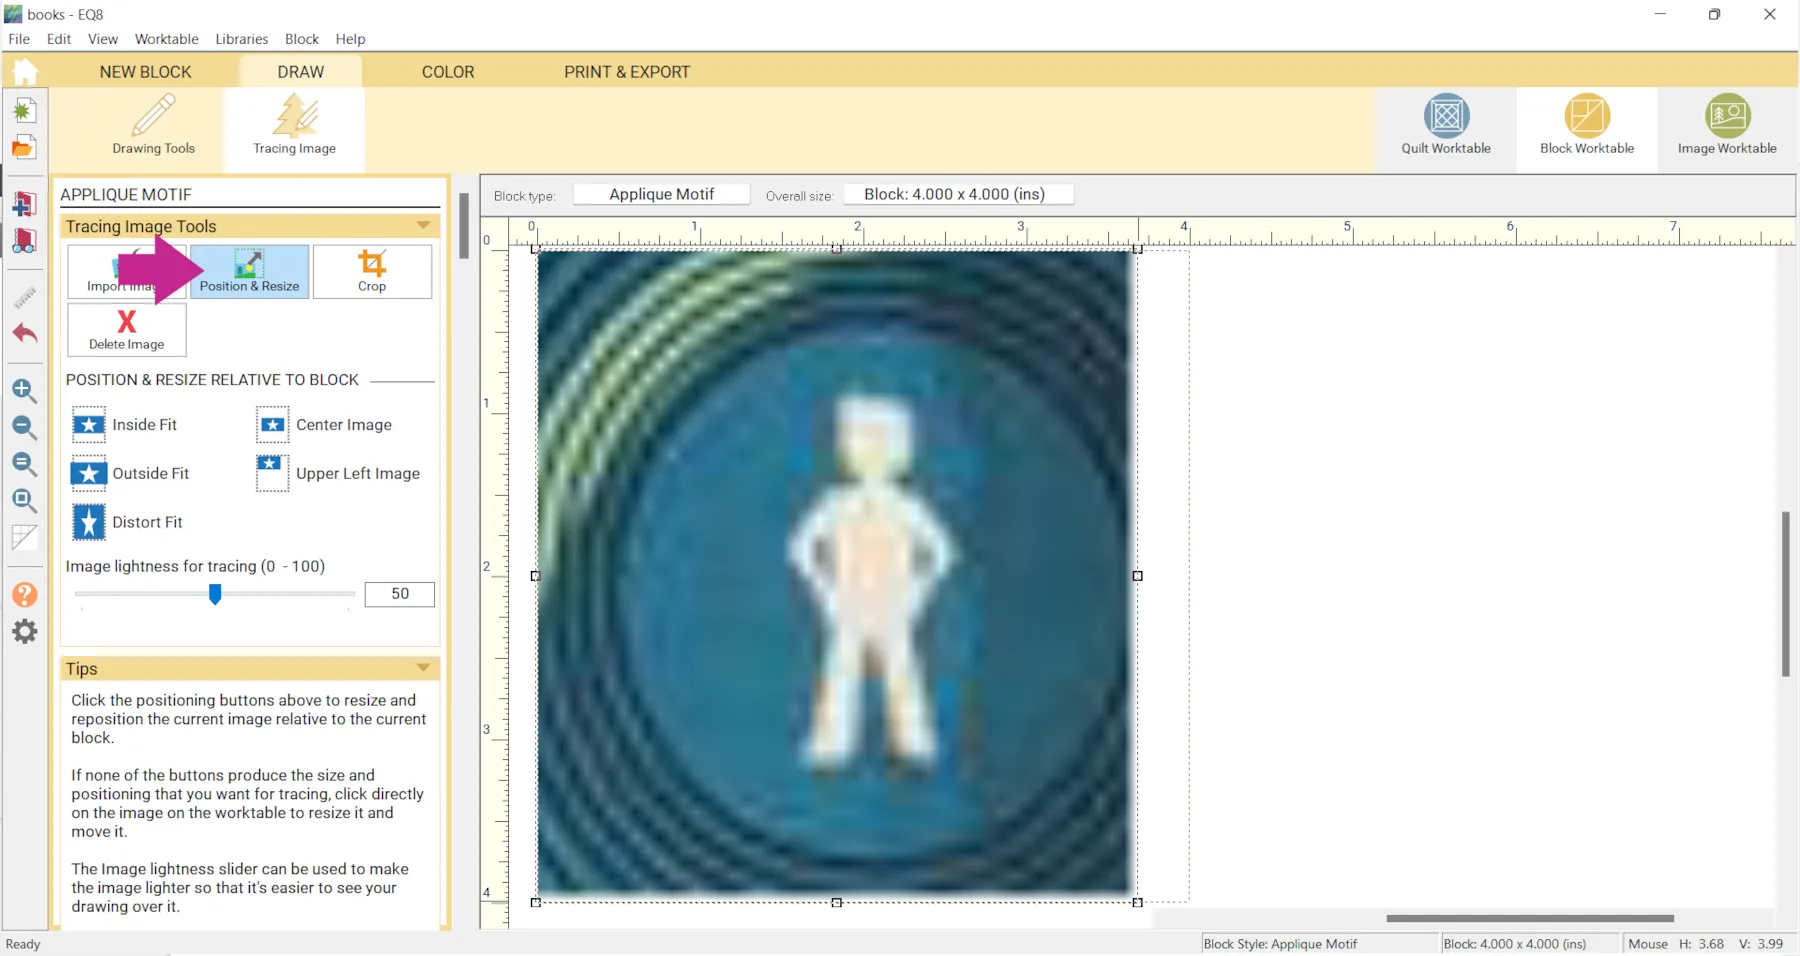
- Click Position and Resize and drag the image out to fit within the square (it doesn’t need to be perfect).
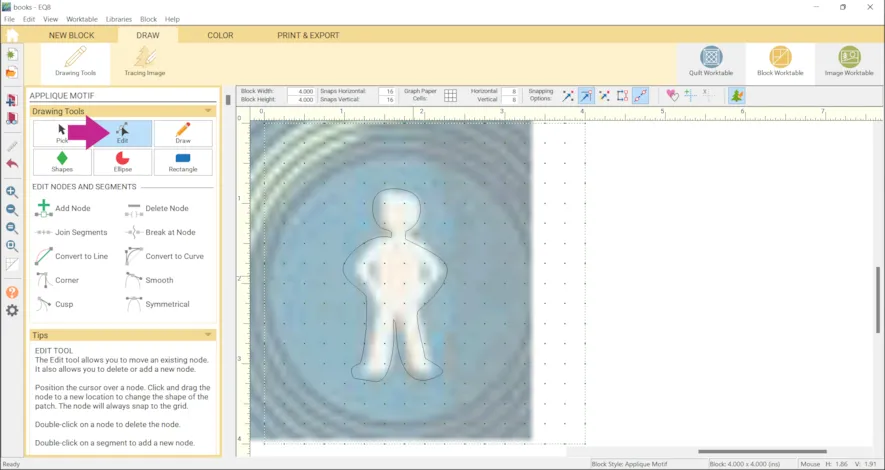
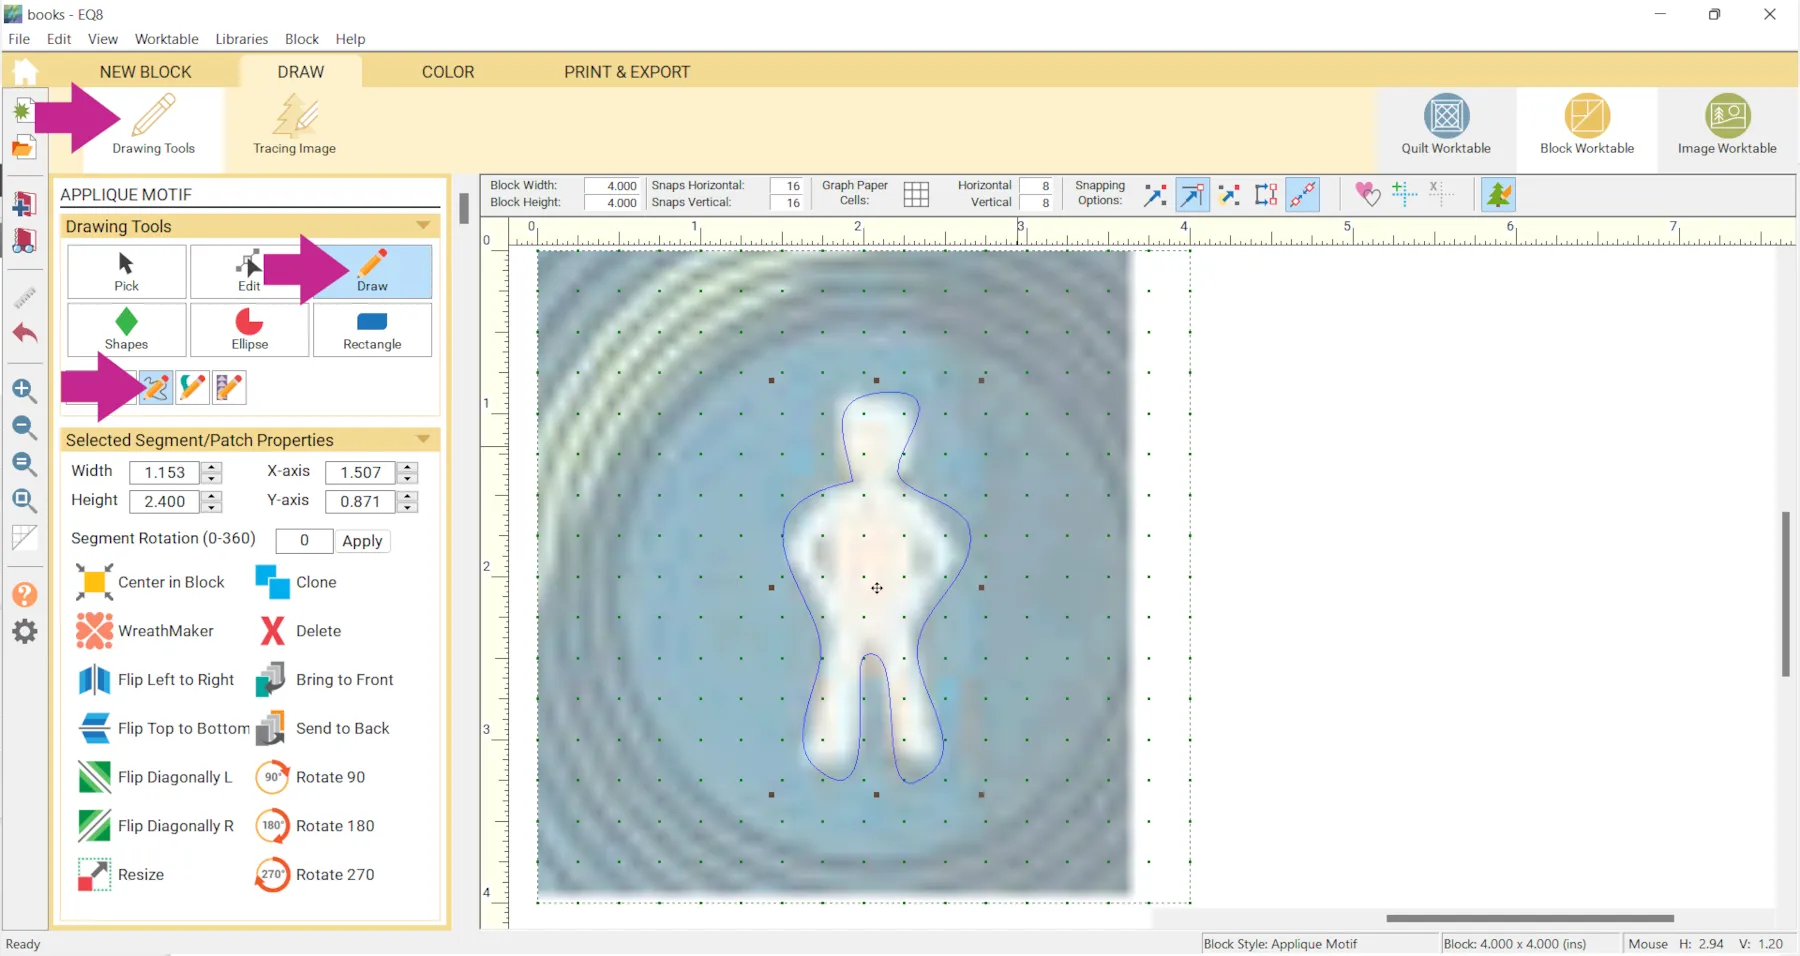
- Click Drawing Tools > Draw > Freehand and draw a rough shape.

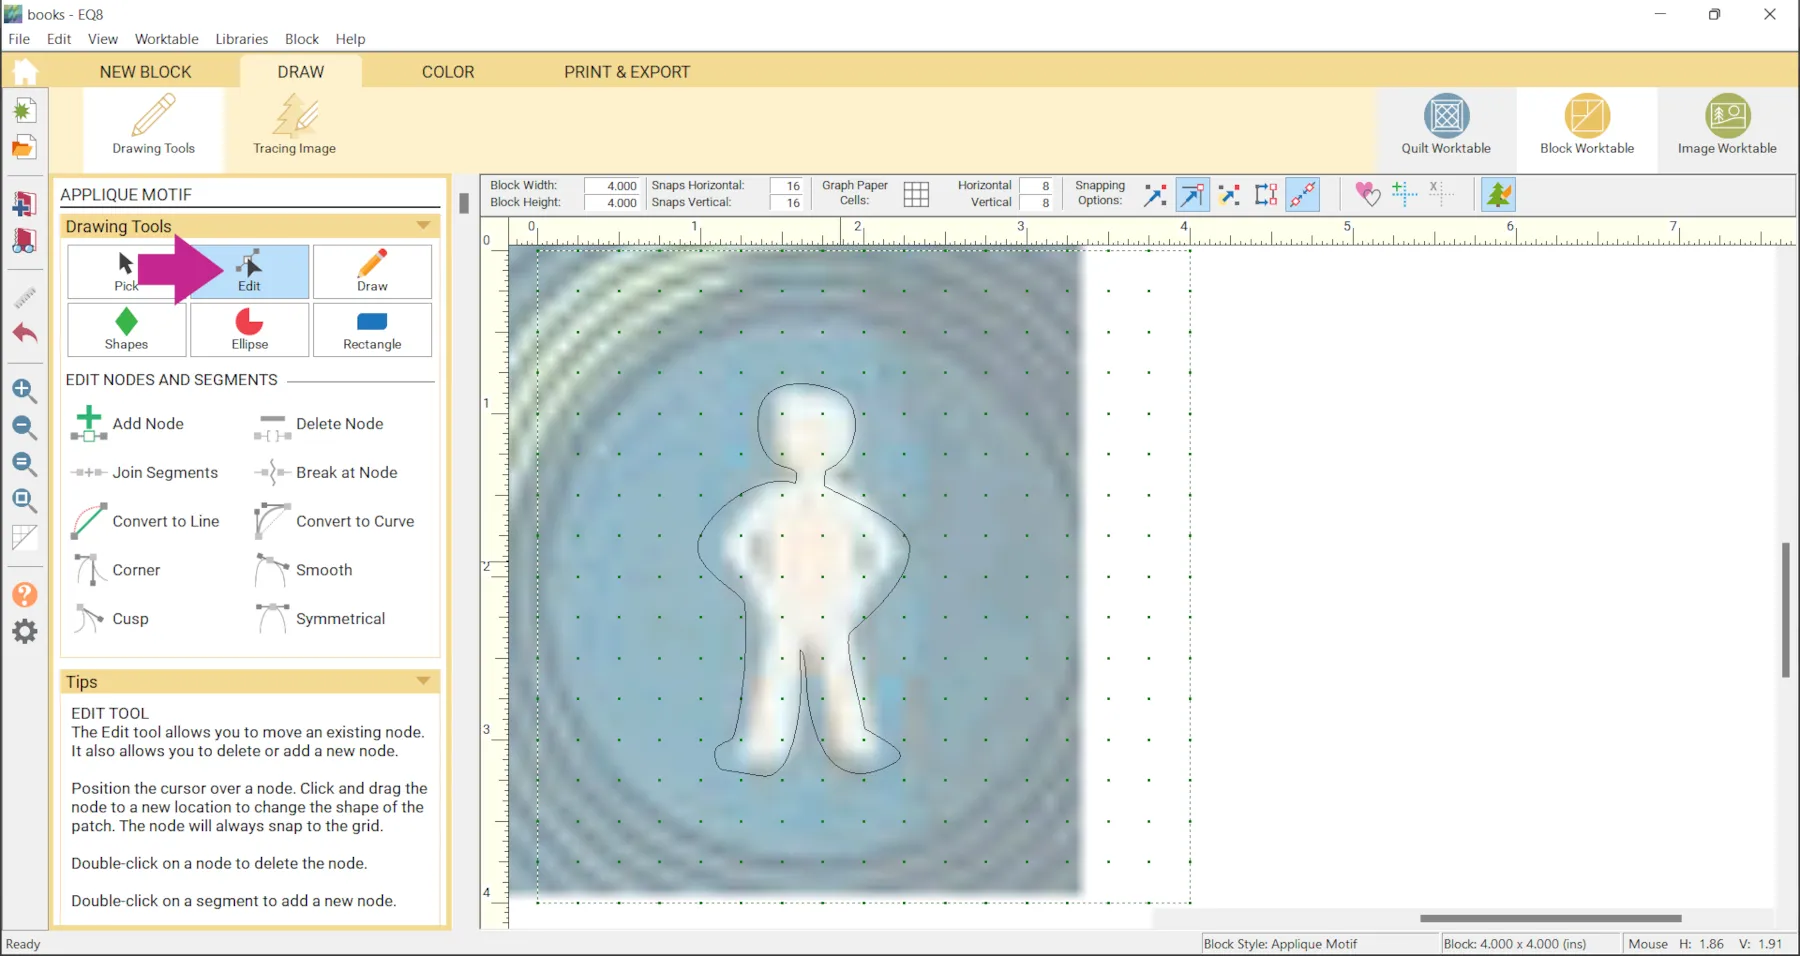
- Use the Edit tool to edit the shape.
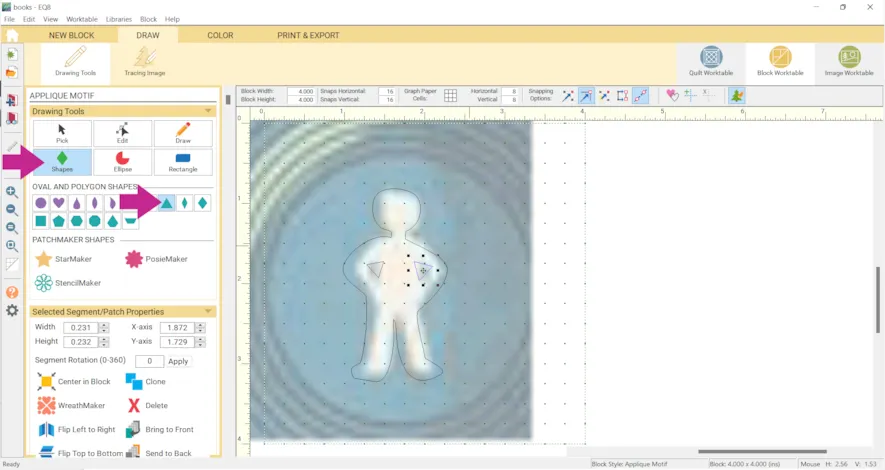
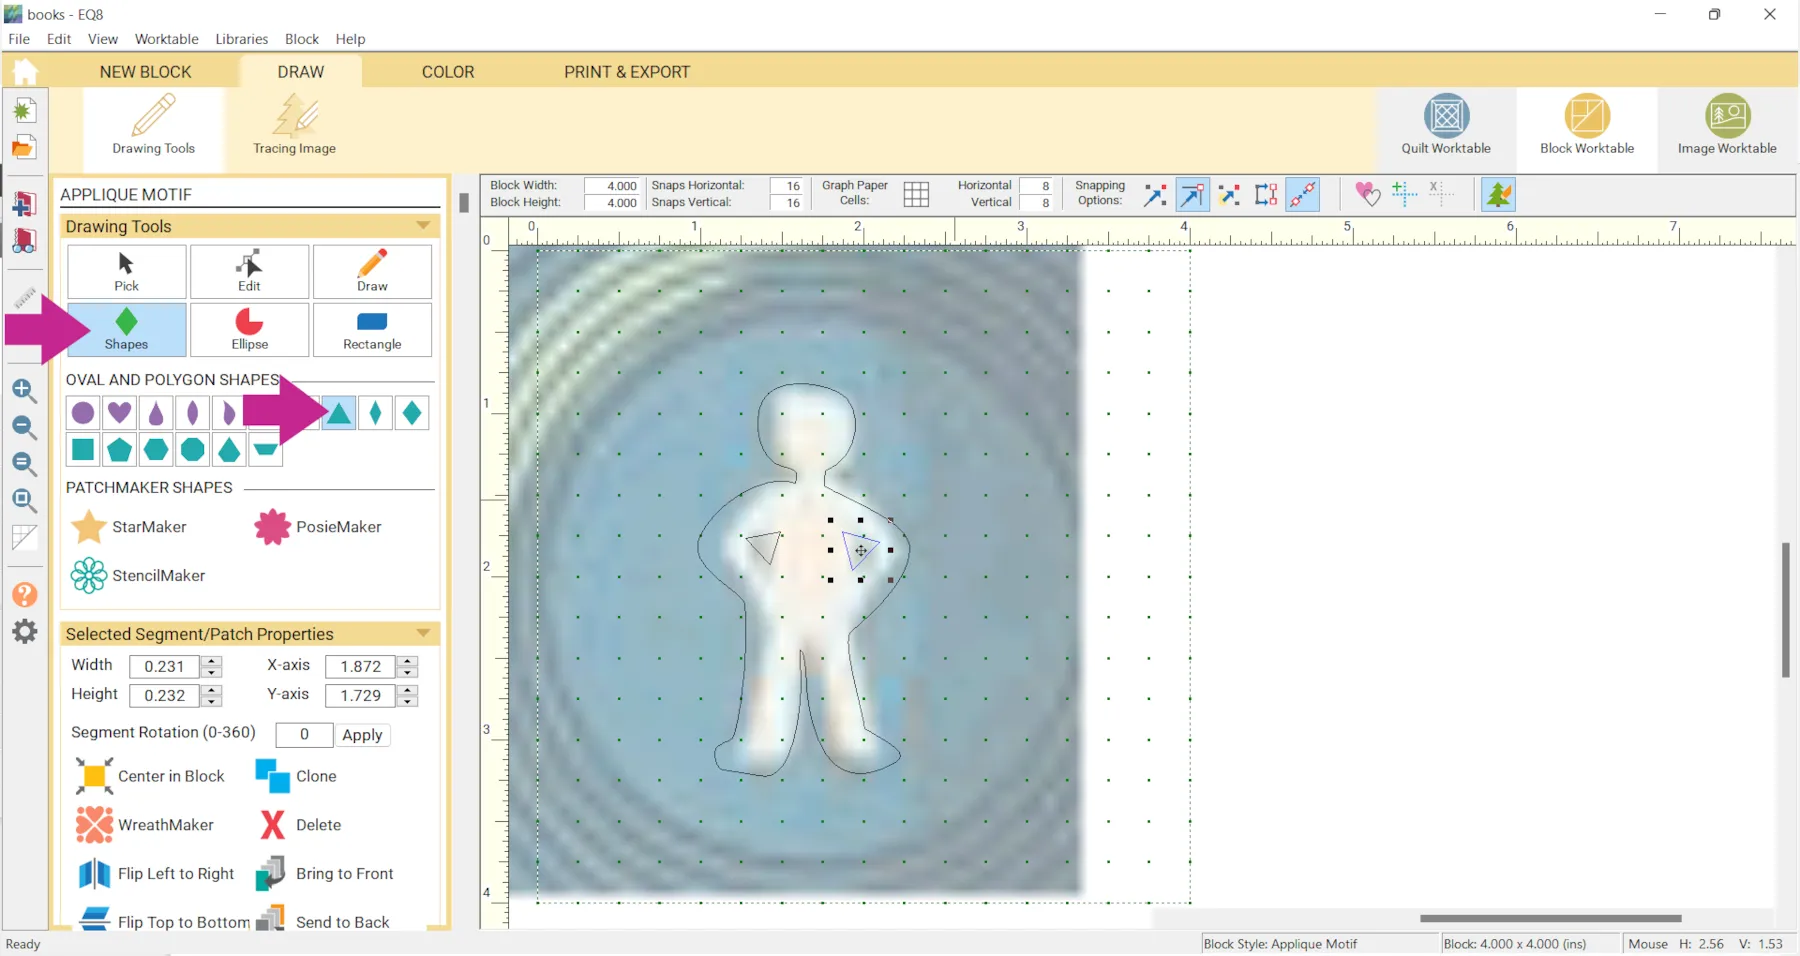
- Click the Shapes tool > Equilateral Triangle to add in under his arms.
- Click Add to Project Sketchbook
 . If the project is unnamed EQ8 will prompt you to do so. (To be saved, your item needs to be in the Sketchbook AND your project needs to be named. Here is more information.)
- Repeat the steps 11-16 for the other two silhouettes. (Calvin and Meg)
- Click Quilt Worktable
- Click Fabric Tools > Spray Can and choose a color or fabric close to the color of the cover.
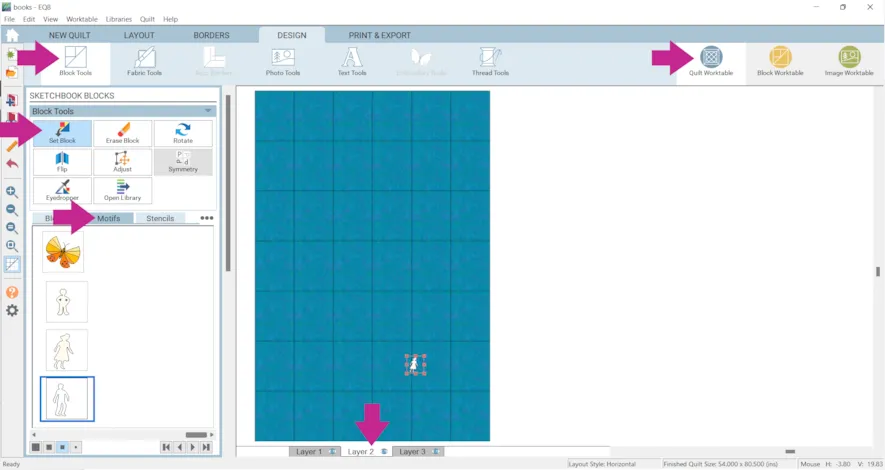
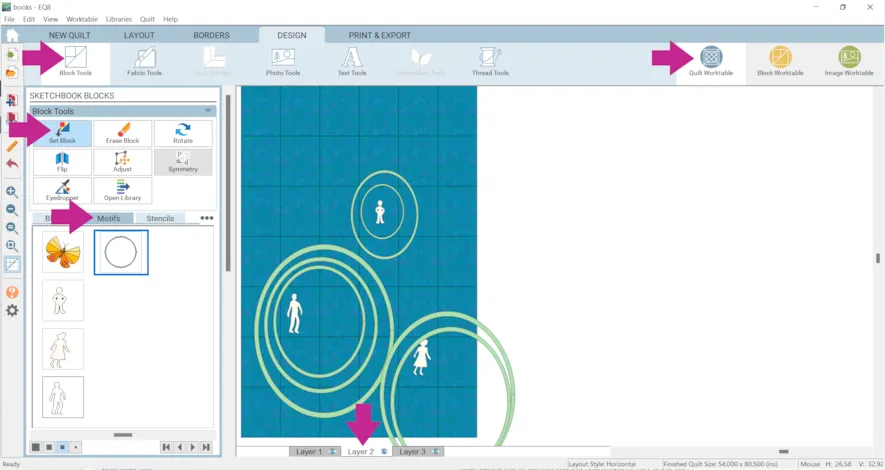
- Click Block Tools > Set Block > Motifs tab
- Click the Layer 2 tab at the bottom of the screen
- Click on a motif and drag it onto your quilt.
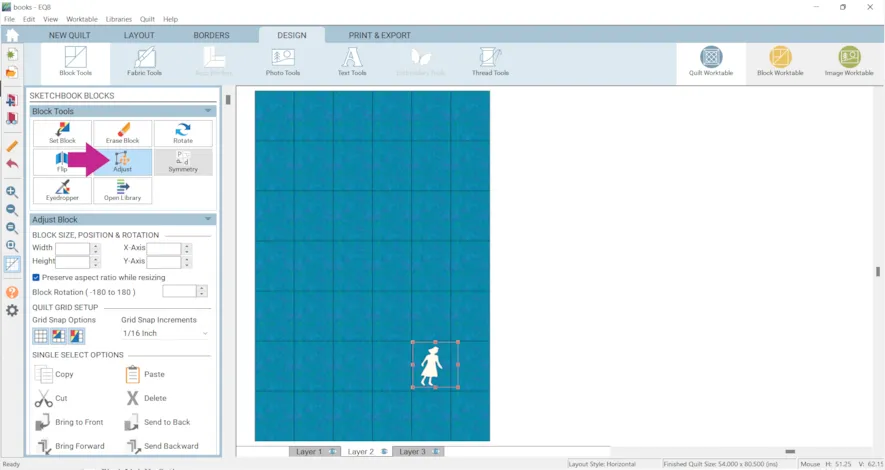
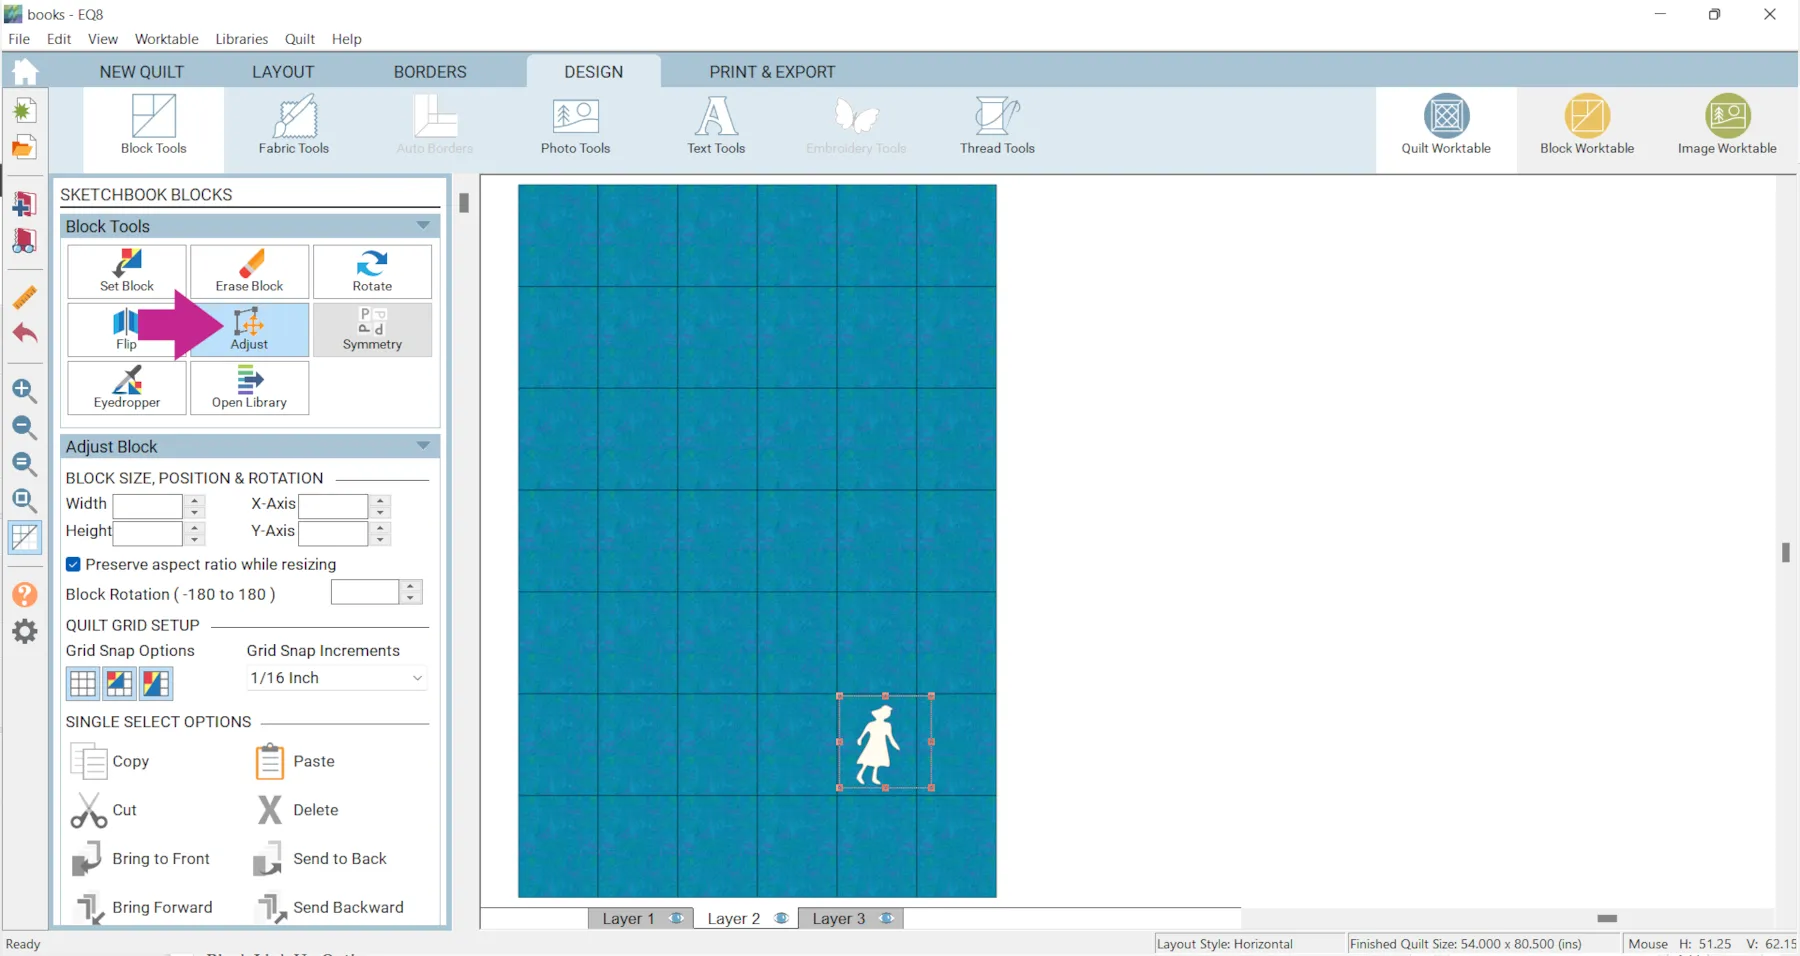
- Use the Adjust tool to change the size and location of the motif.
- Repeat steps 24-25 for the other two motifs.Now we’re going to edit a block to use for the green rings.
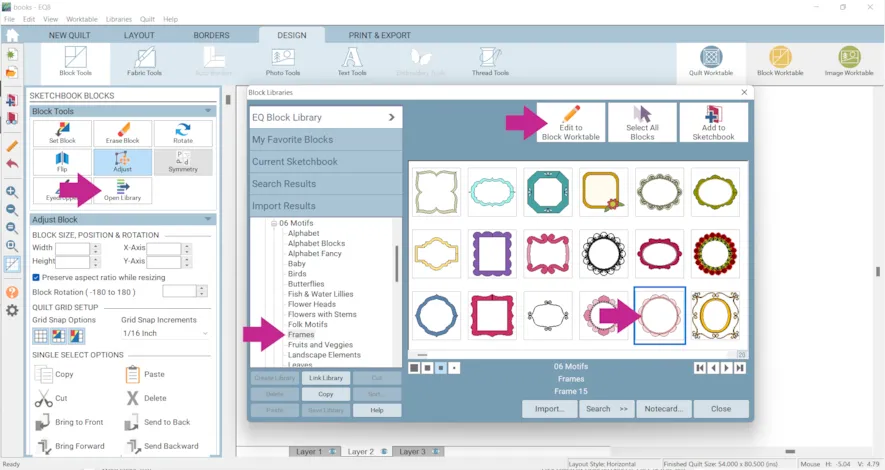
- Click Open Library > 06 Motif > Frames
- Click on Frame 15
- Click Edit to Block Worktable
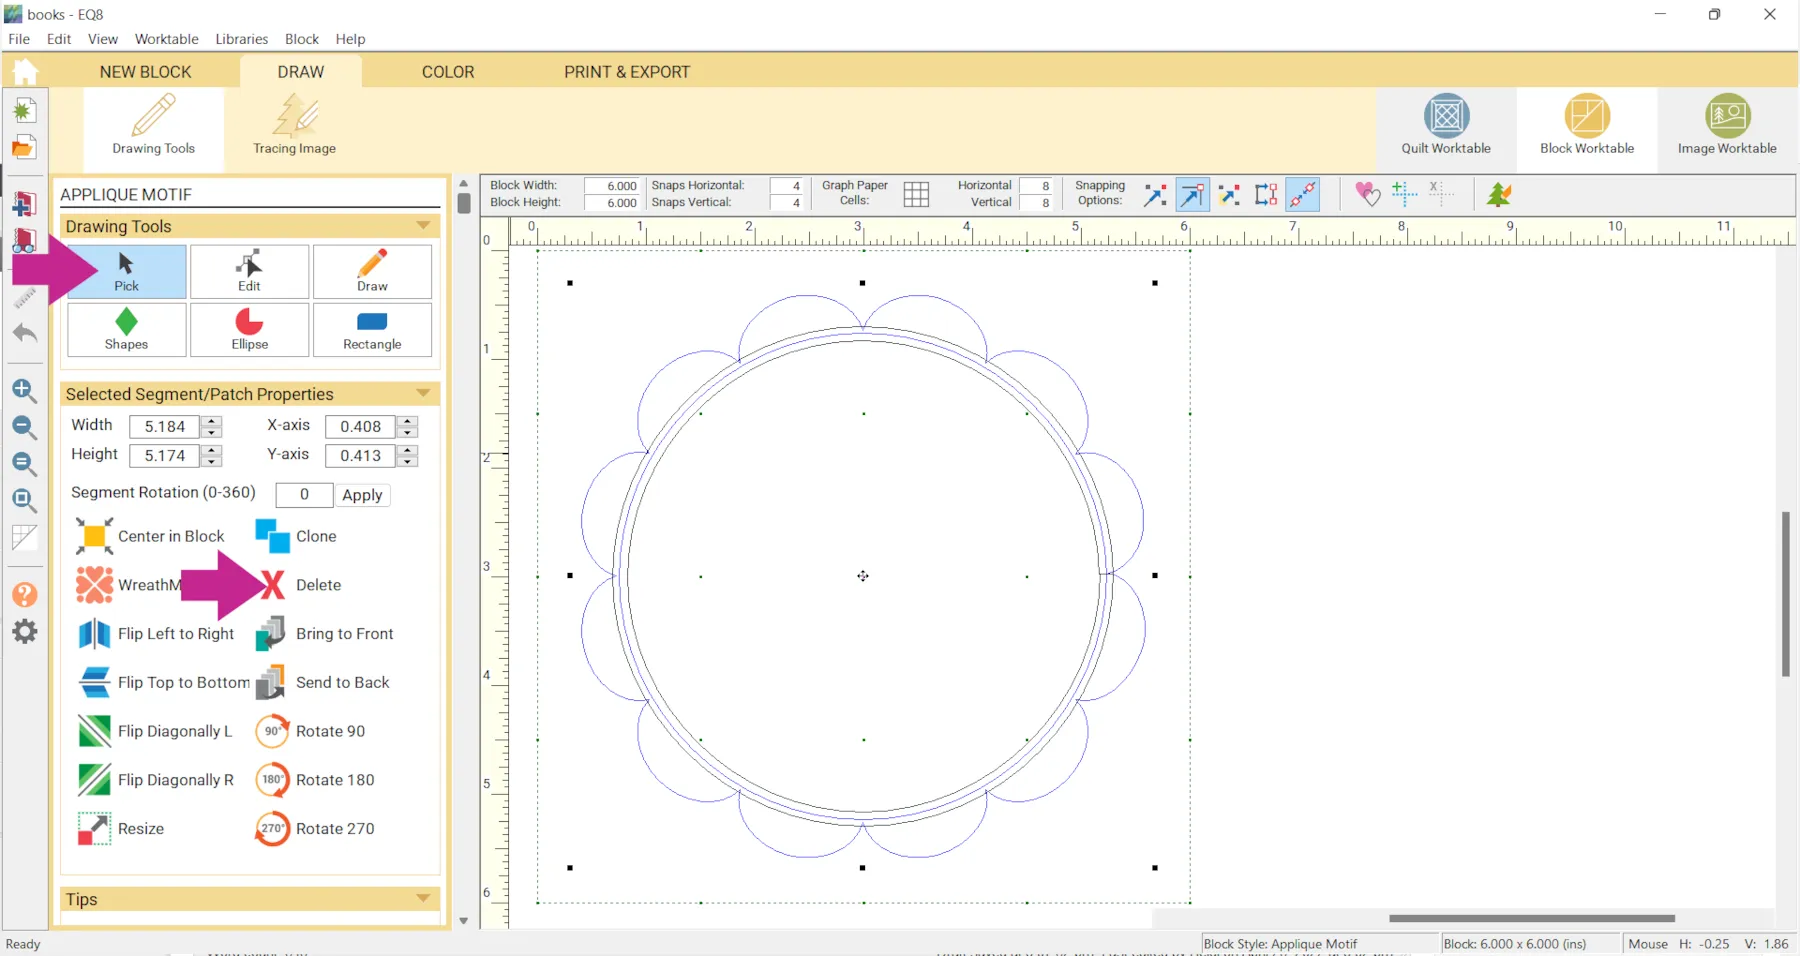
- Click the Pick tool
- Click on the scallops
- Click Delete
- Click Add to Project Sketchbook

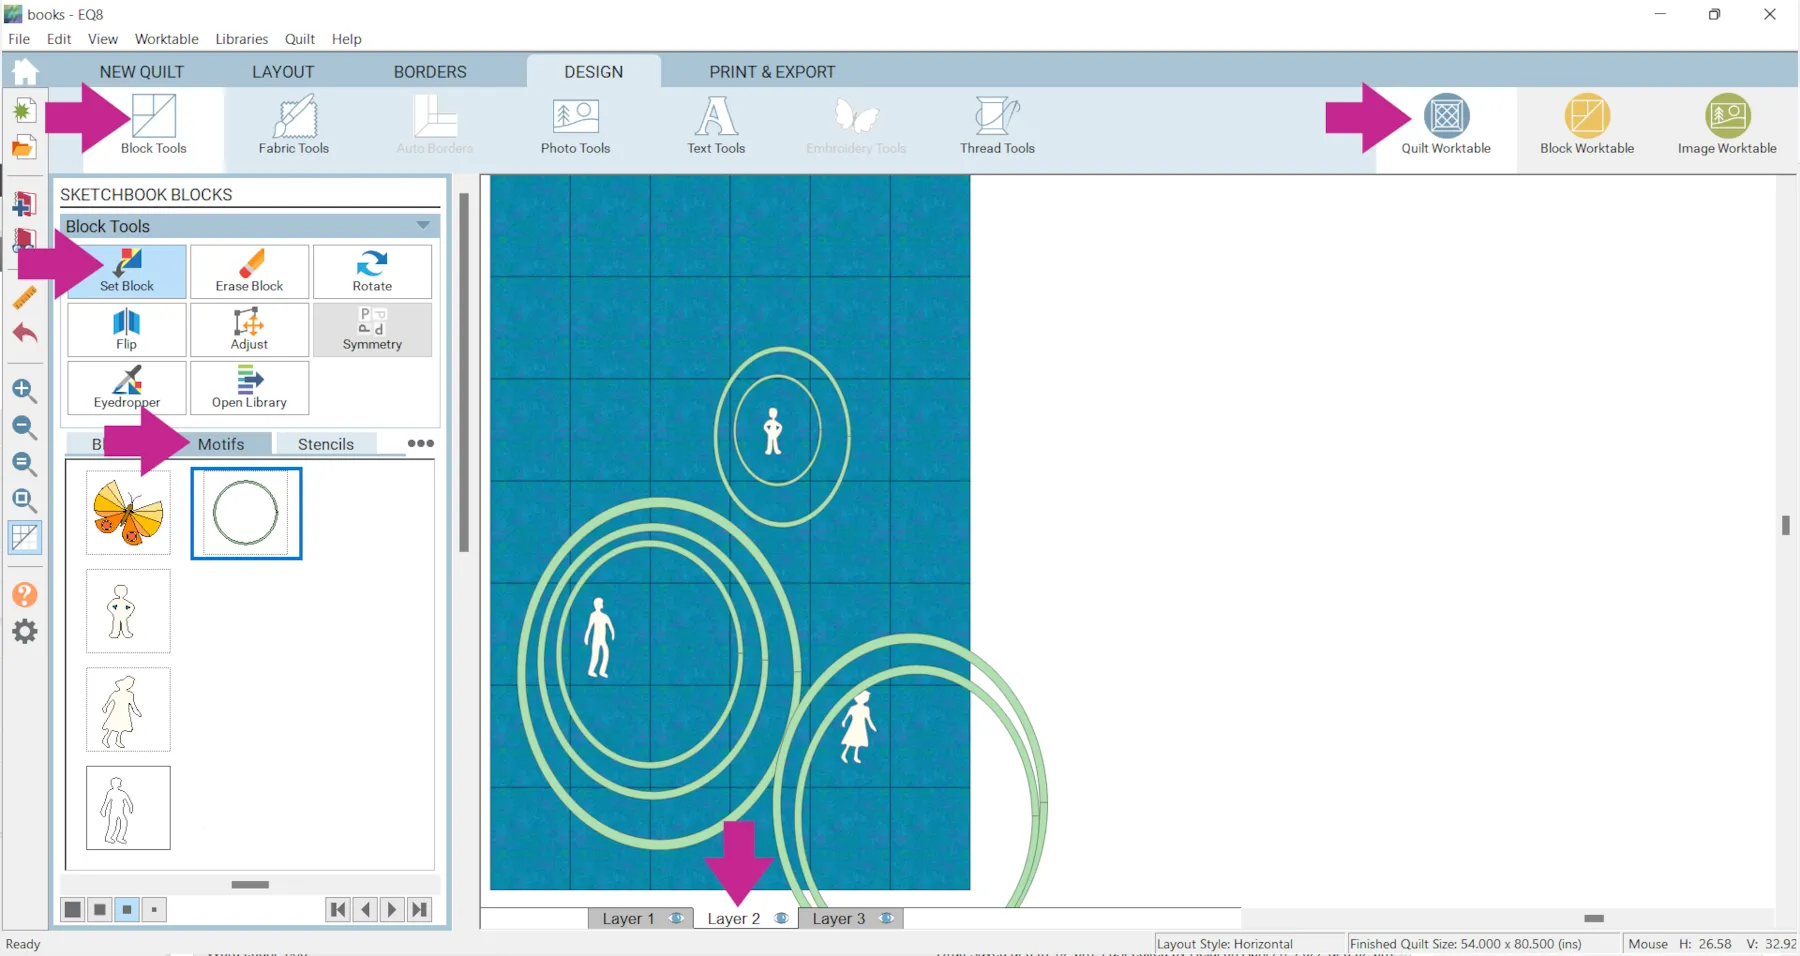
- Click Quilt Worktable > Block Tools > Set Block > Motifs
- Click Layer 2 at the bottom of the screen.
- Use the same step from 24-25 to place the circles on the quilt.
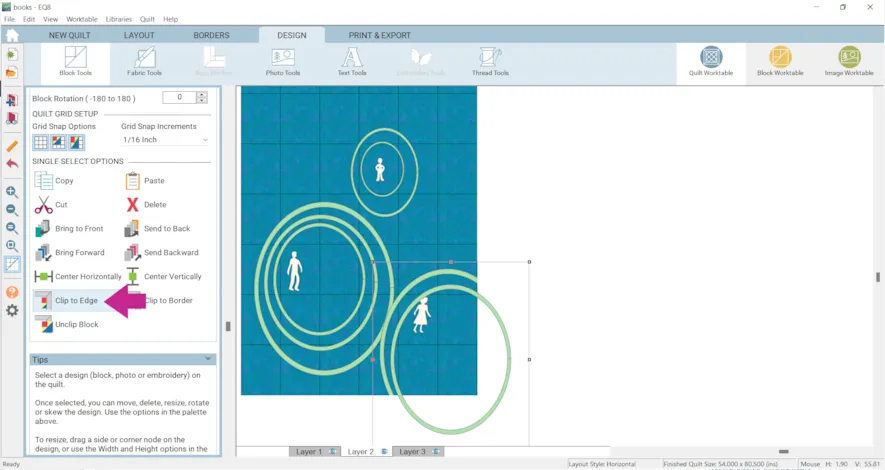
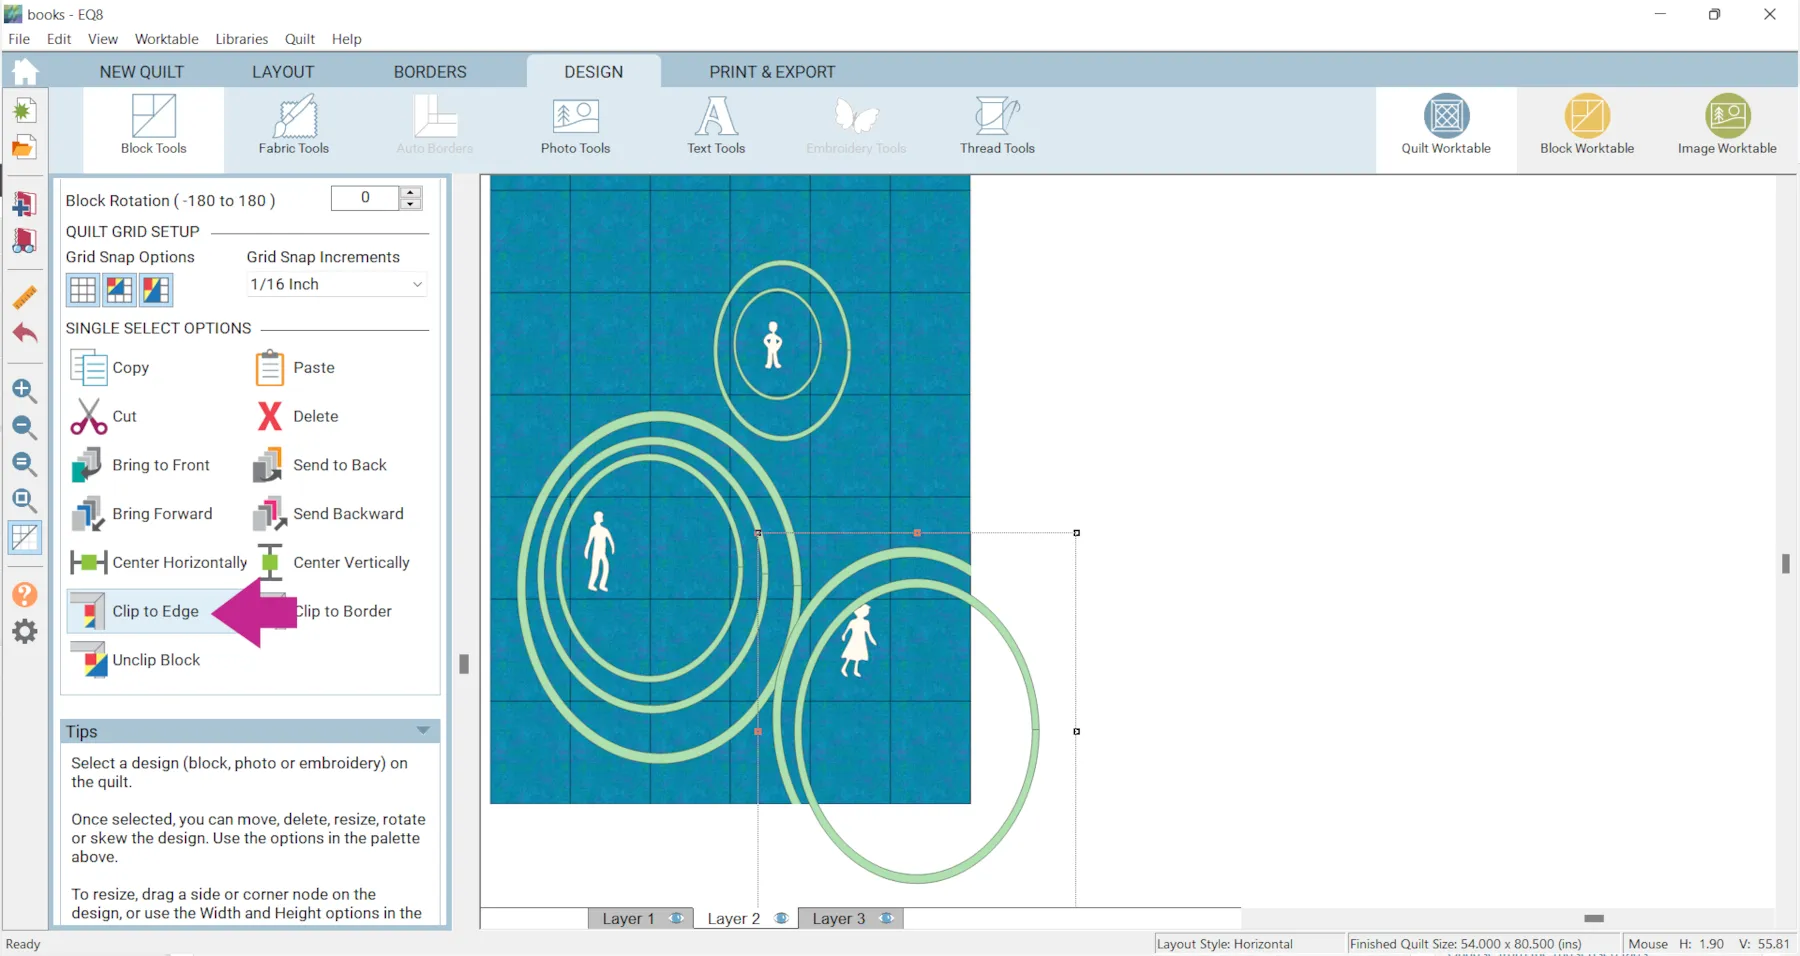
Some circles will hang over the edge of the quilt. - Make sure the Adjust tool is selected and click on a circle that is hanging over the edge.
- Click Clip to Edge.
- Repeat for and other circles that need it.
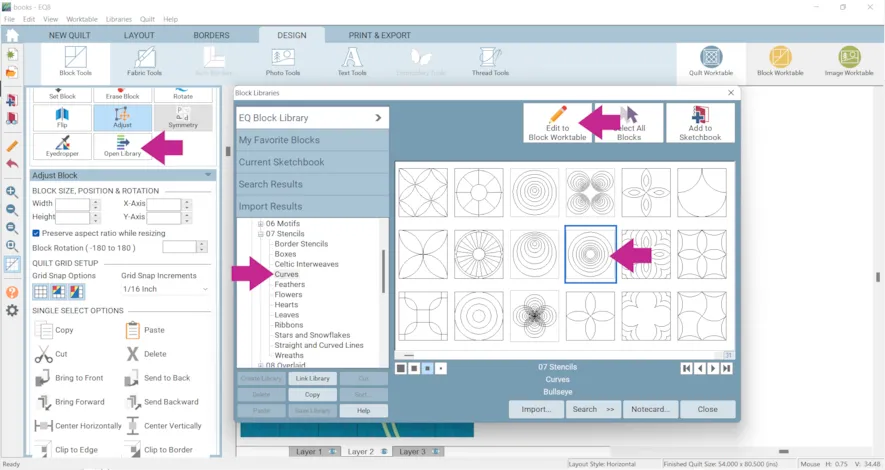
- Click Open Library > 07 Stencils > Curves
- Click on Bullseye
- Click Edit to Block Worktable
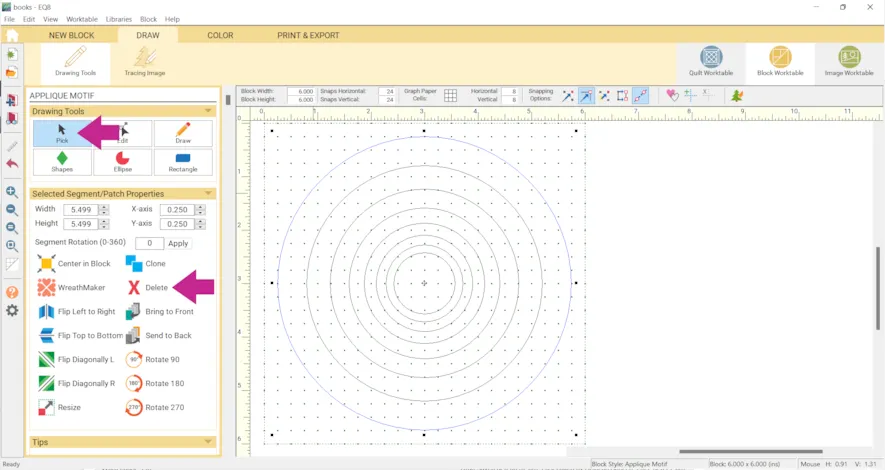
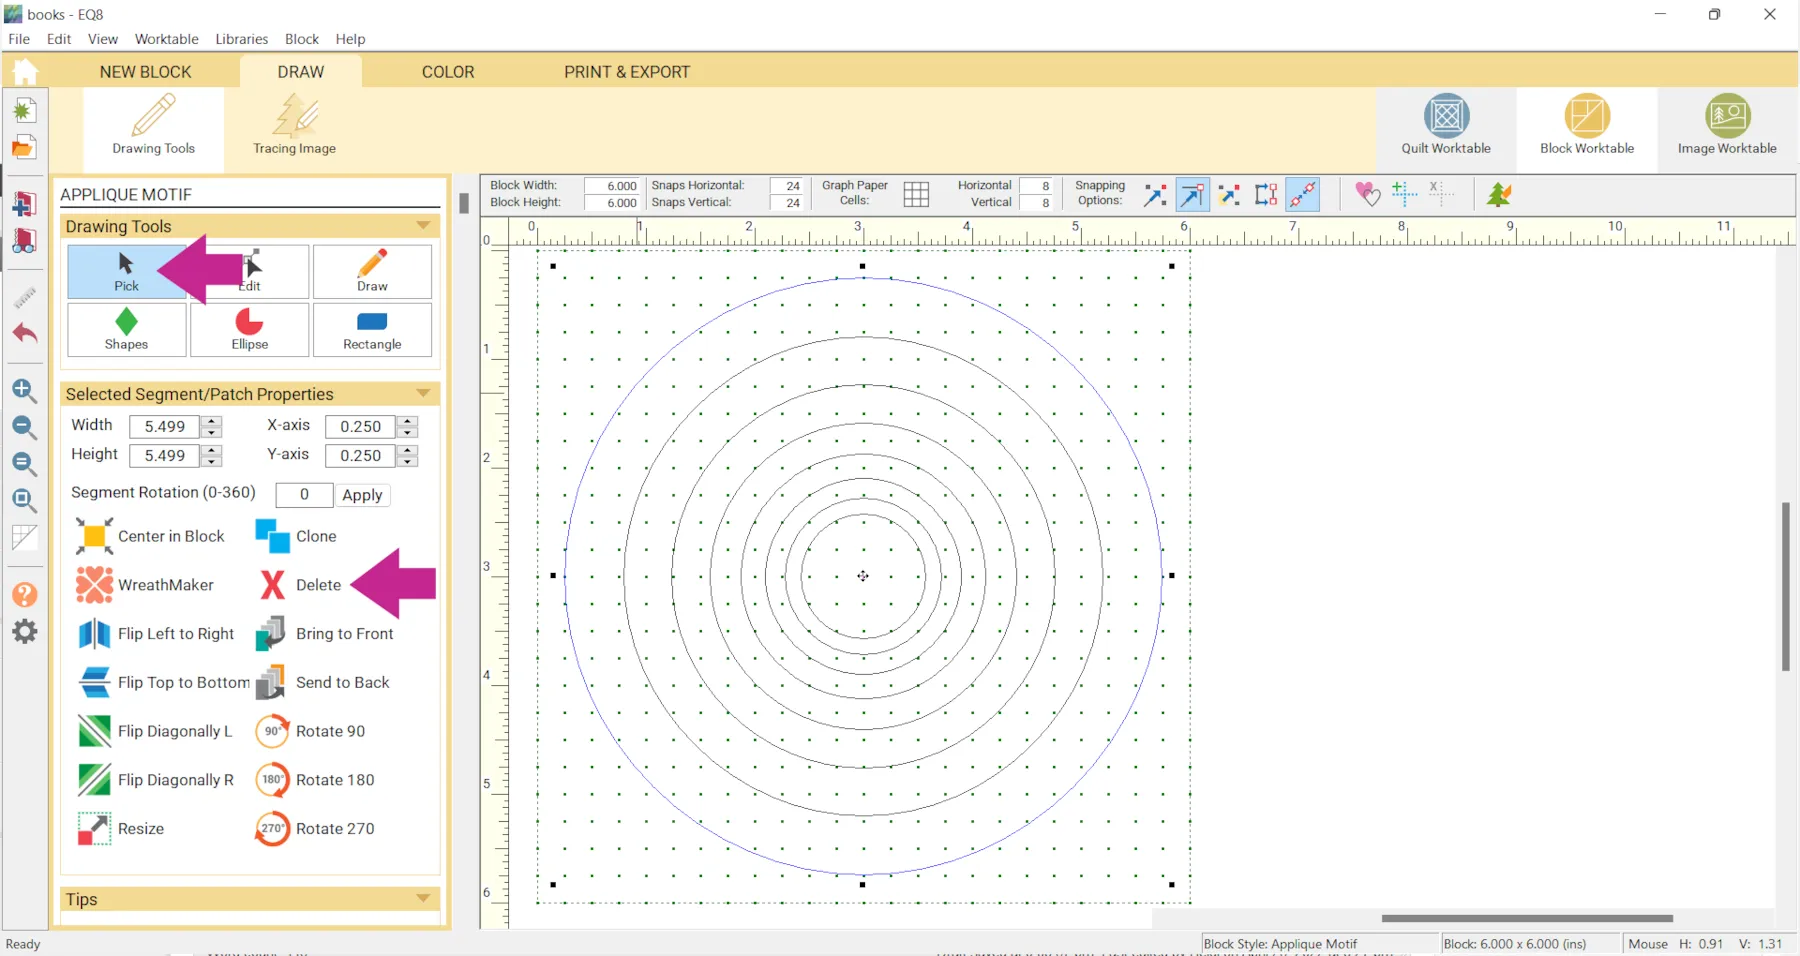
- Click the Pick tool
- Click on one of the outer rings and click the Delete button.
- Repeat for a few of the outer most rings.
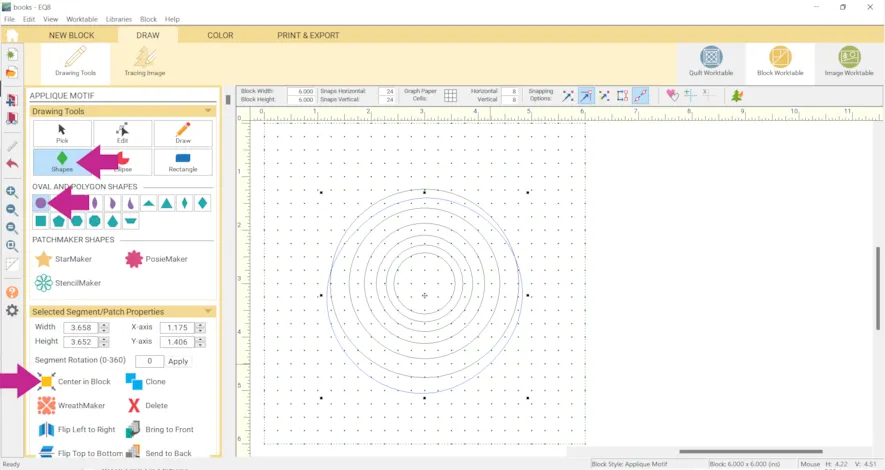
- Click the Shapes tool > Circle
- Draw a new circle and click Center in Block.
- Repeat step 47 a few times.
You can make a few different variations if you would like. - Click Add to Project Sketchbook when you are done.
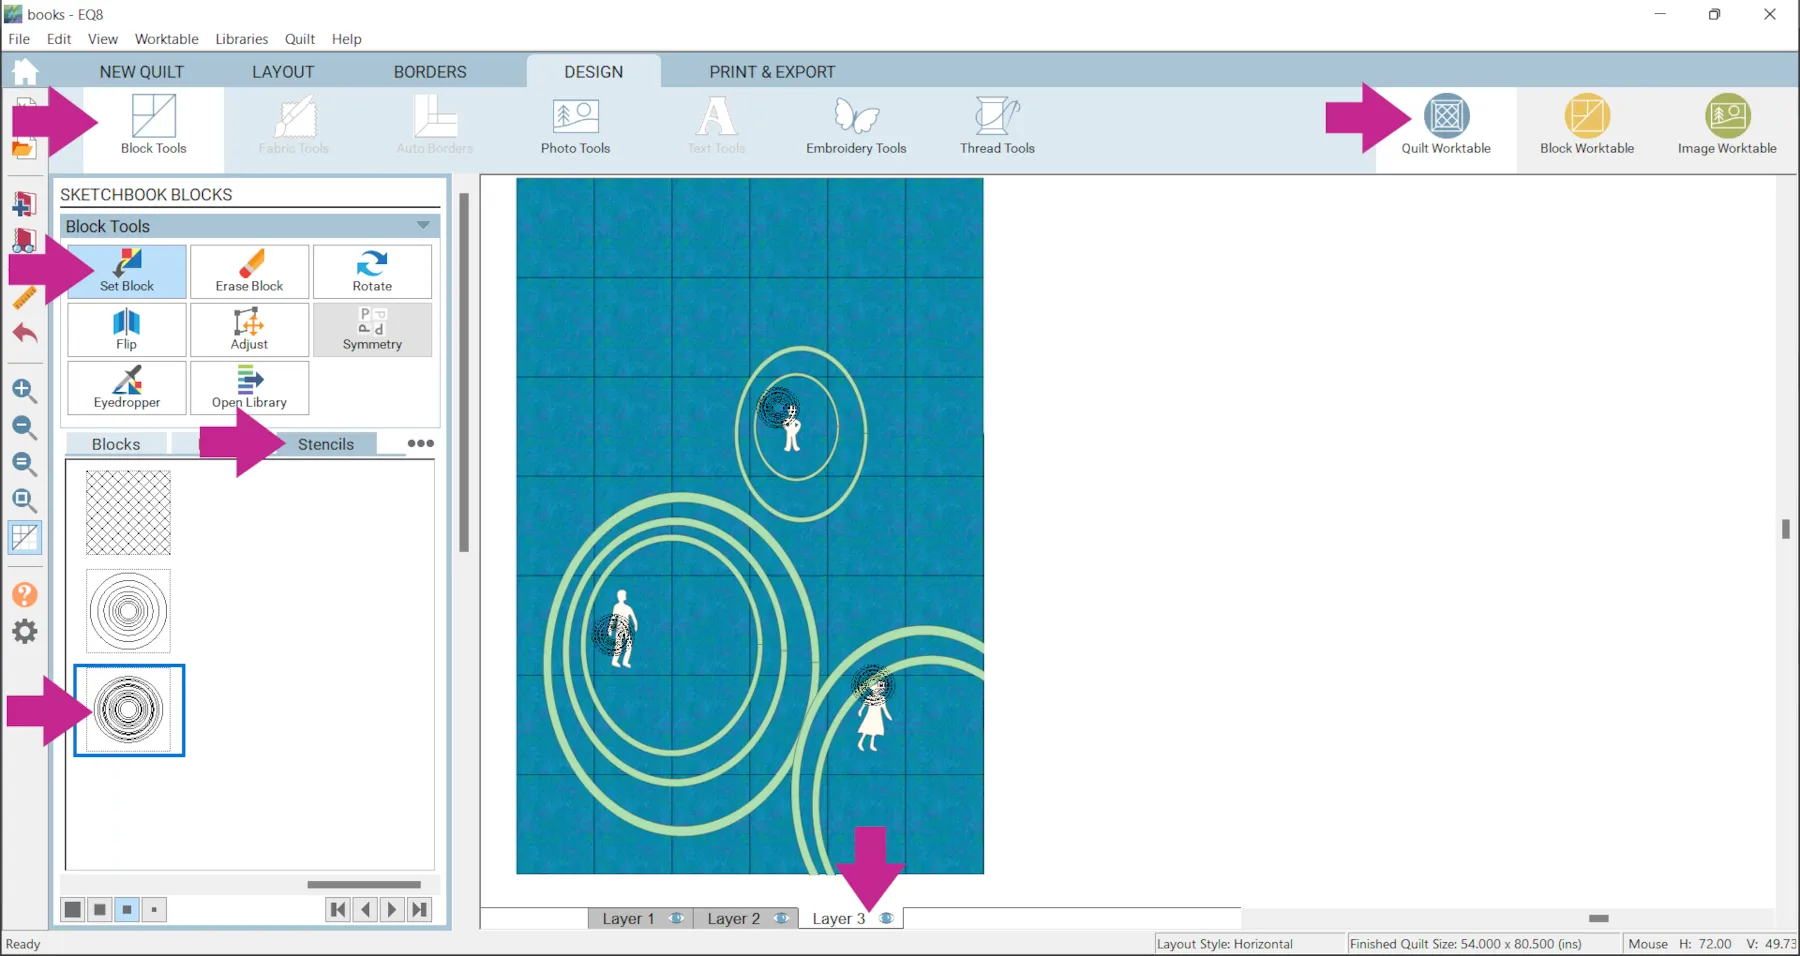
- Click Quilt Worktable > Block Tools > Set Block > Stencils
- Click on Layer 3 at the bottom of your screen.
- Drag three of the stencils onto the quilt.
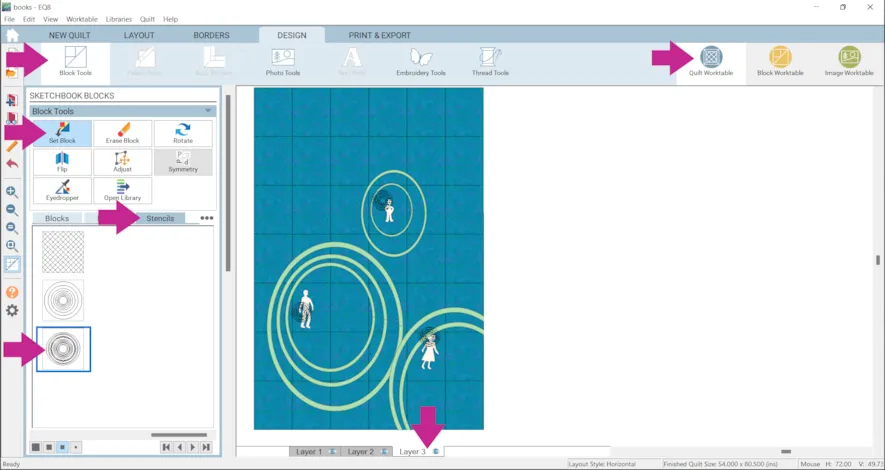
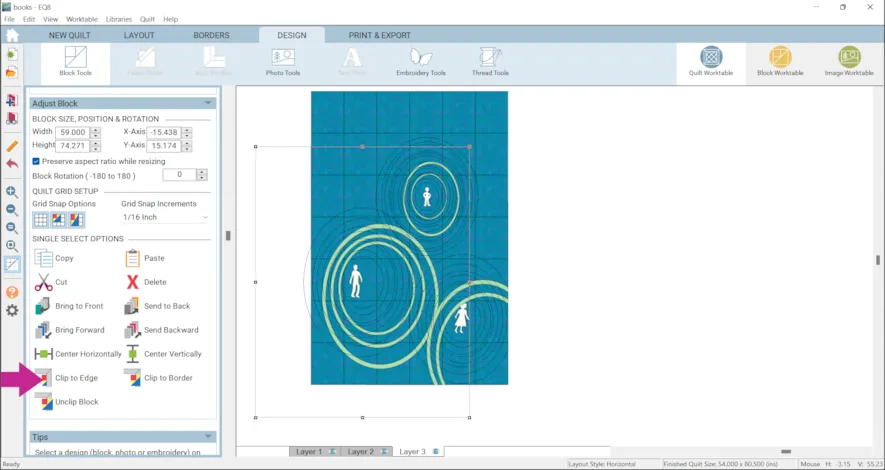
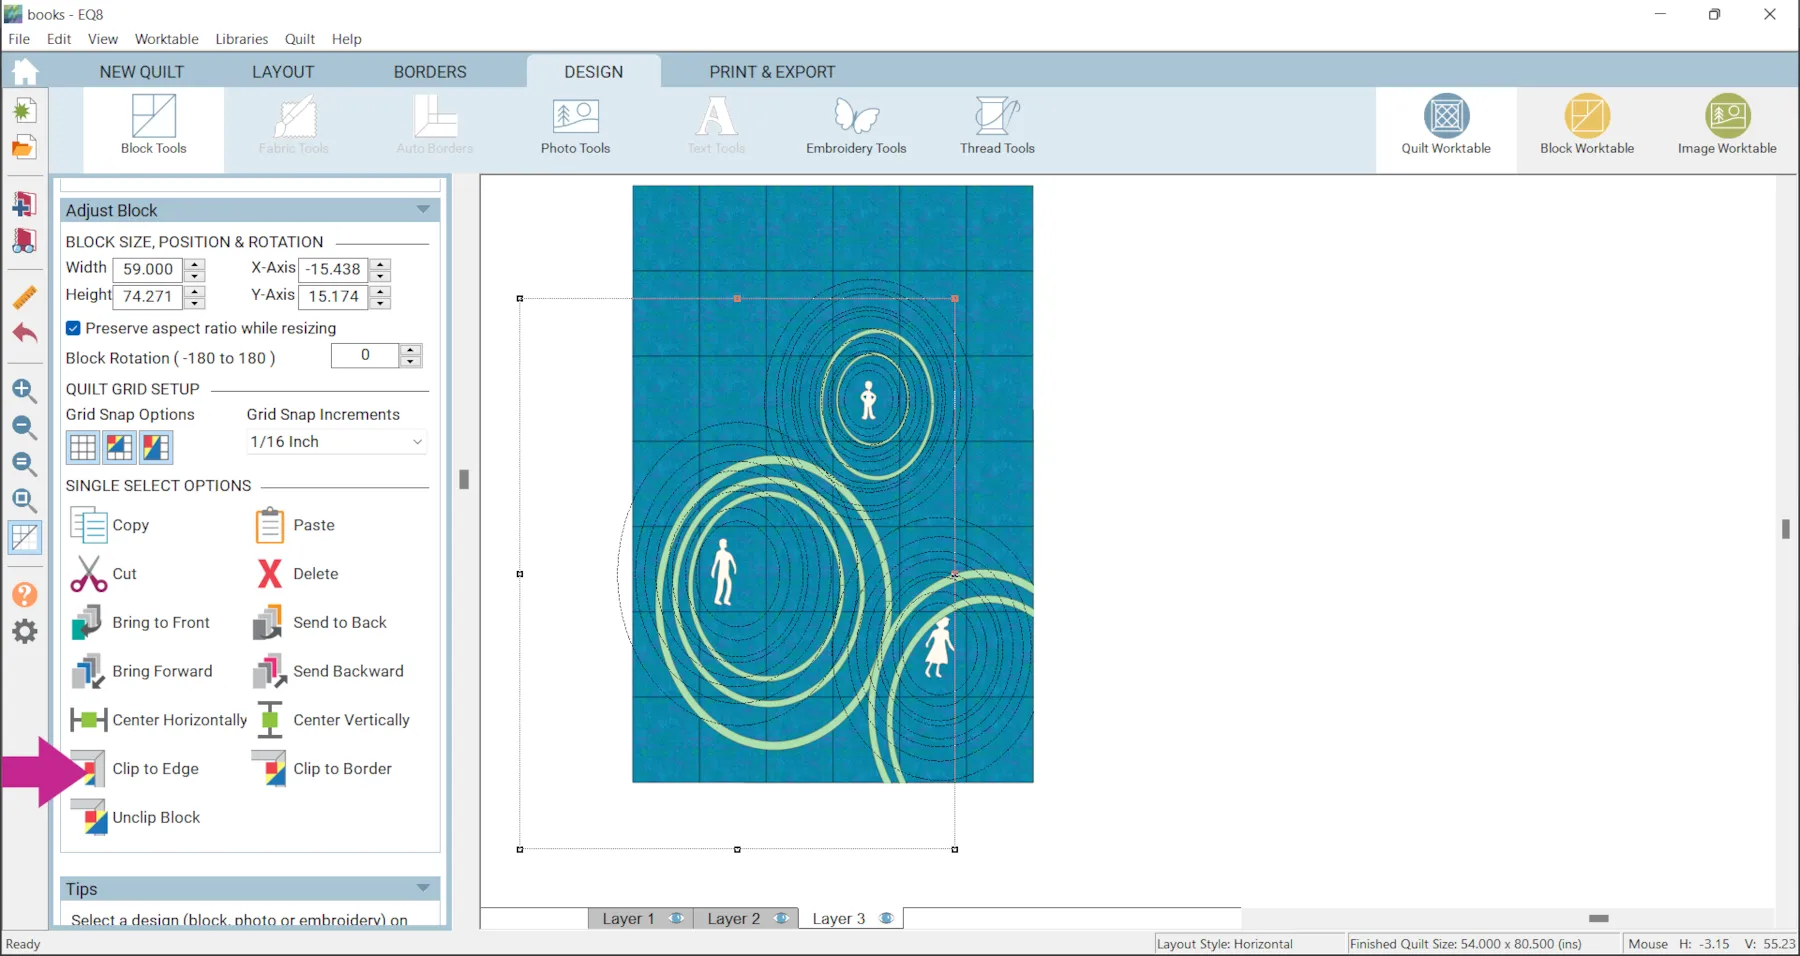
- Use the Adjust tool to change the size and location of the stencils.
- If the stencils hang off the edge click Clip to Edge.
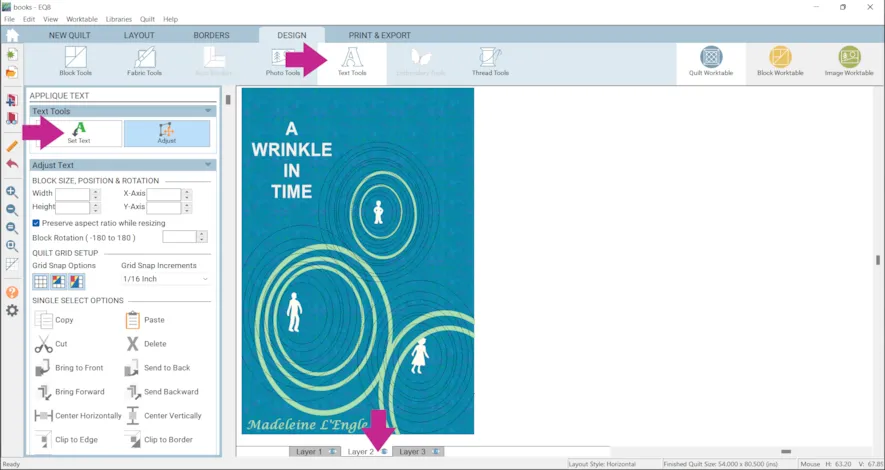
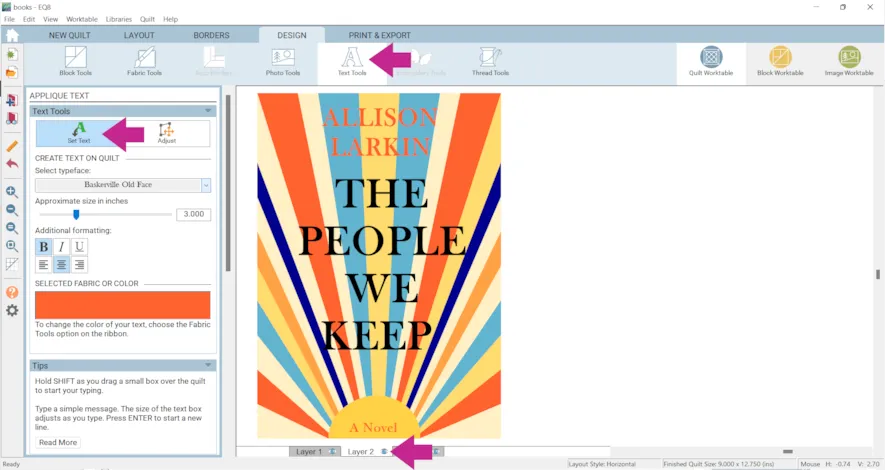
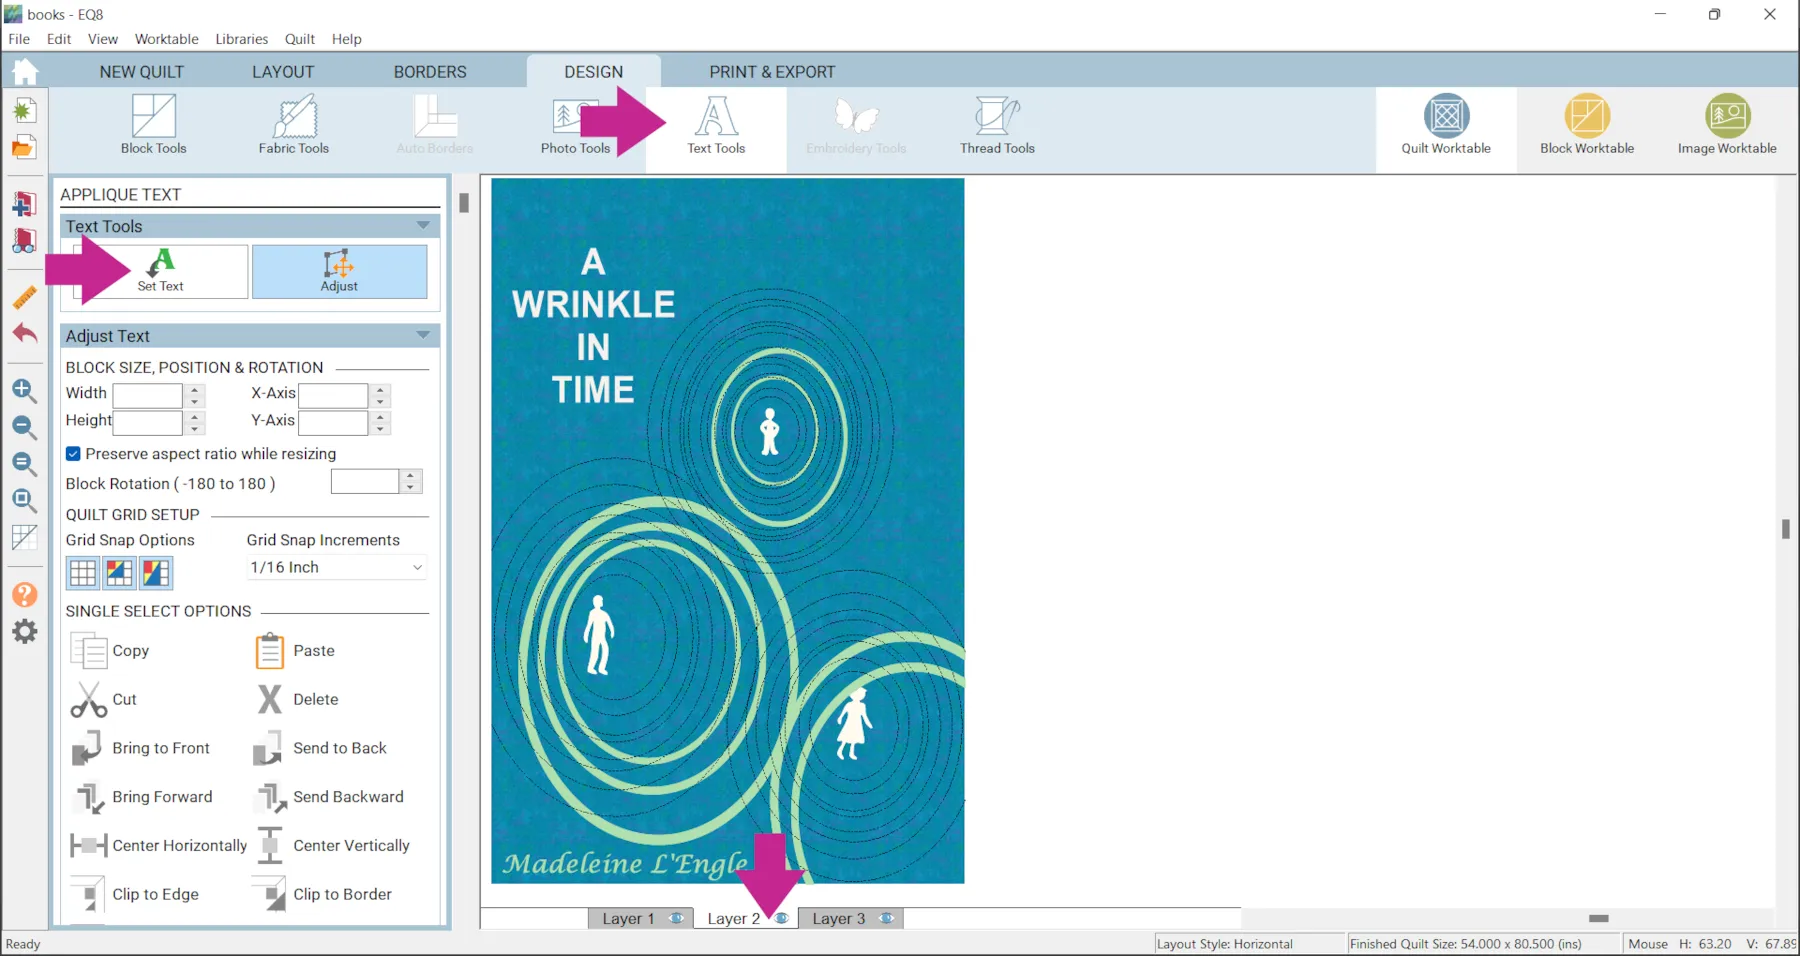
- If you’d like to add text, click the Layer 2 tab at the bottom of your screen
- Click Text Tools > Set Text and experiment with fonts and sizes.
- Click Add to Project Sketchbook when you are done.

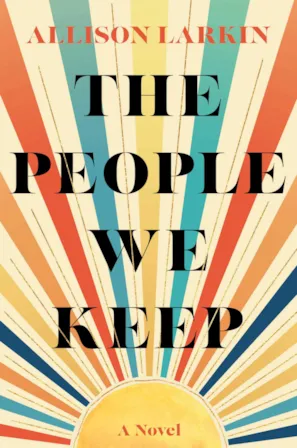
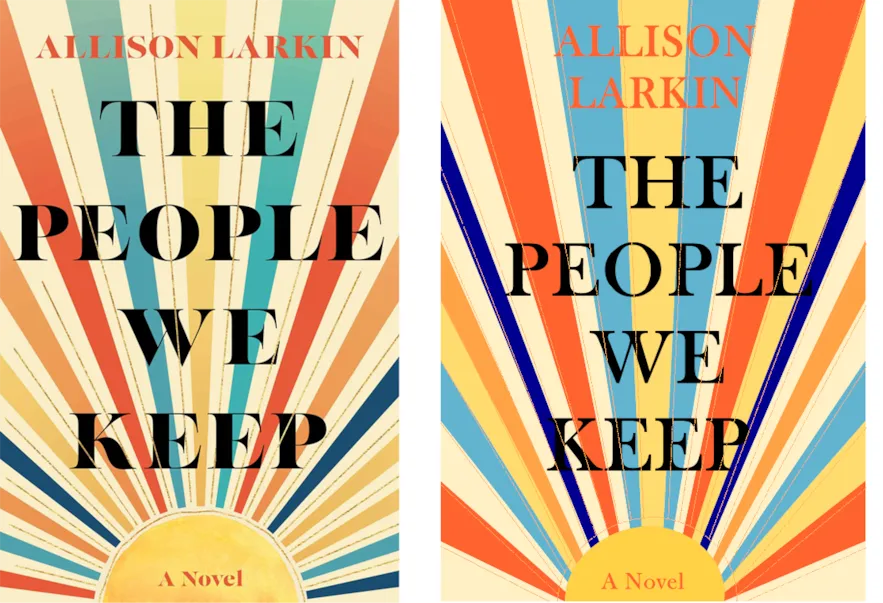
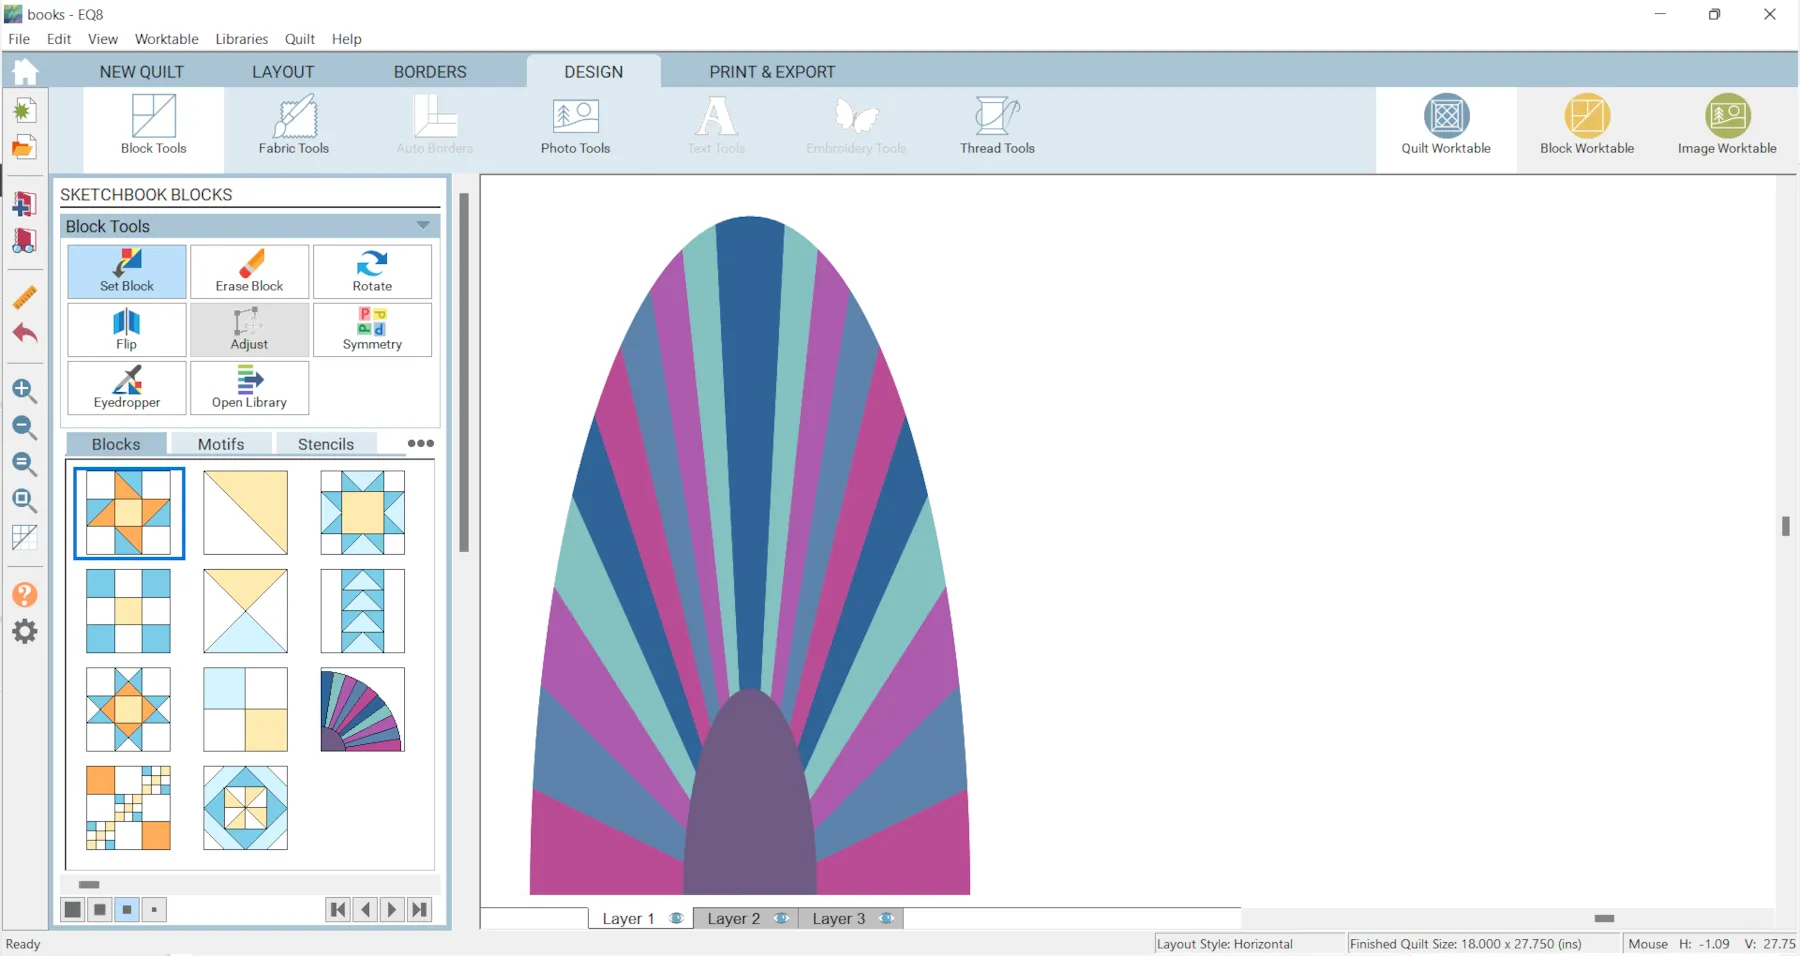
The next one we’ll try is The People We Keep.
I thought I could just use two wheel blocks to make this book cover but I didn’t really end up liking it that way.

So, let’s draw a block instead.
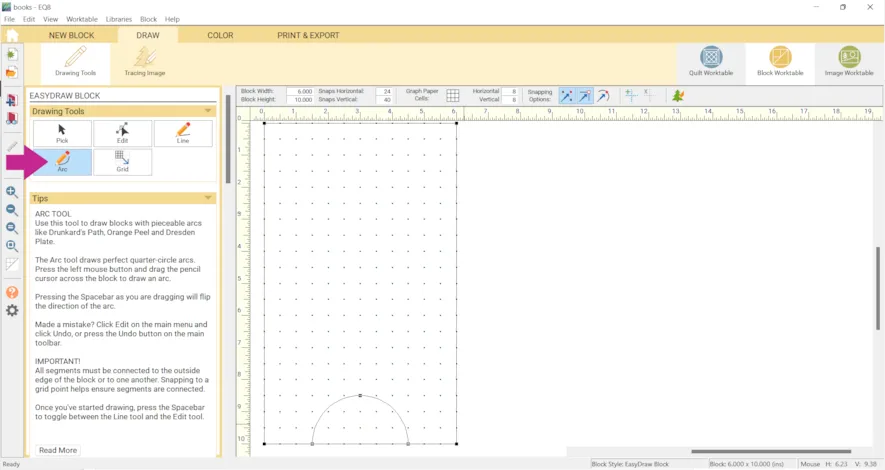
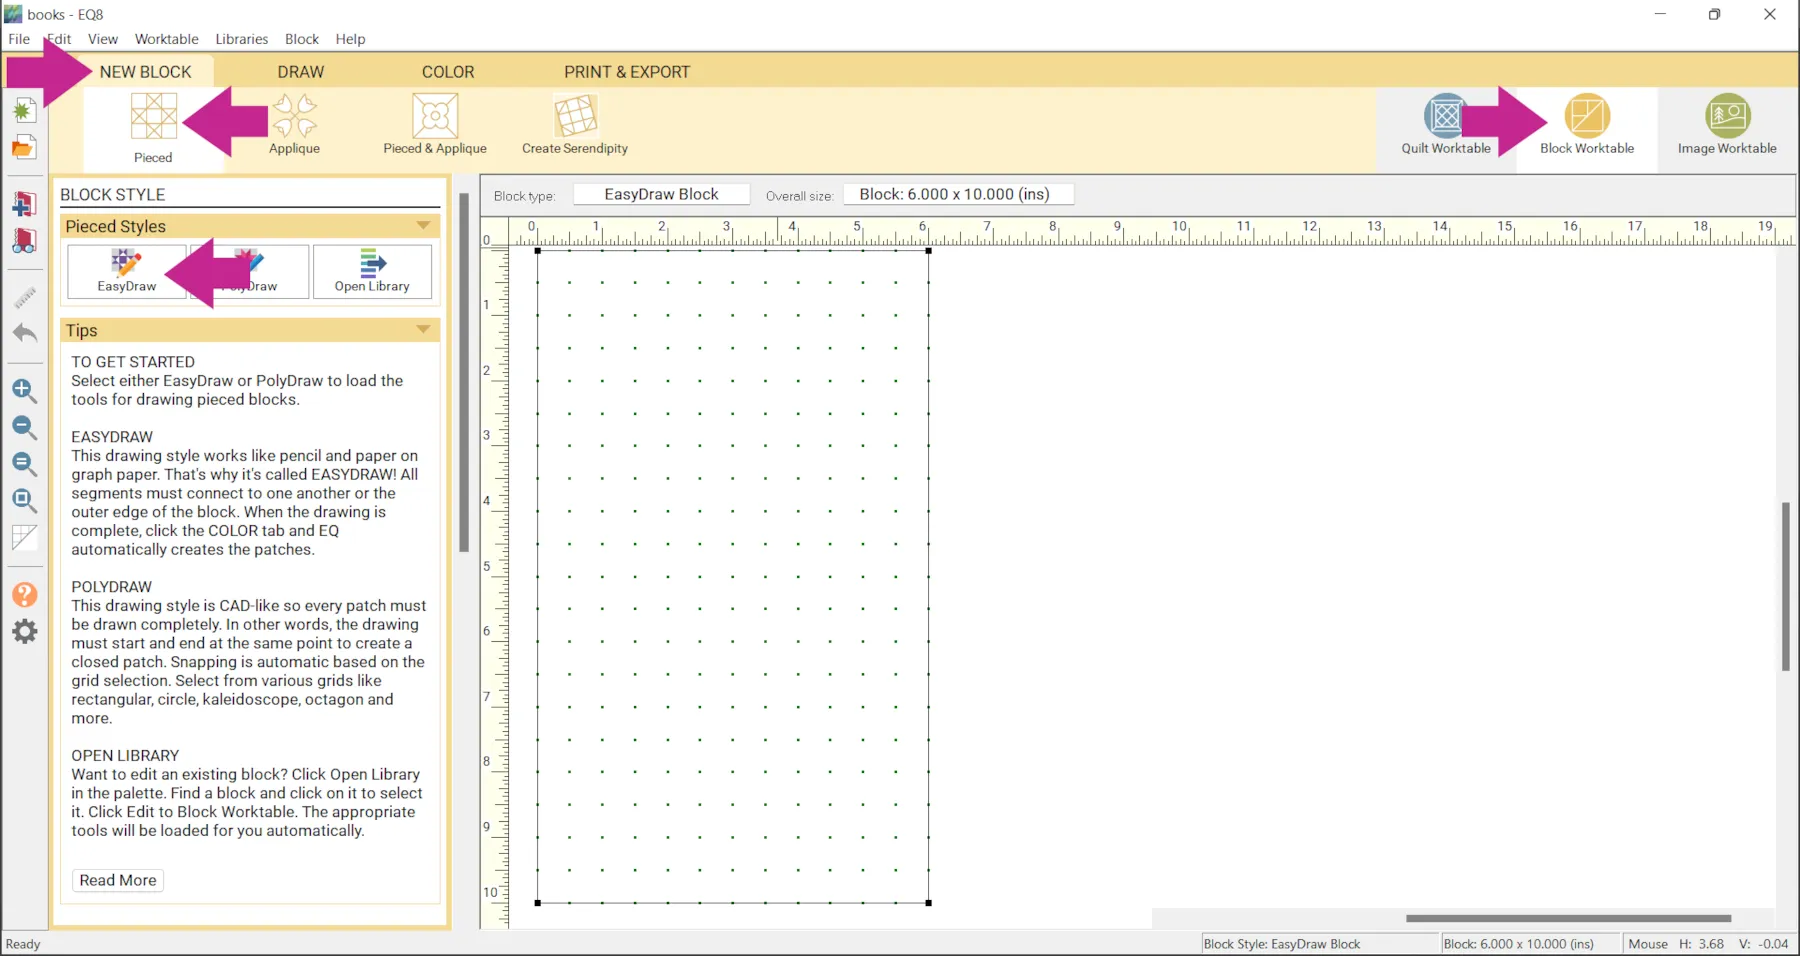
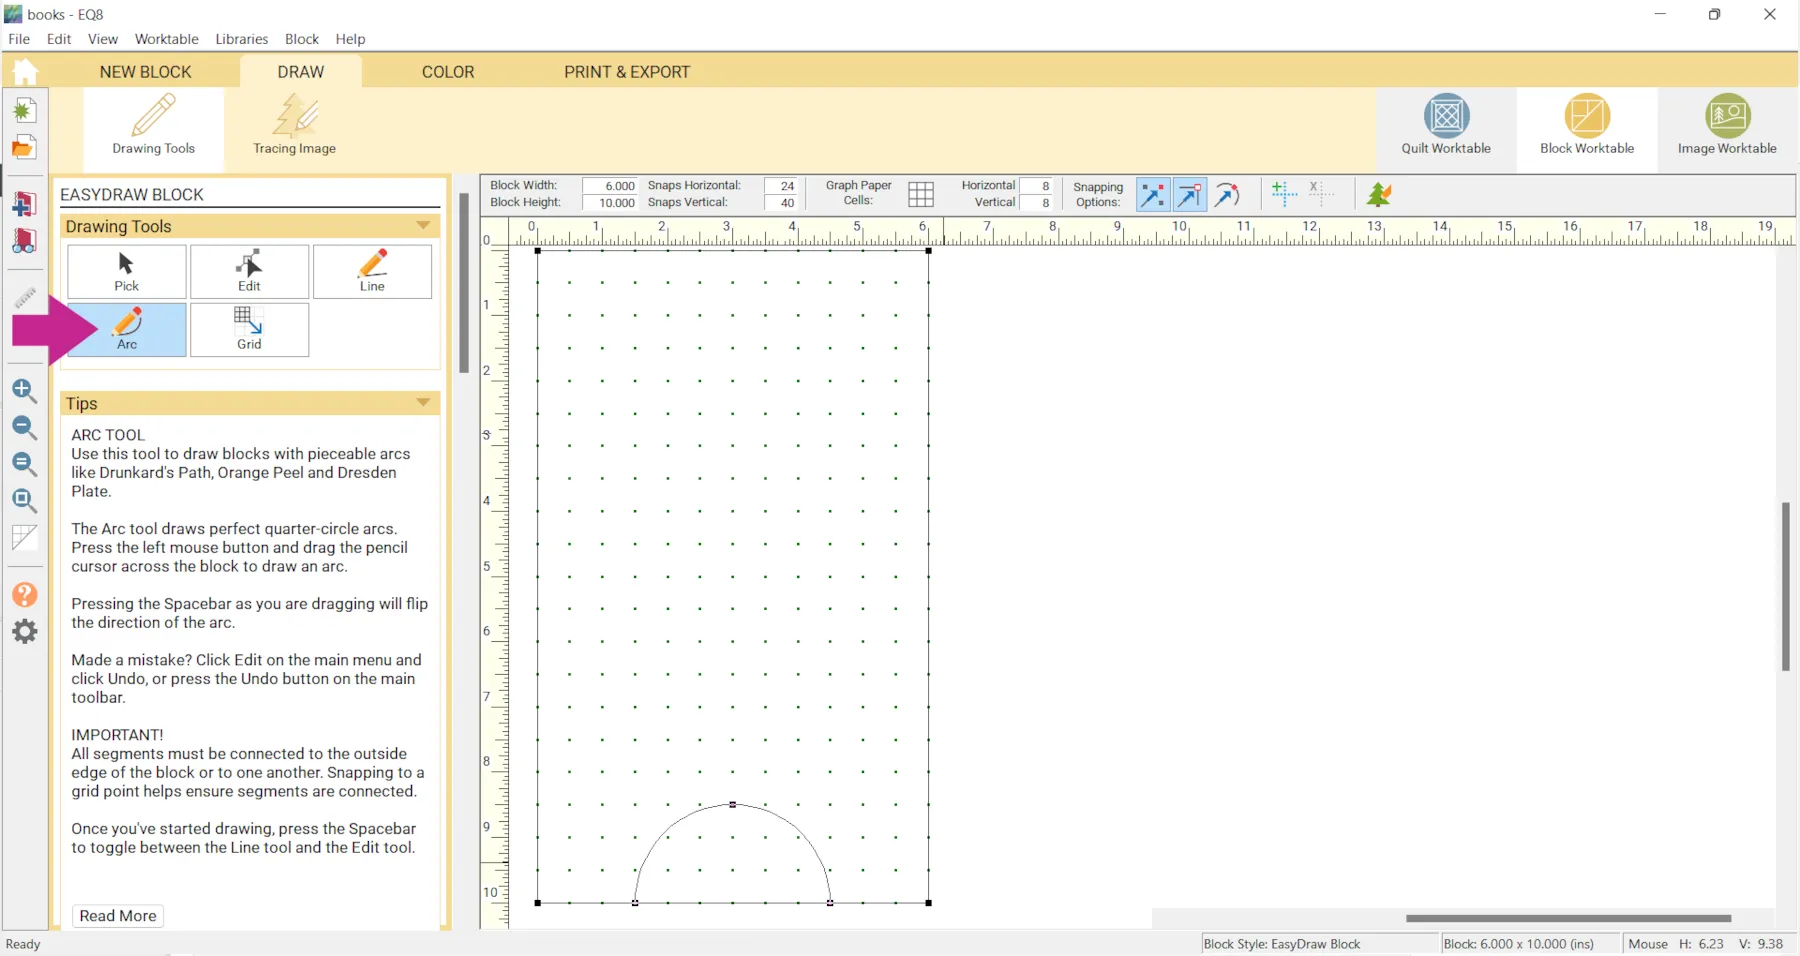
- Click Block Worktable > NEW BLOCK > Pieced > EasyDraw

- On the Precision Bar set the following…
Block Width: 6
Block Height: 10Snaps Horizontal: 24
Snaps Vertical: 40Snapping Options
Snap to Grid Points on Worktable: ON
Snap to Nodes of Drawing: ON

- Use the Arc tool to draw an arc from the bottom of the block at 4.5 inches to the middle of the block 8.5 inches down, as shown below.
- Draw another arc from the middle at 8.5 inches down to the bottom at 1.5 inches, as shown below.
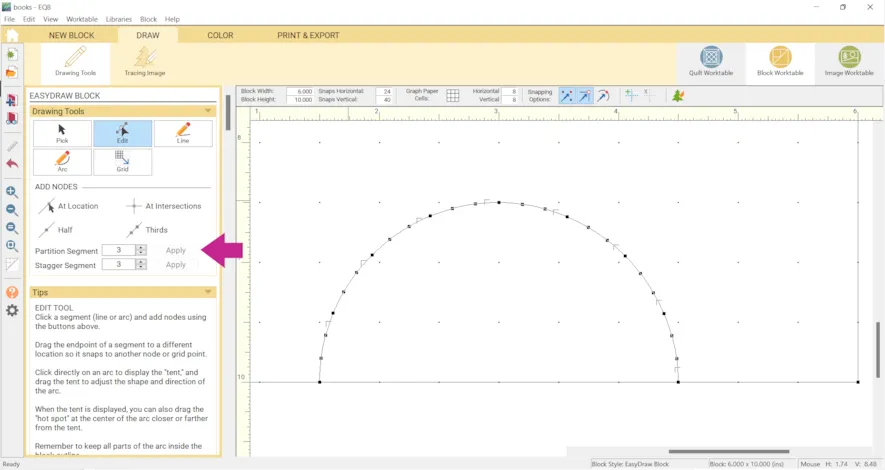
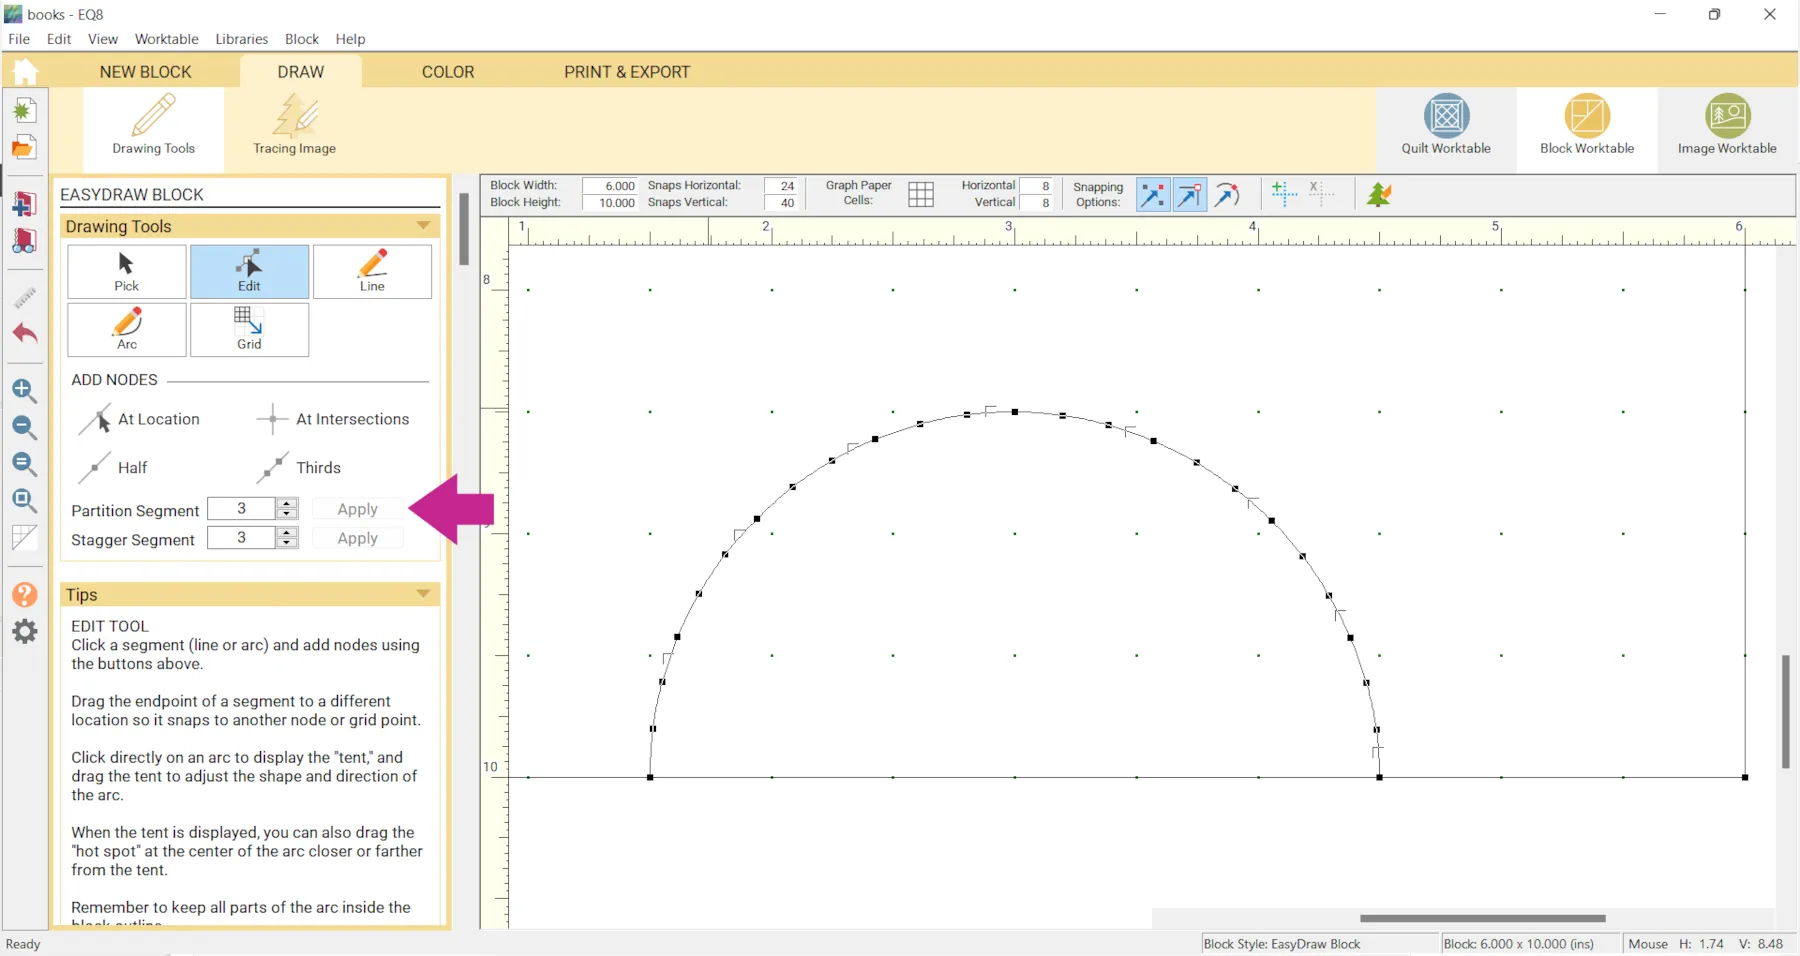
- Click the Edit tool and click on a arc.
- Under Partition Segment enter 4 and click the Apply button.
- Repeat for the other arc.
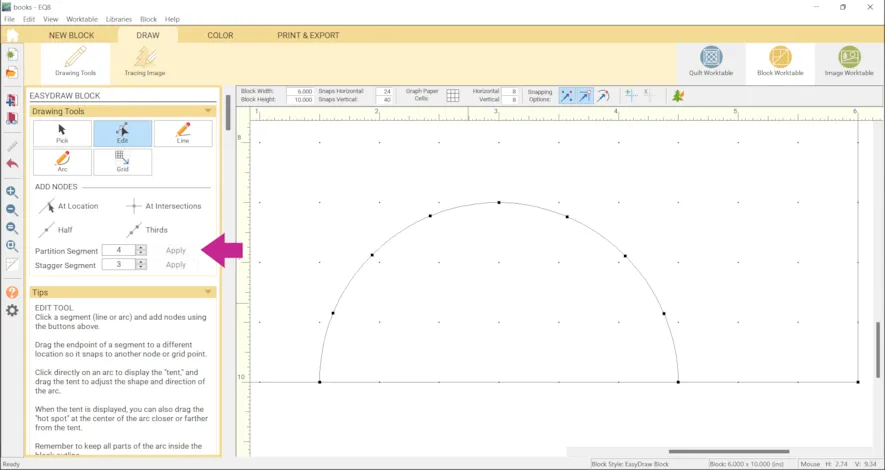
- Under Partition Segment enter 3 and click the Apply button.
- Repeat for the 7 other segments.
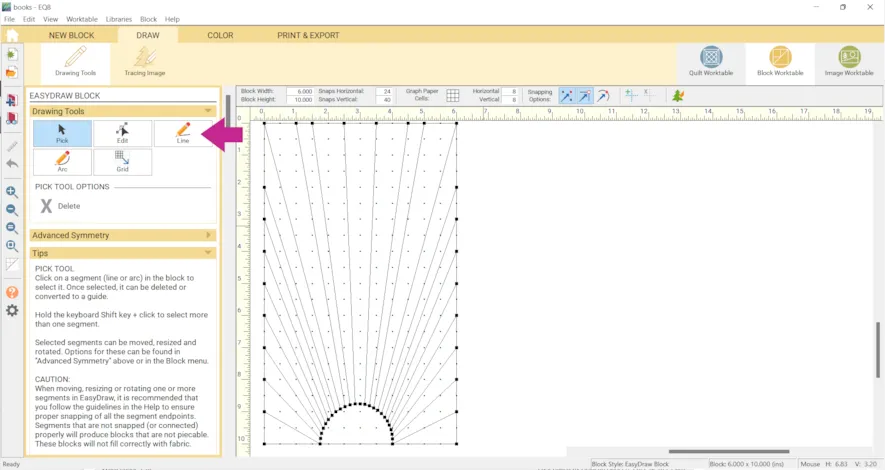
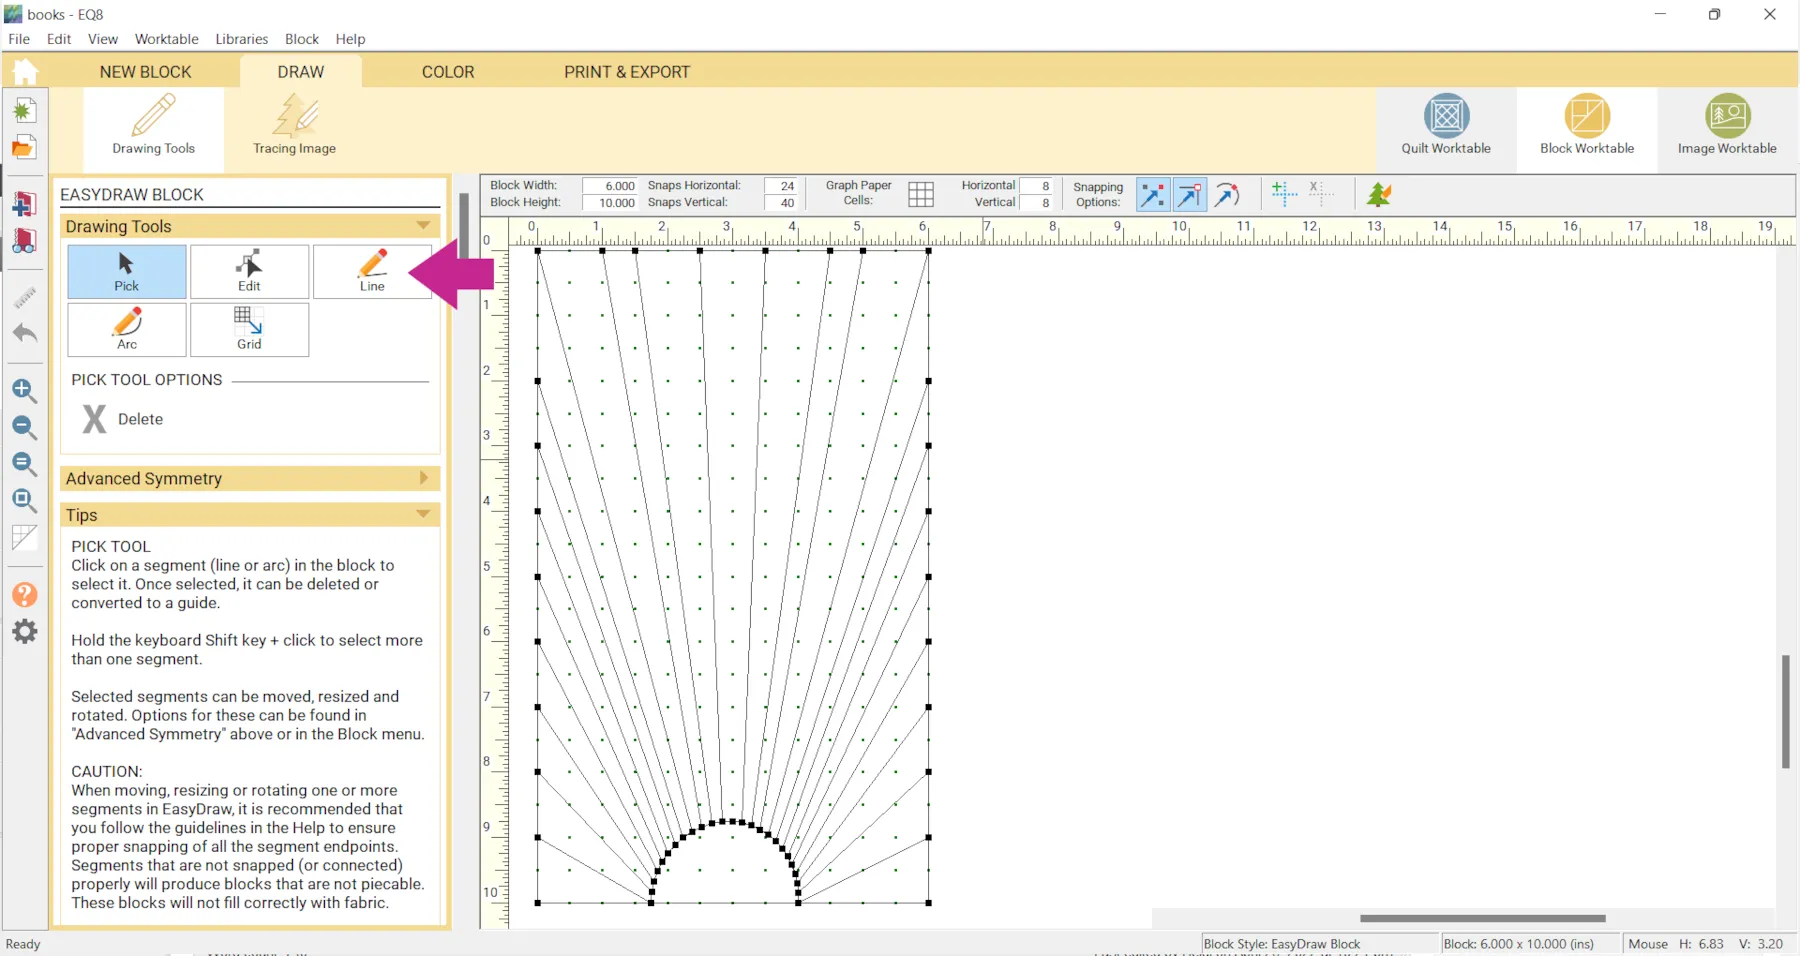
- Use the Line tool to connect the nodes to the edges of the block as shown.
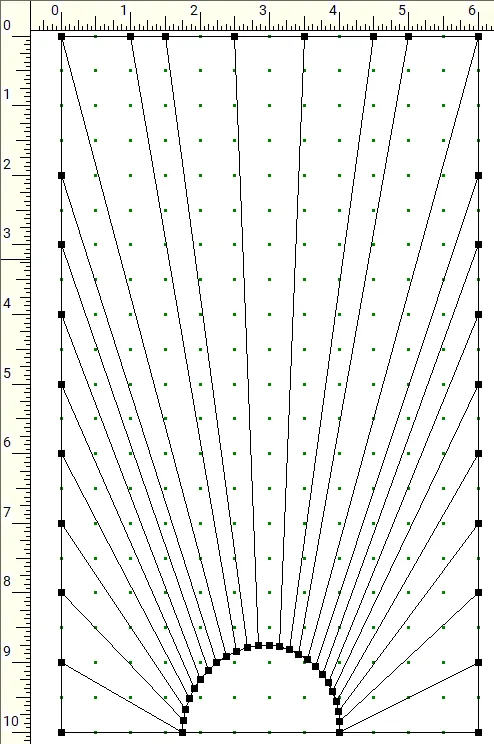
 Here is a closer view.
- Click Add to Project Sketchbook
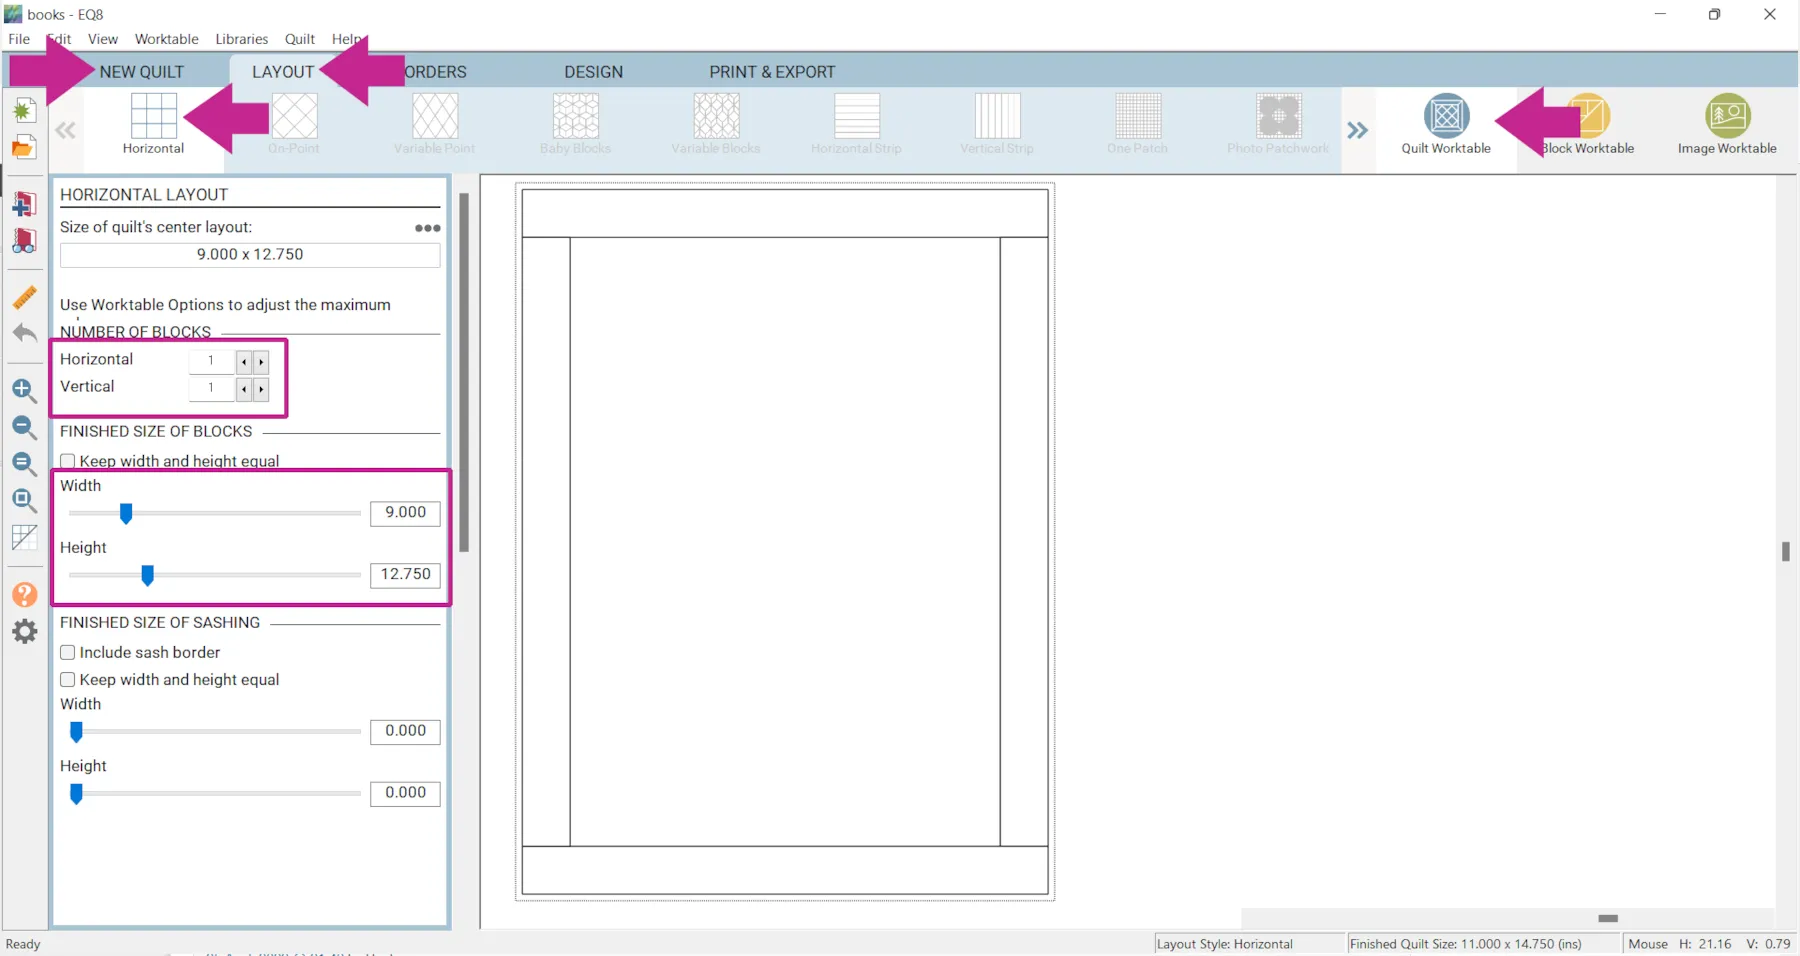
- Click Quilt Worktable > NEW QUILT > Horizontal
- Click the LAYOUT tab
- Under NUMBER OF BLOCKS enter:
Horizontal: 1
Vertical: 1Under FINISHED SIZE OF BLOCK enter:
Width: 9
Height: 12.75

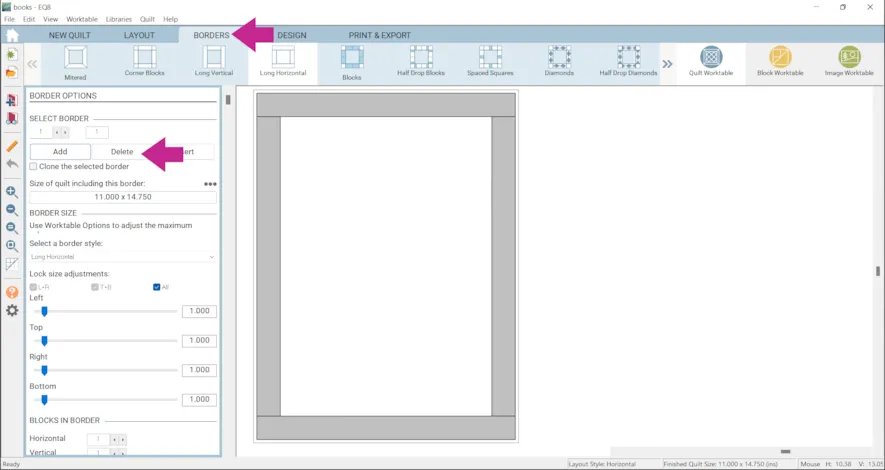
- Click the BORDERS tab
- Click the Delete button
- Click the DESIGN tab > Block Tools > Set Block
- Click on the block you drew and click to set it in the quilt.
- Click Fabric Tools and recolor to match the cover.

- If you’d like to add text, click the Layer 2 tab at the bottom of your screen
- Click Text Tools > Set Text and experiment with fonts and sizes.
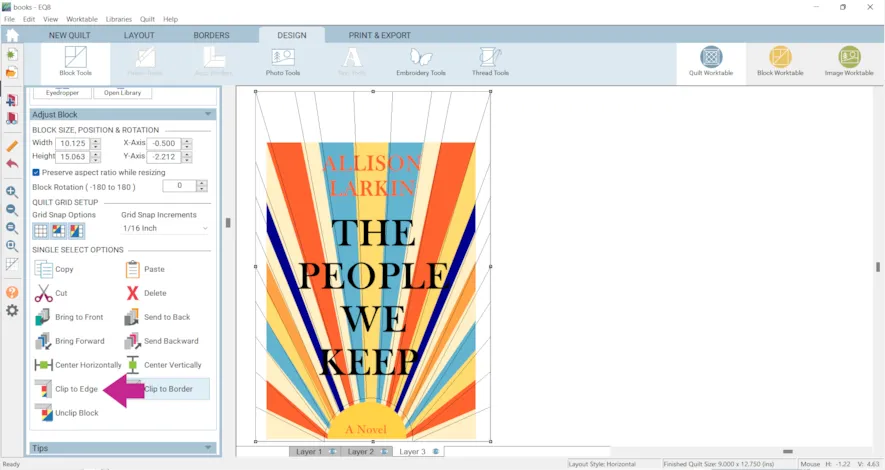
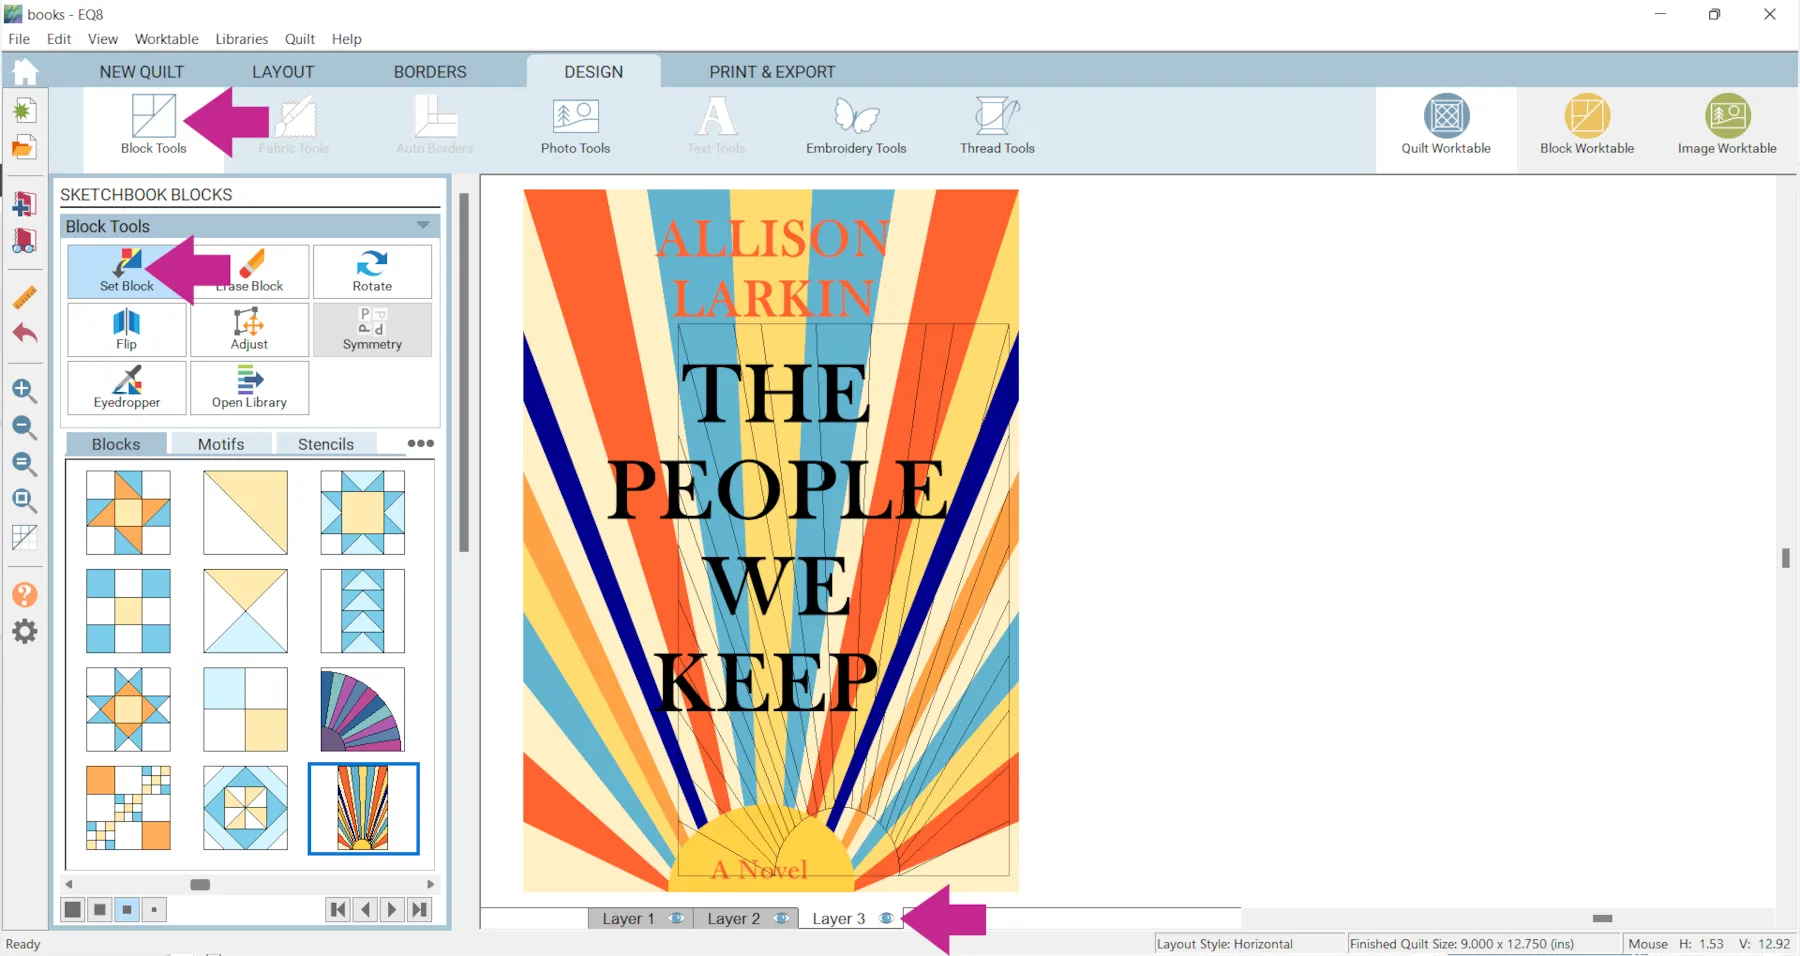
- Click Block Tools > Set Block
- Click Layer 3 at the bottom of your screen.
- Click on the block you drew and drag it onto the quilt.

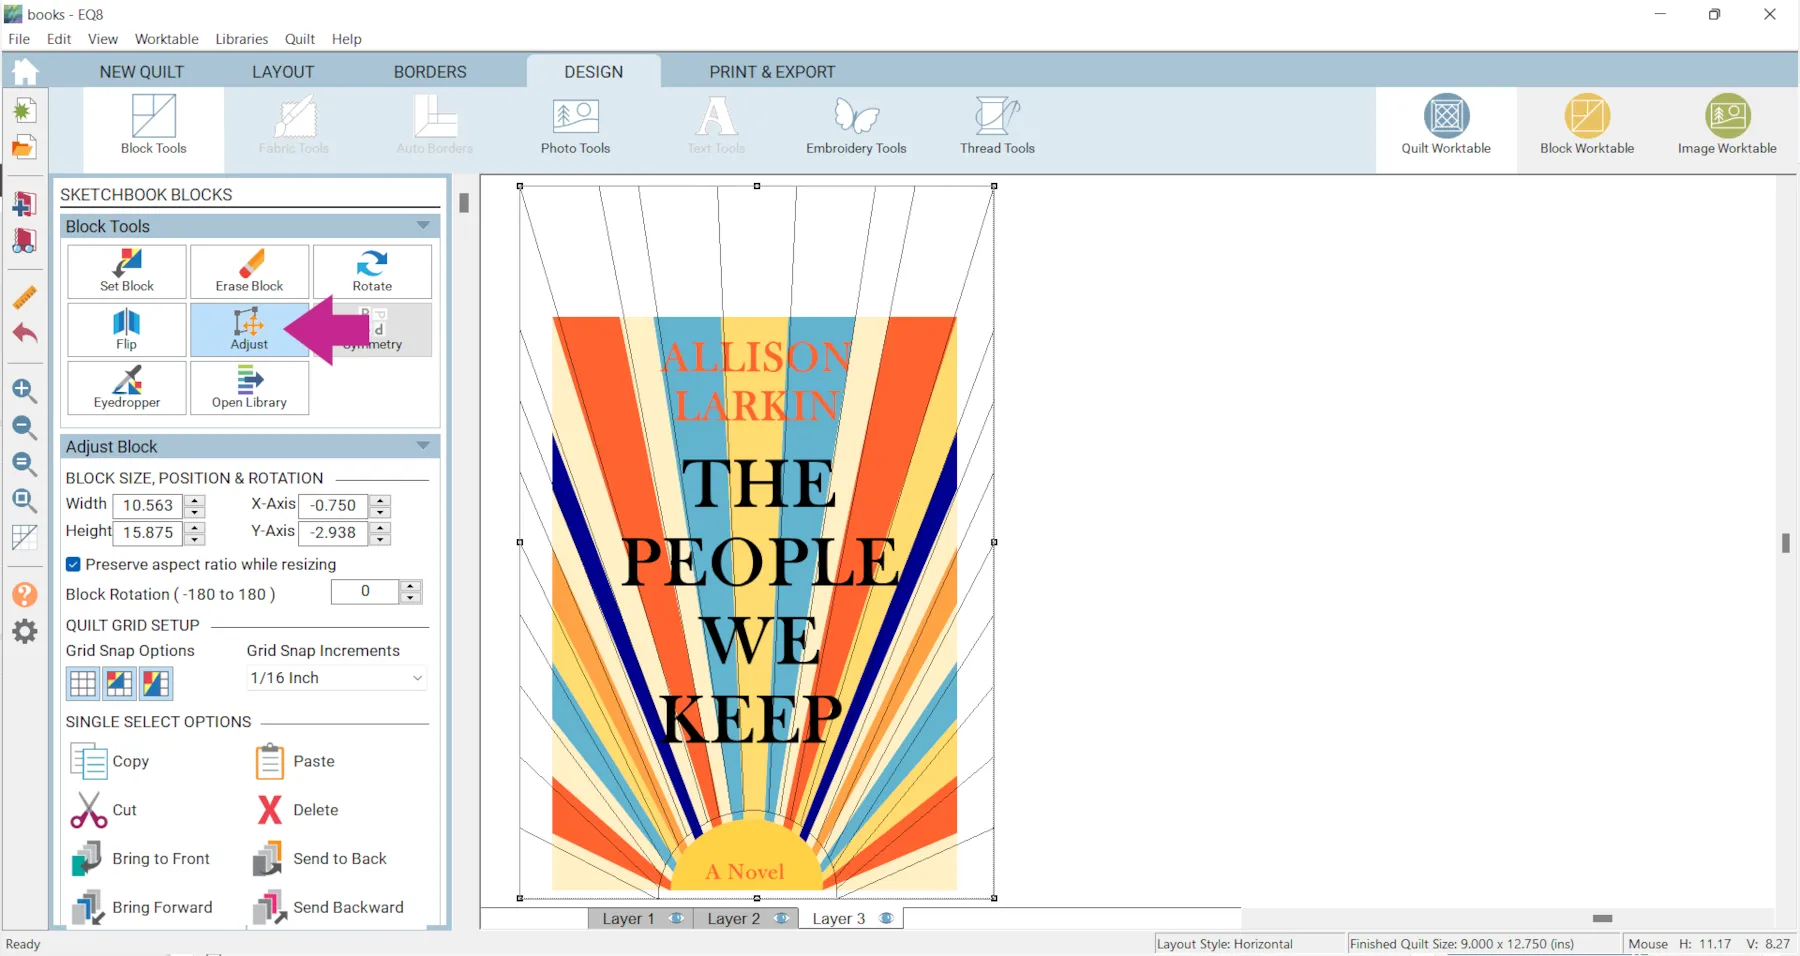
- Use the Adjust tool to make the stencil larger than the quilt.

- Click Clip to Edge
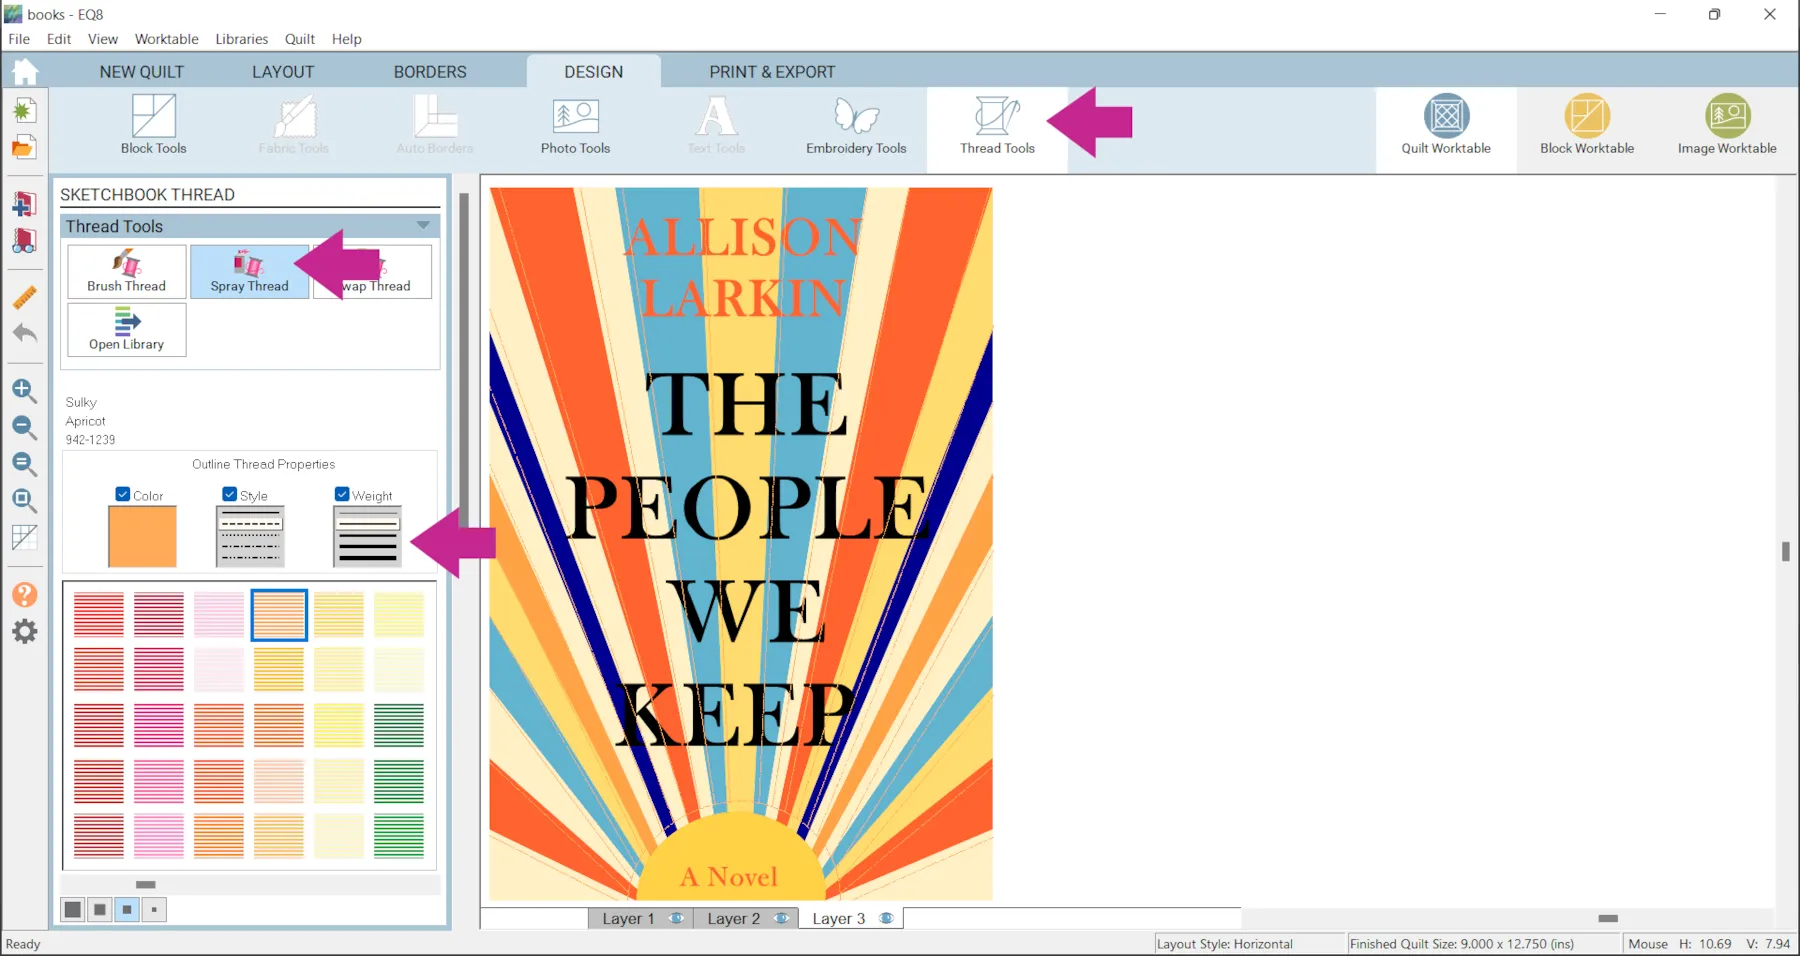
- Click Thread Tools > Spray Thread
- Choose the Color, Style and Weight of thread you would like and click on the stencil to change it.

- Click Add to Project Sketchbook when you’re done.
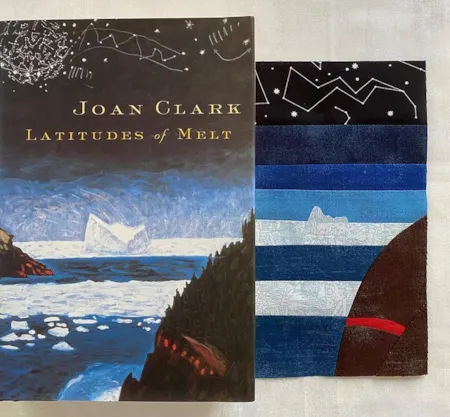
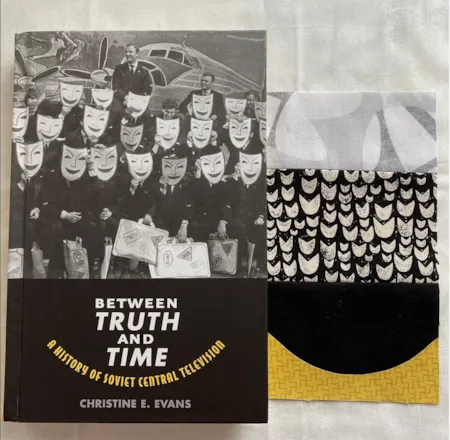
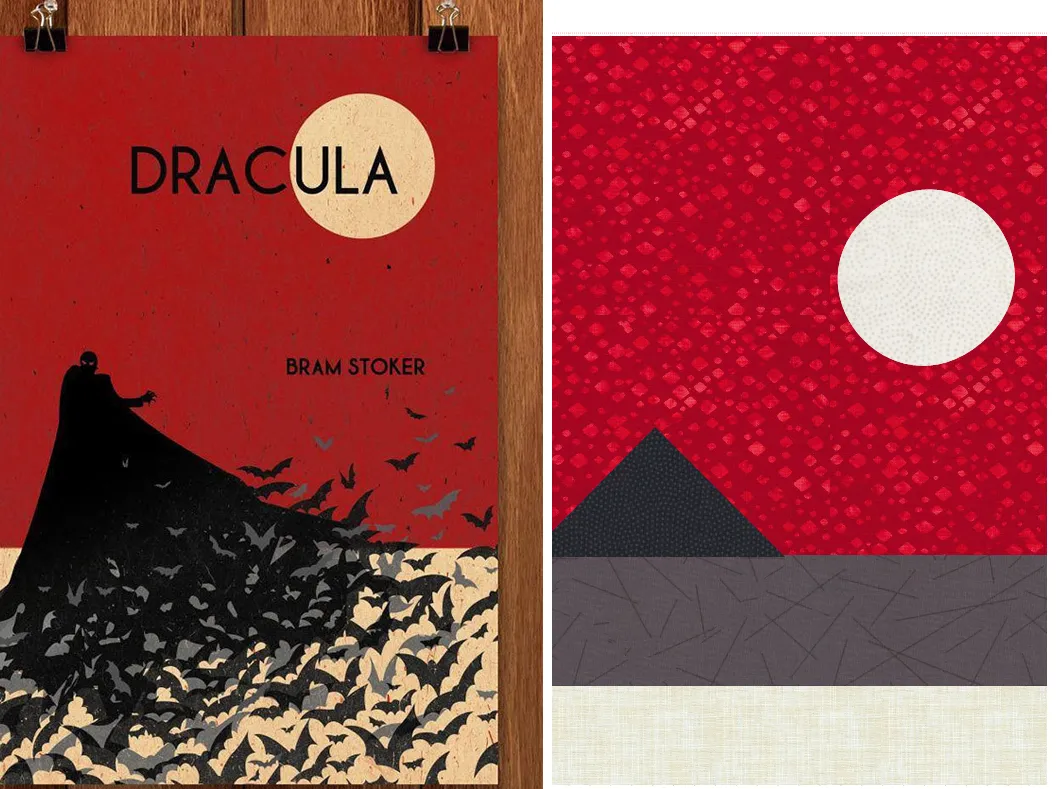
These examples are both literal copies of the book covers. You could design much more abstract if you’d like too. Here are a few more examples.


If you want to post images of your quilt, here is how to export the images.
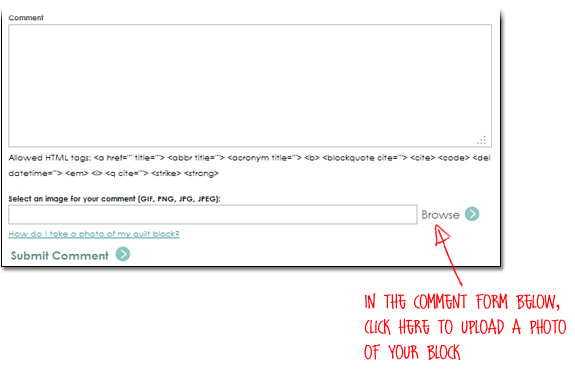
To post your image click to comment on this post.Fill in your info and then click Browse.
Go to: Documents\My EQ8\Images
I can’t wait to see what you’ve done! I hope you enjoyed the lesson!
If you have questions about the lesson feel free to post them below.
If you have questions about something else EQ related, please contact techsupport@electricquilt.com.
If you have suggestions for new Design & Discover lessons feel free to comment below or email Heidi@electricquilt.com.


