

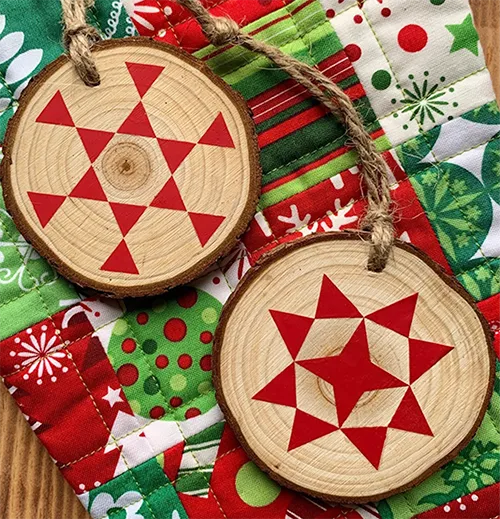
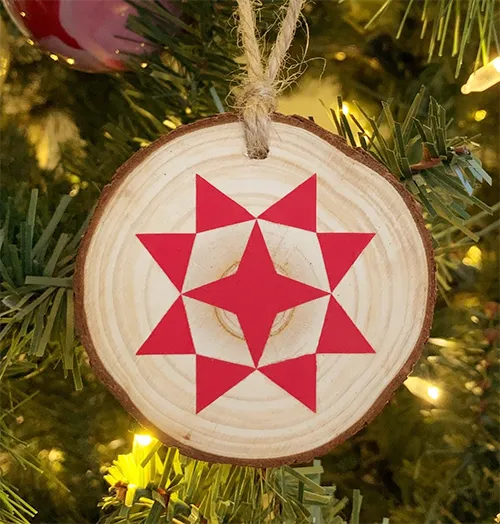
You can export SVG files for the 4000+ blocks in BlockBase+, which makes it easy to cut the fabric for your blocks using a digital cutting machine. But it also opens up a world of other crafty possibilities using these blocks! In this post, I’ll walk you through the basic steps of exporting an SVG file that you can use for an ornament. I cut the design from heat transfer vinyl (HTV) and applied it to a blank wood slice ornament from the craft store.
For more info on using BlockBase+ SVGs, visit our support site.
Find a Block
Look for a block in BlockBase+ that you’d like to use for your ornament. I’m using Block 3541 from 20 Wheels > 10 Intersecting Straight Lines.
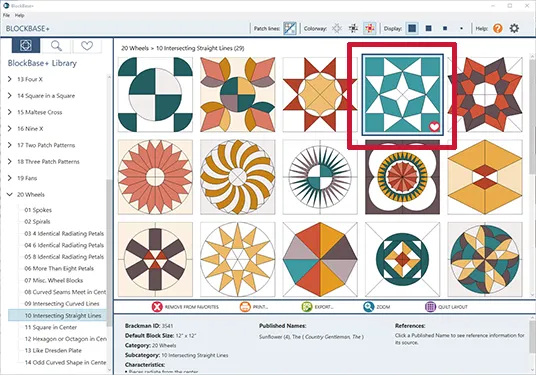
I added the block to my Favorites too (that’s why you see a little heart in the corner of the block). I suggest picking a fairly simple block for your ornament. Intricate blocks with lots of patches won’t cut well at such a small scale.
Export the SVG
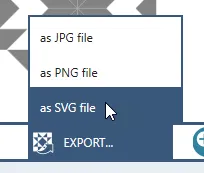
With the block selected, click Export on the Block Toolbar and choose as SVG file.
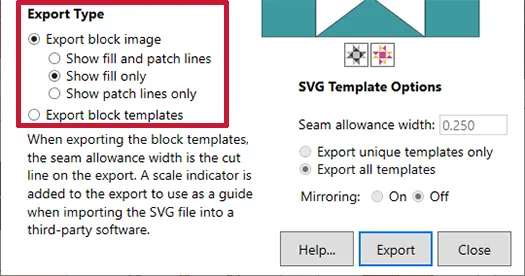
Because I plan to resize the block in my cutting software, I’m not concerned with the size that appears in the Export window. I left the Finished Block Size and the Resolution set to the defaults. Under Export Type, select Export block image and Show fill only.
Click Export and you’ll see a Save window. By default, BB+ saves exported files to the Documents > My BlockBase Plus > Images folder. The file will be named the Brackman ID number (you can type a new name, if you like). Click Save.
Use the SVG with Your Digital Cutter
Now that the SVG file has been created, it can be uploaded to a digital cutter’s software. I’m using a Cricut Maker and Cricut Design Space software. If you are using a different cutting machine and software, you’ll need to adjust accordingly.
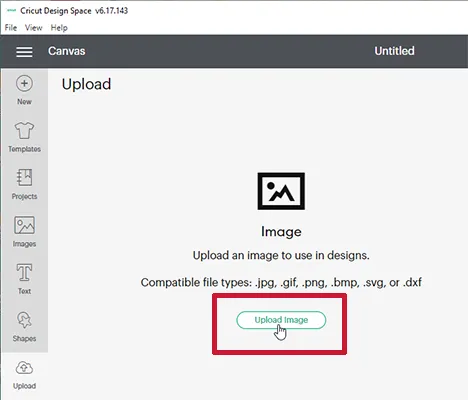
First, upload the SVG file.
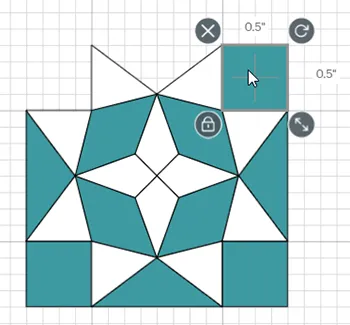
Then add it to the Canvas and make adjustments. I’ve measured my ornament and know that I want the design to be 2” wide, so I’ll change the size first.

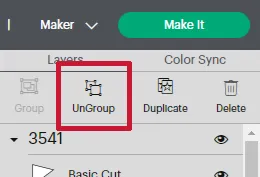
Looking at this block in Design Space, I’ve decided that I want the white patches in the block to be the shapes that I cut and transfer to the ornament. To get rid of the teal patches, I need to Ungroup the design.
Then I can select and delete each teal patch. Note: If you have trouble selecting some of the patches to delete them, you can use Send to Back to change the stacking order of the patches. Or select the patch’s layer in the palette on the right and then delete.
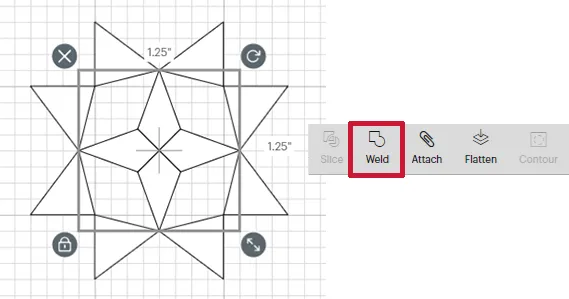
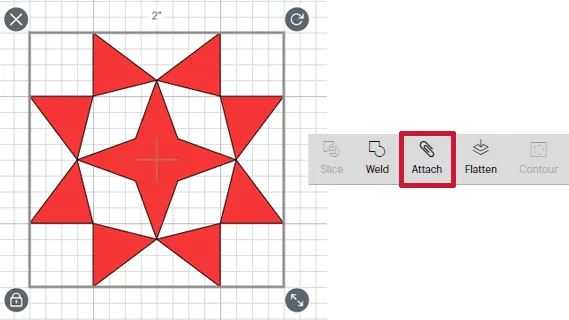
The four patches in the center are separate shapes and will have an X cut through the center. They will be easier to transfer to the ornament if they are one shape, so I selected all four patches and clicked Weld.
You can change the color of the shapes to the color of your vinyl, if you like. The last step before cutting is to select all the shapes and click Attach so the shapes stay in the current arrangement when placed on the cutting mat.
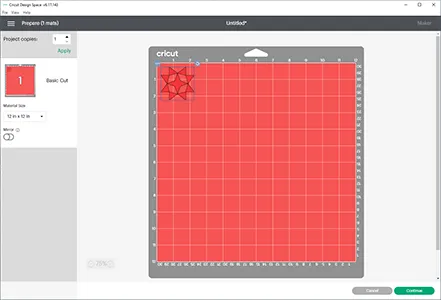
Click Make It and proceed through the steps to select the cutting material, load the mat, and cut!
Note: I’m using Heat Transfer Vinyl (HTV) for this project. Normally, when cutting designs from HTV, you want to make sure you choose Mirror because you are cutting the design on the wrong side of the material. Because this block is symmetrical, I don’t need to worry about mirroring. I think you could use regular vinyl for this project too. But red HTV is what I had in my stash!
After cutting, follow the HTV directions to apply it to the wood slice ornament.
With over 4,000 blocks to choose from in BlockBase+, you’ll be able to make a whole tree of ornaments!
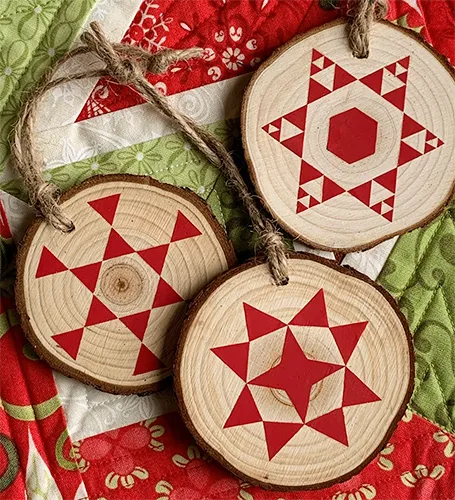
Brackman ID numbers for the ornaments above:
Left: 262, Upper-Right: 266.5, Lower-Right: 3541


12-15-2021
11:48 am
thank you for sharing – I love the idea of cutting the block-pieces in the Cricut ! Going to try it at once.
Jayni
12-15-2021
12:16 pm
Just one more non- fiber, non- quilting use for EQ. Happy Holidays to all.
12-15-2021
1:44 pm
What is the HTV applied to? Is that a wooden background on the ornament? Or fabric circle?
12-15-2021
2:04 pm
It’s a blank wood slice ornament from the craft store. So the HTV is adhered directly to the wood. I think regular vinyl would work for this project too, but I had red HTV in my vinyl stash, so that’s what I used.
12-15-2021
9:45 pm
I love this idea! I am always looking for new ways to use any of my software programs. I will be using a Silhouette Czmeo for my project. Thank you! I do love the Block Base Plus!
12-16-2021
4:56 pm
Is this option to export as an svg available on EQ8? I don’t see it in the options. Thanks.
12-17-2021
8:45 am
SVG export is only available in BlockBase+.
There are some work-arounds for EQ8. You can find more info on our support site: https://support.electricquilt.com/articles_categories/export-share/electric-quilt-8/
12-23-2021
4:52 am
Thank you. I love to see applications between EQ and Cricut!