Sometimes a simple easy draw block is all you need to create something amazing. For this lesson, we are going to draw a big juicy strawberry and then edit our drawing to create interesting and fun variations. Blocks don’t have to be square, this block is a rectangle shape. You can then use these techniques to add some pizzazz to a variety of blocks. These designs will be a great way to use your stash or a pile of scraps.
Strawberry Block
Skillset: Beginner
Block Size: 10″ x 12″ finished
Skill Builders:
- Creating an easy draw block
- Editing Blocks to create block variations
Design Time!
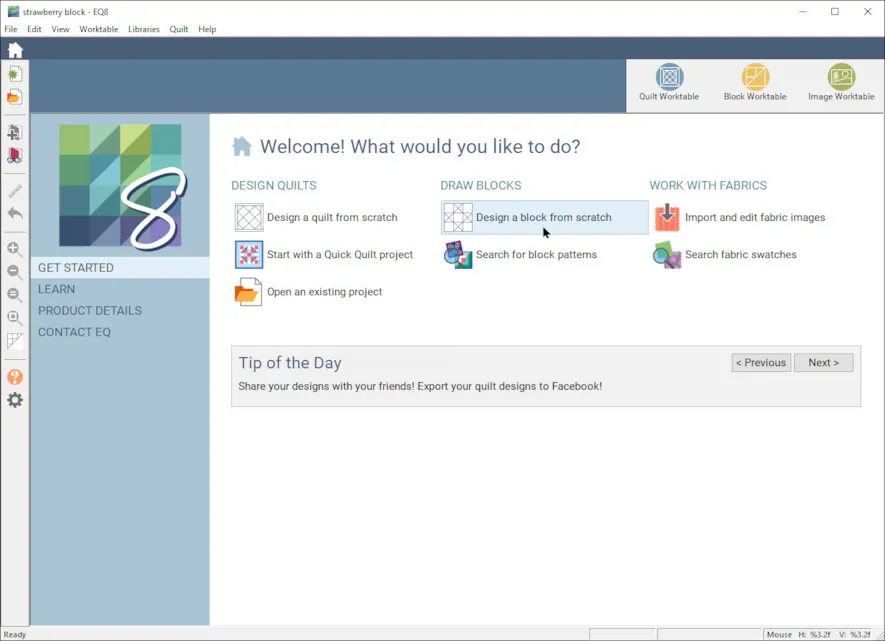
- Open EQ8.
- Let’s name the Project. The project name appears at the top left of the EQ8 Window. Right now the project says Untitled – EQ8.
- On the left side toolbar, click the New project button.

- On the Create a new project tab, type in the project name field Strawberry.
- Click OK. The box will close. Notice the project name Untitled has been replaced with Strawberry.
- Under DRAW BLOCKS, selectDesign a Block from Scratch
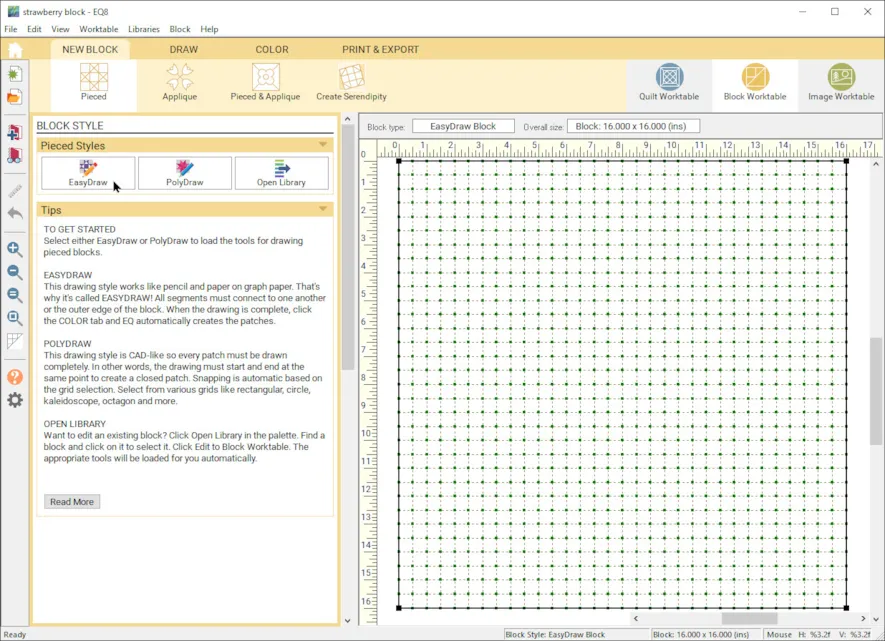
- Select NEW BLOCK, Pieced, Easy Draw.

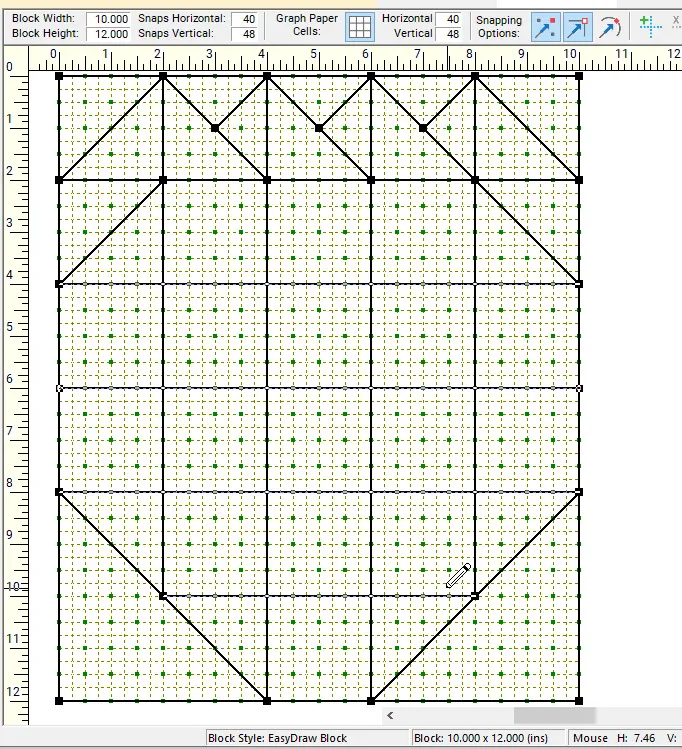
- In the precision bar, enter Block Width 10, Block Height 12
Snaps Horizontal 40, Snaps Vertical 48
Graph paper cells Horizontal 40, Vertical 48
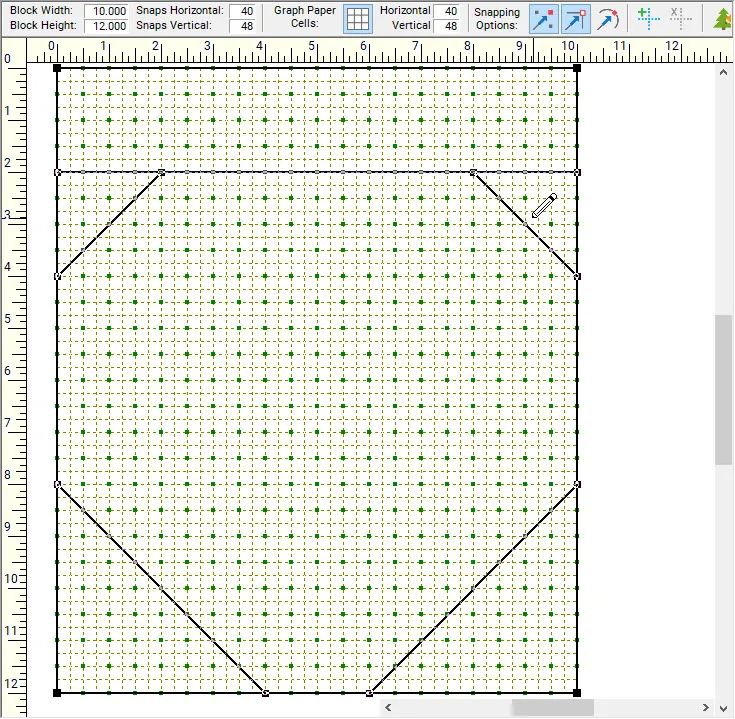
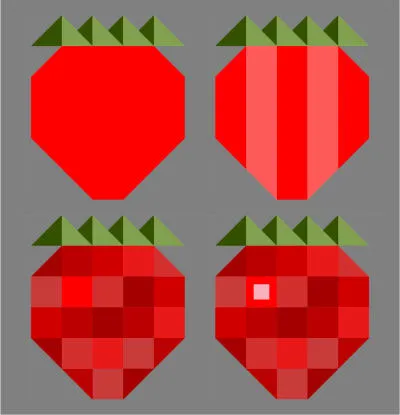
- Now we are going to draw the parts of the strawberry. Use the following coordinates (Horizontal, Vertical) and the diagram above to guide you. Under DRAW, Drawing Tools: Use the Line tool and draw a horizontal line down 2″ from the top. (0″, 2″) to (10″, 2″). In the top left corner, draw a diagonal line to create a 2″ half square triangle (HST), (0″, 4″) over to (2″, 2″). In the top right corner, draw a diagonal line to create a 2″ HST (8″, 2″) to (10″, 4″). In the bottom left corner, draw a diagonal line to create a 4″ HST (0″, 8″) to (4″, 12″). In the bottom right corner, draw a diagonal line to create a 4″ HST, (6″, 12″) to (10″, 8″).
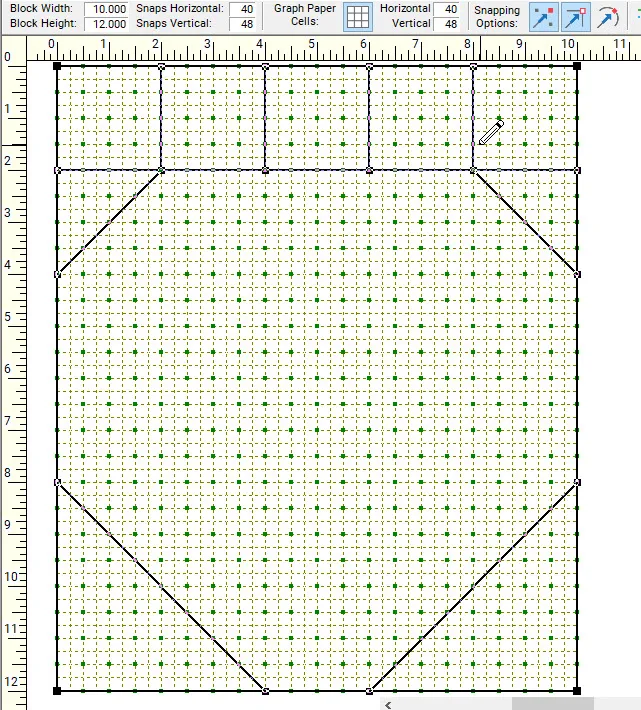
- Lets draw the top greenery in a few steps. For the first step, section off the top into 2″ squares.
- In the first square, draw a diagonal line from the bottom left up to the top right. For the next four squares, draw a diagonal line from the top left down to the bottom right. Refer to diagrams as needed.
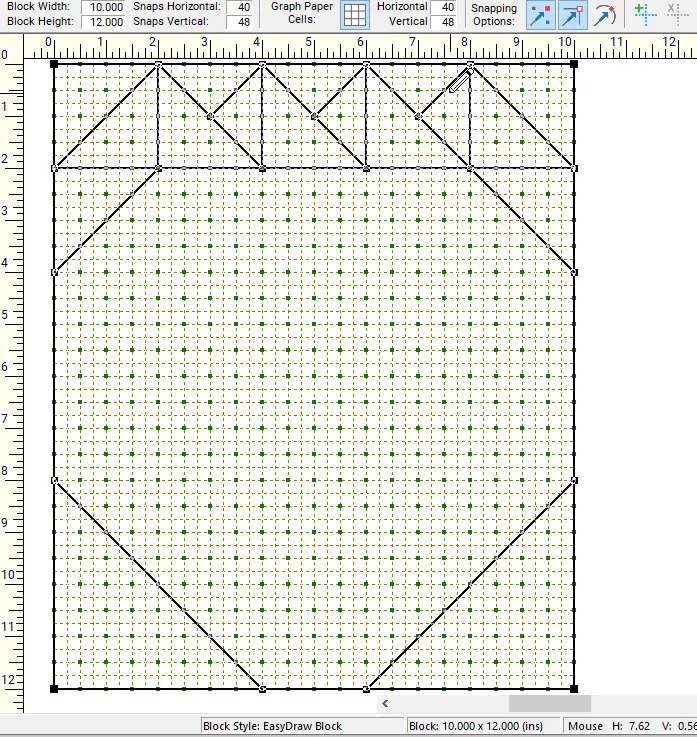
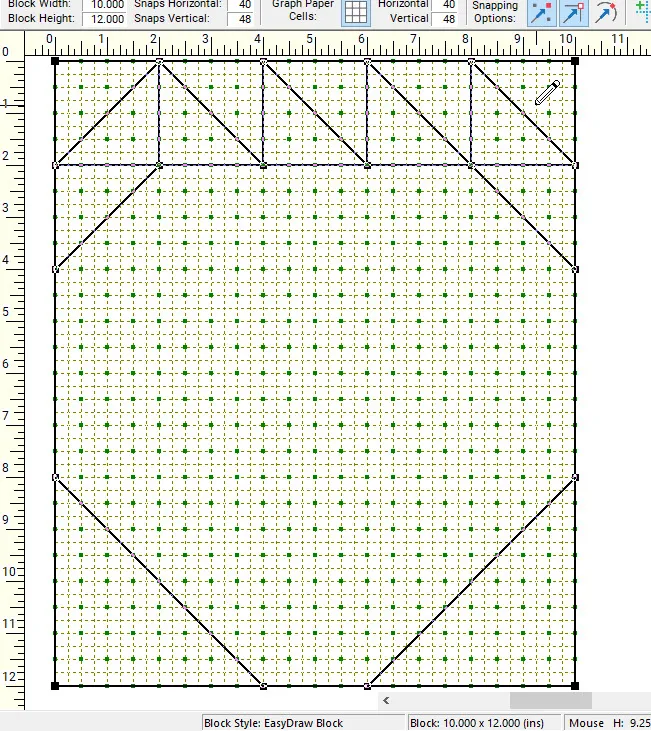
- Finally, in the middle three squares, draw a small diagonal from the center up to the right creating two quarter squares.
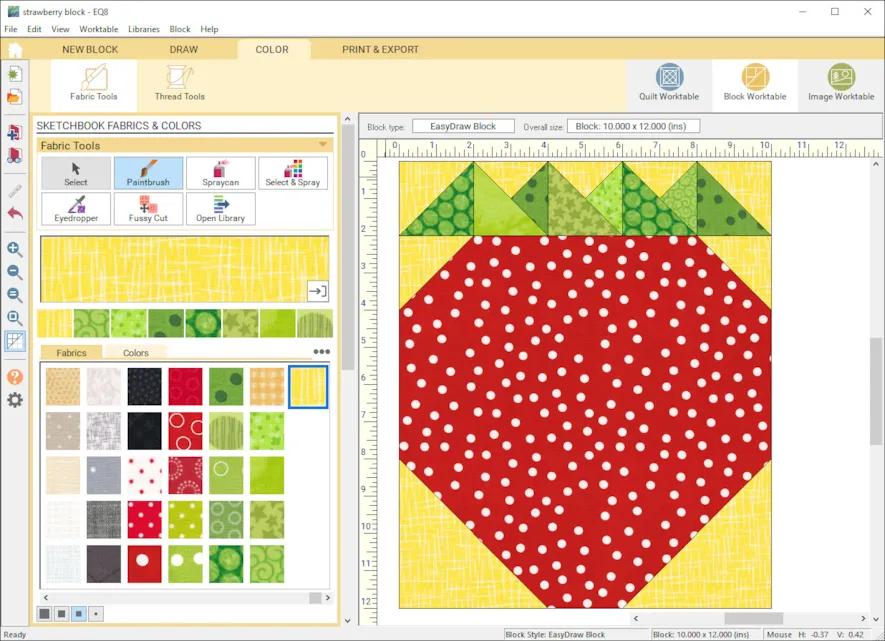
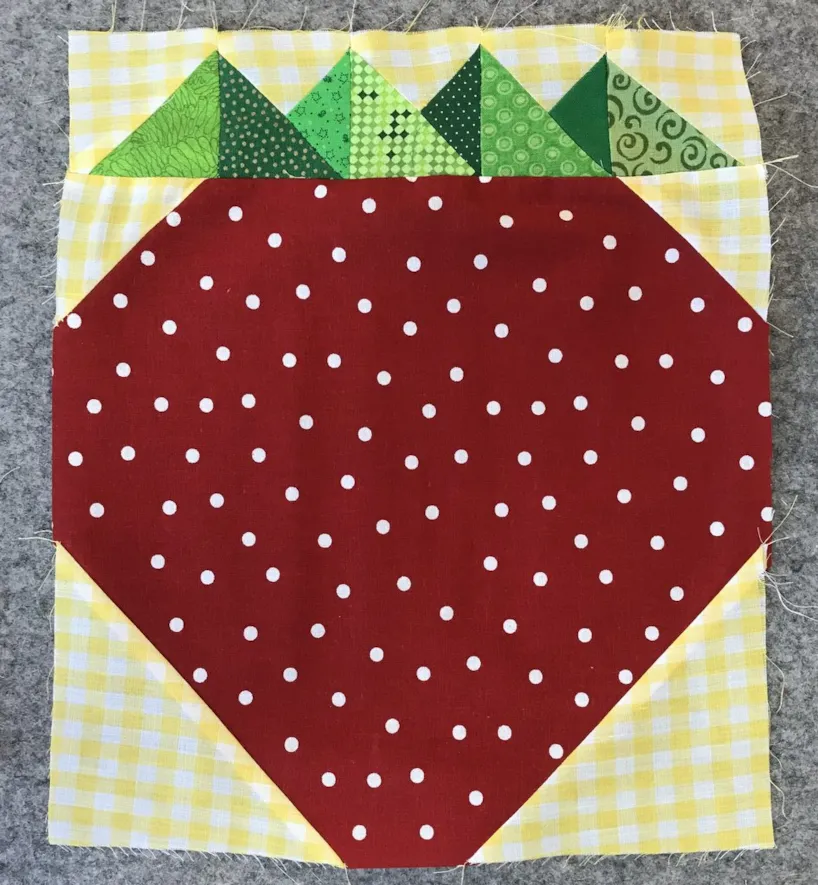
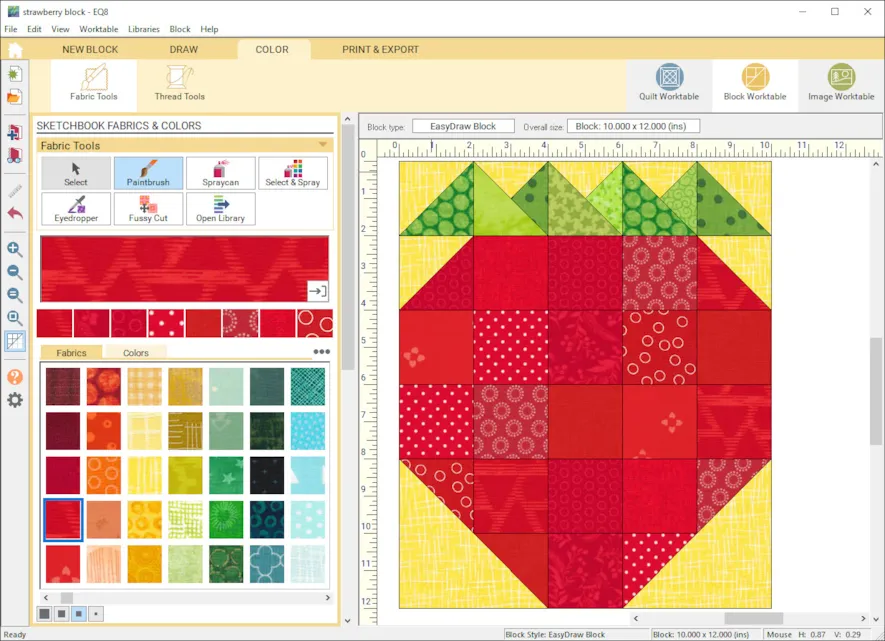
- Select the COLOR tab and use the Drawing tools to color in your strawberry. When you have it colored to your liking, Add to the Sketchbook. Your first block is finished and ready to drop into a quilt. i picked a nice red polkadot to mimic the strawberry seeds. This would cut out and stitch out in a hurry with this large central shape and the top greenery is perfect to make with your green scraps.
- Lets continue to edit this block to add a little more versatility to it in terms of fabrics and colors. Make sure you have added the first block version to your sketchbook.
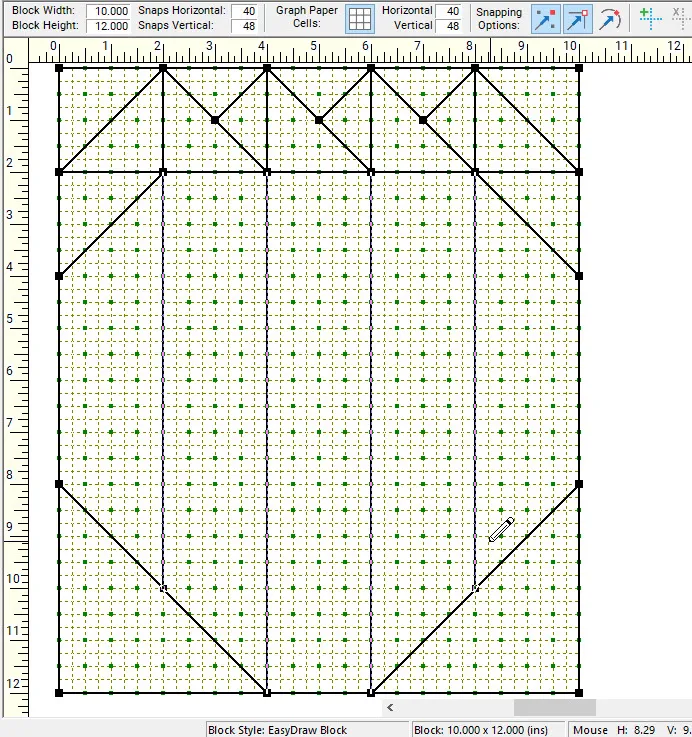
- Go back and select the DRAW tab. Under DRAWING TOOLS, use the line tool in the center of the strawberry to draw in 2″ vertical strips.
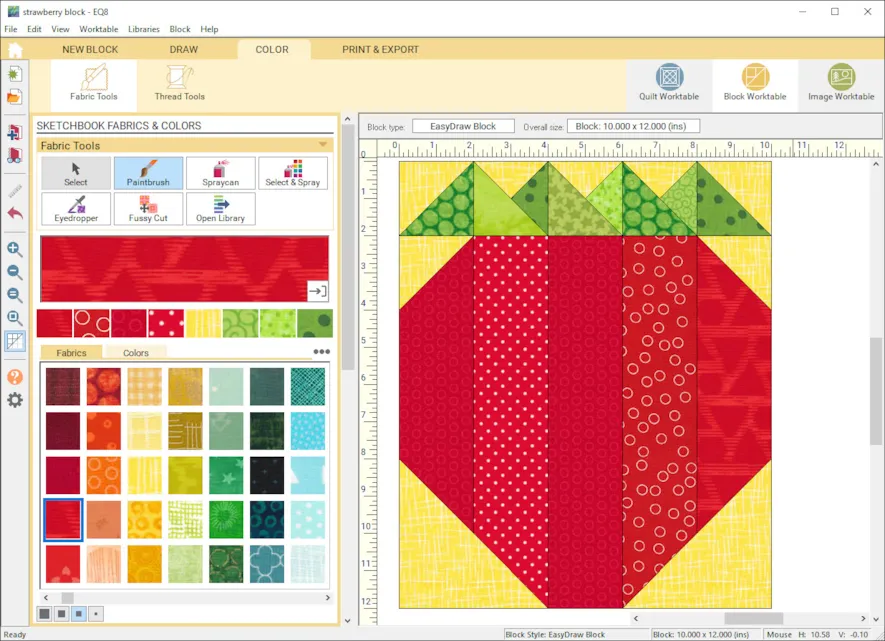
- Select the COLOR tab and use the Drawing tools to color in your strippy strawberry. When you have it colored to your liking, Add to the Sketchbook. And that quickly you have a nice variation of the block that you can use with jelly roll or other 2 1/2″ unfinished strips from your stash.
- Let’s edit this block ONE MORE TIME! Make sure you added the last block to your sketchbook!
- Go back and select the DRAW tab. Under DRAWING TOOLS, use the line tool in the center of the strawberry to draw in 2″ horizontal strips to create squares and half squares.
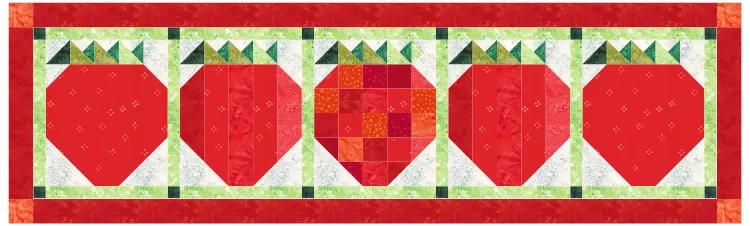
- Select the COLOR tab and use the Drawing tools to color in your squared strawberry. When you have it colored to your liking, Add to the Sketchbook. You have add another variation that uses mini charm squares or 2 1/2″ unfinished squares in your block. A great way to use up all those red scraps and stash.
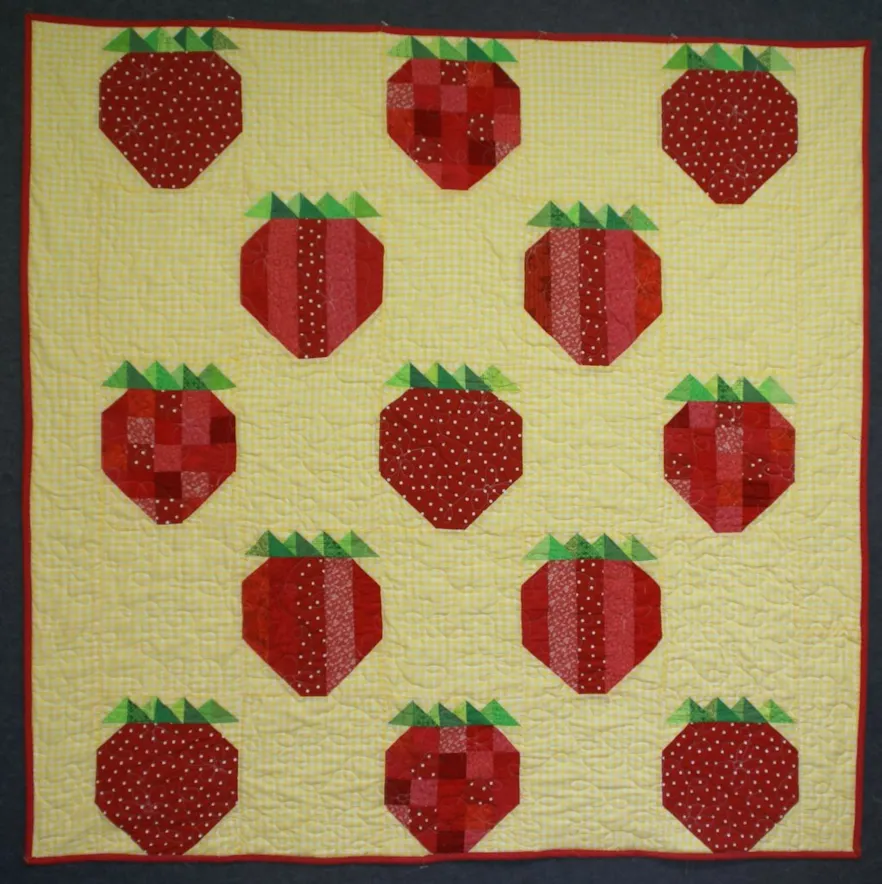
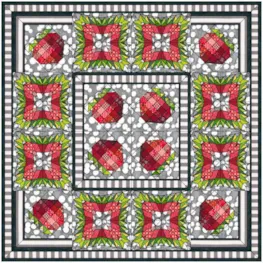
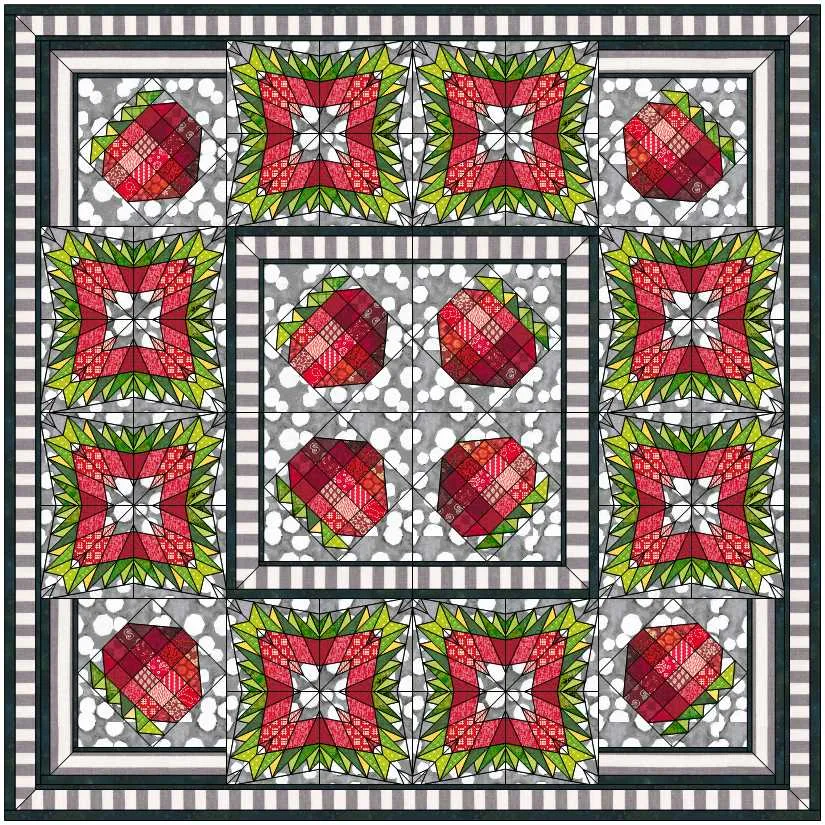
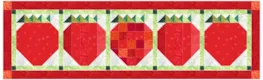
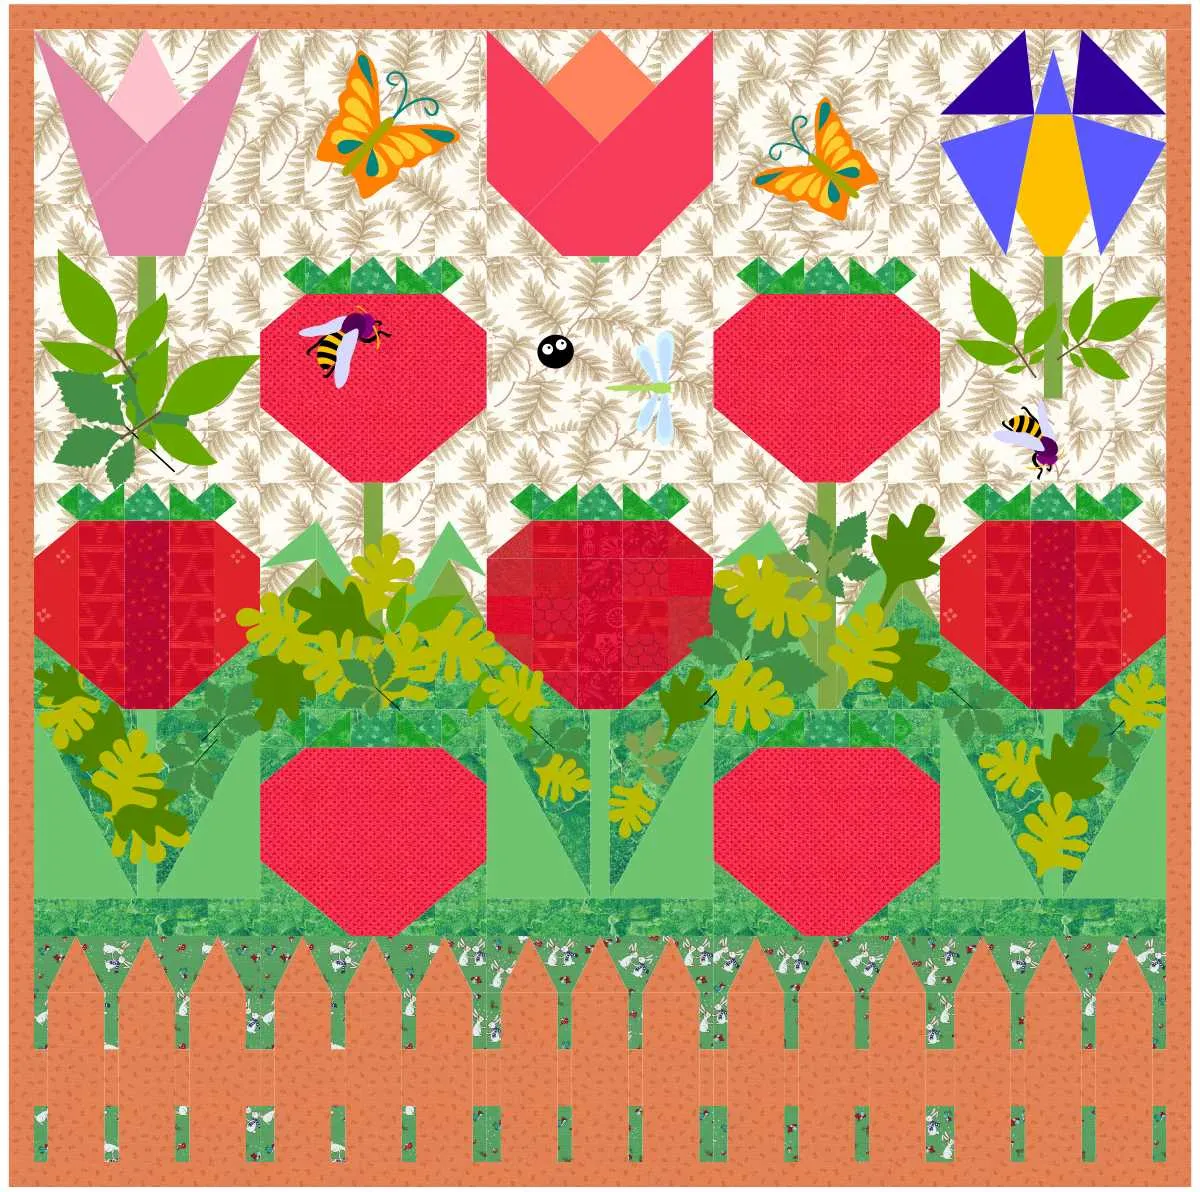
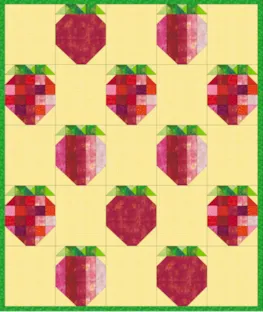
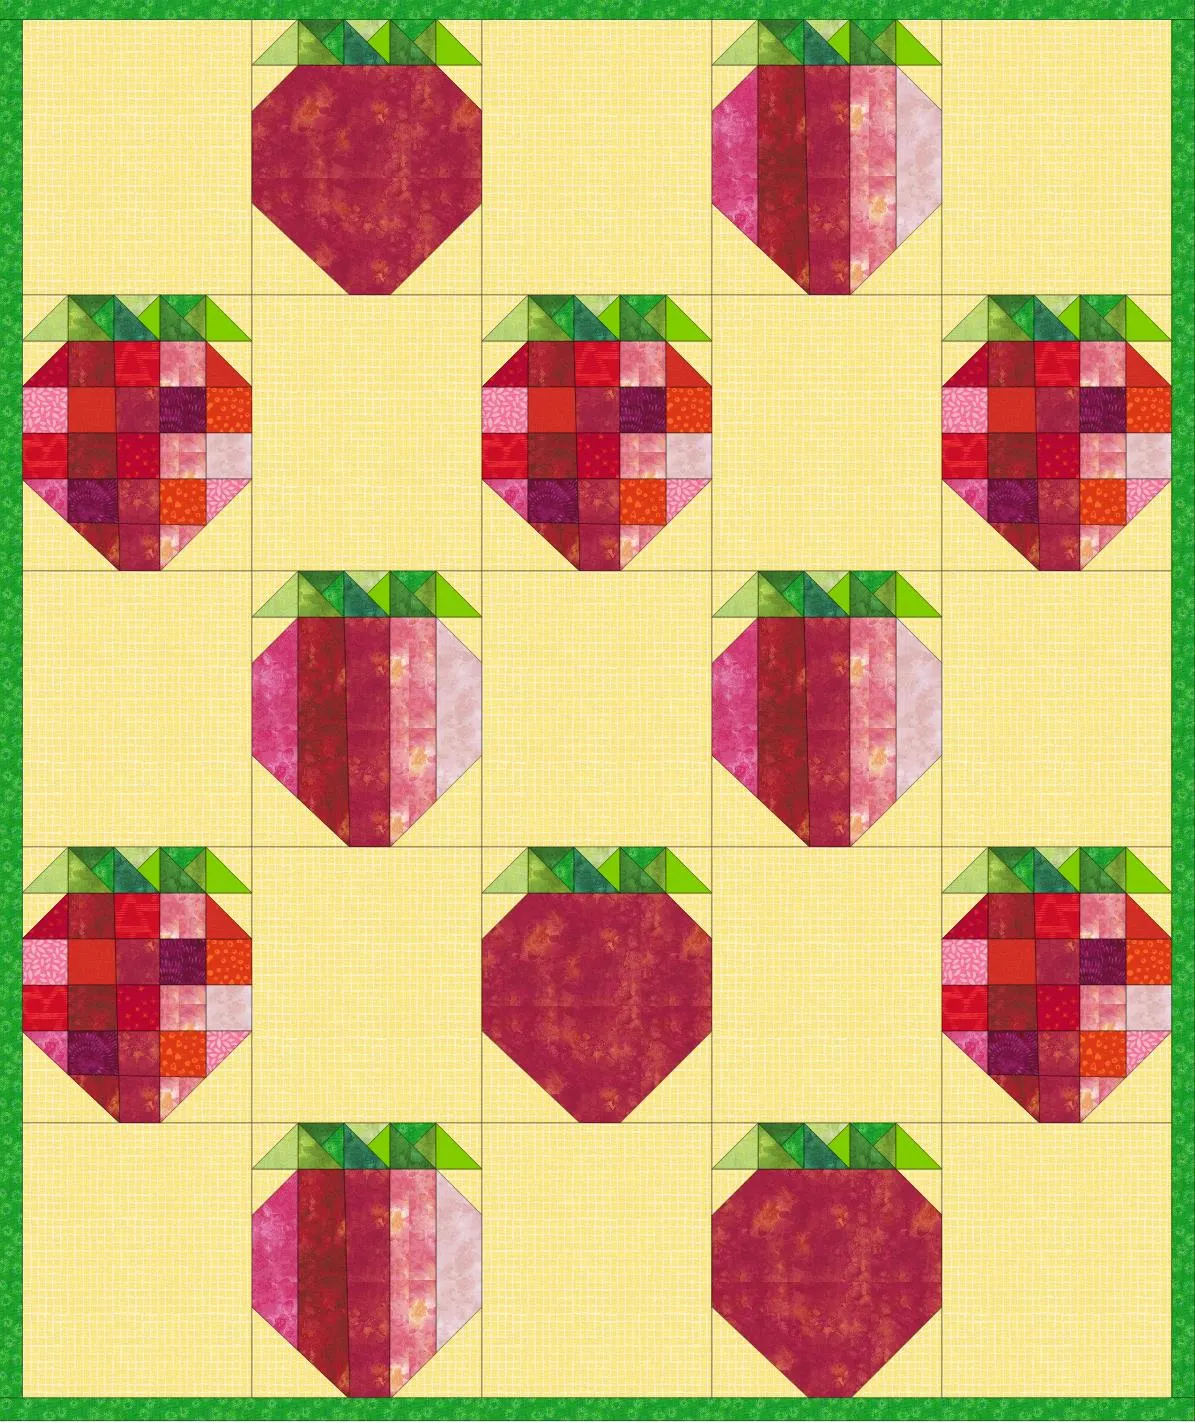
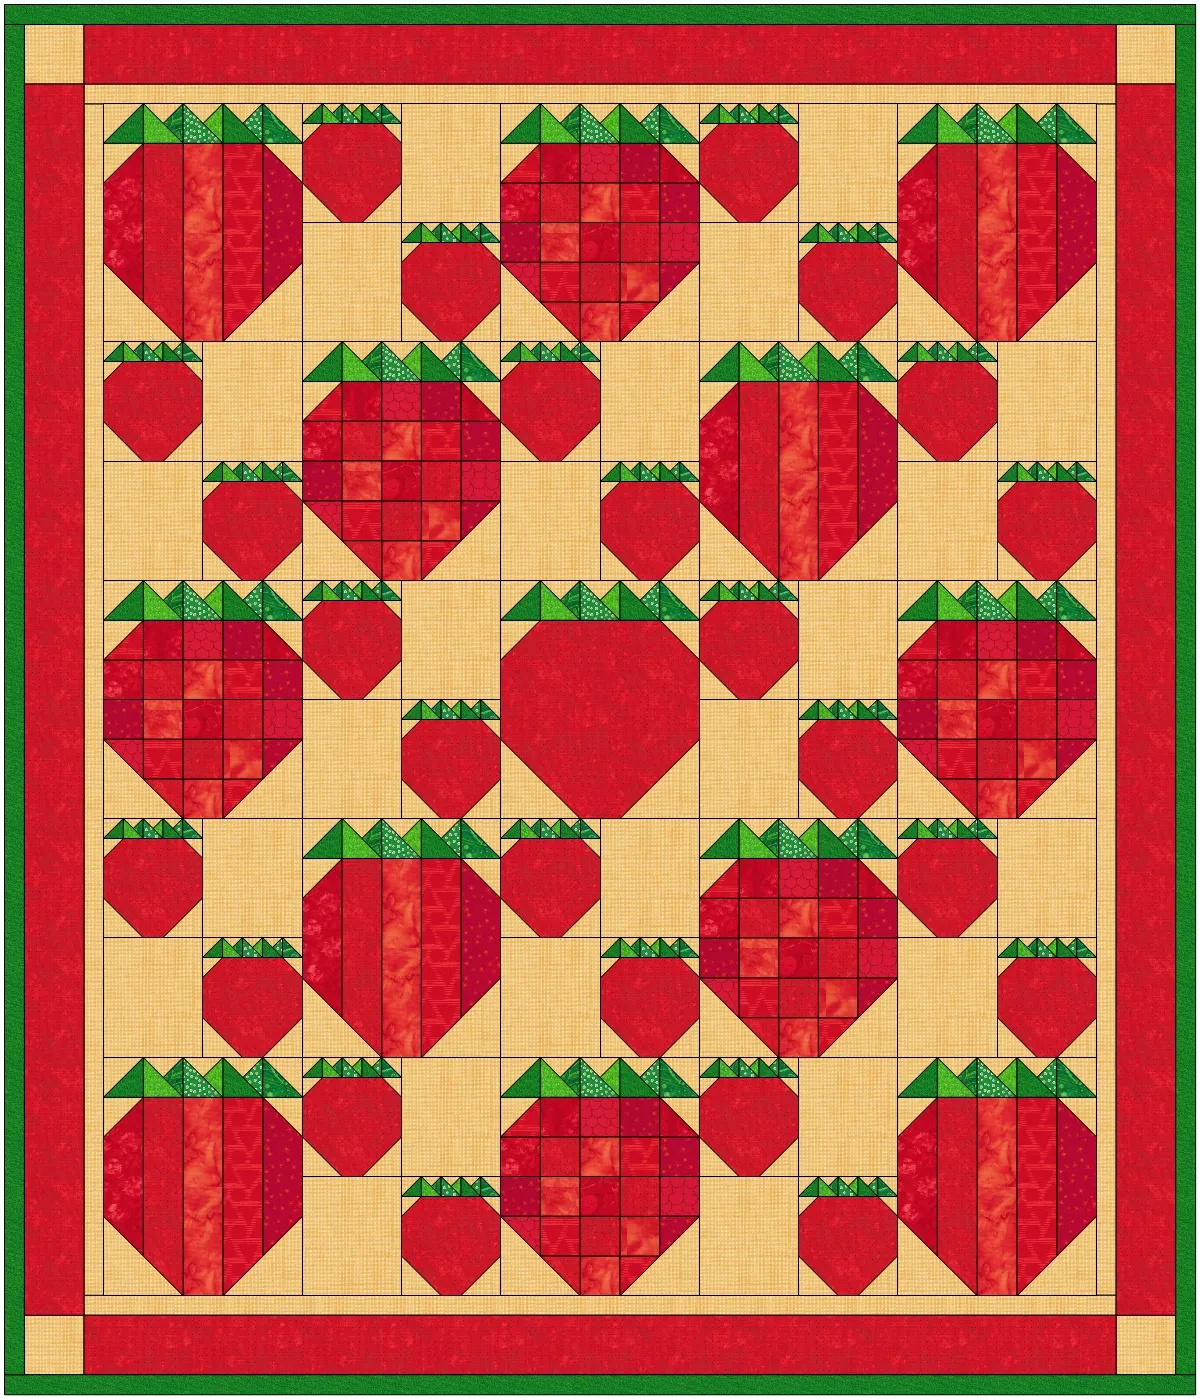
Here are all of the strawberries in a quilt!
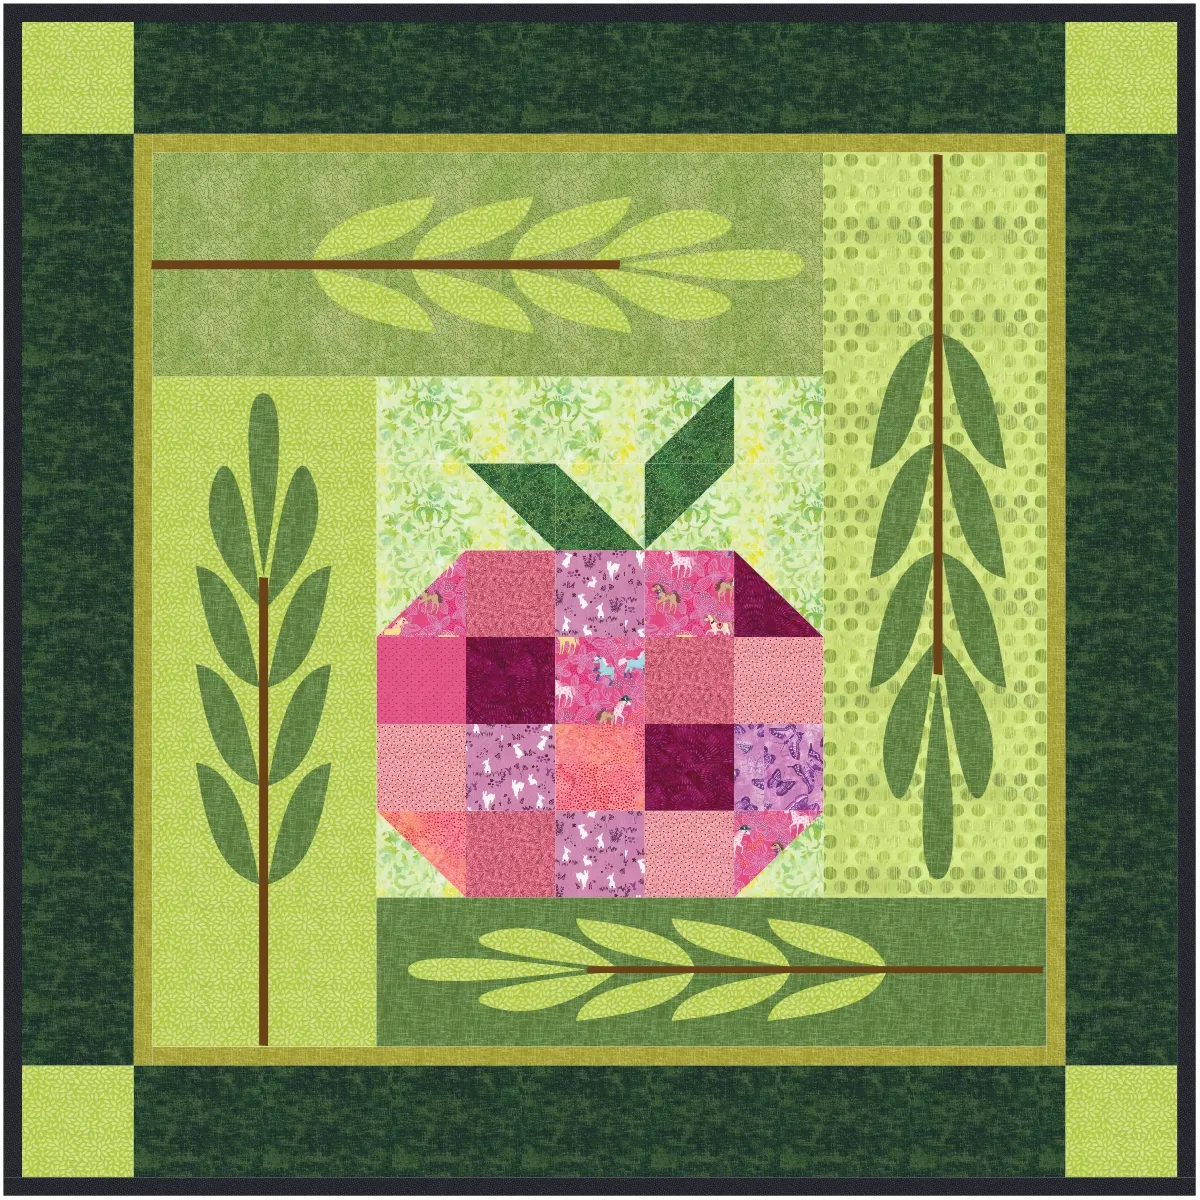
This is a great technique to use on other blocks too. i just use a block size that divides into 2′ strips or squares as a guide. Explore what works for you.
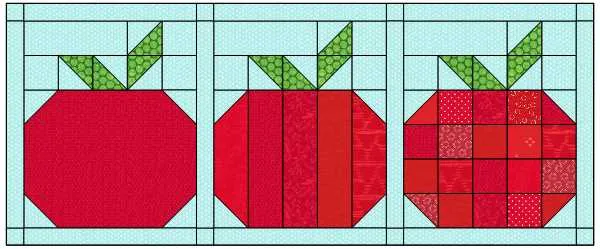
How about Apples?
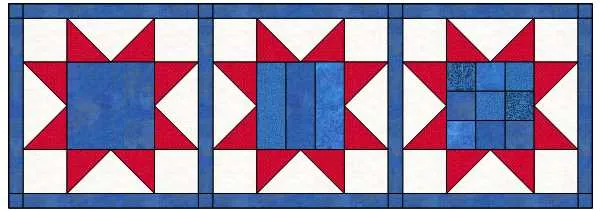
or Stars?
Use your imagination and create some great blocks for your next quilt.
Feel free to link up your strawberry or other block variation pics.
Happy Designing!
Questions or Feedback
Lori J. Miller lives in Oxford, Michigan, where she designs, stitches and sews quilts and quilty things. She loves experimenting with fun colors and designs to make playful and clever products for the modern sewist. Lori continues to share her knowledge with others teaching quilting and EQ8 classes around the country. A self professed EQ8 superfan, you can follow her quilting adventures on her blog at lorimillerdesigns.com or on instagram @lorimillerdesigns