Welcome to Design & Discover! You can follow along with a lesson and submit your version of the quilt right on the blog with a link up. If you have a blog, make sure to add your site too. Let’s visit each others’ blogs and all get to know each other!
Before getting started, keep in mind any of the images can be viewed larger by clicking on them.
Also, you don’t have the make the quilt exactly as shown, have fun and make it your own!
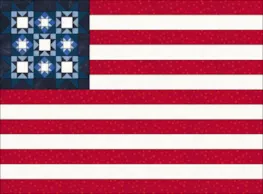
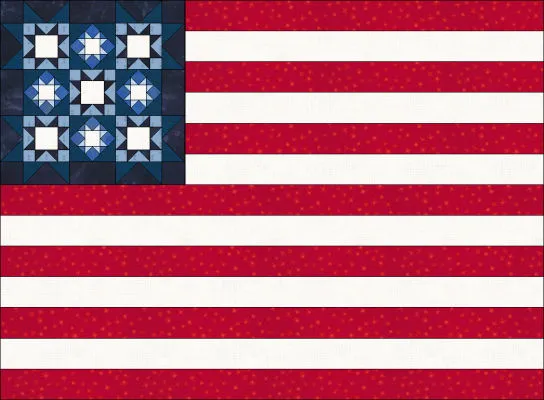
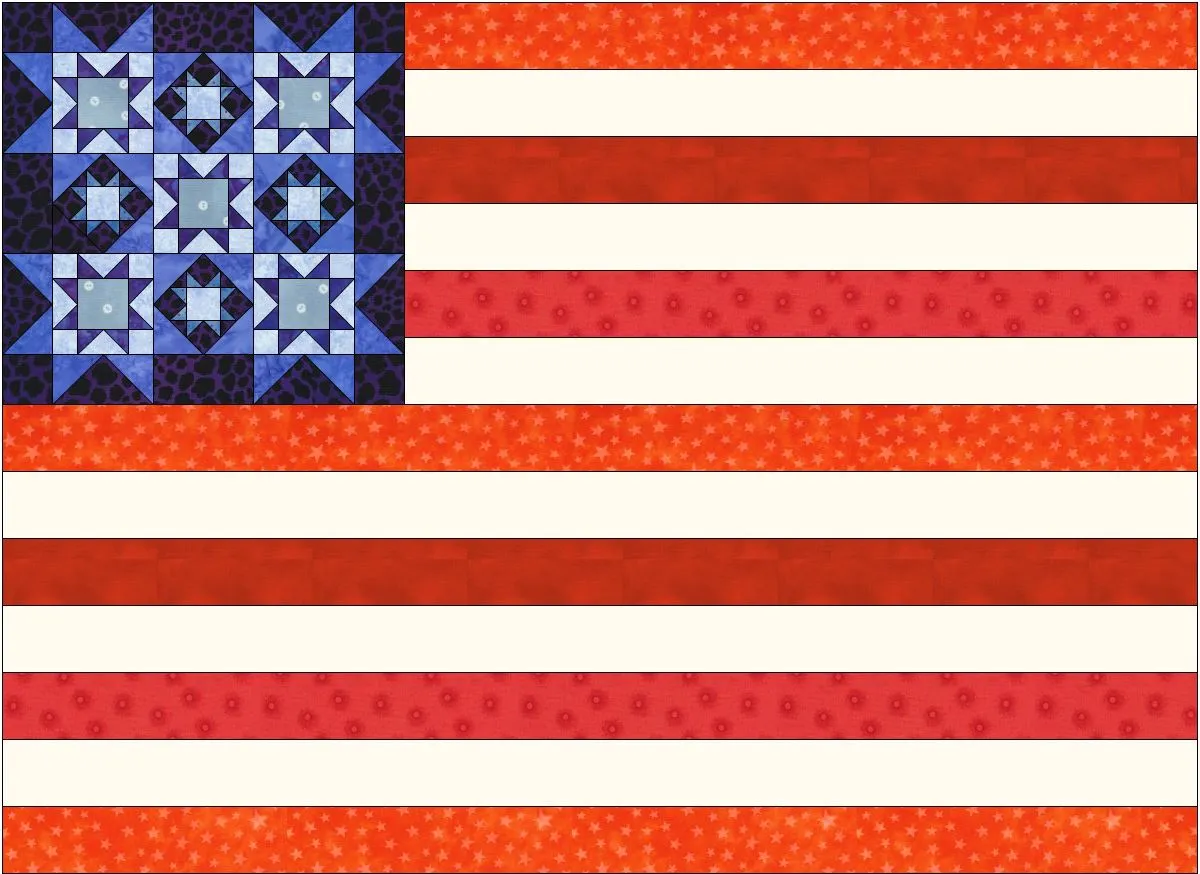
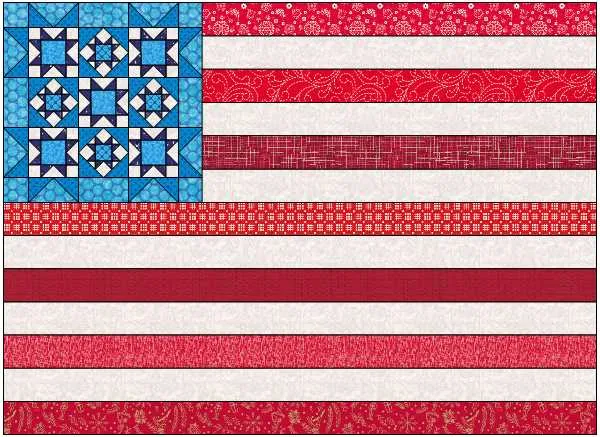
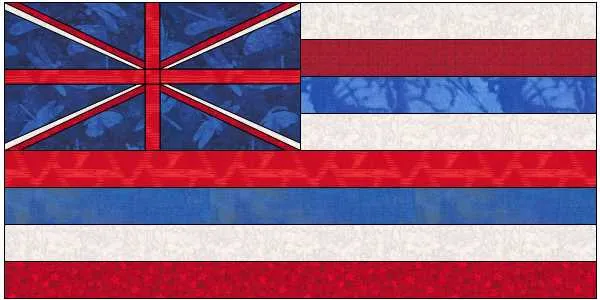
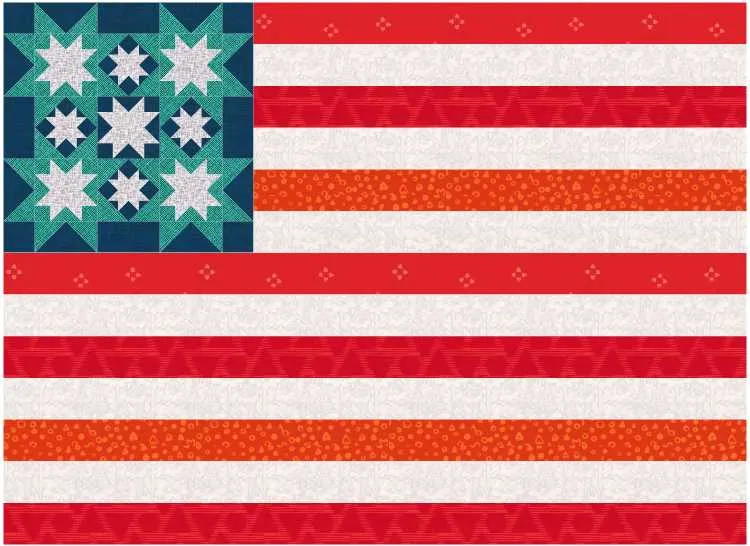
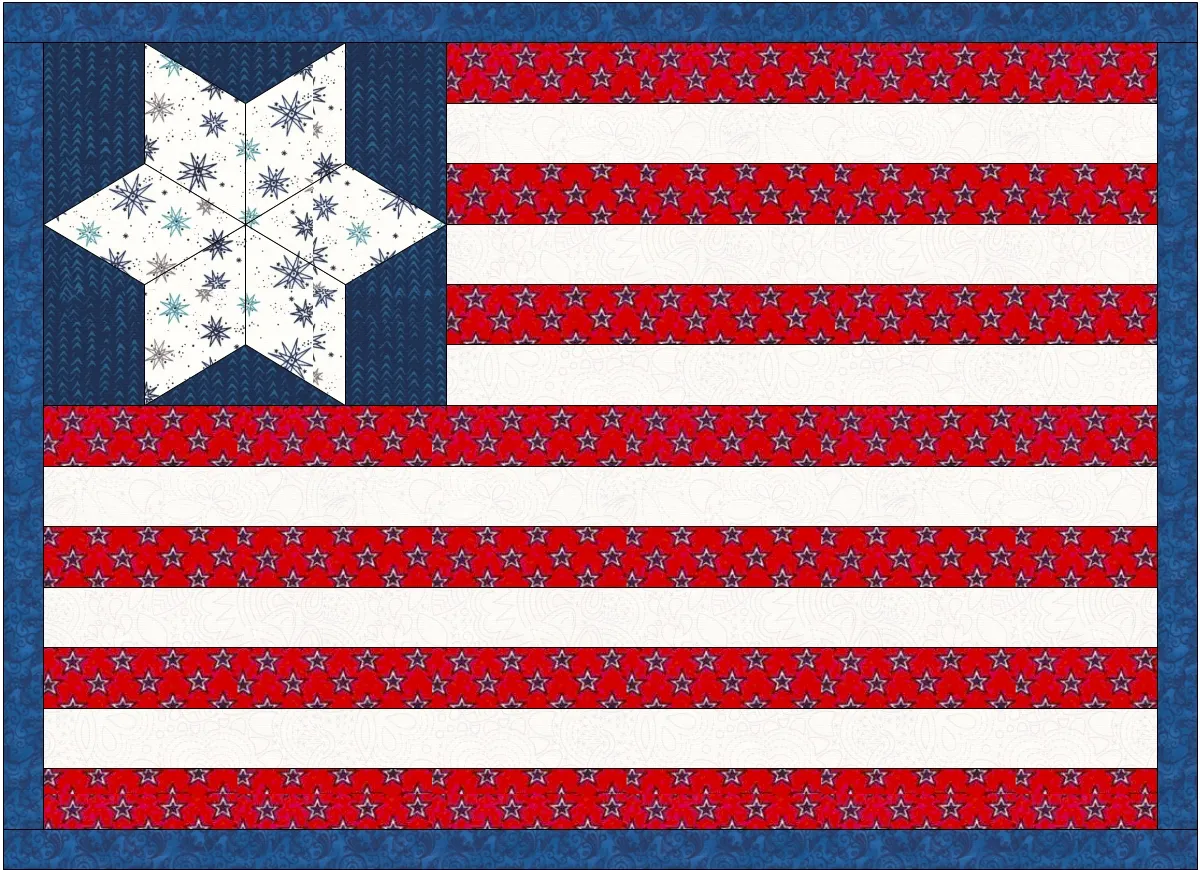
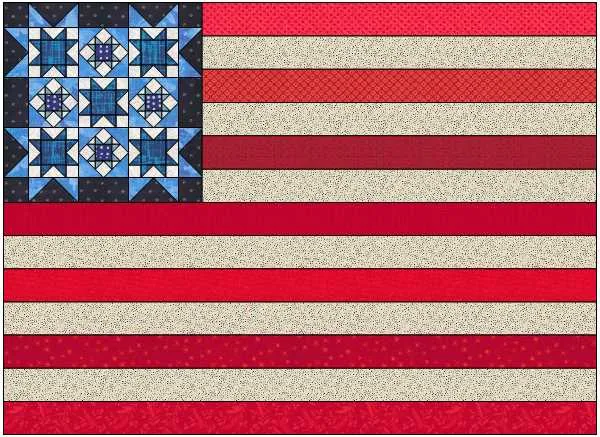
This month we are going to make an American flag quilt! However, again, feel free to make adjustments if you’d like to make some other type of flag.
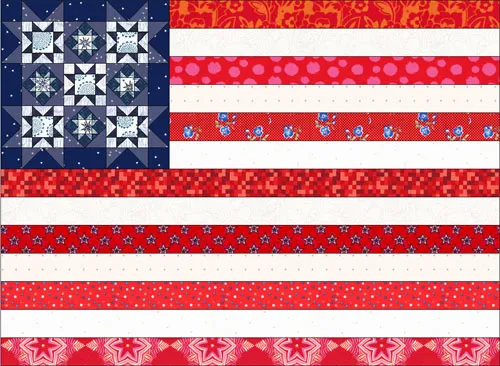
(You can also download this project here.)
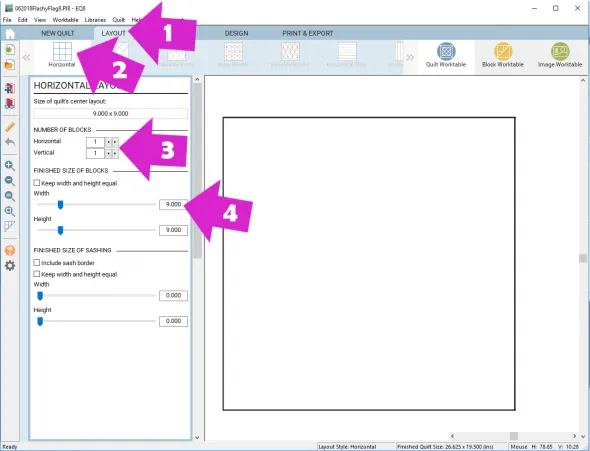
1. Click the Layout tab.
2. Click Horizontal
3. Make your quilt 1 x 1
4. Make you quilt 9 inches x 9 inches
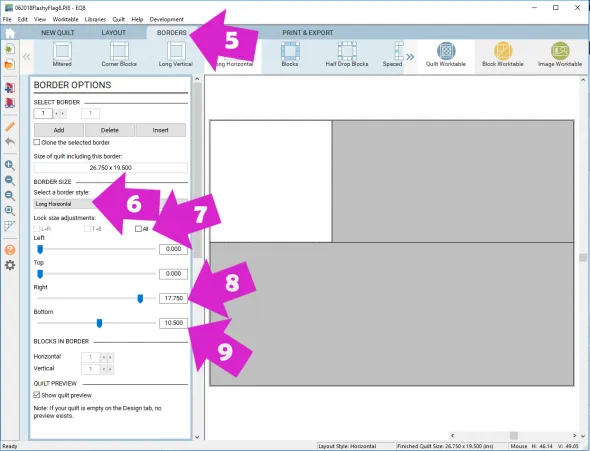
5. Click the Borders tab
6. Choose a Long Horizontal Border
7. Make sure lock size adjustments are unchecked
8. Make your right border 17.75
9. Make your bottom border 10.5
Remember to click Add to Project Sketchbook ![]() to save your progress.
to save your progress.
If you haven’t named your project yet, EQ8 will prompt you to do so. (To be saved your item needs to be in the Sketchbook AND your project needs to be named.)
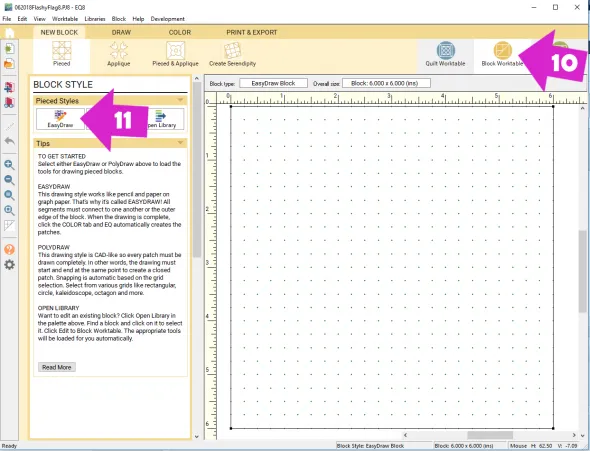
10. Click the Block Worktable
11. Click EasyDraw
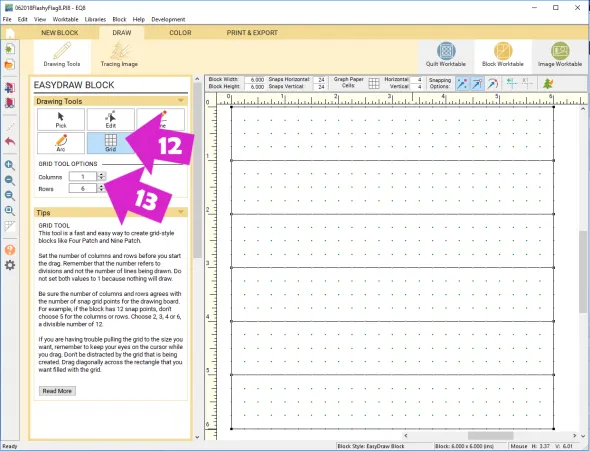
12. Click the Grid tool
13. Make it 1 Column and 6 Rows
14. Click the upper left hand corner of the block and drag out to the lower left hand corner, then release the mouse. Here is more information.
You should have a block like below. It doesn’t matter what size it because when we place it in our quilt it will automatically resize to the dimensions we want it.
15. Click Add to Project Sketchbook ![]() to save your block.
to save your block.
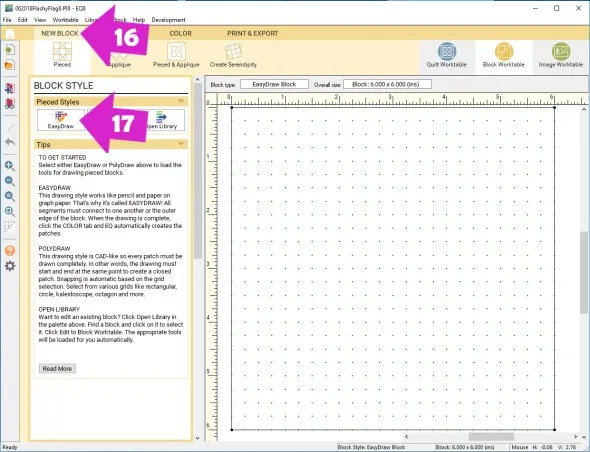
16. Click New Block
17. Click EasyDraw
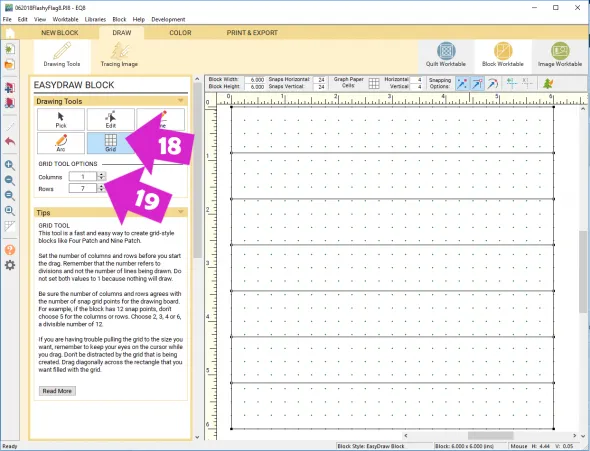
18. Click the Grid tool
19. Make it 1 Column and 7 Rows
20. Click the upper left hand corner of the block and drag out to the lower left hand corner, then release the mouse.
Again, it doesn’t matter what size the block is because when we place it in our quilt it will automatically resize to the dimensions we want it.
21. Click Add to Project Sketchbook ![]() to save your block.
to save your block.
You can use any star block you want in this quilt but if you want to draw the one shown above keep reading. If you’d like to use a different star block you can skip to step #38.
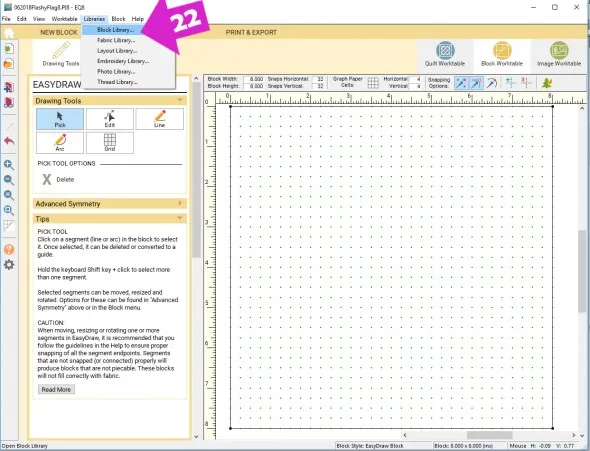
22. Click Libraries > Block Library
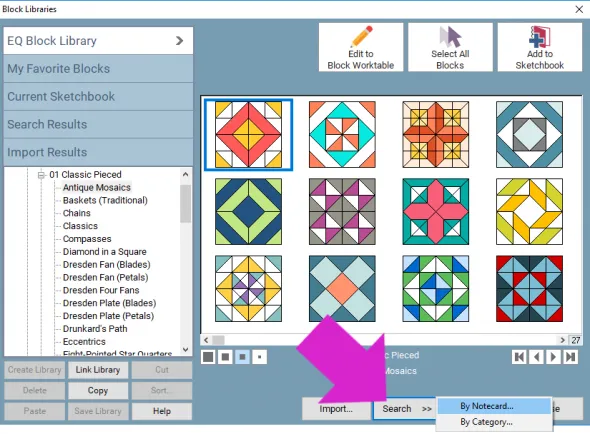
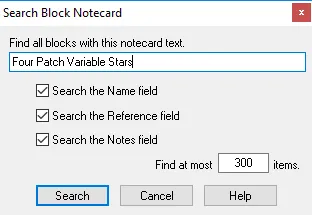
23. Click Search > By Notecard
24. Type in Four Patch Variable Stars and click Search
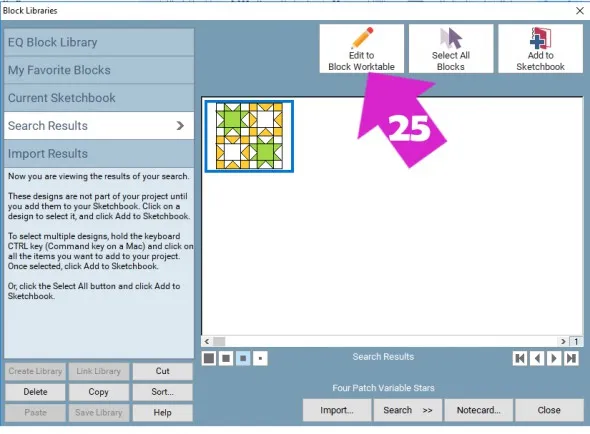
25. Click on the block and click Edit to Block Worktable
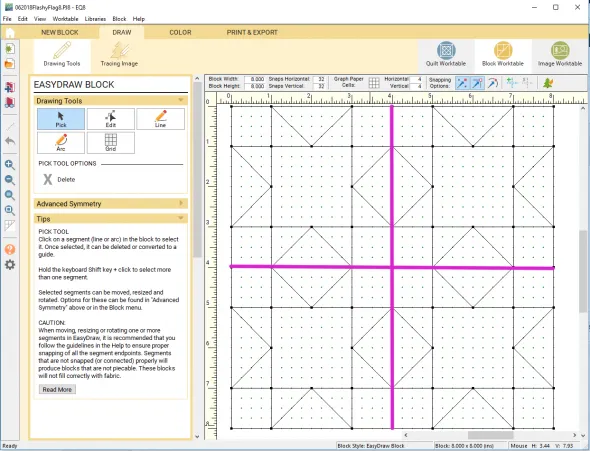
26. Delete the lines shown below.
To delete a line click on it, then press the delete key on your keyboard.
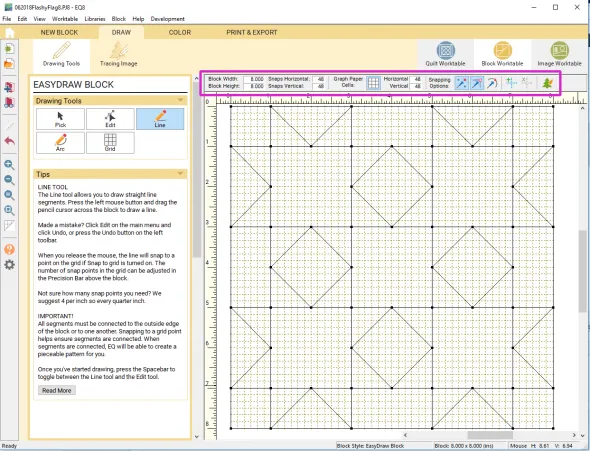
27. Now we are going to start drawing so let’s make sure our Precision Bar is set. (Remember you can see the image larger by clicking on it.)
Block Height and Width – 8
Snaps Horizontal and Vertical – 48
Graph Paper - on
Graph Paper Horizontal and Vertical - 48
Snap to Grid Points on Worktable – on
Snap to Nodes of Drawing – on
Snap to Lines and Arcs of Drawing – off
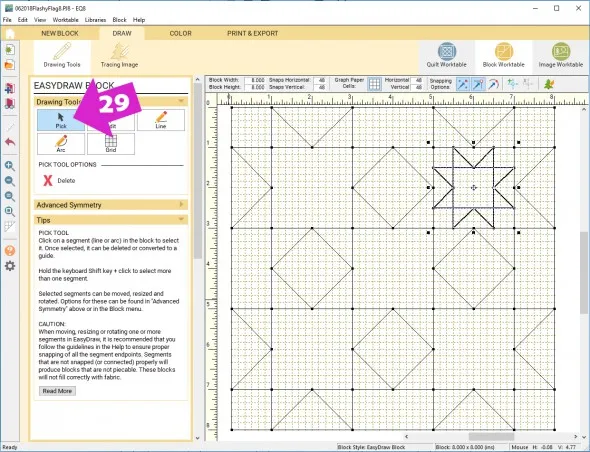
28. Click the Line tool and draw a star as shown here.
29. Now click the Pick tool, hold down the Shift key on your keyboard and click on all of the lines in the star we just drew. The lines should all be bold to show they are selected.
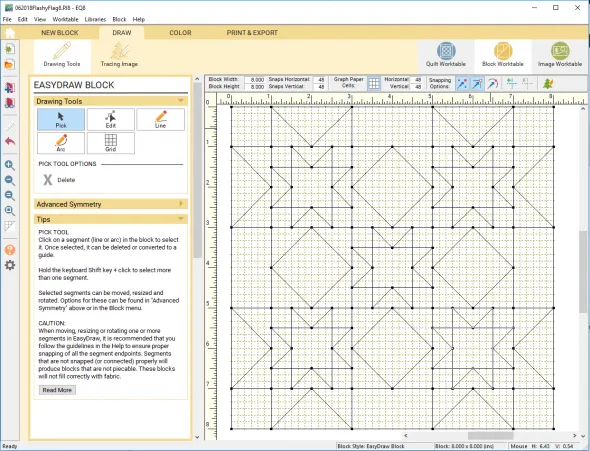
30. Use copy and paste to create new stars and place them as shown. (Windows computer use Ctrl + C and Ctrl + P. Mac computers use Command + C and Command + P. You can also Edit > Copy and Edit > Paste as shown here. )
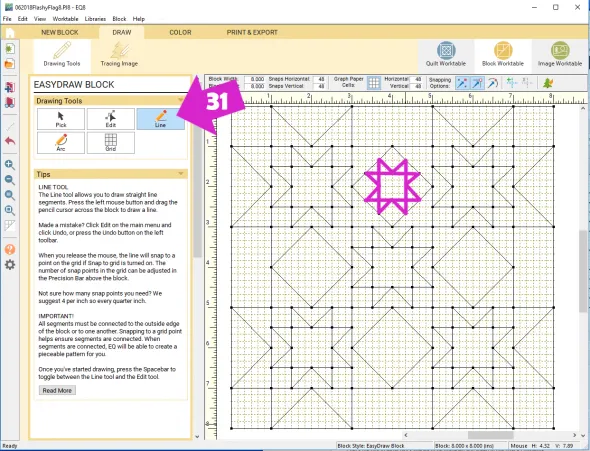
31. Use the line tool to draw another star as shown below.
32. Now hold down the Shift key on your keyboard and click on all of the lines in the star we just drew. The lines should all be bold to show they are selected.
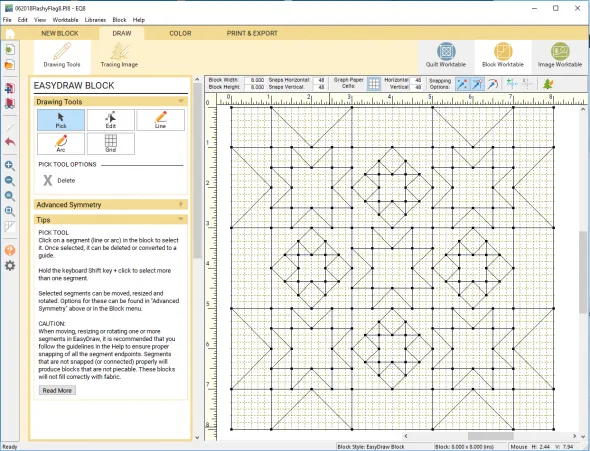
33. Use copy and paste to create new stars and place them as shown. (Windows computer use Ctrl + C and Ctrl + P. Mac computers use Command + C and Command + P. You can also Edit > Copy and Edit > Paste as shown here. )
34. Click Add to Project Sketchbook ![]() to save your block.
to save your block.
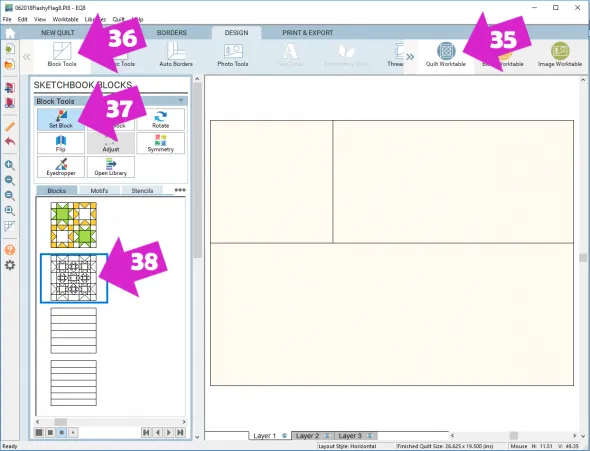
35. Click Quilt Worktable
36. Click Block Tools
37. Click Set Block
38. Click on the star block and place it in the quilt.
Put the 6 Stripe Block on top and the 7 Stripe Block on the bottom.
Because of the layout the stripes of the 6 Stripe Block and the 7 Stripe Block are both now 2 inches wide. (I’m sure you could use math to figure out how to do that but I just used trail and error. ![]() I would make the bottom wider and then check the size of the stripes, then adjust accordingly. )
I would make the bottom wider and then check the size of the stripes, then adjust accordingly. )
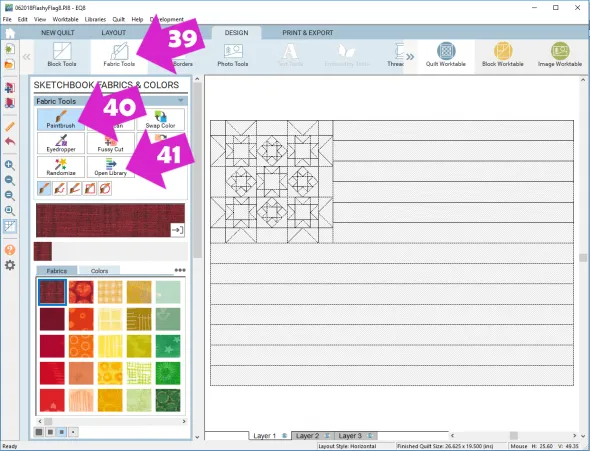
39. Click Fabric Tools
40. Click the Paintbrush
41. Click Open Library and add more fabrics to your sketchbook, if you would like.
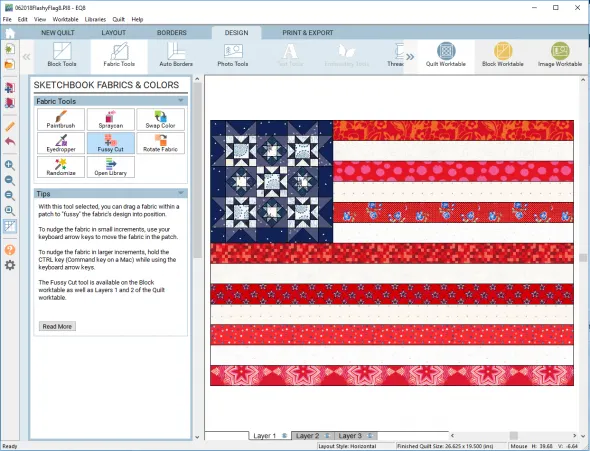
42. Recolor your flag.
43. Click Add to Project Sketchbook ![]() to save your quilt.
to save your quilt.
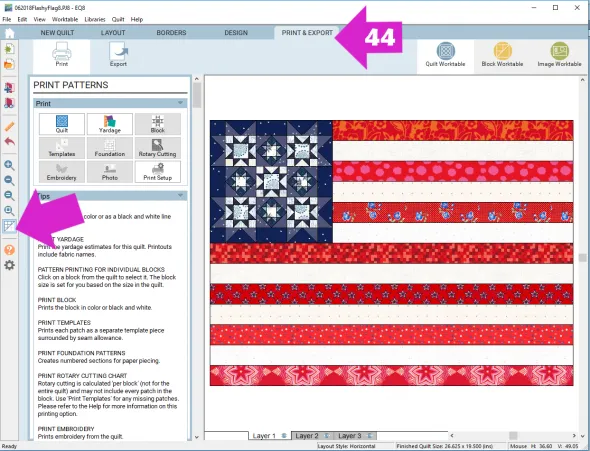
44. If you would like to post your quilt below, click the Print & Export tab. You can also click the Hide/show quilt patch lines tool, if you prefer your quilt without lines.
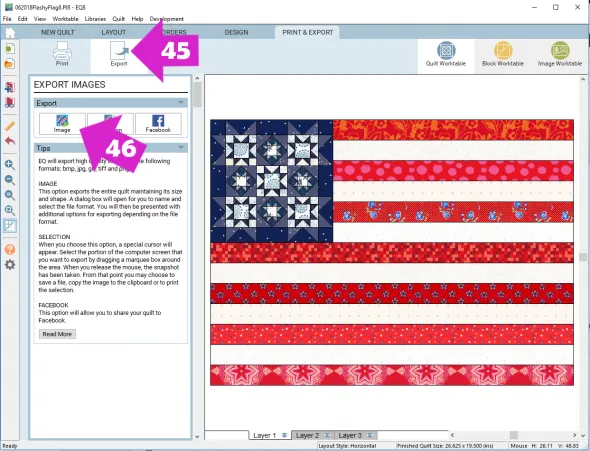
45. Click Export
46. Click Image
47. Name your file and click Save (in Documents\My EQ8\Images)
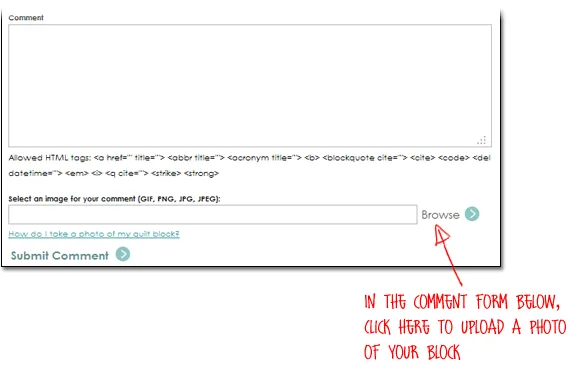
48. To post your image click to comment on this post. Fill in your info and then click Browse. Go to: Documents\My EQ8\Images
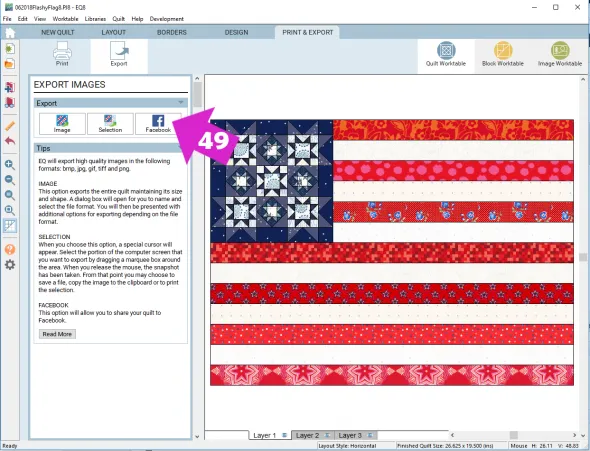
49. Also, we have a DoYouEQ Facebook page where you can share images of any quilt you design and see quilts other users have made! If you would like to share your quilt(s) to Facebook page, click the Facebook button. It may ask you to sign in.
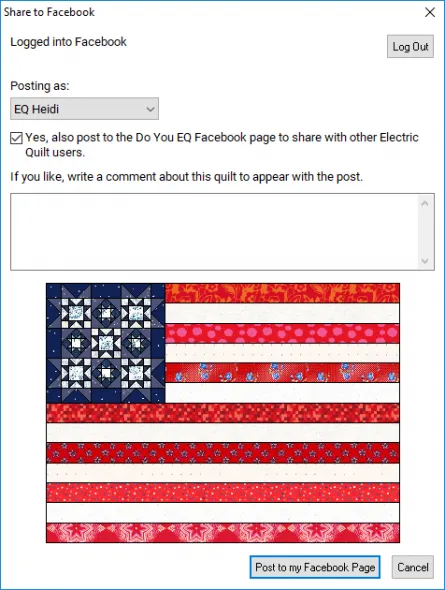
50. If you want to share it to the DoYouEQ Facebook page make sure to check the box.
You can also post to your personal Facebook page by clicking the “Post to my Facebook Page” button.
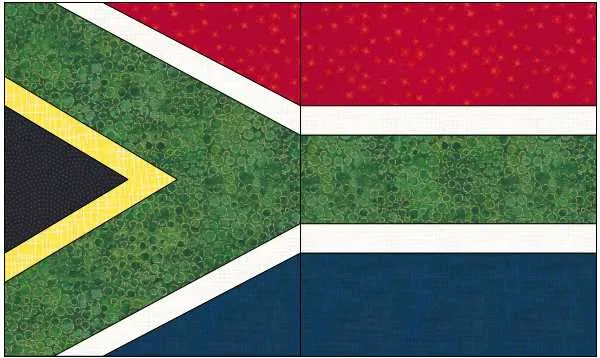
I can’t wait to see your quilts! I hope you enjoyed the lesson! If you want to create a flag from another country (or any type of flag) please feel free to post that as well!
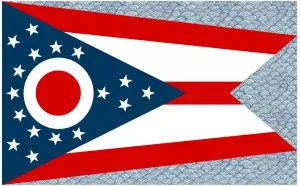
(Here is the Ohio Flag I drew as a block.)
If you have questions about the lesson feel free to post them below.
If you have questions about something else EQ related, please contact techsupport@electricquilt.com.


