
Traveling to sewing shows in the Spring and Fall is always a really busy time for me. This week I go to Toronto, Ontario, Canada to teach at the Creative Festival. After that I go to the Houston International Quilt Festival to teach EQStitch and EQ7 classes. The very best part of the traveling is that I get to meet so many people and hear what they are doing with the program. They also share with me the types of lessons they want to have in the future. That is really helpful for me. The worst part of traveling is that I am away from my sewing machine and don’t have time to test sew my design ideas.
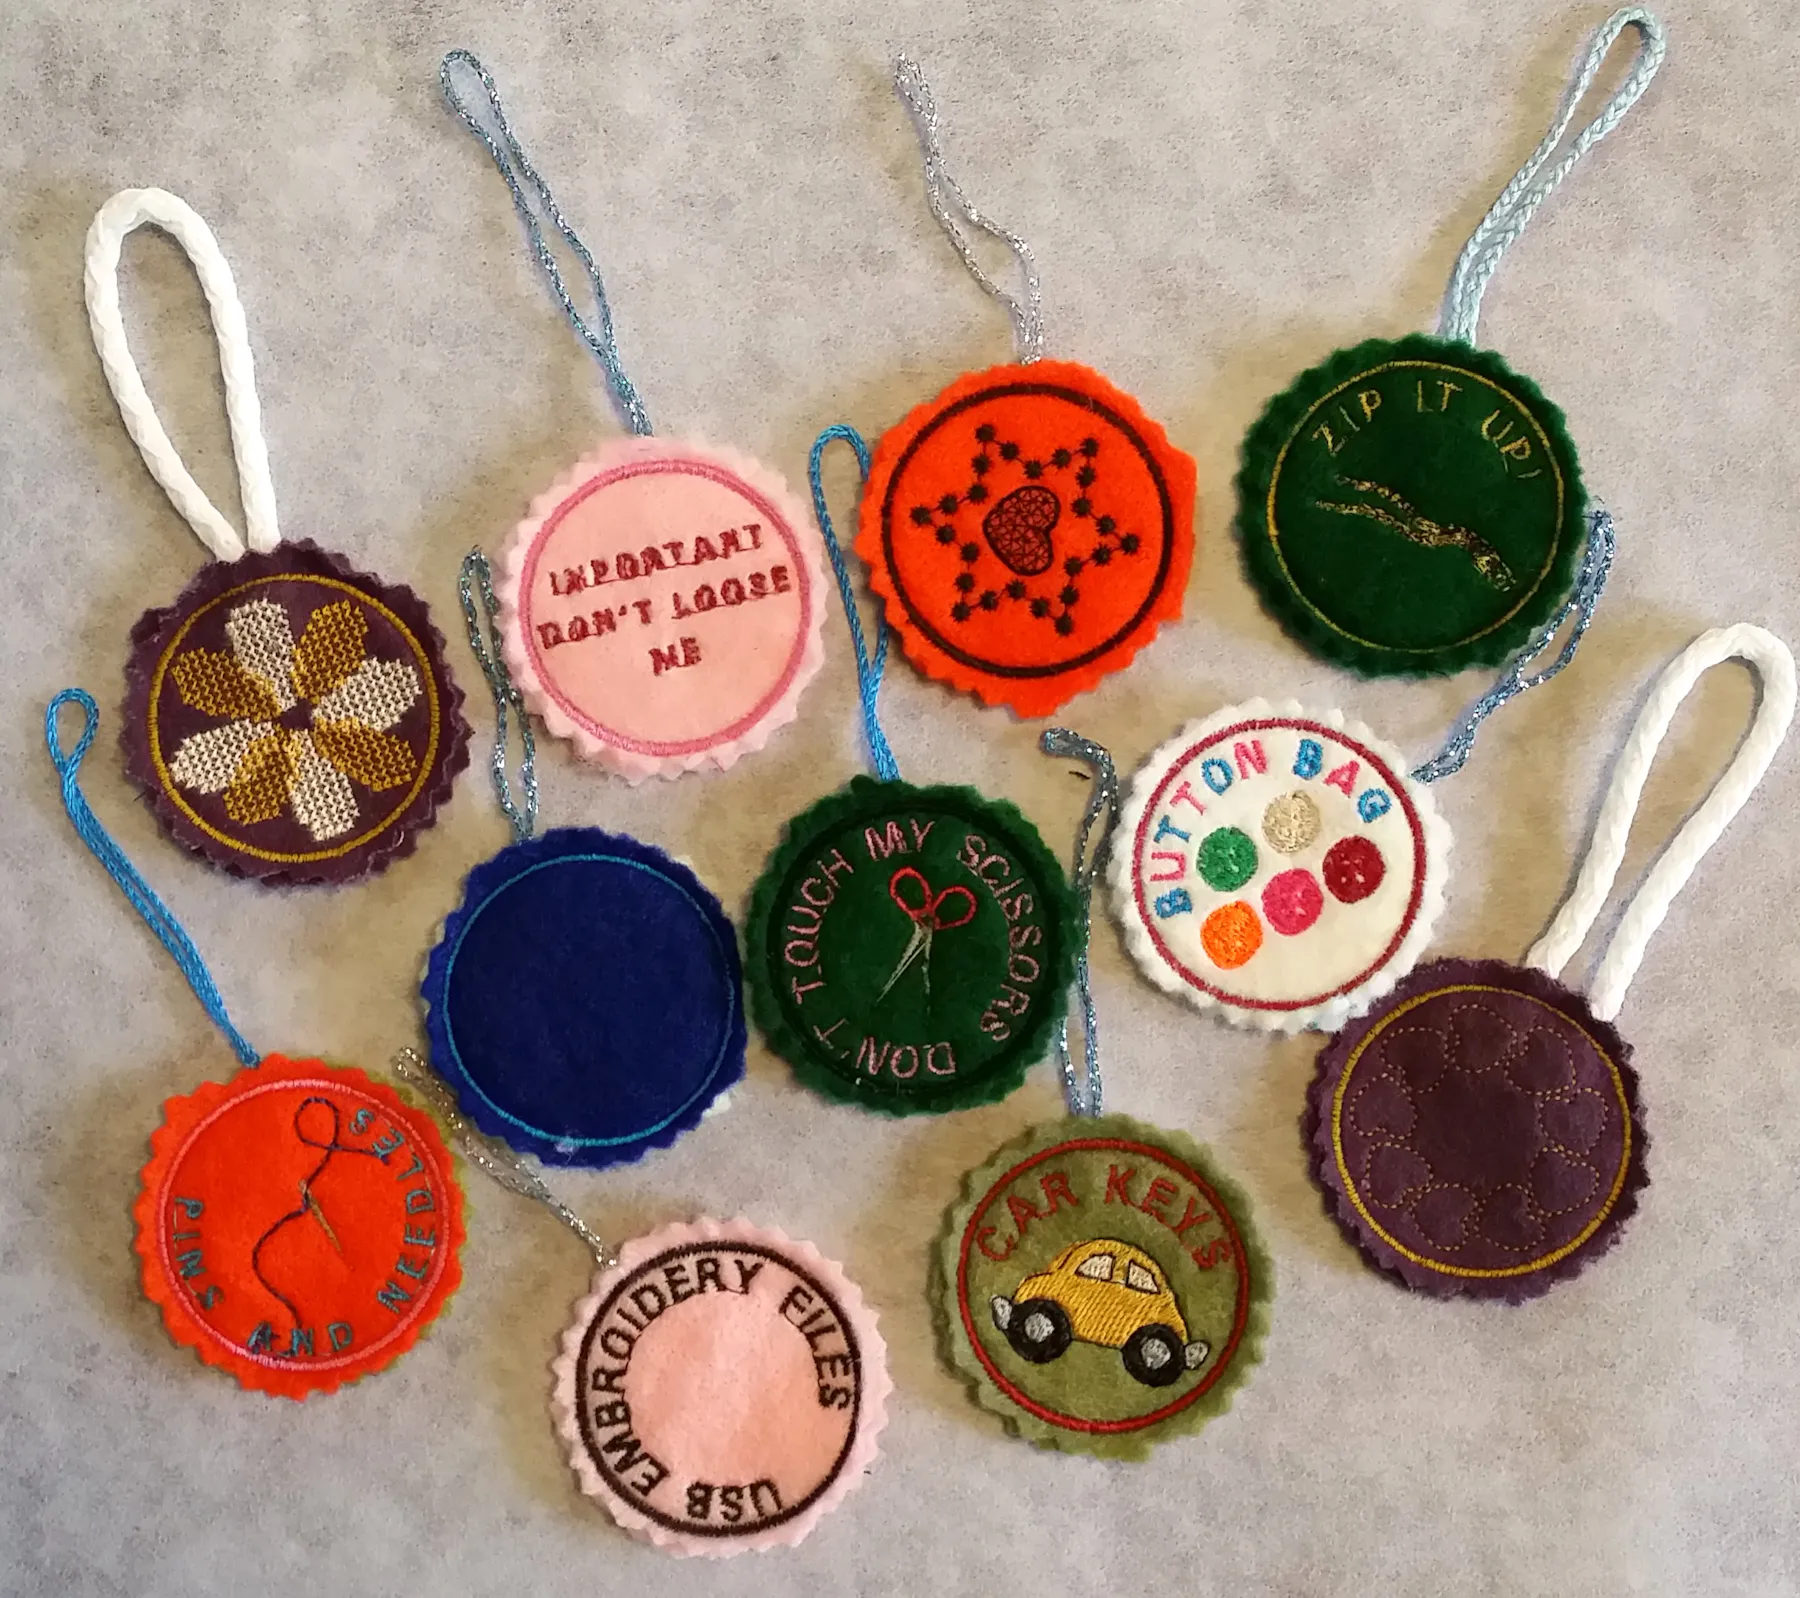
I recently taught a machine embroidery class in which we made fobs. You can see these at my groups website under the September class heading. http://members.shaw.ca/lmeg/ These quick and easy little projects come in handy when traveling. I use the fobs to mark my suitcase so it is easy to find at baggage pick up.
Launch your EQStitch program from your desktop.

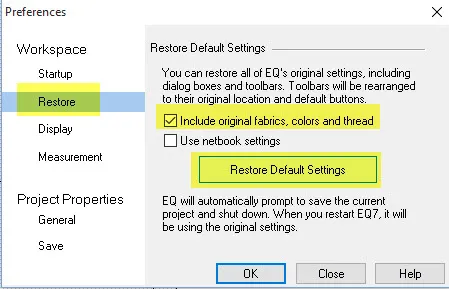
Click on FILE>Preferences and reset the program back to the defaults if you have been playing with the settings.
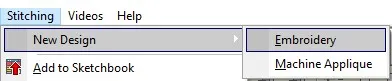
Click on STITCHING>New Design>Embroidery to be on the embroidery stitch worktable.
Click on the ‘drawing board options’ box ![]() on the properties bar at the top of the screen.
on the properties bar at the top of the screen.
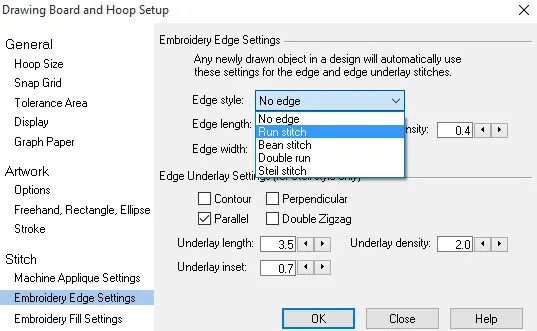
In the options box, click on the embroidery edge setting and change it to running stitch.
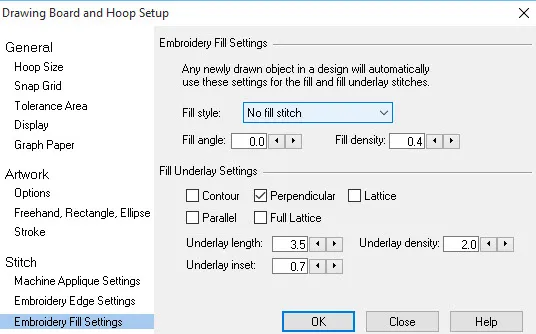
In the options box, click on the embroidery fill settings nd change it to no fill. Be sure to click on the ‘OK’ in the bottom of the box to set the new preferences.
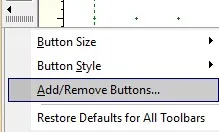
Click and hold the black arrow at the bottom of the toolbar to get the fly out menu. Click on the words ‘add/remove buttons’.
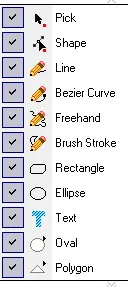
In the tool box, place a check mark in front of all the tools by clicking on them. Click anywhere on a white space on the screen to close the selection box.
Click on the ‘Ellipse’ tool![]() on the toolbar.
on the toolbar.
Move the cursor over to the drawing board, and while holding down the control key (CTRL) on the keyboard (Command for Mac), click/hold/drag/release a perfect circle on the hoop area approximately 50mm in size (2 inches).
Click on the ‘clone selected objects’ icon ![]() on the properties bar at the top of the screen to get a second copy of the circle element.
on the properties bar at the top of the screen to get a second copy of the circle element.
Click on the stitch tab at the bottom of the screen and color each circle a different color.
Click on the artwork tab and use any tools you wish to create your own little design. It must be small enough to fit inside the circle elements.
Click on the stitch tab and apply any stitch properties you want for your design.
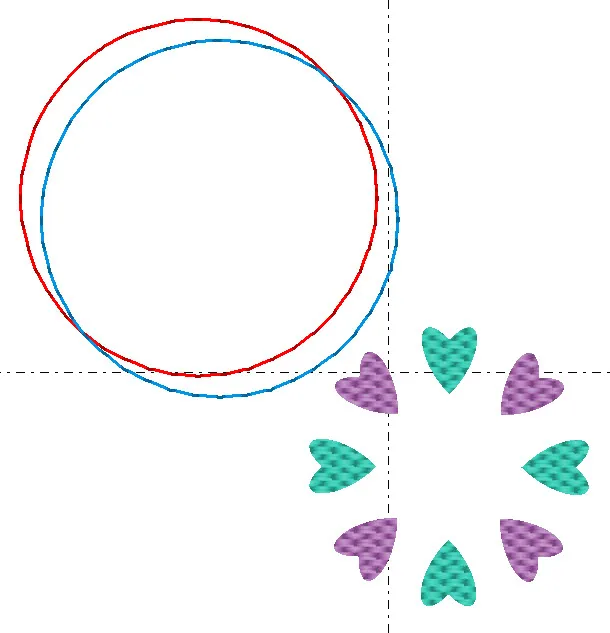
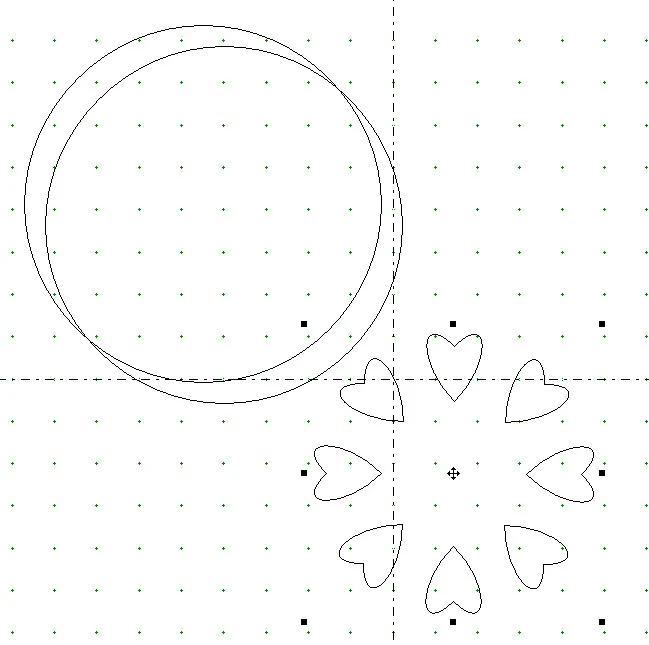
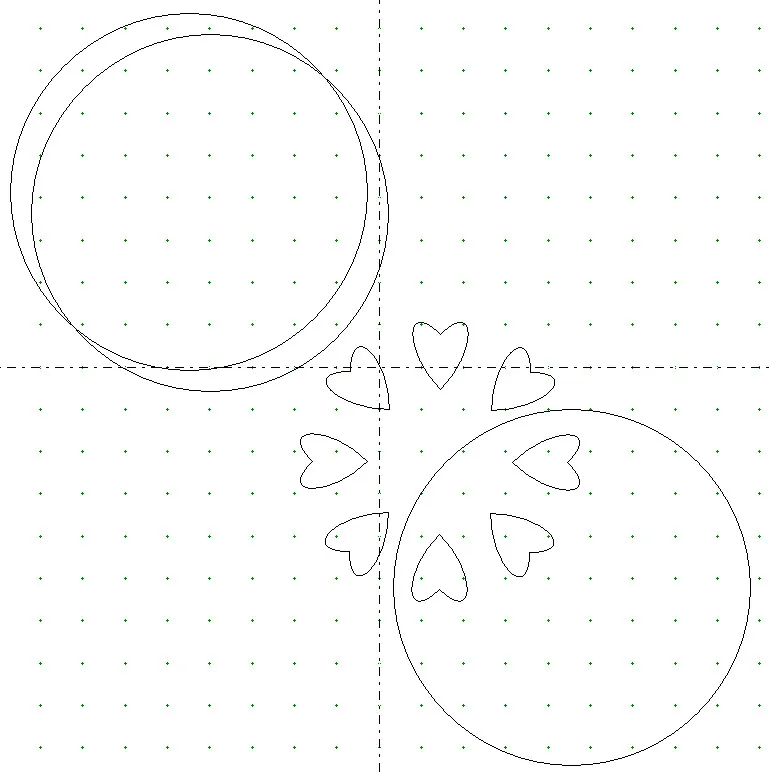
Click on the artwork tab and make another cloned copy of the circles. and move it to the right so it is away from the first two circles.
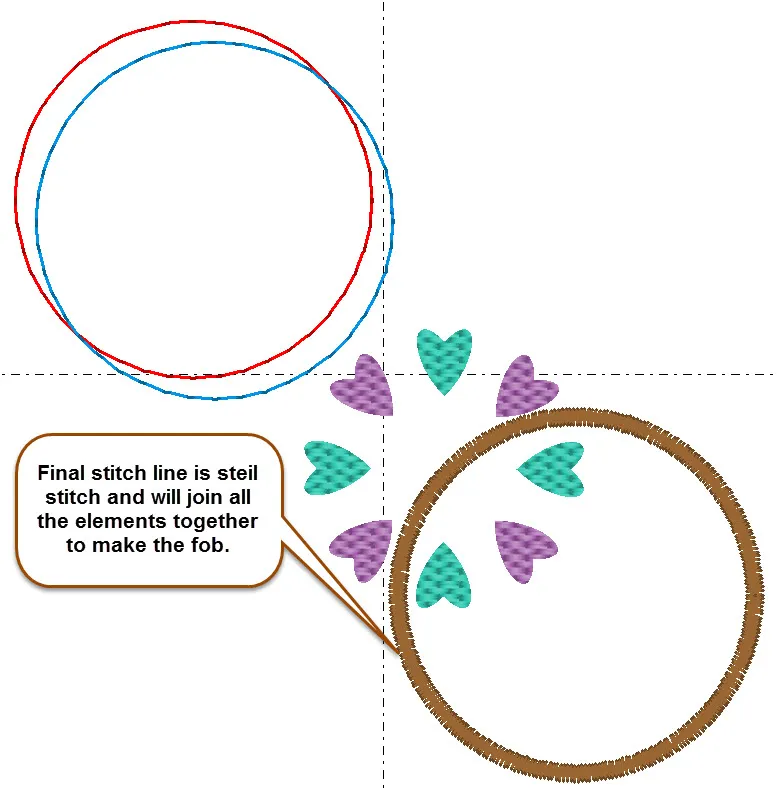
Click on the stitch tab and apply a steil stitch outline to the last circle.
Click on the artwork tab and select each of the elements and center the objects ![]() on the hoop area.
on the hoop area.
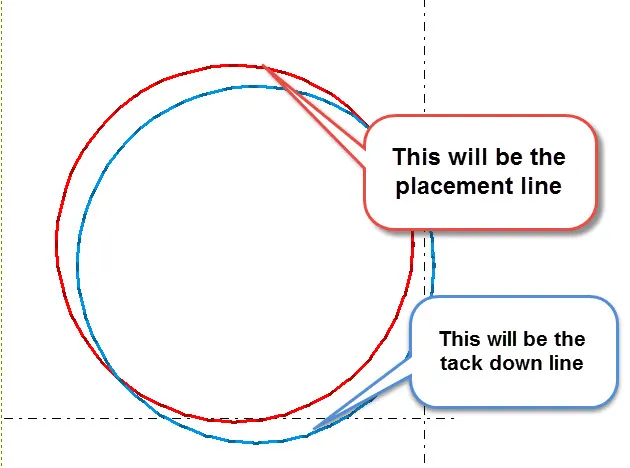
The objects will be one on top of the other. The stitch order will be the first circle as a placement line, the second circle as the tack down line, the decorative elements you created, and finally the edge stitch outline to join all the elements together.
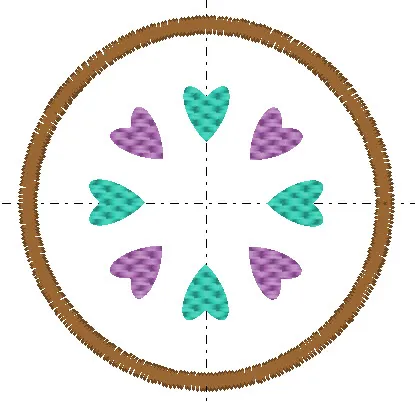
AT THE MACHINE: Hoop tear away stabilizer, stitch the first circle placement line on the stabilizer only. Float your fabric under the needle and stitch the next circle tack down line. Stitch the decorative elements you created. Remove the hoop from the machine and tape a string loop extending from inside the circle outwards. I used a 6 inch piece of string folded in half to make a 3 inch loop. The tape will keep the string from catching under the design area and into the feed dogs when stitching. Add another piece of fabric to the back side of the stabilizer large enough to cover the circle area. I spritzed a small amount of 505 spray adhesive on the fabric before applying it to the back so it would not move. Carefully place the hoop back into the machine making sure the string and backing fabric have not moved. Stitch the final steil stitch outline which will join all the elements together. I used pinking shears to trim the top fabric and then the back fabric for a decorative raw edge finish. After trimming, remove the completed fob from the stabilizer.


10-12-2015
10:21 am
I’ve just caught up with all the sunday stitch posts which I’d temporarily forgotten about! Looking forward to working through them and these tags look like real fun – useful too. Thanks so much for this. I assume there is still no solution to the UK VAT problem regarding add-ons for the programme??
10-12-2015
12:23 pm
Sorry to say there is no real answer to help you with your countries VAT. It is out of our hands.