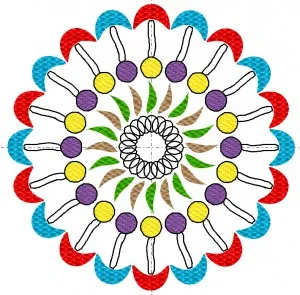
I have to design lessons for several different classes I am teaching on the use of EQStitch. I find myself constantly returning to my favorite tool for my samples. That tool is the Wreath Maker tool. It is so easy to create repeated patterns of a design. They do appear in a circle, but I can move the individual elements outside of the circle line if I wish for a new look.
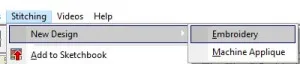
1. On the stitch worktable ![]() , set up the worktable to be an embroidery table.
, set up the worktable to be an embroidery table.
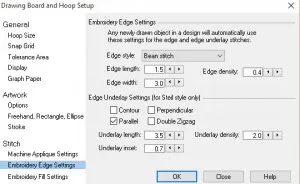
2. Click on the ‘drawing board options’ icon ![]() on the properties bar.
on the properties bar.
In the drawing board box, set the embroidery edge setting to a bean stitch with a shortened stitch length of 1.5. The shortened stitch length allows the stitches to easily sew around a curve for a smooth stitched look.
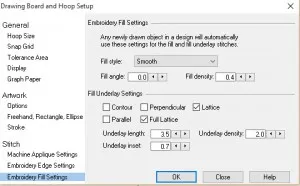
Set the embroidery fill setting to be a smooth stitch. Be sure to click on ‘OK’ in the bottom of the box to set the new properties of your drawing.
TIP: Always set your stitch properties before you begin drawing so you don’t need to change them on the stitch tab later. It makes your digitizing process faster. You can always change your mind and re-set a different stitch property on the stitch tab later.
3. Draw any shape you wish on the hoop area by selecting the shape and then click/hold/drag/ release the cursor on the hoop area to place the shape. With the ‘pick tool’ ![]() selected, select the shape you drew and move it to the top of the screen on the vertical horizontal line by clicking on the center crosshair and dragging it to the place you need it.
selected, select the shape you drew and move it to the top of the screen on the vertical horizontal line by clicking on the center crosshair and dragging it to the place you need it.
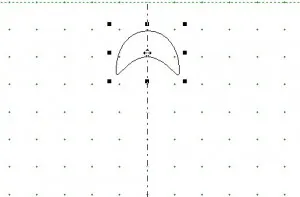
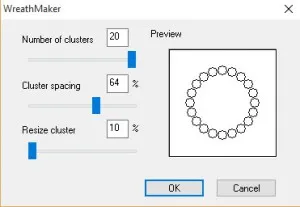
With the shape still selected, click on the ‘wreathmaker tool’ icon![]() on the properties bar.
on the properties bar.
In the selection box, set the number of units you want and the spacing you would like to use. NOTE: This is an individual preference and you may have to play with the settings a bit before you get the shape you want to use. Your settings will be different than mine based on the size and shape of the drawing you created. Below is an example only. Be sure to click ‘OK’ to set your wreathmaker options.
4. The design will appear on your worktable slightly off center. Click on the ‘center selected segments’ icon ![]() on the properties bar to center the design on the worktable.
on the properties bar to center the design on the worktable.
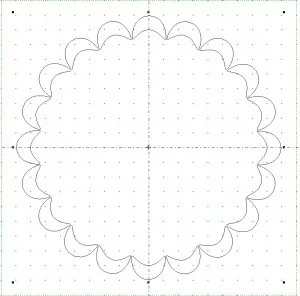
5. Repeat this process using different drawing tools and shapes and resize the amount of area it fills in the wreathmaker properties box.
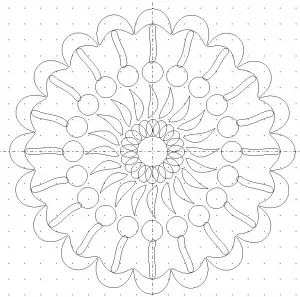
Add the design drawing to the sketchbook ![]() before you go to the stitch tab. This way, if the program ever crashes or closes unexpectedly, you will not have to redraw the design as it will be in the sketchbook.
before you go to the stitch tab. This way, if the program ever crashes or closes unexpectedly, you will not have to redraw the design as it will be in the sketchbook.
6. Click on the ‘stitch’ tab at the bottom of the screen.
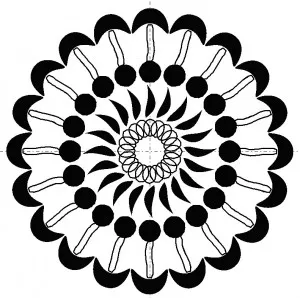
Use the tools on the right side of the screen to change any fill or edge settings you want to at this time. The edge stitch and fill stitch that are automatically applied are the settings we selected on the drawing board before we began our drawing process.
Click on the ‘set thread’ tool icon![]() on the toolbar and select a color then move the cursor over to the elements drawn and click once to apply that color. Use multiple colors for a variety of looks to the same design.
on the toolbar and select a color then move the cursor over to the elements drawn and click once to apply that color. Use multiple colors for a variety of looks to the same design.
Have fun playing with my favorite tool!! It may become your favorite tool too.!!


08-16-2015
11:22 am
Yvonne,
You are such an inspiration! Thank you for doing this. I always learn something new.
Linda
08-16-2015
11:37 am
You are so very welcome Linda B! I love writing and sharing my love of digitizing with others.
08-16-2015
7:37 pm
Thank you. This is the first time I followed one of your Sunday Stitches and just loved what I came up with. Now to go try stitching it out.
08-16-2015
7:41 pm
Nancy–Stitching is what will show you how well you created the design. Test sew all designs you create to make sure they stitch the way you want. Enjoy!