To use the PatchDraw Pieced Grids
1. Click Block > New Block > PatchDraw Block
2. Choose your grid from the drop down menu
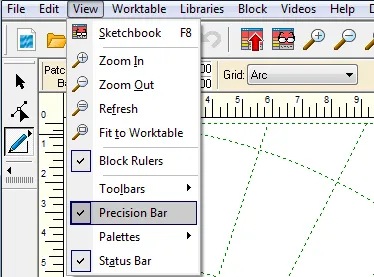
While you can access the grids through the Drawing Board Setup, it’s much easier if you have your Precision Bar turned on. To display the Precision Bar, click on the View menu at the top of the screen, and choose Precision Bar.
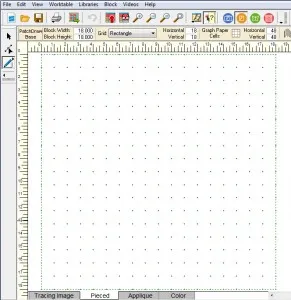
The PatchDraw Pieced Grids are only available on the Pieced layer of the PatchDraw Block worktable. A Rectangle grid style is turned on by default, however EQ7 has 5 other grids for you to use to create pieced blocks. Keep in mind, the Pieced layer of PatchDraw is to design pieced blocks, therefore do not overlap patches.
The Pieced layer of PatchDraw has automatic snapping based on the grid you are working on. The PolyDraw tools are your only sources for drawing blocks on this layer. With the PolyDraw tools, you’ll notice that with each click, your line will snap to the closest grid point or arc.
With these grids, use the “Clone and Rotate” method to make quick, effortless block designs.
1. Draw the first patch using the PolyDraw tools.
2. Click the Clone button ![]() on the Precision Bar.
on the Precision Bar.
3. Click the Rotate ![]() selected segments button on the Precision Bar. The patch will rotate to the angle of the adjacent spoke of the grid.
selected segments button on the Precision Bar. The patch will rotate to the angle of the adjacent spoke of the grid.
4. Grab the 4-arrow crosshair in the center of the newly rotated patch to move it into place. (If the patch is no longer selected, get the Pick ![]() tool to select it again before you try to move it.)
tool to select it again before you try to move it.)
Repeat Steps 2-4 to complete the block.
Rectangle Grid
Minimum Snap Point: 4
Maximum Snap Point: 200
Rotate: When using a Rectangle grid, each click of the rotate button ![]() will rotate the selected patch by 45 degrees.
will rotate the selected patch by 45 degrees.
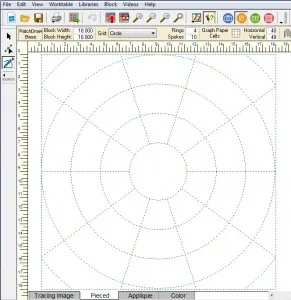
Circle Grid
Minimum Number of Rings and Spokes: 4
Maximum Number of Rings and Spokes: 60
Clicking on the same arc creates an arc. Clicking on a different arc creates a straight line segment.
Rotate: When using the Circle grid, each click of the rotate button ![]() will rotate the selected patch clockwise by a spoke.
will rotate the selected patch clockwise by a spoke.
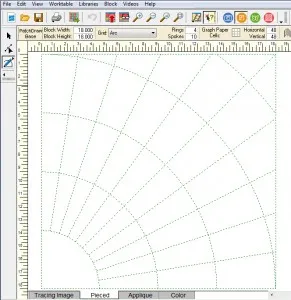
Arc Grid
Minimum Number of Rings and Spokes: 4
Maximum Number of Rings and Spokes: 60
Clicking on the same arc creates an arc. Clicking on a different arc creates a straight line segment.
Rotate: Each click of the rotate button ![]() will rotate the selected patch clockwise by a spoke. For the rotate button to be useful with this grid style, you want your first patch to be drawn on the left side of the grid (since the patches will rotate clockwise).
will rotate the selected patch clockwise by a spoke. For the rotate button to be useful with this grid style, you want your first patch to be drawn on the left side of the grid (since the patches will rotate clockwise).
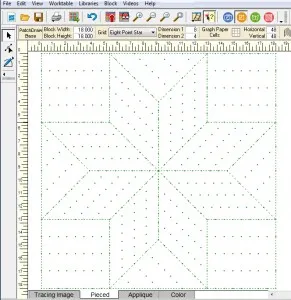
Eight Point Star Grid
Minimum Snap Point: 2
Maximum Snap Point: 20
When setting the snap points, it is recommended that you keep the values in both dimensions the same or close to the same.
Rotate: When using the Eight Point Star grid, each click of the rotate button ![]() will rotate the selected patch by 45 degrees.
will rotate the selected patch by 45 degrees.
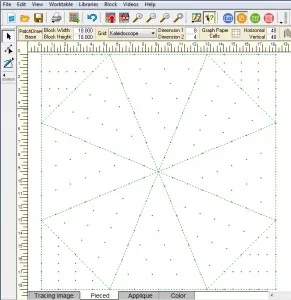
Kaleidoscope Grid
Minimum Snap Point: 2
Maximum Snap Point: 20
When setting the snap points, it is recommended that you keep the values in both dimensions the same or close to the same.
Rotate: When using the Kaleidoscope grid, each click of the rotate button ![]() will rotate the selected patch by 45 degrees.
will rotate the selected patch by 45 degrees.
Draw one of the corner triangles, clone and rotate multiple times until they are in the correct rotation. Repeat until all triangle patches are completed.
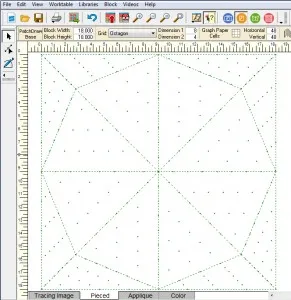
Octagon Grid
Minimum Snap Point: 2
Maximum Snap Point: 20
When setting the snap points, it is recommended that you keep the values in both dimensions the same or close to the same.
Rotate: When using the Octagon grid, each click of the rotate button ![]() will rotate the selected patch by 45 degrees.
will rotate the selected patch by 45 degrees.
Draw one of the corner triangles, clone and rotate multiple times until they are in the correct rotation. Repeat until all triangle patches are completed.






04-08-2015
10:25 pm
It would be helpful if you could add a link/way to print out such pages as you have in the tool tips in this Blog. I need a way to have them in front of me while I work in EQ. Thanks for your consideration.
04-09-2015
10:52 am
Hi Marilyn,
This is available in the help section of EQ7. You can also print it by clicking on the title “Tool Tip Tuesday! The PatchDraw Pieced Block Grids” and then printing that page.
Thanks,
Heidi
04-10-2015
9:07 am
@MARILYN KOESTLER: When I need a quick reference, or detailed step-by-step instructions, I open the PDF of the EQ7 User Manual. Then I leave it open for the duration of the session, until I finish the block or the quilt design. I use a second screen on my laptop, as it is much easier to view the Manual while also working on a design.
For the road, I printed the manual. I went to one of the local print shops and had the manual printed (PC version, all 249 pages). In black and white it cost me $15 plus tax. It is a terrific resource!
You will find the PDF for the Manual at:
http://electricquilt.com/download/eq7-user-manual/
Al
04-10-2015
9:55 am
Great advice Al! Thanks
04-10-2015
12:23 pm
You are welcome, Heidi! Thank you for all your hard work at EQ!!!