Bea Lee is hosting a Blog Hop! I drew some blocks to be included in the hop.
Download here.
The theme is Appliqued Animals and she also has three sub-themes which are, Summer Animals, Critters and Bugs, and Summer garden “stuff”.
Lots of other EQ users are also participating in the hop.
Seamstobesew
Freemotionbytheriver
Sewincrediblycrazy
Kissedquilts
Funthreads
Patchworkbreeze
Janesquilting
SewCalGal
Beaquilter
Be sure to check out their blogs and collect the free blocks!
You could also win some EQ software! (See the above blogs for details.)
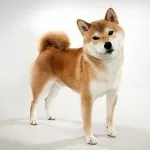
Navigate to your file and click open.
Crop to desired size.
Click open.
Click to place your image.
Click the Applique tab at the bottom.
Use the Freehand ![]() tool to draw out a rough outline.
tool to draw out a rough outline.
(Click on the images to see them larger.)
Use the Pick ![]() tool to adjust the lines of your drawing to get a more precise shape.
tool to adjust the lines of your drawing to get a more precise shape.
I think Add Node(s) ![]() and Convert Line to Curve
and Convert Line to Curve ![]() are very helpful in achieving the shapes you want.
are very helpful in achieving the shapes you want.
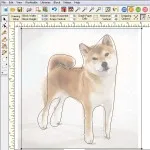
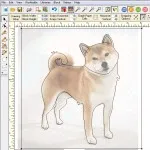
Once I was happy with the basic shape of the dog I deleted the image. Click the Tracing Image tab, right click and select Delete Image.
Then I added more personality and detail using the same tools as before plus the Oval ![]() and Polygon
and Polygon ![]() tools. (Both of them show more shapes when you click on the little black triangle.)
tools. (Both of them show more shapes when you click on the little black triangle.)
Isn’t she cute?
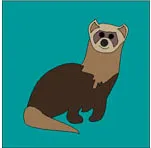
I drew the ferret block in a very similar way.
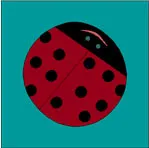
The Ladybug Block was a little different.
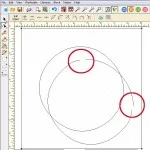
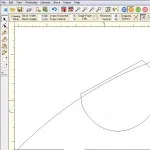
Click Block > New Block > PatchDraw Motif.
Draw a big circle using the Oval ![]() tool.
tool.
Copy and paste the circle to get another just like it.
Click the Add Node(s) ![]() tool to add nodes to both sides of the circle.
tool to add nodes to both sides of the circle.
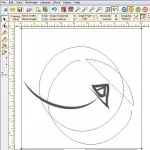
Click on a node then the Break Curve ![]() button.
button.
Click the Line ![]() tool and draw a line to form the head of the ladybug.
tool and draw a line to form the head of the ladybug.
Click to the Color tab at the bottom the make sure your shape is joined correctly. (If not click back to the Applique tab and click the Zoom In ![]() tool. Use the Shape
tool. Use the Shape ![]() tool to join the lines.) Click back to the Applique tab.
tool to join the lines.) Click back to the Applique tab.
Delete the “C” part of what used to be the second circle.
Click the Pick ![]() tool and move the “head” into place. Use the Shape
tool and move the “head” into place. Use the Shape ![]() tool to adjust the lines slightly, if needed.
tool to adjust the lines slightly, if needed.
Click the Line ![]() tool and draw a line in the middle of the body.
tool and draw a line in the middle of the body.
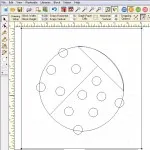
Click the Oval ![]() tool and draw a small circle the will be one of the ladybug’s spot. Copy and paste the spot all over the ladybug’s wings.
tool and draw a small circle the will be one of the ladybug’s spot. Copy and paste the spot all over the ladybug’s wings.
Some of the spots are hanging over the edge.
Click Zoom In ![]() and zoom in to one of the edge spots.
and zoom in to one of the edge spots.
Select the spot and click Add Node(s). ![]()
Add multiple nodes on both sides of the circle.
Click on a node and click Break Curve. ![]()
Delete the small top half of the spot.
Click the Line ![]() tool and connect one side of the “C” shape to the other.
tool and connect one side of the “C” shape to the other.
Click the Convert line to curve ![]() button.
button.
Click the Shape ![]() tool. Use the handles to edit the spot.
tool. Use the handles to edit the spot.
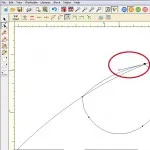
Repeat for all the edge spots.
Click the Oval ![]() tool and draw two circles for the ladybug’s eyes.
tool and draw two circles for the ladybug’s eyes.
Click the Brush Stroke ![]() tool to draw a mouth. You will probably have to change the Brush Stroke’s settings.
tool to draw a mouth. You will probably have to change the Brush Stroke’s settings.
And there you have your ladybug!
I hope you enjoy the Blog Hop. Thanks to Bea Lee for hosting!
Carol Steely from Funthreads blog hop lessons are posted on DoYouEq.com. Check it out!






04-26-2013
9:34 am
I love your puppy with the sunglasses and the ferret. Thanks for a great tutorial and all of the time you put into making it!
04-26-2013
9:47 am
Love the animals and the tutorial. Love my EQ which is such a powerful program.
04-26-2013
9:47 am
fun fun! love them… linked to this too on my blog
04-26-2013
10:12 am
Thanks for sharing I love your little weasel
04-26-2013
10:51 am
All of your blocks are adorable! The ferret is my favorite!
04-26-2013
11:14 am
Thanks everyone! And thanks to Bea for hosting the blog hop. It was fun, I’m glad to be included
04-26-2013
11:56 am
Thanks for sharing. I love the ladybug.
04-26-2013
12:01 pm
Thanks for sharing your quick how-to. Love the ladybug.
04-26-2013
1:26 pm
Excellent tutorial. thank you for sharing. All your animals are so cute, but I just love your ferret.
SewCalGal
www.sewcalgal.blogspot.com
04-26-2013
2:27 pm
Love to see all those cute animals on quilts.
04-26-2013
8:17 pm
Thank you for the tutorial. I did not know about the Break Curve tool but now see how helpful it can be. Also, I have learned about the Brush Stroke tool from two bloggers and am glad I did. This was a fun blog hop and THANK YOU, EQ for sponsoring.
04-26-2013
8:53 pm
Love,love,love the ferret. Must say this was a fun blog hop and thank to Bea for hosting.
04-26-2013
9:12 pm
Thanks for the tutorial! Adorable creatures and you make it look so easy!
04-27-2013
12:56 am
Thanks for the tutorial!
04-27-2013
1:11 am
That is so freaking cute!!
04-27-2013
9:31 am
Thanks for a wonderful tutorial and what cute block! This has been a fun blog hop!
04-27-2013
9:37 am
Great information! Thank you! It looks so easy to manipulate and set up different designs! I am defintely putting EQ on my wish list!!
04-27-2013
2:32 pm
Thank you for sharing that great Tutorial! I love your shiva! Have a nice day!
04-27-2013
8:50 pm
Thanks for a great hop. I learned a lot.
04-29-2013
12:16 pm
Thanks again! I’m glad you liked the blocks and tutorial. It was fun!