If you have EQ7 and you haven’t used the Swath tool yet, or maybe you have but you need more help, this little Swath tool overview is for you.
The Swath tool draws a pre-defined, stylized stroke surrounding a segment. This segment or “spine” of the stroke can be edited and shaped like any curve or line segment (see theShape tool). The stroke or “hull” surrounding the spine can have varying widths and end styles. Use Convert to patch to change the object into a set of Bezier curves.
- Position the cursor where you want to begin.
- Press and hold the left mouse button to anchor the initial node of the first segment.
- Still holding the left mouse button, drag in any direction. A blue line will display the path of your mouse and the curves that are created as you move. The path will follow the actions of the mouse very closely.
- Release the mouse to drop and anchor the end node for the final segment. Your curve will draw with the current stroke style settings.
- When you are finished editing and adjusting your stroke, make sure to click the Convert to patch
 button on the Precision Bar.
|
Click, hold and drag the mouse to create your stroke. |
Release the mouse. Spine: the single line running down the middle of the stroke. Hull: the thicker outline surrounding the spine. |
Notes:
|
 To Select a Drawn Stroke:
- Click to select the Pick tool.
- Position the cursor over any part of the spine.
- Click to select the stroke.
To Edit the Stroke Using the Shape Tool:
- Click to select the Shape tool.
- Position the cursor over any part of the spine.
- Click to select the stroke. Bezier handles will appear.
- Edit or reshape your stroke using the handles and the Edit buttons on the Precision Bar.
Adjusting the Stroke Settings:
To change the contour, style, minimum width and boldness settings, select the stroke with the Pick tool (or keep the stroke selected after drawing it), then adjust the Precision Bar to make changes to your stroke. You’ll see the stroke changing as you adjust the settings. Once the stroke is deselected, the settings return to the defaults.
To change the default settings, deselect the stroke, then adjust the Precision Bar to make changes to your stroke. The next stroke drawn will have these same settings.
![]()
You can also make changes to the default settings in the Drawing Board Setup (BLOCK > Drawing Board Setup > Stroke and Swath). Any changes made here will update the Precision Bar settings, and vice versa.

The Contours:
Select a contour by clicking the drop-down menu on the Precision Bar to make a new selection.
|

|
|
|
|
|
|
The Styles:
Select a style by clicking the drop-down menu on the Precision Bar to make a new selection.
For the first style, to make the “flying geese” fly right, draw your stroke from left to right. To make the “flying geese” fly left, draw your stroke from right to left.
|
|
^ Back to top
Adjusting the Width and Boldness: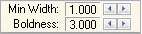
Some of the contour styles of the stroke taper at one or both ends. The Minimum Widthrefers to this tapered-down area of the stroke. If the width is zero, this area is basically flat. As this number increases, the width of this part of the stroke increases.
The Boldness refers to the area surrounding the entire spine of the stroke. As the number increases, the fatter or bolder the brush stroke becomes.
|
|
Minimum Width = 1. The tapered end is really small. |
Minimum Width = 20. The tapered end is really large. |
|
|
|
|
Boldness = 1. The thickness around the entire spine is small. |
Boldness = 20. The thickness around the entire spine is large. |
The Swath Tool Precision Bar:
![]()


