I love foundation piecing. I wish I could foundation piece everything.
So a few months ago when my friend was having a baby shower for her upcoming twins, I decided to try to make some toys to match the nursery. I logged into her baby registry and checked out the theme she had chosen for the room. They were super-cute elephants.
I saved the photo, traced it in EQ, printed templates (with the seam allowance) and then panicked. I had never made stuffed animals before. I knew that the stuffing would ‘eat up’ my design and that I needed extra fabric somehow to account for the depth.
I was overthinking it completely, so I decided to approach it like foundation piecing and just go for it! To my surprise I was able to finish them accurately on the first try in 10 minutes!
Here’s how to make lightning fast ornaments & stuffed animals:
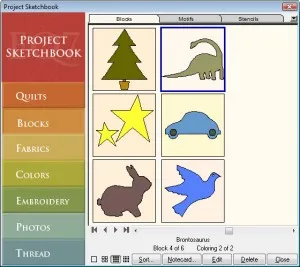
1. Find some REALLY EASY designs – ones without a whole lot of ins & outs… more like silhouettes. (The brontosaurus below is pushing it – that one may be harder to do with this technique.)
You can even draw your own in EQ7.
2. Print templates with seam allowance. Here’s the part you’ll want to play with. I printed mine at 6 inches with 1/2″ seam allowance (I changed it from 0.25 to 0.5). So for bigger blocks you may want to increase your seam allowance. For smaller ones you may want to leave it at 0.25. Mark on your printout on the seam allowance line somewhere where you want to leave the gap so you can turn it.
3. Stack your fabric right sides together and put the piece of paper on top. Pin if you like.
4. Shorten your stitch length on your machine.
5. Start your needle where you marked your gap, stitch on the SEAM ALLOWANCE LINE all the way around to the other end of where you marked your gap.
6. Crumple the whole thing so you can tear away the paper easier.
7. Turn it inside out & stuff it.
8. Hand stitch it closed and embellish.
For some reason, sewing on the seam allowance line worked great and gave the toys just the right amount of depth when I stuffed them. I actually zoomed all the way around and had a line I could follow just like foundation piecing.
If you try it, send me a picture to webmaster@electricquilt.com and I’ll post it here.


