So I visited the vendor mall for a while. I got to this booth that was an absolute color explosion. I think it was the Material Girl shop I loved it. Everything was Westminster, FreeSpirit, and Art Gallery fabrics. I was staring at this quilt they had on their wall thinking “oh my, that’s a lot of piecing and appliqué.” And then I got closer and realized… “no…. that’s just plain squares! I can totally do that!” I asked them about the fabric, and of course they had half-yard cuts that they showed me off the rack. ![]()
For those of you who want to try something similar, these Westminster fabrics would work for the plain squares:


Start a horizontal quilt. Set these in the plain squares alternately (ALT). Then set something super-simple in the other alternate blocks (ALT)… like a Log Cabin (with really thick logs), or a 4-X block, or a Diamond in the Square block. Sew it up. Then when it comes time to quilt it, echo-quilt the Westminster fabric on the lines of the fabric design. It ends up looking like you appliquéd it all! It’s so easy it seems like cheating, but hey, that fabric was really inspirational.
So after buying about 6 or 7 different ones…. whoops… what happened to my fiscal self control?… lol… I went off to teach my EQ6 Layouts class.
There were many familiar faces in my class. I was excited that they would all be familiar with my teaching style… and that if they could follow me that well in the previous classes, then today would be great as well.
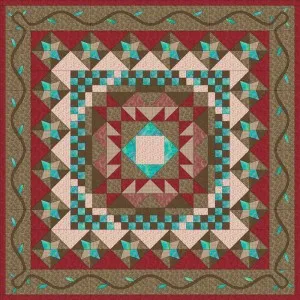
Our first quilt was a medallion quilt. I taught them about borders: adding borders, inserting borders, deleting borders, etc. I showed them how the “aligned” border styles work great when you want seams to line up. I also showed them how Tile Squares and Tile On-Point does the math for you. We added an Auto Border around the outside and called it done. They were very happy with their quilt #1′s.
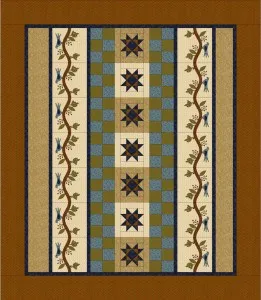
For the next layout, we played with Vertical Strip Quilts… an often under-appreciated quilt layout in EQ6. I showed them how it works just like borders. We designed some strips, cloned them in different orders to make the rest of the strips, and then started designing. I had them put a wide border around the quilt and we set the Auto Border Vine with the birds in the border. It’s a cool trick that “whatever Auto Border you try out, the blocks go in your Sketchbook no matter what.” So we used the Erase tool to wipe out the border, but then used the Set Block tool to use the Auto Border blocks in two of our strips. We put stars down the center and then gave them more breathing room by using Serendipity > Frame Blocks to frame up the stars and then we set them again in the quilt. I noticed the class was flying through my lesson plan once again, so I padded the lesson a little bit and taught them how to steal the birdie out of the block and make him into his own Motif and set that on Layer 2 … like a Folk Art quilt.
Quilt #3 was our first attempt at Custom Set. I showed them how long it took to set blocks, set them the right size, use the Graph Pad, and align them like a puzzle.
Thanks to the Nebraska State Quilt Guild for a wonderful weekend. I had a blast visiting your state, meeting your members, shopping & teaching.


