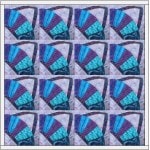
We came across this blog post by Rebecca Deming Rumpf and it inspired this lesson.
Sew one block. Then quickly preview your finished quilt. Sounds impossible? Try this:
Scan the block
You only need a small, low resolution image. So if your scanner lets you choose a size and resolution make your block about 3” x 3” and 72-75 dpi. Save the scan somewhere you can find again.

Create a new project
Open EQ7.
Name it: any name of your choice.
Import the block image into EQ7
In EQ7 click WORKTABLE > Work on Image
Click the Import Image ![]() button > browse to find and select your scanned block image > click Open.
button > browse to find and select your scanned block image > click Open.
(We could have imported from the Photo Library. But if you import from the IMAGE worktable you can use the Twist ![]() tool to create rotations to audition in your quilt.)
tool to create rotations to audition in your quilt.)
Crop if needed
Click the Crop ![]() tool.
tool.
Drag the crop box from top-right to bottom-left so only your block is within > then click the green check above. (You want to crop out any white background left by the scanner lid showing behind the block.)
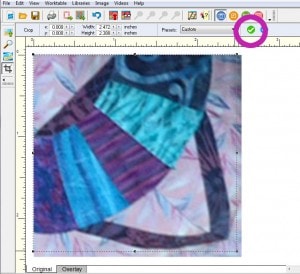
Click Add to Sketchbook ![]() button.
button.
Save rotated versions of the image if needed
(Optional – do this only if your block is not the same on all 4 sides)
Click the Twist ![]() tool.
tool.
- Click the Rotate 90 degrees
 button on the top of your screen.
Click Add to Sketchbook
- Click the Rotate 90 degrees
 button, again.
Click Add to Sketchbook
- Click the Rotate 90 degrees
 button, a third time.
Click Add to Sketchbook
You’ve just saved the block in 90, 180, 270 rotations, plus unrotated.
Design a quilt
Click WORKTABLE > Work on Quilt.
Click QUILT > New Quilt > Horizontal.
Adjust the layout as desired
Click the Layout tab.
Number of blocks: Your choice, but make it an even number – 4, 6, 8, etc. for horizontal and vertical.
For size: Your choice.
Sashing: 0
Set the block photo into the quilt layout
Click Layer 1.
Click the Set Photo ![]() tool. Your block scan, and rotated versions, are there.
tool. Your block scan, and rotated versions, are there.
Use CTRL+click (PC) or Command+click (Mac) to set the first scan in all spaces at once. Voila! Preview your quilt.
But if working with rotations, you can try them out.
Q: Why can’t you just use the Rotate Block ![]() tool to rotate?
tool to rotate?
A: The Rotate Block tool rotates blocks. The Rotate Block tool will not rotate scanned images (photos).
Have fun setting various rotated block scans (optional)
Click Block 2 (the first rotated scan) in the palette
Use ALT+click (PC) or Option+click (Mac) to set it. It sets into every other block space.
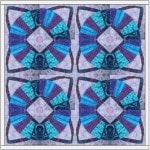
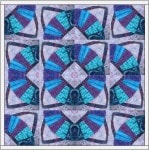
Continue with Block 3 and Block 4, setting different scans different places to create different patterns.
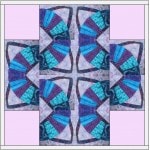
You’ll be previewing variations of your finished quilt!
 |
 |
 |


