Getting Started
Print off these instructions from your internet browser by clicking FILE > Print. Follow each step of this lesson to begin making your “EQuinox” Mystery Quilt.
Open the EQuinox.PJ5 or .PJ6 File
- Open EQ6 (EQ5).
- Click the Open an Existing Project tab (it appears immediately when you open EQ6 or EQ5).Or
On the menu bar, click FILE > Open. - Click on EQuinox.PJ6 (or EQuinox.PJ5 in EQ5).
- Click OK. The Sketchbook opens.
Edit the Quilt Layout
- Click the Quilts section to find your mystery quilt layout.
- Scroll beneath the quilts to find the last quilt (with the lighthouse, flower, cabin and pine border you made in Lesson 7).
- Click the Edit button. Your quilt appears on the Quilt worktable.
Create Border Ten
- Click the Borders tab.
- Click the Add button. It adds a border.
- Under Select a border style, click the down arrow to display choices.
- Click Mitered (at the top of the list).
- In the sizing area, lock your borders so they will all move together by putting a check next to the “All” box.
- Drag the slider bar for Left (or click directly on the slider bar) to make the border 1.50 (3.81cm x 3.81cm). Since you have the “All” box checked, all border sides should change at once as you drag, so they are all now 1.50.
Create Border Eleven
- Click the Add button. It adds a border.
- Under Select a border style, click the down arrow to display choices.
- Click Mitered (at the top of the list).
- Drag the slider bar for Left (or click directly on the slider bar) to make the border 3.00 (7.62cm x 7.62cm). Since you have the “All” box checked, all border sides should change at once as you drag, so they are all now 3.00.
Create Border Twelve
- Click the Add button. It adds a border.
- Under Select a border style, click the down arrow to display choices.
- Click Blocks (near the top of the list).
- Drag the slider bar for Left (or click directly on the slider bar) to make the border 1.00 (2.54cm x 2.54cm). Since you have the “All” box checked, all border sides should change at once as you drag, so they are all now 100.
- Use the arrows to change the number of blocks in the border. Change Horizontal and Vertical both to 9 in each box.
Create Border Thirteen
- Click the Add button. It adds a border.
- Under Select a border style, click the down arrow to display choices.
- Click Mitered (at the top of the list).
- Drag the slider bar for Left (or click directly on the slider bar) to make the border 4.00 (10.16cm x 10.16cm). Since you have the “All” box checked, all border sides should change at once as you drag, so they are all now 4.00.
- Click the Layer 1 tab.
Set and Rotate Half-Square Triangles
- Click on the Set Block tool
 (Set tool in EQ5). The Sketchbook Blocks palette (Blocks palette in EQ5) appears.
 - Click on the Half-Square Triangle block in the palette. It does not matter which coloring is showing.
- Holding down the CTRL key, click on a tiny corner block space in border number 12.
- Click the Rotate Block tool
 (Rotate tool in EQ5).
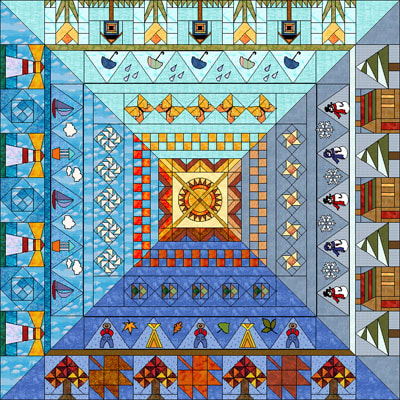
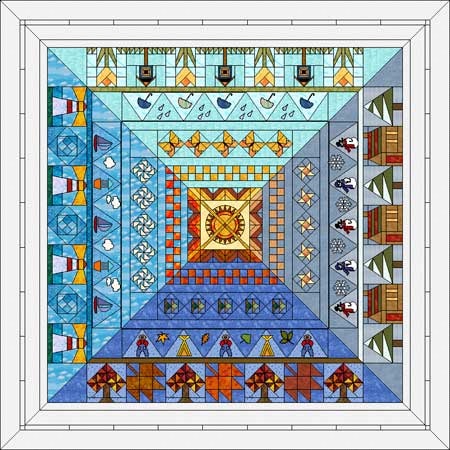
 - Click on the top-right, then click on the bottom-left Half-Square Triangle block in the border. (You should notice the seam lines for your Half-Square Triangles line up with the mitered borers all the way to the center block.) Your quilt should look something like this now:
Color Borders 10, 11 and 13
- Click on the Paintbrush
 tool. The palette will appear.
 - Inside the palette, click on the Colors tab (Solids tab in EQ5).
- Find and click on black.
- CTRL+click on the border to either side of the Blocks border to make both those wide mitered borders black. (Borders 11 and 13.)
- Color Border 10 using the same colors used in Border 8. Click the Eyedropper
 tool.
tool. - Click on the fabric/color in the quilt. The color will be sucked up and you’ll automatically be switched to the Paintbrush and able to start clicking in that color. Color all 4 sides to Border 8. Your quilt will look something like this:
Color Border 12
- Click on the Paintbrush
 tool.
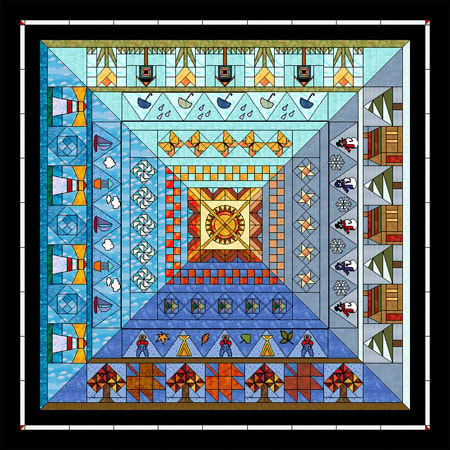
tool. - Color each square a different color. If you like you can make it go in a rainbow around the border.
- To color the Half-Square Triangles, you may want to zoom in on them. Click the Zoom In
 tool.
tool. - Make a marquee box around what you want to see bigger (start above and left of one of the corners, click and hold, make a dotted box, release when you’re below and to the right of the corner).
- Color the corner triangles the same colors as the neighboring rectangles. Like this:
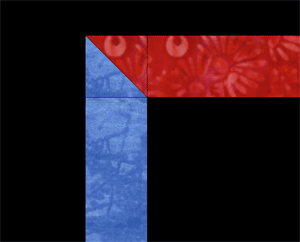
- Color all your border rectangles and corner triangles, your quilt will look something like this.(Click the picture below to see the image larger… then click your browser’s BACK button to return to this page.)
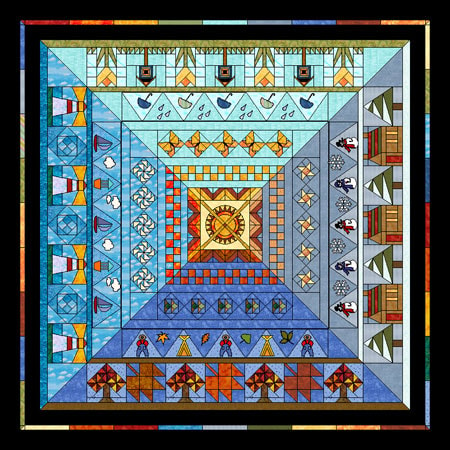
- Click Add to Sketchbook
 button (Save in Sketchbook in EQ5) to save this quilt.
 - Click FILE > Exit to close the program.
THE END! You’re done!
Congratulations! You have now completed the EQuinox quilt design. If you have questions about design or construction of the quilt, please visit the Mystery Quilt section of EQ Forum where you can ask questions from Fran Iverson Gonzalez, designer of EQuinox. It’s a beautiful year’s worth of weather and activities! Thank you for reading the mystery and doing the lessons…
Mitzi will be back…
We’re cooking up another mystery with Mitzi McDruben.
Watch for another exciting adventure and more EQ lessons.
We will announce it in our newsletter when we’re about to start.

