Getting Started
Print off these instructions from your internet browser by clicking FILE > Print. Follow each step of this lesson to begin making your “EQuinox” Mystery Quilt.
Open the EQuinox.PJ5 or .PJ6 File
- Open EQ6 (EQ5).
- Click the Open an Existing Project tab (it appears immediately when you open EQ6 or EQ5).Or
On the menu bar, click FILE > Open. - Click on EQuinox.PJ6 (or EQuinox.PJ5 in EQ5).
- Click OK. The Sketchbook opens.
Edit the Quilt Layout
- Click the Quilts section to find your mystery quilt layout.
- Scroll beneath the quilts to find the last quilt (with the clouds, leaves, snowflakes and raindrops border you made in Lesson 5).
- Click the Edit button. Your quilt appears on the Quilt worktable.
Get Blocks from the Library
- Click LIBRARIES > Block Library on the top menu bar.
- Scroll down in the libraries list, click on 5 Contemporary Applique.
- Click on the Christmas style to show the blocks.
- Click on the Snowman block to select it.

- Click the Add to Sketchbook button (Copy button in EQ5) to put it in your Sketchbook.
- Still in 5 Contemporary Applique, scroll down a little bit and click on Toys.
- Click on the Sailboat 3 (Sailboat III in EQ5) block to select it.

- Click the Add to Sketchbook button (Copy button in EQ5) to put it in your Sketchbook.
- Scroll down in the libraries list and click on 6 Motifs.
- Click on the Sunbonnet Motifs style to show the motifs.
- Click on the Overall Bill motif to select it.
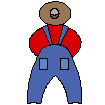
Notice how Overall Bill does not have a background square. Motifs can float on Layer 2 because of this. We’re going to need to edit the Snowman, Sailboat and Umbrella to make them like Overall Bill later in this lesson.
- Click the Add to Sketchbook button (Copy button in EQ5) to put it in your Sketchbook.
- Scroll down in the libraries list and click on 8 Overlaid Blocks.
- Click on the Embellished Alphabet style to show the blocks.
 Click on the U is for Umbrella block to select it.
- Click the Add to Sketchbook button (Copy button in EQ5) to put it in your Sketchbook.
- Click Close to put the library away.
Edit Library Blocks to Make Motifs
- Click the View Sketchbook
 button on the Project toolbar.
 - Click the Blocks section.
- Click the Sailboat 3 (Sailboat III in EQ5) block to select it and click Edit. You will be taken from the Quilt Worktable to the Block Worktable.
- The next step is different for EQ5 and EQ6. Please follow the appropriate instructions depending on which version you are using:
EQ6 Instructions:
- Click the Applique tab at the bottom of your screen.
- Click EDIT > Select All on the top menu bar.
- Click EDIT > Copy on the top menu bar.
- Click BLOCK > New Block > PatchDraw Motif on the top menu bar.
- Click EDIT > Paste on the top menu bar.
- In the center of the pasted patches is a crosshair. Position your cursor over the crosshair so it turns into a crosshair too. Click, hold, and drag the patches so they are centered within the “block outline”… and not over the edge.
- Click the Add to Sketchbook
 button on the top toolbar to save the motif.
EQ5 Instructions:
- Click the Select arrow on the top of the right Drawing toolbar.
- Click on the block outline so it is selected.
- Press your keyboard DELETE key.
- Click the Save in Sketchbook
 button to save the motif.
- Repeat steps 25-28 for the Snowman block.
- Click the View Sketchbook
 button on the Project toolbar.
 - Click the Blocks section.
- Click the U is for Umbrella block to select it and click Edit. You will be taken from the Quilt Worktable to the Block Worktable.
- Click the Applique tab.
- Click EDIT > Select All on the top menu bar.
- Click EDIT > Copy on the top menu bar.
- Start a new block without a background by following the directions for either EQ5 or EQ6:EQ6 Instructions: Click BLOCK > New Block > PatchDraw Motif on the top menu bar.EQ5 Instructions: Click BLOCK > New Block > PatchDraw. Click BLOCK > Convert to Guides on the menu bar. (This will remove the background square, but also let you know where the edges were.)
- Click EDIT > Paste on the top menu bar. The umbrella will be quite small.
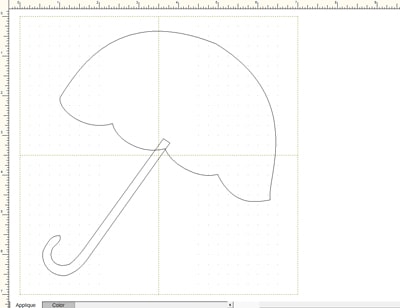
- While the patches are still selected, hold down your keyboard CTRL key. Grab the bottom-right corner handle and drag it down and right while holding down CTRL. Make it just big enough so it looks like it will fit in the square guides.
- Now the patches will be over the edge. In the center of the pasted patches is a crosshair. Position your cursor over the crosshair so it turns into a crosshair too. Click, hold, and drag the patches so they are centered within the “block outline”… and not over the edge.
- Click the Add to Sketchbook
 button (Save in Sketchbook in EQ5) to save the motif.
 - Click the Color tab, color your umbrella and click Add to Sketchbook
 button (Save in Sketchbook in EQ5) to save the coloring.
Draw a Mrs. Snowman
- First, let’s make a change Mr. Snowman’s nose and then make a Mrs. Snowman. Click the View Sketchbook
 button on the Project toolbar.
 - Click the Blocks section. Click the Motifs tab near the top of the Sketchbook.
- Click the Snowman motif to select it and click Edit. You will be taken from the Quilt Worktable to the Block Worktable.
- Click the Pick
 tool (Select tool in EQ5).
 - Click the Snowman’s nose and press your keyboard DELETE key.
- Click the Line
 tool. Draw a carrot nose, as shown below.
 - Click the Color tab and color the carrot nose.
- Click Add to Sketchbook
 button (Save in Sketchbook in EQ5) to save the motif and its coloring.
 - Click the Pick
 tool (Select tool in EQ5). Click on the Snowman’s pipe and press your keyboardDELETE key.
 - Click on the top part of the hat and press your keyboard DELETE key. It should look something like this now:
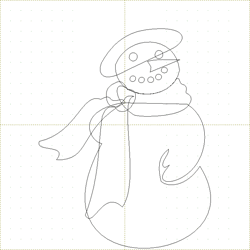
- With the Pick tool, click on the Snowman’s head. Click EDIT > Copy, EDIT > Paste on the menu bar. (Using CTRL+C and CTRL+V on your keyboard works too.)
- In the center of the pasted patch is a crosshair. Position your cursor over the crosshair so it turns into a crosshair too. Click, hold, and drag the patch so it is away from the rest of the patches.
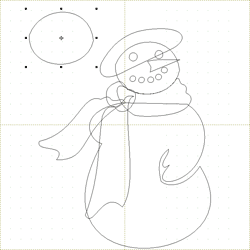
- Let’s rotate the patch so the it will make a nice hat. Right-click the patch and choose Rotate. (Or, click BLOCK > Rotate from the menu bar.)
- The number is already blue, so you can type over it. Type: 335
- Click OK.
- Position your cursor over the center crosshair of the patch so it turns into a crosshair too. Click, hold, and drag the patch to make the top part of the hat. It should look something like this:
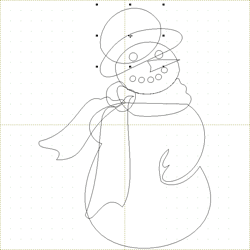
- Follow the directions for the version you’re using to choose the heart:
EQ6 Instructions:
- Click and hold on the Oval tool to make the flyout appear.
- Click on the 2nd patch that looks like a heart.

EQ5 Instructions:
- Find the Simple Oval tool on the right Drawing toolbar and click on the small black arrow in the button to make the flyout appear.
- Click on the 2nd patch that looks like a heart.

- Position your cursor below the scarf at her neck. Click, hold, and drag down and stop near her hand. It should look something like this now:
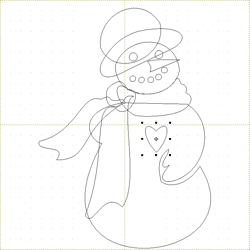
- Click the Color tab.
- The circle for the hat will most likely be covering up the brim and her eye. Click the Pick
 tool (Select tool in EQ5).
 - Click on the circle for the hat and then right-click it and choose Send to Back.
- Color your Mrs. Snowman:

- Click Add to Sketchbook
 button (Save in Sketchbook in EQ5) to save the motif and its coloring.
Draw a Corn Shock
- Start a new block without a background by following the directions for either EQ5 or EQ6:
- Click BLOCK > New Block > PatchDraw Motif on the top menu bar.
- Click and hold on the Polygon tool to make the flyout appear.
- Click on the 2nd patch that looks like a tall triangle.

EQ5 Instructions:
- Click BLOCK > New Block > PatchDraw.
- Click BLOCK > Convert to Guides on the menu bar. (This will remove the background square, but also let you know where the edges were.)
- Find the Simple Shape tool on the right Drawing toolbar andclick on the small black arrow in the button to make the flyout appear.
- Click on the 2nd patch that looks like a triangle.

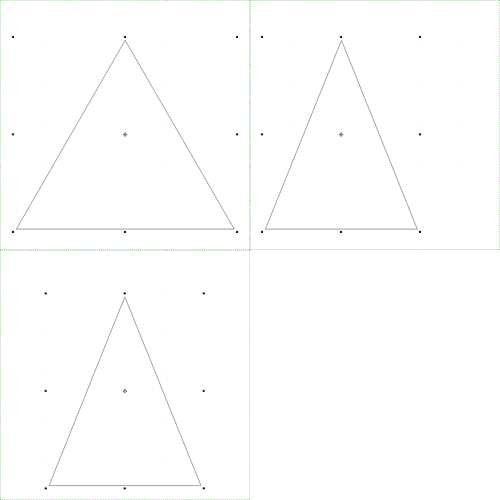 Hold down your keyboard CTRL key.
- Starting about 1″ down from the top-middle of the block, still holding down your CTRL key… click, hold and drag out a triangle shape. Try to make it so the bottom is perfectly horizontal. Stop about 1/2″ from the bottom. You don’t need to be exact. It should look something like this:
- Click the Pick
 tool (Select tool in EQ5).
 - EQ5 Users - click on the triangle to select it, so you see the handles.
- Using the middle handle on the right side, click, hold, and drag the handle in a little toward the center of the selected patches… making the triangle narrower.
- Grab the triangle by the center crosshair and move it to be centered within the motif outlines.
- Click EDIT > Copy, EDIT > Paste on the menu bar. (Using CTRL+C and CTRL+V on your keyboard works too.)
- Hold down your keyboard CTRL key.
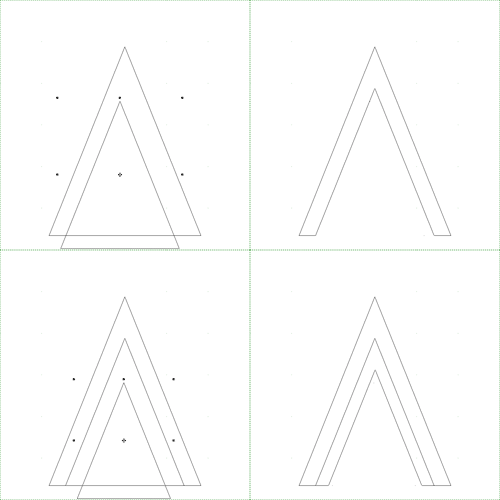 Using the top-right corner handle, click, hold, and drag the handle in a little toward the center. (The CTRL key keeps it proportional.)
- In the center of the pasted patch is a crosshair. Position your cursor over the crosshair so it turns into a crosshair too.Click, hold, and drag the patch so it is centered and the bottom of this triangle lines up with the previous one. (If you place it exactly right, the bottom of your pasted patch may turn the bottom of the original patch white for a second until you release. The bottoms of the two patches will be within pixels then.)
- While this new triangle is still selected,
repeat steps 72-75 to do one more triangle like this. - While the third triangle is still selected, hold down your keyboard SHIFT key and click on the second triangle you did.
- Click EDIT > Copy, EDIT > Paste on the menu bar. (Using CTRL+C and CTRL+V on your keyboard works too.)
- Click BLOCK > Symmetry.
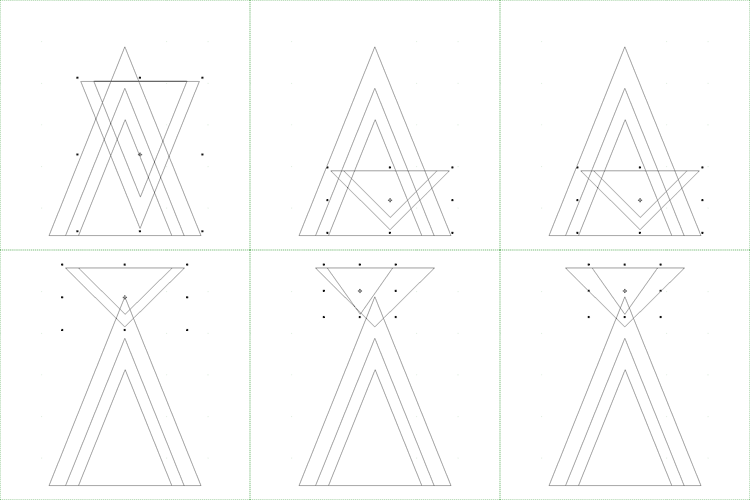 Click the Flip V button.
- While they are still selected… use the top-middle handleand click, hold, and drag the handle in toward the center of the patches.
- Position your cursor over the crosshair so it turns into a crosshair too. Click, hold, and drag the patches so they are centered above the existing triangles.
- Click in the white space on the outside of the motif to deselect the patches.
- Click on the line of the center triangle you just pasted and flipped.
- Using the middle handle on the right side, click, hold and drag the handle in toward the center a little.
- Position your cursor over the center crosshair and re-center the triangle inside the top.
- Click the Color tab.
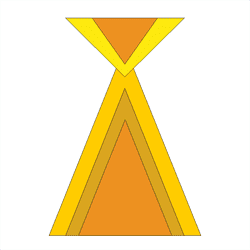
- Color your corn shock. Click Add to Sketchbook
 button (Save in Sketchbook in EQ5) to save the motif and its coloring.
Draw a Buoy
- One more motif and then we’re done drawing. Start a new block without a background by following the directions for either EQ5 or EQ6:
- Click BLOCK > New Block > PatchDraw Motif on the top menu bar.
- Click and hold on the Polygon tool to make the flyout appear.
- Click on the 5th patch that looks like a square.

EQ5 Instructions:
- Click BLOCK > New Block > PatchDraw.
- Click BLOCK > Convert to Guides on the menu bar. (This will remove the background square, but also let you know where the edges were.)
- Find the Simple Shape tool on the right Drawing toolbar andclick on the small black arrow in the button to make the flyout appear.
- Click on the 6th (last) patch that looks like a rectangle.

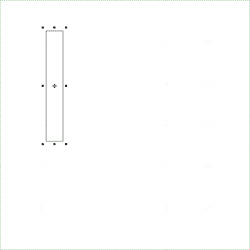
- Position your cursor inside the block guides. Click, hold, and drag out a small vertical rectangle like this:
- Click the Pick
 tool (Select tool in EQ5).
 - Click on the line of the rectangle to select it.
- Click EDIT > Copy, EDIT > Paste on the menu bar. (Using CTRL+C and CTRL+V on your keyboard works too.)
- Click EDIT > Paste again. You will now have 3 rectangles.
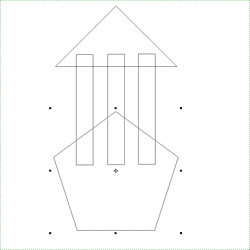
- Line up the rectangles as in the image below. To do this, click on the line of the rectangle to select it. Position your cursor over the center crosshair of the patch. Grab the crosshair and drag the patch elsewhere.

- EQ6 Users: Click and hold on the Polygon tool to make the flyout appear. Click on the first shape which is a triangle.EQ5 Users: Click on the small black arrow inside the Simple Shape tool to make the flyout appear. Click on the first shape which is a triangle.
- Hold down your keyboard CTRL key. Position your cursor near the top-middle of the block.
- Click, hold, and drag out a triangle to form the roof of the buoy. Keep the bottom of the triangle horizontal.

- EQ6 Users: Click and hold on the Polygon tool to make the flyout appear. Click on the sixth shape which is a pentagon.EQ5 Users: Click on the small black arrow inside the Polygon tool to make the flyout appear. Click on the first shape which is a pentagon.
- Start your cursor in the middle of the middle rectangle. Hold down your keyboard CTRL key as you drag a pentagon down to form the base of the buoy.
- Click the Shape
 tool (Bezier Edit tool in EQ5).
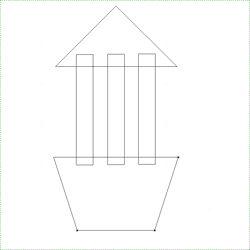
 - EQ6 Users: Double-click on the top node of the pentagon to delete it. (If you have trouble, follow the EQ5 instructions below… they work too.)EQ5 Users: Click on the top node of the pentagon to select it. Right-click the node and choose Edit. (BLOCK > Edit works too.) Click the Delete button on the box that appears.
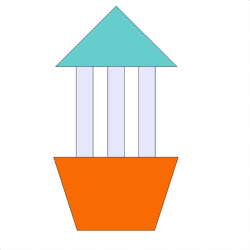
- Click the Color tab. Color your buoy.
- Click Add to Sketchbook
 button (Save in Sketchbook in EQ5) to save the motif and its coloring.
Take a moment and name your new blocks
a) Click the View Sketchbook ![]() button.
button.
b) Click the Blocks section.
c) Above the blocks you see, click the Motifs tab.
d) Select one of the new motifs you made.
e) Click the Notecard button.
f) In the Name line, type its name. (Snowman, Mrs. Snowman, Sailboat, Umbrella, Corn Shock, or Buoy)
g) Click the X in the top corner of the notecard.
h) Repeat steps d) – g) for each of the new motifs.
i) Click Close or the X to close the Sketchbook.
Start Setting Motifs on Layer 2
- Click WORKTABLE > Work on Quilt on the top menu bar.
- Click on the Set Block tool
 (Set tool in EQ5). The Sketchbook Blocks palette (Blocks palette in EQ5) appears.
 - You want to be on the second tab of the worktable and palette. So, click the Layer 2 tab at the bottom of your screen. And click the Motifs tab within the Sketchbook Blocks palette.
- EQ5 Users: For each motif, click on it in the palette and then click the 4th colorway arrow
 to show the coloring you saved.
 - Click to select the Snowman motif in the palette.
- Hold down your keyboard SHIFT key. Move your cursor over the Winter (right) side of the border. Keep holding down SHIFT as you drag out a box shape on the quilt (it’s a click and hold as you move your mouse down and right). Don’t make the box too small.
[Keyboard touchpad users: hold down SHIFT, click and hold the left mouse clicker, then stroke the touchpad diagonally down and right.] - Release the mouse and release the SHIFT key. The Snowman will pop into the dotted box you made.
- Click the Adjust
 tool and click on the Snowman.
 - The Graph Pad should still be showing from the last lesson. If you don’t see something like this at the top of your EQ6 window (below the Project toolbar):
 or something like this at the bottom of your EQ5 window (just above the START button):

then, on the menu bar, click VIEW > Graph Pad and click it to put a check next to it.
- The pair of numbers in the middle of the Graph Pad display the size (red circles). To change the motif’s size, you can either a) click the arrows beside the numbers or b) double-click on the existing number and type in the new number and press ENTER. Resize the selected Snowman to 4.50″ x 4.50″ (11.43 cm).
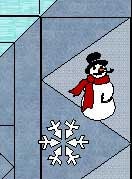
- When you’re using the Adjust tool, you can copy and paste motifs. Click EDIT > Copy, then click EDIT > Paste on the menu bar. (CTRL+C and CTRL+V on your keyboard works as well.)
- The pasted Snowman is selected. Move this one down to the next triangle.
- Continue pasting and moving snowmen until you have 2 in each border.
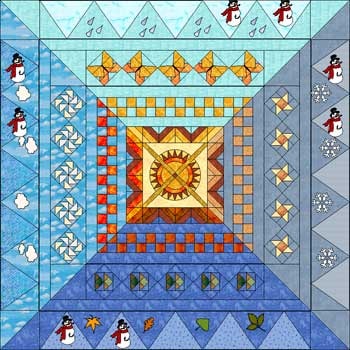
- Click on the Set Block tool
 (Set tool in EQ5). If you are not still on the Motifs tab within the palette, click on the Motifs tab.
 - In the bottom border (Fall), replace one snowman with Overall Bill. Do this by clicking on the Overall Billmotif in the palette and clicking on the snowman in the bottom border.
- Following step 119, replace the other snowman in the bottom border with the Corn Shock motif.
- In the left border (Summer), replace one snowman with the Sailboat motif and the other snowman with theBuoy motif.
- In the top border (Spring), replace both snowmen with the Umbrella motif.
- In the right border (Winter), replace one snowman with the Mrs. Snowman motif.
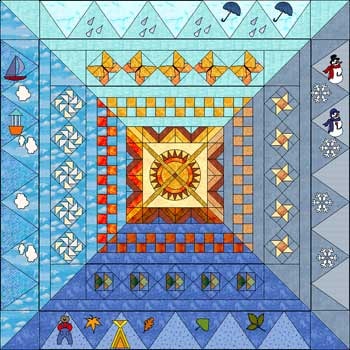
- Click the Adjust
 tool.
tool. - Click on a motif and copy and paste it, so the motifs go every other one in the border. Use steps 115 and 116 if you need help.

- Click the Rotate Block tool
 (Rotate tool in EQ5).
 - Rotate each Snowman and Mrs. Snowman 3 times.
- Rotate each Sailboat and Buoy 1 time.
- Rotate each Umbrella 2 times.

- Click the Adjust tool again. If necessary, click on a motif and move it to fit inside the triangle it goes in.
- Click on the Paintbrush
 tool.
tool. - Recolor any motifs you want. For instance, you can color every other Umbrella a different color.
- Click Add to Sketchbook
 button (Save in Sketchbook in EQ5) to save this quilt.
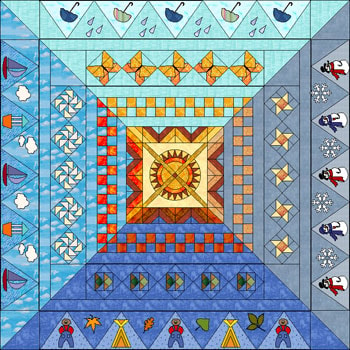
EQuinox color and fabric tips
If you are sewing along with us during the lessons, remember EQuinox is a scrap quilt. It uses a large variety of colors and values. The Sun is the quilt’s center block.
For the borders around the Sun, think in terms of sun rays, slightly varying the colors and values in each border strip to reflect seasonal color and light changes:
Top Border = Spring
Right Border = Winter
Bottom Border = Fall
Left Border = Summer
We recommend printing Templates for all the motifs. Do this from Layer 2.
Click the Select tool ![]() .
.
Click on the Layer 2 tab.
Click on a motif in the border to select it.
From the menu bar, choose FILE > Print > Templates.
Be sure you put a check in “size from quilt”.
For each season, pick two different colors. Cut 5 full points of one color. From the other color cut 4 full points and 2 half points.
Use your preferred method of appliqué to sew these pieces down.
- On the menu bar, click FILE > Exit.
