I love quilts with unusual shapes. With EQ7 you have a wonderful tool to create quilts, even with non-square layouts.
With this example, I’ll show you how I do it.
The EQ Pieced Drawing book by Patt i Anderson was a great help to me. If you don’t have it already you should purchase it (see a free preview chapter from the book here). EQ has republished this book with a convenient spiral binding and it is available on their website.
If you have the book, go to Chapter 4: Drawing Outside the Box > Drawing 60° Blocks > Drawing Hexagonal Blocks with Pieced PatchDraw. Following Patti Anderson’s instructions, I first drew an isometric grid for a vertical hexagon on the Pieced PatchDraw Worktable. Following the guidelines, I drew a hexagon as a motif and saved it to my Sketchbook. You can find the hexagon in my project file (download the Longing for Spring.PJ7 file at the top of this page). I’ll show you how to use this hexagon to create a hexagon-shaped quilt layout.

Creating the Layout
Before we start a new quilt let’s change the worktable options.
Step 1: Click QUILT >Quilt Worktable Options > Snap Settings.
• Nudge Settings: all to 1/32
• Grid Settings: 1/32
• Click OK to close the window.
Step 2: On the Quilt Worktable go to QUILT>New Quilt>Custom Set.
Step 3: Click the Layout tab and make the Width: 0.5 and Height: 0.5.
Step 4: Click the Borders tab.
• Border style: Mitered
• Lock size adjustments: Check All
• Size: 20
Step 5: Click the Layer 2 tab. Click the Set Block tool and drag the hexagon over the center.

Step 6: Click the Adjust tool and then click on the hexagon to select it. Click the Center vertically and Center horizontally buttons on the Precision Bar.

Step 7: Use the Copy and Paste buttons on the Project toolbar to set more hexagons (if these buttons are not on the toolbar, click the Customize Toolbar button to add them). Use the arrow buttons next to the Position boxes on the Graph Pad to place the hexagons exactly.

Step 8: Place 6 hexagons around the center one. Notice, that you don’t set blocks outside the border. If necessary, you can add a second border.
Step 9: Done? Add to Sketchbook.
Step 10: Click the Borders tab. Click Delete. Click Add to Sketchbook again.

Step 11: Click View Sketchbook after deleting the border.

You can get very nice effects when adding more shapes that are based on the 60° triangle. The shapes can be rotated 180° in both directions using the Graph Pad controls.
If you want to set your own hexagons, click the Layer 2 tab. Click the Set Block tool, click on the hexagon in the Blocks palette and then on the plain hexagon in the layout.
This is wonderful with fabrics, using the Fussy Cut tool and the Rotate Fabric tool:
With self-drawn Hexagons:
Try it and you will have a lot of fun!
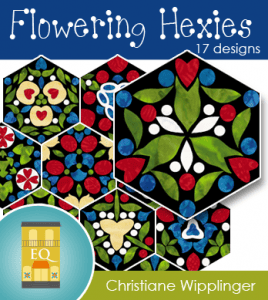
 Get more Flowering Hexies from Christiance Wipplinger at MyEQBoutique.com.


