Welcome everyone to our newest sew along lessons! We are calling this ‘DESIGN AND SEWING’ . The lessons are for everyone but can be especially beneficial for the beginner EQ8 user. Following along with the lessons and creating the pattern will be a great way to learn how to use the tools in the EQ8 program. The lessons begin with this introduction on January 12 and there will be a new lesson posted every 2nd and 4th Sunday of the month for 3 months. The first designing lesson will be January 26, 2020. There will be instructions on how to create the blocks and the layout for the quilt below. This will include all the different block styles, border options, and printing of the patterns for each of the blocks for construction. You will be able to download and print the lesson from the website to follow along. You will
Favorite Posts
LESSONS WITH YVONNE–INTRODUCING NEW ‘DESIGN AND SEW ALONG’ LESSONS
Posted 01-12-2020 by Yvonne | Posted in: Design and Sew Along EQ8 EQ8 Lessons with Yvonne Favorite Posts Sew Alongs
Design & Discover – Designing a Basic Quilt
Posted 01-01-2020 by Heidi | Posted in: Design & Discover
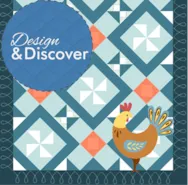
Did you just get EQ8? Or, would you like a basic lesson on how to design a basic quilt? This quilt has a horizontal layout with elements placed on Layer 1, Layer 2, and Layer 3. Let’s get started! When you open EQ8 you will see this screen. Click Design a quilt from scratch In general the idea is to work on the tabs from left to right. You can always click back and forth between tabs to change things as you go along though. Under the first tab – NEW QUILT click Horizontal Now click the second tab – LAYOUT Under NUMBER OF BLOCKS make it Horizontal: 3 Vertical: 4 Under FINISHED SIZE OF BLOCKS make it Width: 9 Height: 9 Under FINISHED SIZE OF SASHING make it Width: 0 Height: 0 Now click the third tab – BORDERS Under Select a border style choose Long Horizontal Under Border
Design & Discover – Pointed and Scallop Borders
Posted 12-01-2019 by Heidi | Posted in: Design & Discover
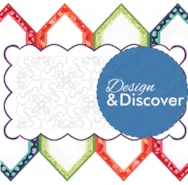
Borders can add so much to a quilt! We’ve covered using the Border tab and Auto Borders but these quilts are a little bit different. These are the two quilts we will be designing in this lesson. If you’d like to skip to the scalloped border go to step #41. Pointed Border Click NEW QUILT > Horizontal > LAYOUT tab Make the NUMBER OF BLOCKS: Horizontal: 1 Vertical: 5 Make the FINISHED SIZE OF BLOCKS Width: 12 Height: 12 Make the FINISHED SIZE OF SASHING Width: 0 Height: 1 Click the BORDERS tab Click the Add button two times or until you have three borders. Click on the first border and make it: Long Horizontal Left: 1 Top: 0 Right: 1 Bottom: 0 Click on the second border and make it: Long Horizontal Left: 2 Top: 0 Right: 2 Bottom: 0 Click on the third border and make it: Long
LESSONS WITH YVONNE–IT’S MY BIRTHDAY
Posted 11-17-2019 by Yvonne | Posted in: EQ8 EQ8 Lessons with Yvonne Favorite Posts
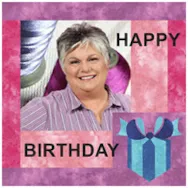
EQ8 is so versatile. Not only can you create quilts, but with the Image worktable, you can create any image you wish using the EQ tools and blocks to create a photo design. You don’t need to worry about block size or placement on the quilt layout table. Just arrange the images and blocks in the way you want your layout to look and then save the image to your computer to use for sending best wishes to people through any internet medium you choose (Facebook, Instagram, messenger, etc). Try this project and send your image in an email to that special person in your life or just post it to the internet for everyone to see. Start by opening your EQ8 program and click on the quilt worktable icon on the upper right side of the screen. Set the layout to be 1 block horizontal quilt layout with the
Design & Discover – Bargello Quilts
Posted 11-01-2019 by Heidi | Posted in: Design & Discover
Bargello Quilts are easy and fun to make in EQ8! Let’s get started! Click New Quilt > Vertical Strip Click the LAYOUT tab. Change the width of the first strip to 3 inches. Change the strip style to Pieced Blocks. Change the NUMBER OF BLOCKS along length to 15 Click to check the Clone the selected strip box. Click Add until you have 24 strips. The box shows how many strips you have. Experiment with different widths until you get a layout that you like. Click Add to Project Sketchbook . If you haven’t named your project yet, EQ8 will prompt you to do so. (To be saved, your item needs to be in the Sketchbook AND your project needs to be named. Here is more information.) Click the DESIGN tab > Fabric Tools > Paintbrush and start coloring your layout. You can also use different subtools of the Paintbrush
Design & Discover – Fabrics and Photos
Posted 10-01-2019 by Heidi | Posted in: Design & Discover
Sometimes it is hard to know if you should import your image as a photo or a fabric. The main difference between the two options is that if you import the image as a fabric, the image will tile. An image imported as a photo will not tile, it will stretch to fit the patch you place it in (on Layer 1). Here is more information. Here the first patch has an image imported as fabric, and it is tiling. The second patch shows an image imported as a photo and it is stretched. Neither image is the right size for the patch. To fix this you can either change the size of your patch (by clicking the Layout tab), resize the image to fit or crop the image to fit. Here are some more tips and information. In this case I changed the layout to fit the size of
LESSONS WITH YVONNE–MUST BE AUTUMN
Posted 09-15-2019 by Yvonne | Posted in: EQ8 EQ8 Lessons with Yvonne Favorite Posts
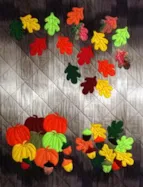
Fall colors are rich and vibrant. Fall to me means colored leaves, pumpkins, and cooler evenings with bright sunny days. Looking around outside you can see that every color imaginable is represented in nature. The colors blend, contrast, and define each other. Therefore, anything goes!! I design in fabric prints, solids, and a gradient palette of my own making. All of this is possible to do in EQ8. When I am designing I may not necessarily be making a pattern to follow. Often, my design is simply a source of visible inspiration. I can ‘see’ how the quilt will look when completed. EQ8 is often a place for me to just test out ideas. The easiest way to stir creativity is to begin with an idea and build on that. Often, I am under a time crunch so I will look in the huge EQ8 library first rather than try


