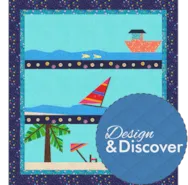
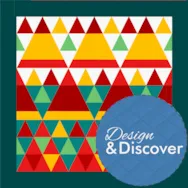
This month we’ll be learning a few different ways to design with sashing! Open EQ8 and click Design a quilt from scratch. Click Horizontal Click LAYOUT Use the sliders to choose the width and height of the sashing (for this example, mine are 1.5). You can also choose to check or uncheck Include sash border and Keep width and height equal. Click the DESIGN tab Click Open Library Any block can be placed in sashing but there are specific blocks designed to fit well. Click the plus sign + next to 10 Sashing to see some block options. Choose a few blocks and click Add to Sketchbook. Click Close. Click the Set Block tool to place the blocks. Click the Rotate tool to rotate the vertical sash blocks. Click Fabric Tools and recolor as desired. Click Add to Project Sketchbook . If you haven’t named your project yet, EQ8 will prompt you
Design & Discover
Design & Discover – Sashing!
Posted 08-01-2021 by Heidi | Posted in: Design & Discover
Design & Discover – Saving Fabrics in EQ8
Posted 07-01-2021 by Heidi | Posted in: Design & Discover
If you want to save certain groups of fabrics to use in multiple projects in EQ8, there are a few ways to do this. For the purposes of the lesson this month, the first step will be to gather all the fabrics you want and add them to your Project Sketchbook. You can also do this a few ways… You can search through the fabrics already in EQ8 and add them to your sketchbook. You can also import your fabric (this includes fabric that you have scanned, taken photos of, or downloaded from websites). If you are getting your fabric this way, be sure to check the scale if necessary. Another way is to import fabrics from other projects. Now that you have your fabrics collected, let’s cover the different ways of saving them. The first (and quickest) way is to change your default fabrics. When you start a new
Design & Discover – Bed-Sized Quilts Using the Layout Libraries
Posted 06-01-2021 by Heidi | Posted in: Design & Discover
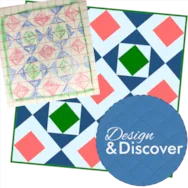
This month we’ll be using the Layout Library to design quilts. In this lesson you’ll see how quick it can be to design a twin and queen sized quilt when you start with a pre-designed layout. We’ll also design a king sized quilt and get into a little more detail modifying the layout and adding stencils. Click Libraries > Layout Library Under Layouts by Size click Twin Click 7″ Pieced Vertical Strip Click Edit to Quilt Worktable It will open to the DESIGN tab Click Block Tools > Set Block Click on a block of your choice and click on a patch on the quilt. EQ Default Flying Geese is used in the example. If you’d like a block in every patch, since this is a Vertical Strip layout, hold down the Ctrl/Command key on your keyboard and click in each strip. Click Layer 2 at the bottom of the
Design & Discover – EasyDraw vs. PolyDraw
Posted 05-01-2021 by Heidi | Posted in: Design & Discover
As far as pieced blocks go, you can draw any block with EasyDraw. Sometimes though, it is easier to draw certain types of blocks in PolyDraw, particularly those that can be aided by using one of the grids. PolyDraw has automatic snapping based on the grid on which you are working. The PolyDraw tools are your only sources for drawing this type of block. With the PolyDraw tools, you’ll notice that with each click, your line will snap to the closest grid point or arc. Click here to learn more about the PolyDraw tools. You may also notice two layer tabs at the bottom of the drawing board: PolyDraw and Applique. The PolyDraw tab is for drawing pieced blocks using the PolyDraw tools, and therefore the patches cannot overlap. The Applique tab is for adding applique patches on top of your piecing. You do not need to do anything on this tab
Design & Discover – Drawing a Pieced & Applique Block
Posted 04-01-2021 by Heidi | Posted in: Design & Discover
If you would like to draw a combination, or overlaid, block with a pieced bottom layer and an applique layer on top, you have two choices. The difference is the drawing tools that are used for the pieced layer. EasyDraw + Applique lets you use the EasyDraw tools on the pieced layer, and the Applique tools on the applique layer. PolyDraw + Applique lets you use the PolyDraw tools on the pieced layer, and the Applique tools on the applique layer. First we’ll try EasyDraw + Applique. Click Block Worktable Click NEW BLOCK Click Pieced & Applique Click Easy + Applique Make your block 6 x 6 Use the Grid tool to make a 6 x 6 grid Click the Applique tab at the bottom of the screen. Click the Shape tool and use the PoiseMaker to create some flower shapes. Use the other Shape tools to draw flower centers, stems
Design & Discover – Creating a Design from an Image
Posted 03-01-2021 by Heidi | Posted in: Design & Discover
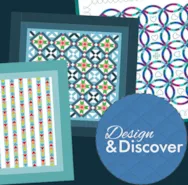
What if you have an image of a quilt you’d like to design in EQ8? Here are some tips for recreating quilts in EQ8. There are two main parts….figuring out the blocks and figuring out the layout. First, look at the quilt and see if you notice any blocks that you know by name. If so, find them in the EQ8 Block Library by searching by notecard by name. You can also try searching By Category with information you know about the block…For example for this block you could choose Pieced and Other Stars. Another option is to browse likely Block Library categories to see if you can find the block you are looking for. Even if you find something similar, you can edit the block. If you can’t find the block you can draw it. In this example you could also just use half square triangles. Just rotate and recolor. Or, try to analyze the quilt and see if you can break
Design & Discover – Quilts with Triangles!
Posted 02-01-2021 by Heidi | Posted in: Design & Discover
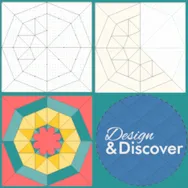
There are a few different ways to make quilts with triangles in EQ8. The simplest way is using a One Patch Quilt layout. Click Design a Quilt from Scratch. Click One Patch Click the LAYOUT tab Click the down arrow under Patch Style to select Lightning You can change the number of units and the finished size of the units. Here is more information on One Patch quilts and how the patches are counted. Click the DESIGN tab. Click Fabric Tools. Please Note: Blocks cannot be placed in One Patch Quilt layouts. See Step 29 for how to add triangles to Layer 2 of any quilt layout. Click Paintbrush. Add colors and fabrics as you wish. Click Add to Project Sketchbook . If you haven’t named your project yet, EQ8 will prompt you to do so. (To be saved, your item needs to be in the Sketchbook AND your project needs to be


