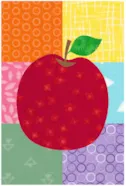
The month of May makes me think of Spring flowers and Mother’s Day. There are some wonderful applique designs built into EQ8 that host a variety of flower shapes in one applique block. This one block can look so totally different depending on the fabric choices used. You can try out different fabrics in your designs to see what gives the best overall feel for the quilt block before you even begin shopping for the fabrics or before you begin cutting the fabrics already in your stash. Launch your EQ8 program and name the project May Flowers. Click on the OK at the bottom of the project helper box. At the top of the screen, click on LIBRARIES>Block Library. In the block libraries box, click on the word ‘search>by notecard’. In the search block notecard box, type in the word ‘mother’ and then click on the ‘search at the bottom of
EQ8
EQ8 Lessons with Yvonne-Fabric Choices Make A Difference
Posted 05-16-2021 by Yvonne | Posted in: EQ8 EQ8 Lessons with Yvonne Favorite Posts
Material Mart Uses EQ8 to Share Fabric Inventory with Customers
Posted 04-14-2021 by Jenny | Posted in: EQ Retailers EQ8
EQ8 teacher Marguerite Shrader recently shared with us how Material Mart in Midland, Michigan uses EQ8 in their store. It’s quite innovative and we wanted to share it with you! Marguerite writes: “We want to let you know how we, as a local quilt store that also sells EQ8, are making it easier for our customers to design quilts with the fabrics we carry. About 2 years ago, we started selling EQ8 after one of our customers agreed to teach classes and support the product. We have a series of 7 classes developed so far, and they have been a big hit with the EQ8 user community in the area.” “Our latest endeavor has been to develop an EQ8 Fabric Library of the fabric inventory we have in the store, so that when our users design a quilt in EQ8, they can design with fabrics they know we have in
EQ8 Lessons with Yvonne – Using SVG Files from BlockBase+
Posted 03-21-2021 by Yvonne | Posted in: BlockBase+ EQ8 EQ8 Lessons with Yvonne Favorite Posts
The newest software release from Electric Quilt is here! Block Base+ is the newest software that is a companion to the Block Base book. Some of you may have the original Block Base CD that was released several years ago, but the new updated Block Base+ is fantastic. It is so versatile with all the things you can do with it. The greatest new feature for the Block Base + program is that you can select a block and set the size you want and then export it as a .svg file. This is very exciting because of all the cutting machines on the market today. You can send your .svg file to your cutting machine and cut all the pieces needed for your block construction. This saves a lot of time. We can not save an image as a .svg file in EQ8, so having the ability to do
EQ8 Lessons with Yvonne-Treat Yourself
Posted 01-17-2021 by Yvonne | Posted in: EQ8 EQ8 Lessons with Yvonne Favorite Posts
2020 was a challenging year. Start 2021 by treating yourself. I turn to my sewing room for inspiration and it provides me with a calming retreat area in my own home. It starts with my favorite inspiration tool–EQ8. Browsing the huge built-in libraries for blocks and layouts gives me just the right space to start experimenting with new design ideas I had not tried before. I like to start my process by looking through the block library in EQ8. I also have many add-on libraries that the EQ company has provided us with to add to the already massive library of blocks in the program. I simply scroll through the library and look at the blocks and choose one that I have not tried before. Open your EQ8 program and start a new project called ‘Treat Yourself in 2021′. I can look at the blocks by category or by construction method.
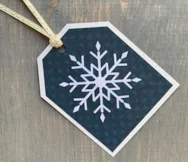
We’ve seen a few snowflakes here in Ohio and it inspired me to design a snowy quilt in EQ8 using the WreathMaker. It’s super easy and you’ll have a Sketchbook full of unique snowflakes in no time! Let’s Make Some Snow! Open EQ8 and click Design a block from scratch on the Home screen. On the Block Worktable, click Applique on the ribbon, then Motif in the palette. (If you want your snowflakes to have a background block, you can choose Block instead of Motif. But I have a plan for these snowflakes you’ll see at the end of this lesson!) For this exercise, the block size doesn’t really matter. But I do think it’s helpful to have the Graph Paper on with the Horizontal and Vertical set to 2 so you have a vertical guideline to draw your shapes on. Click the Shapes tool and select one of the
Lessons with Yvonne – Use Your Birthstone Color to Create a Quilt
Posted 11-15-2020 by Yvonne | Posted in: EQ8 EQ8 Lessons with Yvonne Favorite Posts
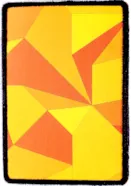
My birthday is in November. The birthstone for that month is Topaz. This is a yellow/orange color. I don’t like that color at all. But, as a challenge to myself, I will make a monochromatic block using that color. I find it is good to challenge myself in all kinds of ways as this is when I grow the most and learn all kinds of discoveries. I once made a quilt in browns and oranges that I don’t care for either, but it is now one of my favorite quilts. Surprise! Open your EQ8 and name your project ‘birthstone designs’. Click on the block worktable icon on the upper right side of the screen. Click on NEW BLOCK>Pieced>Easy Draw. Set the block size to be an 8 x 8-inch block with 24 snaps horizontal and vertical. I don’t care for the colors I am using so I will create areas
Lessons with Yvonne – Back to School
Posted 09-20-2020 by Yvonne | Posted in: EQ8 EQ8 Lessons with Yvonne Favorite Posts
Let’s celebrate going back to school! A great way to start a new school year is to make a little gift for the teacher. EQ8 can help us design a very simple little ‘mug rug/coaster’ for the teacher. Open your EQ8 and name a new project called ‘back to school’. Click on the block worktable icon on the upper right side of the screen. Click on New Block>Pieced and Applique>Easy Draw. At the top of the block worktable, set the dimensions to be 4 x 6 inches with 24 snaps horizontal and vertical. On the left side of the screen, click on the grid tool to select it. Set the properties to be 2 columns by 3 rows. Move the cursor over to the drawing table and click/hold/drag/release the cursor from the upper left side of the block area to the lower right side of the block area. Add to


