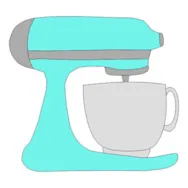
I spend a lot of time designing quilt blocks for piecing in Electric Quilt, but I also like the look of applique. The good news is that with EQ8, you can easily design your own applique blocks and motifs. And once you have designed it, you can use the tools in EQ8 to make it any size you would like. In this lesson, we will take an existing drawing and create an applique motif. Last year for Christmas, I finally received a much coveted gift of a Kitchenaid Mixer. I always had a little hand mixer, but how I dreamed of mixing up cookies and goodies with a stand mixer. I decided I really wanted an applique motif of my mixer to use for kitchen related items like aprons and tea towels. So I sketched a picture of my wonderful mixer. I scanned in my hand drawing to use to
EQ8 Lessons with Lori
EQ8 Lessons with Lori – Let’s Play with Applique
Posted 02-25-2020 by Lori | Posted in: EQ8 Lessons with Lori Uncategorized
EQ8 Lessons with Lori – Create a Pantograph
Posted 12-31-2019 by Lori | Posted in: EQ8 Lessons with Lori Uncategorized
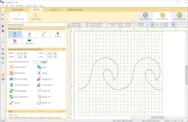
Many EQ8 Users have longarm or midarm machines that they use to machine quilt their quilt creations. Sometimes they use a pantograph to create all over quilting designs. A pantograph is usually a repeating quilting design. The longarm user follows the line on the paper with a stylus or laser light that is attached to the machine. Pantograph designs can vary in width with simple to complex designs. Using the power of Electric Quilt Design Software, you can create your own pantographs to print out and use for your machine quilting. For this lesson, we will use an existing stencil, resize it and clone it to create a pantograph that can be printed out and used with a longarm or midarm machine for machine quilting. Ocean Waves Pantograph Skillset: Beginner/ Advanced Beginner Stencil size: 8″ x 60″ Skill Builders: Draw a stencil Edit a Stencil Open EQ8. Let’s open the Project. The project
EQ8 Lessons with Lori – Add stencils to a quilt
Posted 11-22-2019 by Lori | Posted in: EQ8 Lessons with Lori Uncategorized
This lesson is all about adding stencils to your quilt. Stencils are the drawings that show the quilting lines on your quilt. You may want to audition different stencils to decide how you might want to quilt your design and to help you figure out what approach you will take when quilting. You can have stencils that go over individual blocks or you can create a stencil that goes over an entire sections of your quilt. For this lesson, I will show you how I quilted the Anchor’s Away quilt from the last lesson. If you haven’t completed that lesson, you can find it HERE. First, lets talk about the layers of a quilt. When you are on the Quilt Worktable, you will see three tabs at the bottom of the screen. Layer 1 This layer is made up of pieced or applique blocks that are stitched together to make
EQ8 Lessons with Lori – Anchor’s Away Quilt with a repeating block design
Posted 09-01-2019 by Lori | Posted in: EQ8 Lessons with Lori
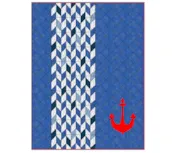
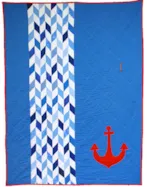
It’s been a wonderful summer and I wanted to add a cute throw quilt to compliment the pillow we designed last year. I came up with this Nautical themed quilt with an interesting inset of scrappy diamonds. And of course, I needed that cute red anchor to set it off. Let’s get right into the design! Anchors Away Quilt Skillset: Beginner/ Advanced Beginner Size: 48″ x 60″ Skill Builders: Working with Vertical Strip layout Working with repeating block design Convert an applique block to a motif Let’s take a closer look and analyze this quilt. I have designed it as a Vertical Strip quilt with applique. First we are going to focus on the diamond insets. These are 45 degree diamonds that are lined up to form a chevron type pattern. This is a repeating diamond shape that I designed as an individual block. The block just had to be square
EQ8 Lessons with Lori – Create a Personal Fabric Library
Posted 06-21-2019 by Lori | Posted in: EQ8 Lessons with Lori
I have had a lot of questions about creating personal libraries in EQ8. Many of you want to create your own libraries containing your favorite fabrics from your Stash or from a particular manufacturer. If you have taken pictures of your stash and imported them into EQ8 or have imported other fabrics into EQ8, you can create and store them in their own library. Electric Quilt allows you to set up your own fabric libraries under My Favorite Fabrics. When you create your own library, the fabrics that you put into it will be available to use in any project you want to design. Here is how to create that space. Open EQ8. Go to the top Main Menu and click LIBRARIES, choose Fabric Library. The dialogue box will open. Select the My Favorite Fabrics section. Click the Create Library button and the Add new Library dialogue will open. Enter
EQ8 Lessons with Lori – EQ8 Update Insider Block Worktable
Posted 05-03-2019 by Lori | Posted in: EQ8 Lessons with Lori
Hello! Have you been following along with the EQ8 Update Insider? Here is the last insider post of the new EQ8 Updates for the Block Worktable. As of March, 2019, there is a new free update to EQ8 that is loaded with New Features, Enhancements and Fixes. If you own EQ8, you can download this update for free! If you missed my previous two posts, check out the General Updates including how to download the update HERE and get the scoop on the Quilt Worktable updates HERE. Lets explore the Block Worktable Updates. Thicker lines when drawing on the Block Worktable You now have the option to make the drawing segments thicker on the DRAW tab only. This may help you to see your drawn blocks with more clarity since the lines will be easier to see. To turn thick lines ON, click the gear button on the main toolbar of the Block
EQ8 Lessons with Lori – EQ8 Insider Update Quilt Worktable
Posted 04-26-2019 by Lori | Posted in: EQ8 Lessons with Lori
Welcome back to the EQ8 Update Insider. As of March, 2019, there is a new free update to EQ8 that is loaded with New Features, Enhancements and Fixes. If you own EQ8, you can download this update for free! In this EQ8 Update Insider, we are going to take a look at some of the Quilt Worktable Updates to the program. Solid Seam Allowance Lines You could always print seam allowance lines with dashed lines. Now you have the option to print seam allowance as a solid line. For many folks, this solid line is easier to see on their printers. Since everyone’s printer is different, see what works best for you. You can find this checkbox option in the Print dialog box for Templates And in the print dialogue box for foundation patterns. Thick Seam Allowance Lines You can also now display thicker seam allowance lines on Template and Foundation printouts.


