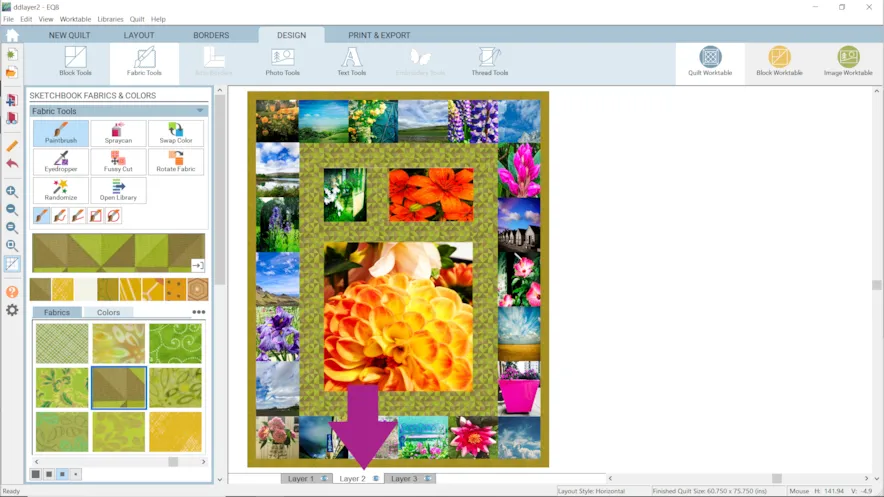
When you think of Layer 2 you may think of using it for applique and motifs, which is correct. However, you can use Layer 2 for elements of your quilt design as well.
For example, to design a quilt with a block on-point in the center with blocks around the center.
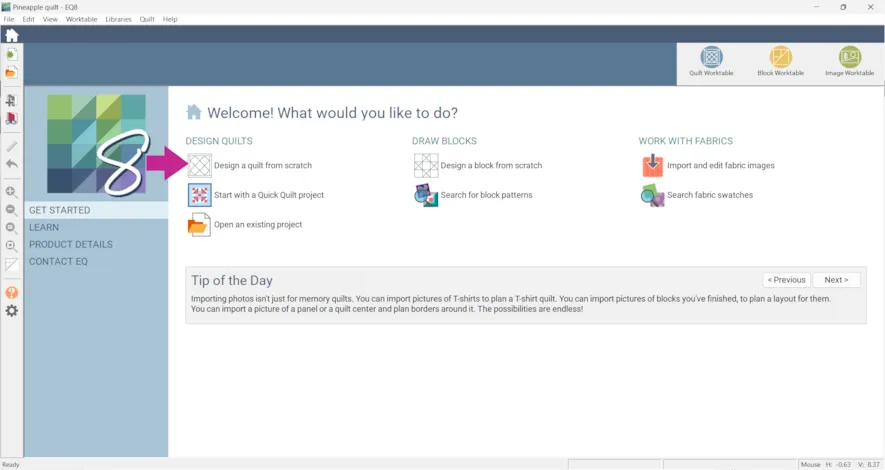
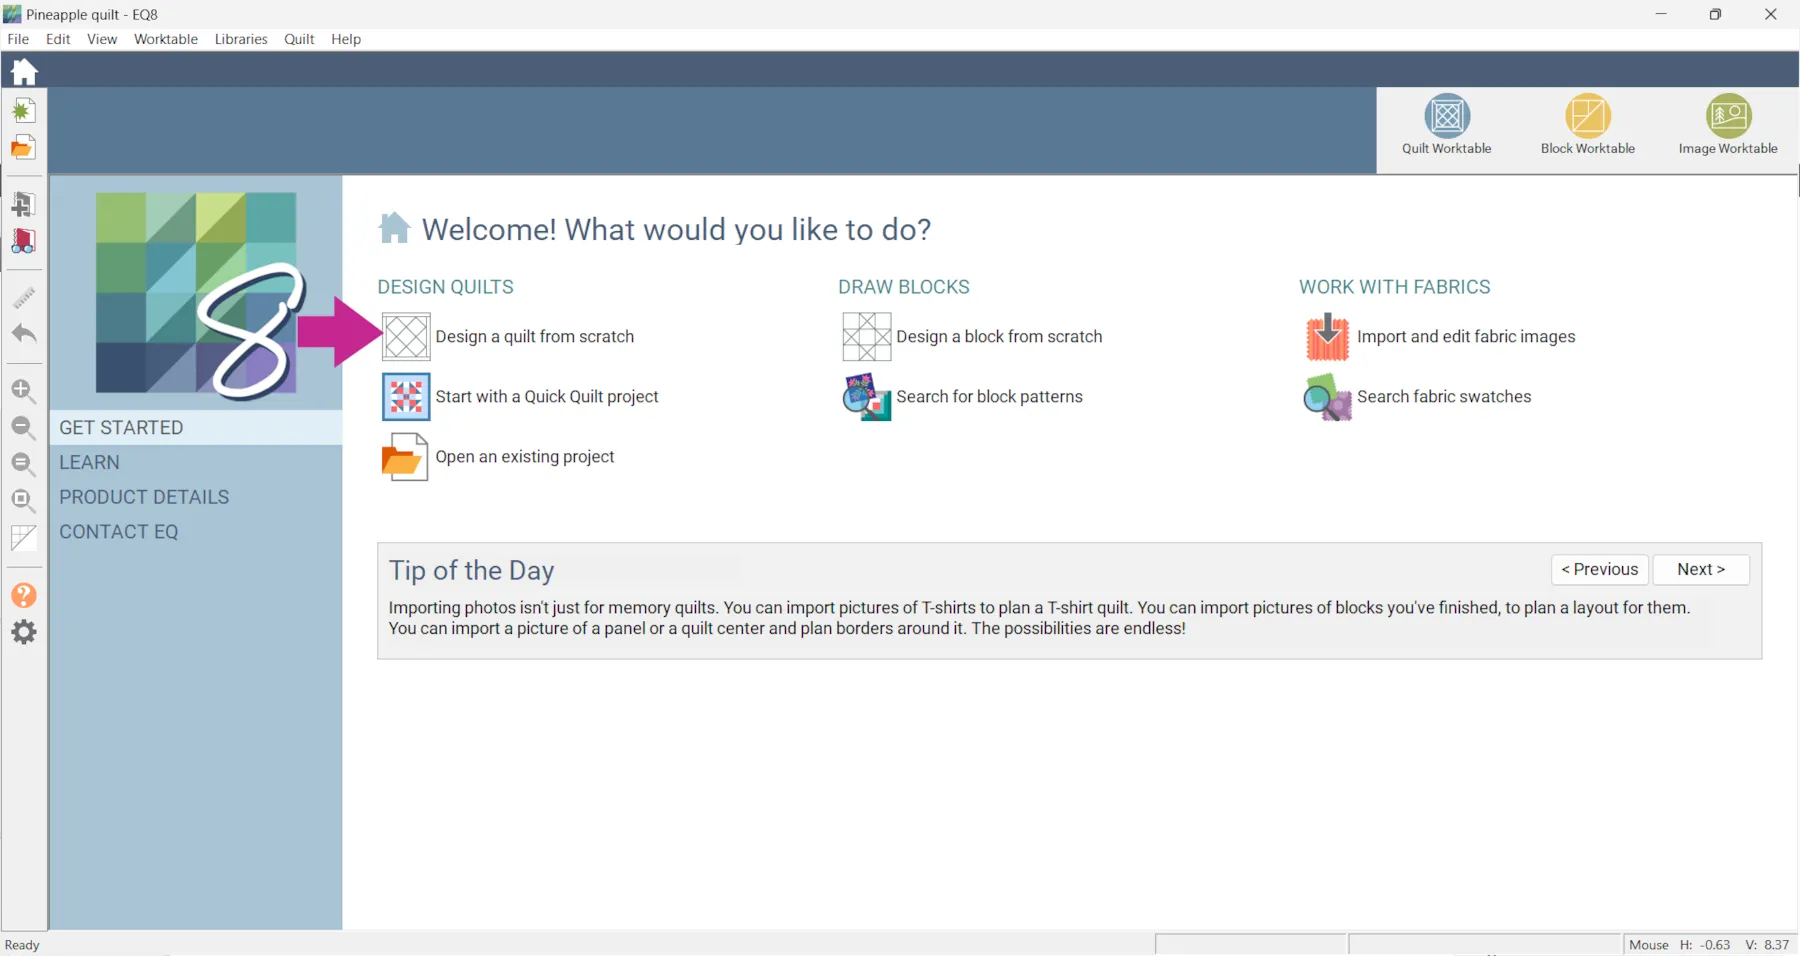
- Click Design a quilt from scratch
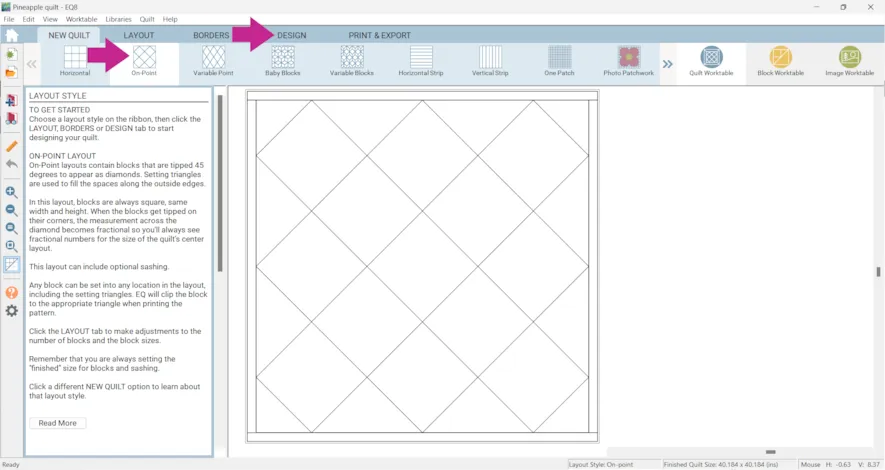
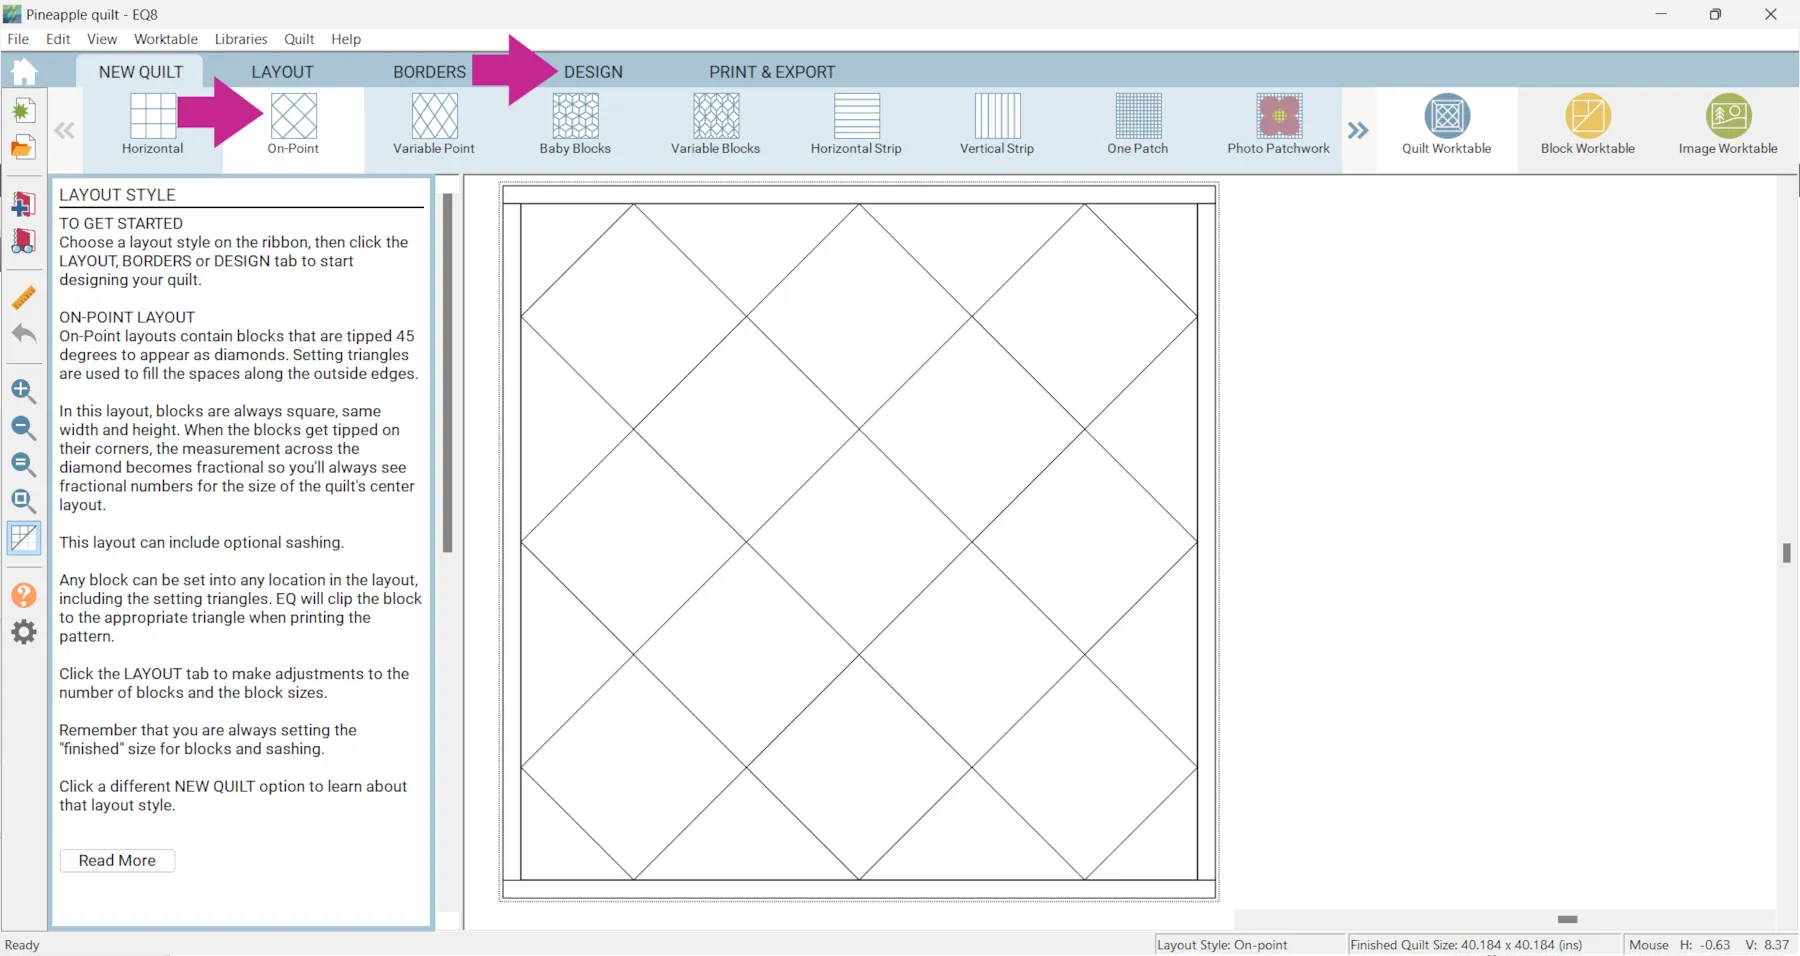
- Click On Point
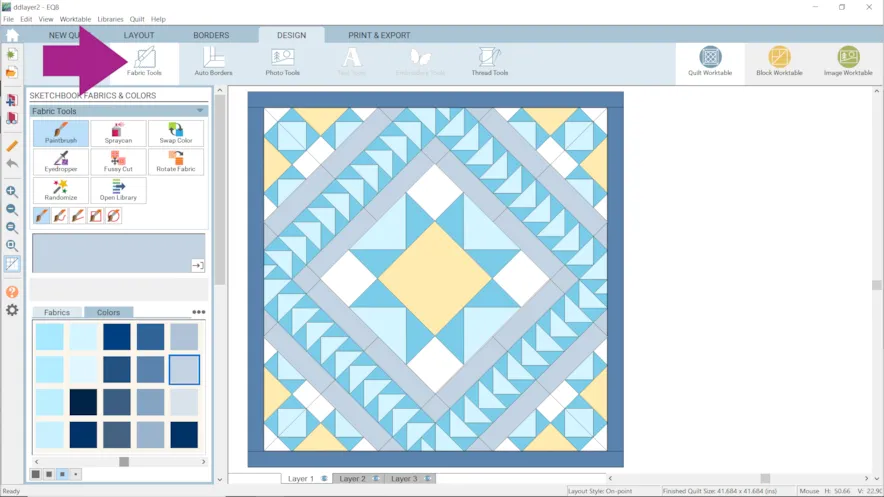
- Click the DESIGN tab
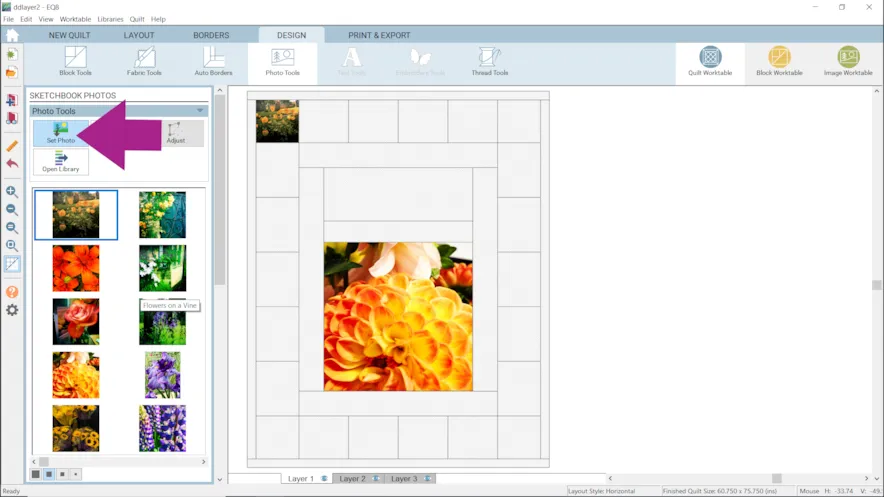
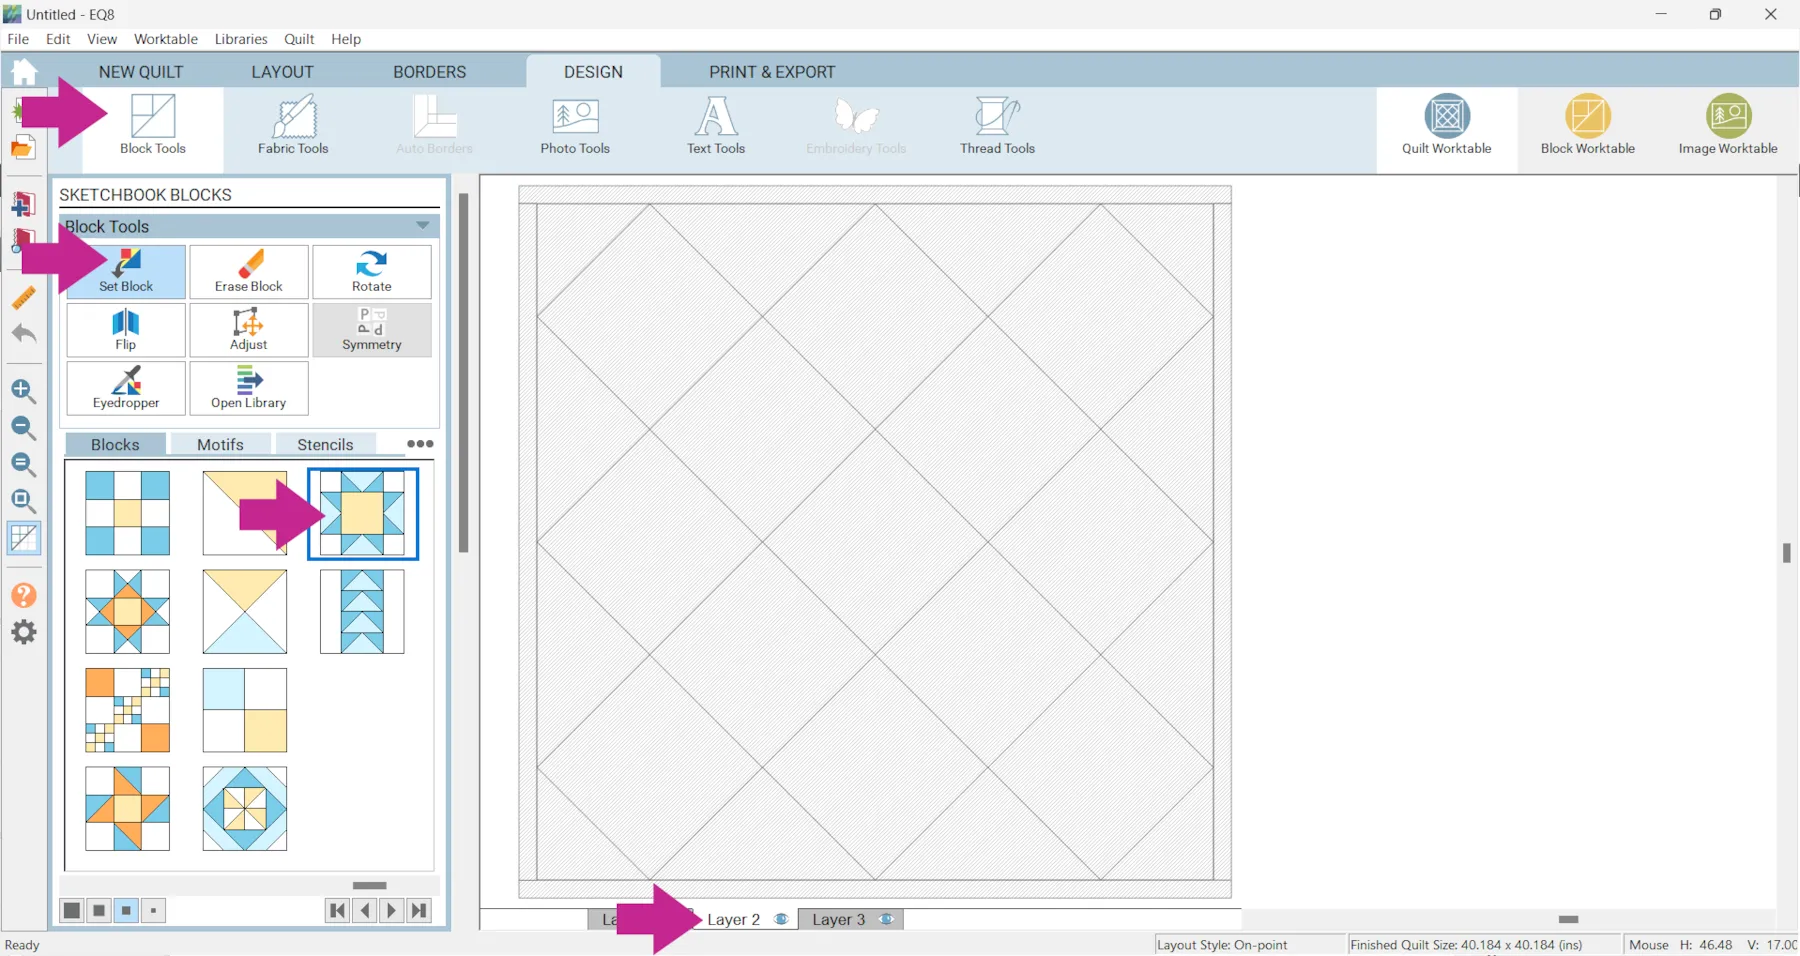
- Click Block Tools > Set Block
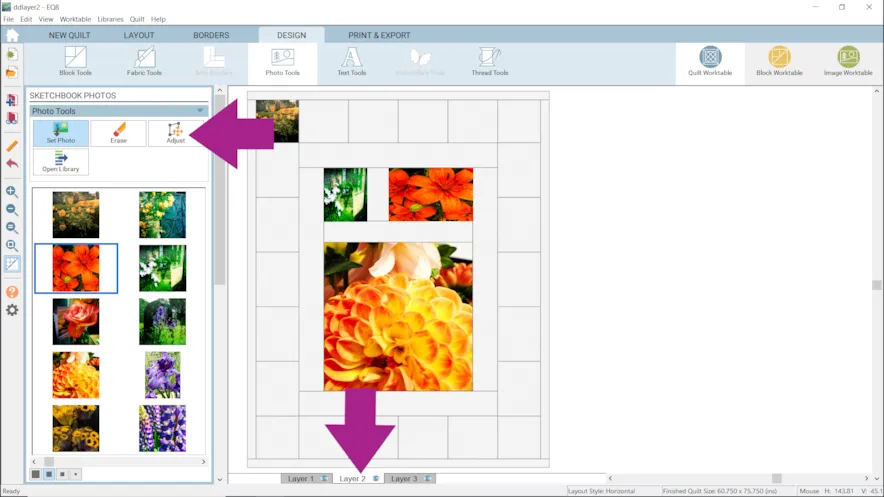
- Click on Layer 2
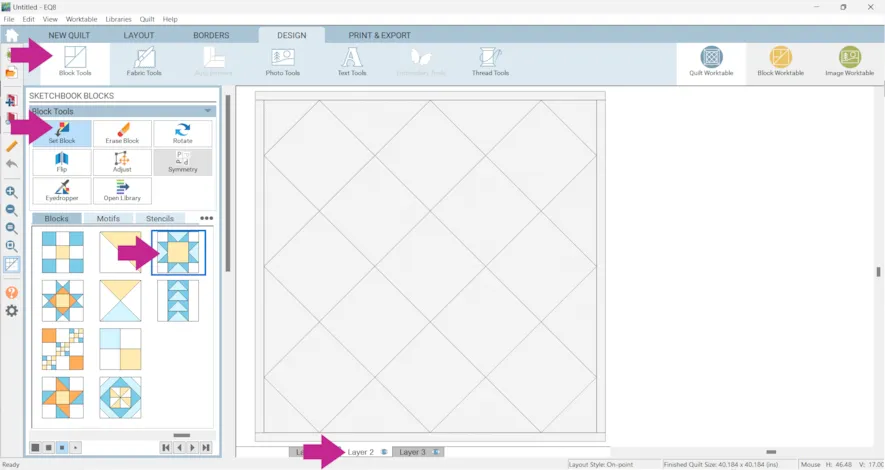
- Click on a block and drag in onto the quilt.
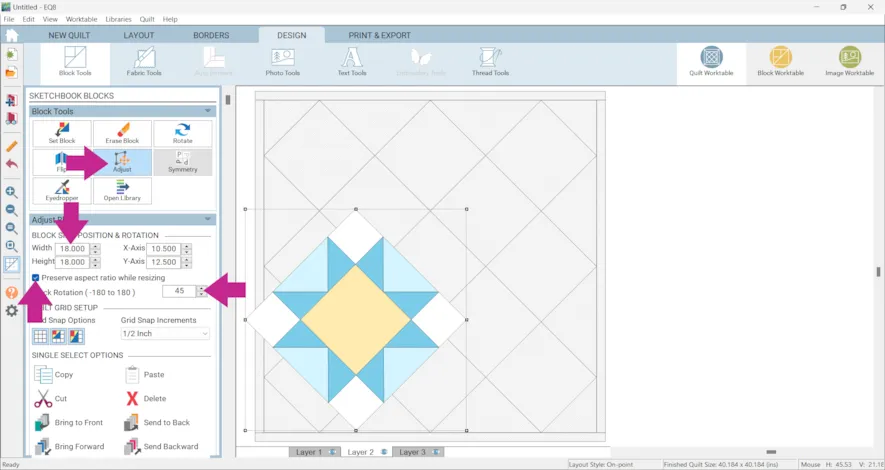
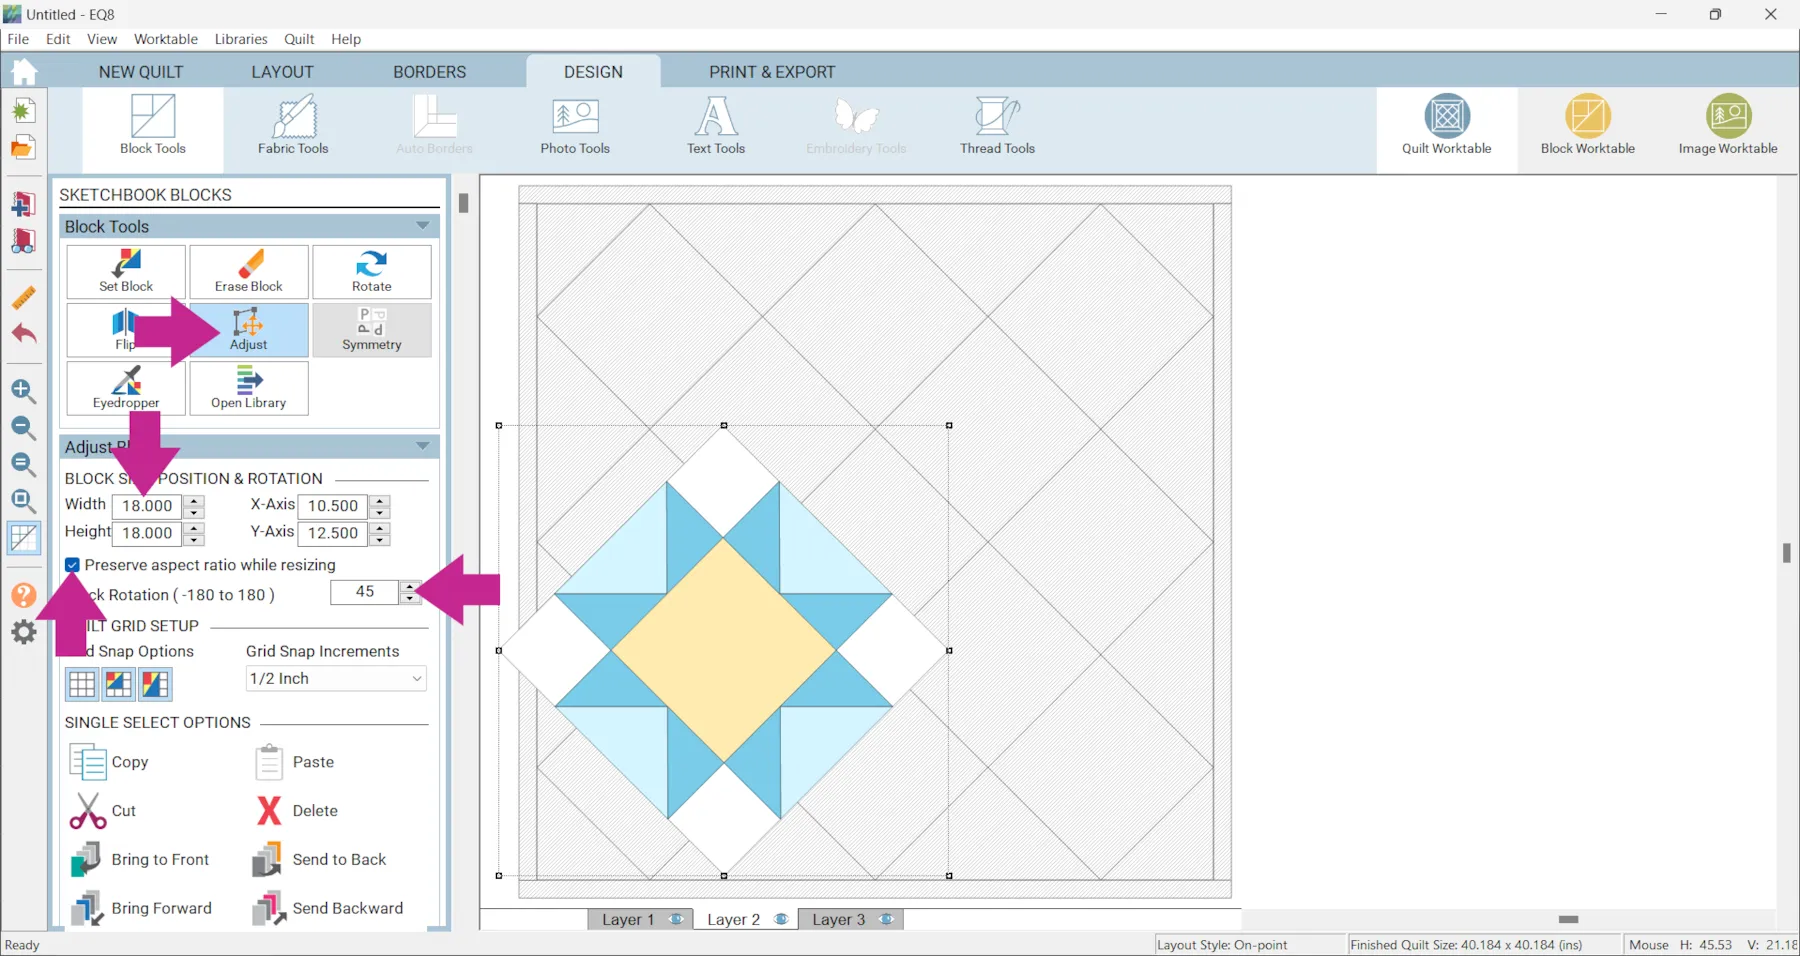
- Click the Adjust tool.
- Place a check mark next to Preserve aspect ratio while resizing
- Type in the new size for your block (in the example it is 18 x 18)
- Enter the Block Rotation degree: 45
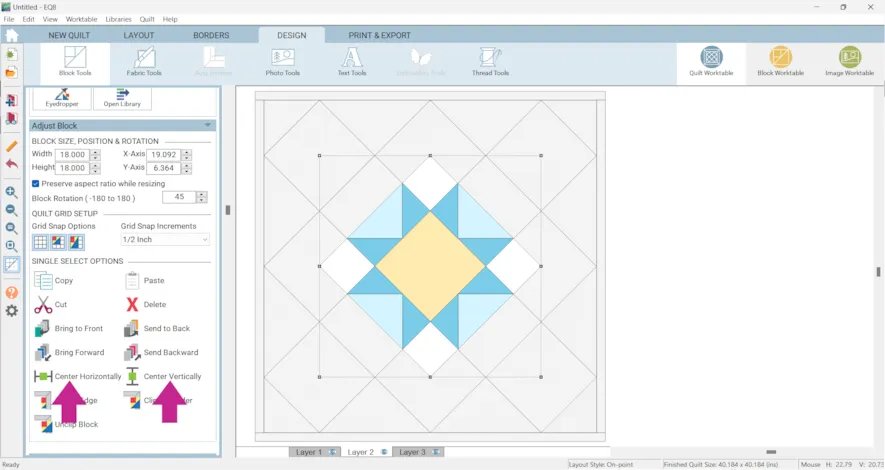
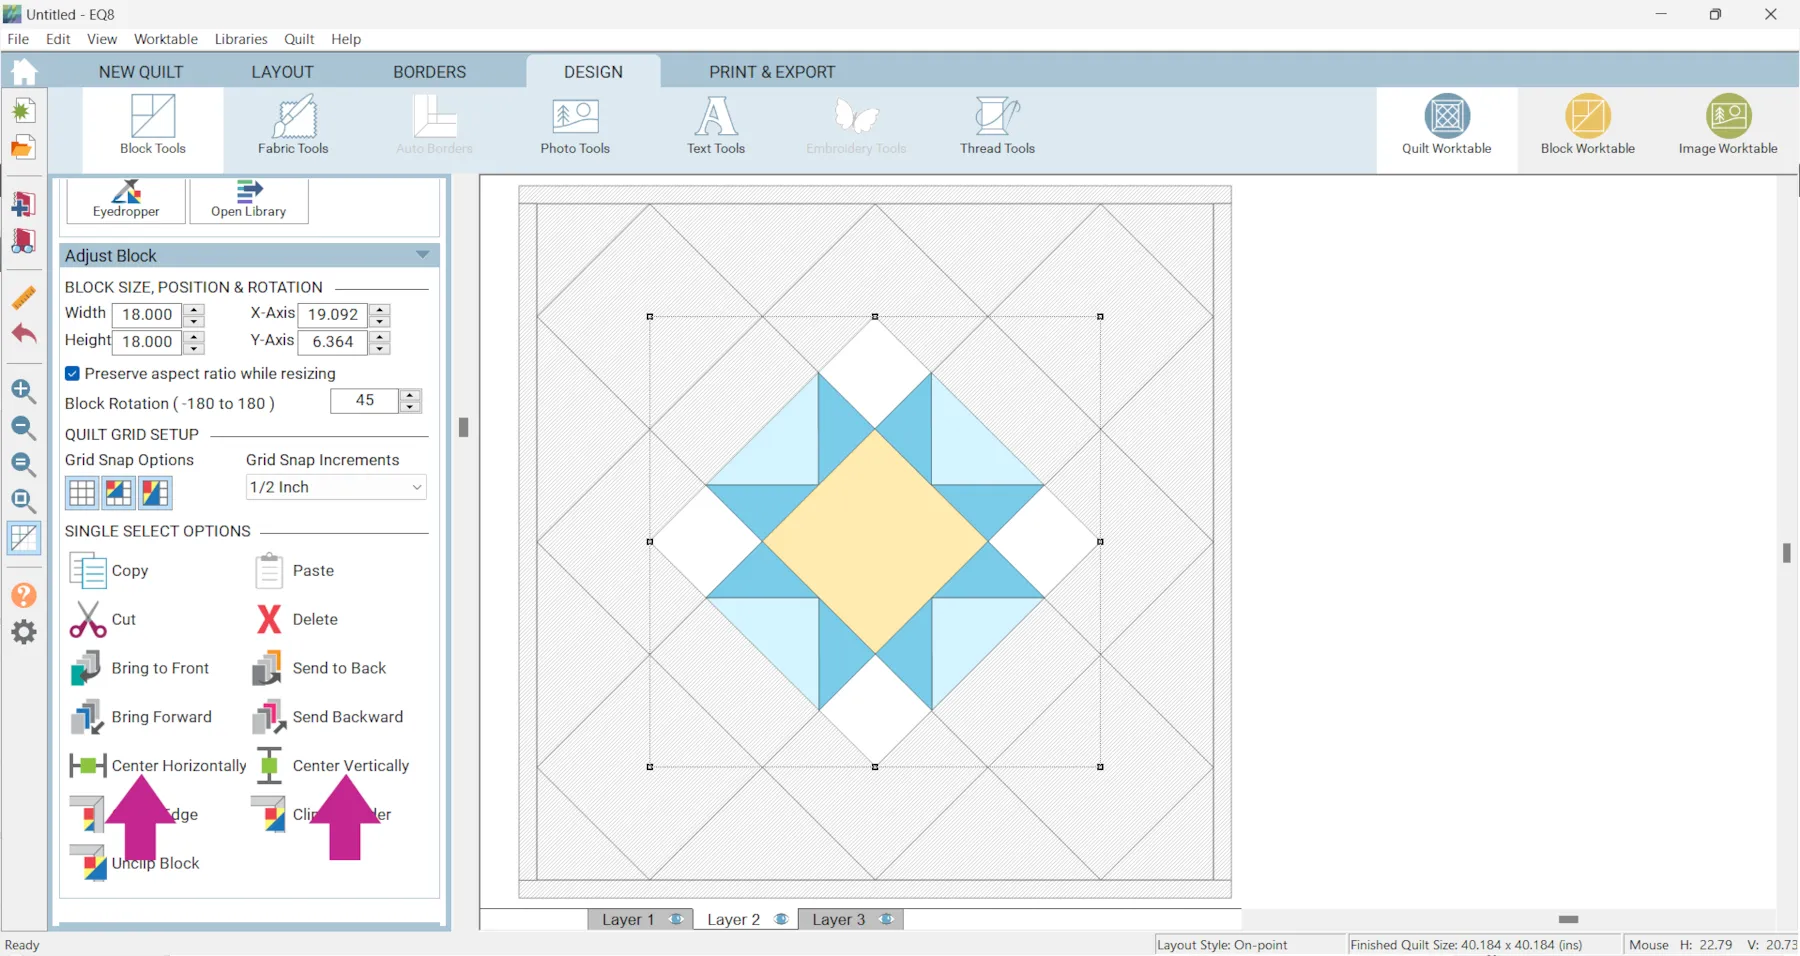
- Click Center Vertically
- Click Center Horizontally
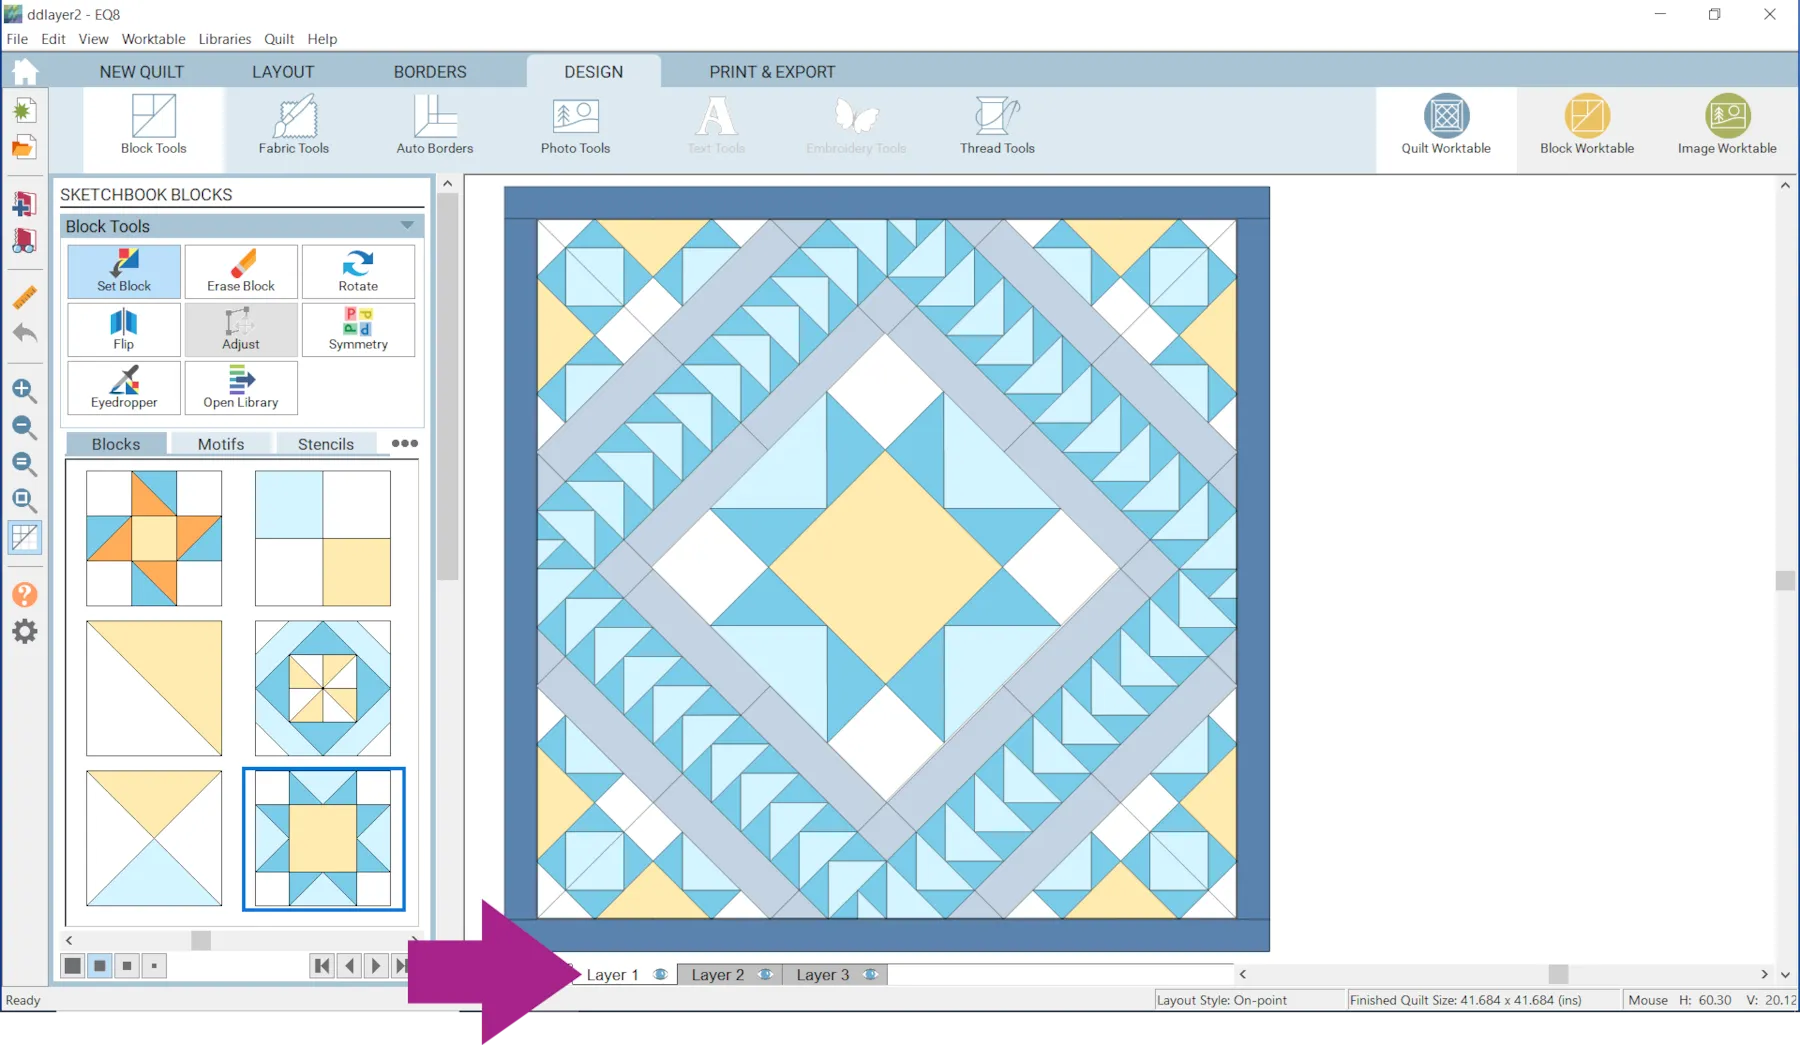
- Click on Layer 1 and place the rest of your blocks as desired.
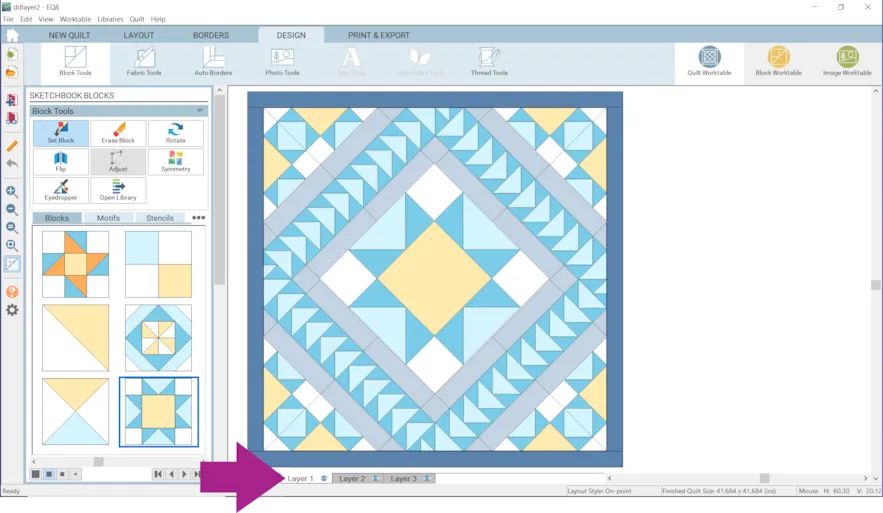
- Click on the Fabric Tools and recolor any way you want.
 Please note: To recolor the middle block or change it you will need to be on Layer 2. For the rest of the blocks you would need to be on Layer 1.
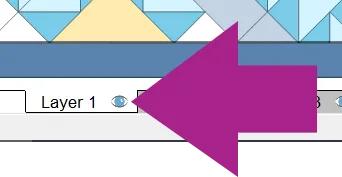
You can turn of layer visibility to see individual layers with the eye icon.

- Click Add to Project Sketchbook
 . If you haven’t named your project yet, EQ8 will prompt you to do so. (To be saved, your item needs to be in the Sketchbook AND your project needs to be named. Here is more information.)
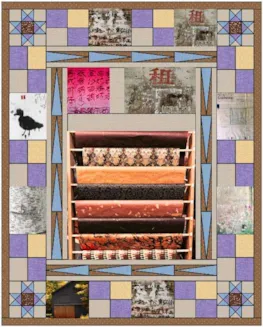
Again, if you are trying to create a quilt that doesn’t quite work with one of the layouts, you can create a Custom Set quilt but sometimes it is easier and faster to just tweak a layout using Layer 2. Let’s start another example. - Click NEW QUILT
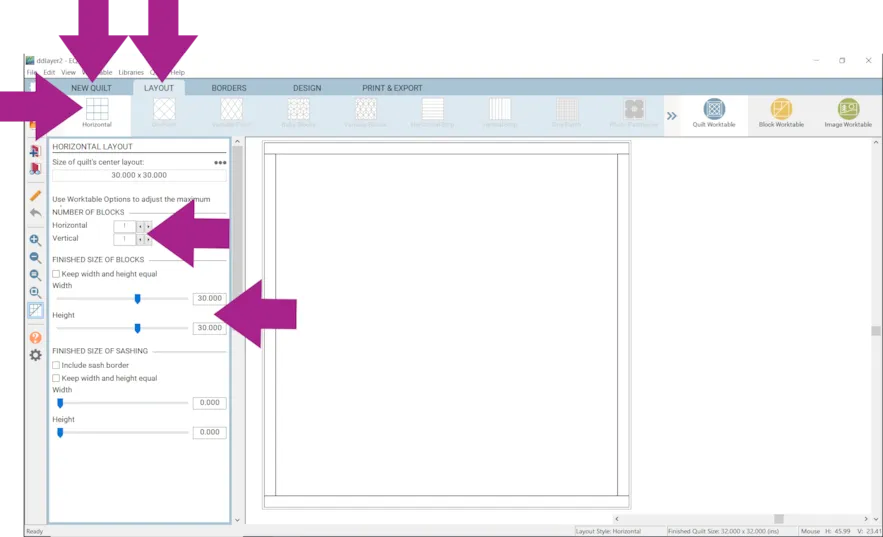
- Click Horizontal
- Click LAYOUT
- Under NUMBER OF BLOCKS make your quilt 1 x 1
- Under FINISHED SIZE OF BLOCKS make your block 30 x0 30.
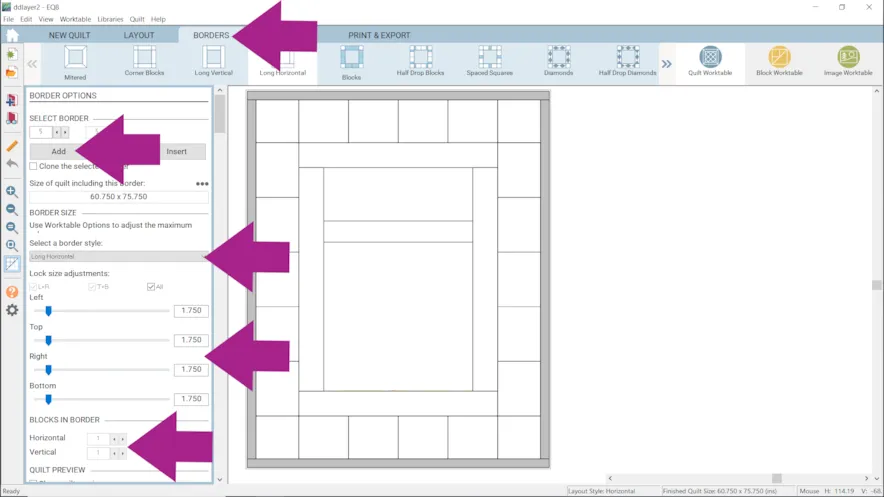
- Click the BORDERS tab
- Click the Add button 4 times. (So you have 5 borders.)
- Make the first border Long Horizontal with a top 4.25 and all other sides 0.
- Make the second border Long Horizontal with a top 10.75 and all other sides 0.
- Make the third border Long Horizontal with a all sides 5.0.
- Make the fourth border Blocks with a all sides 8.625. If you are having trouble change your Nudge Settings.
- Under BLOCKS IN BORDER
Enter 4 for Horizontal and 5 for Vertical. - Make the fifth border Long Horizontal with all sides 1.75.
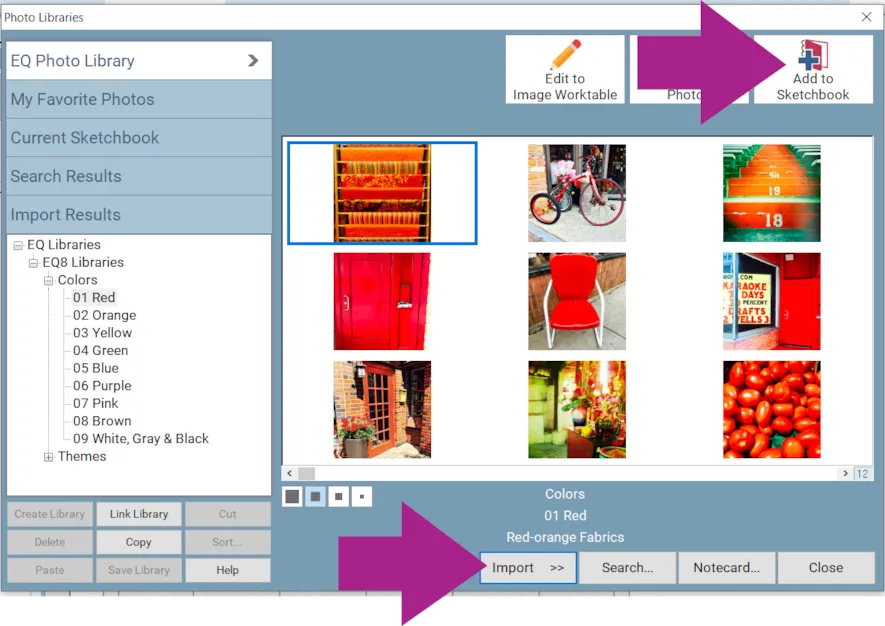
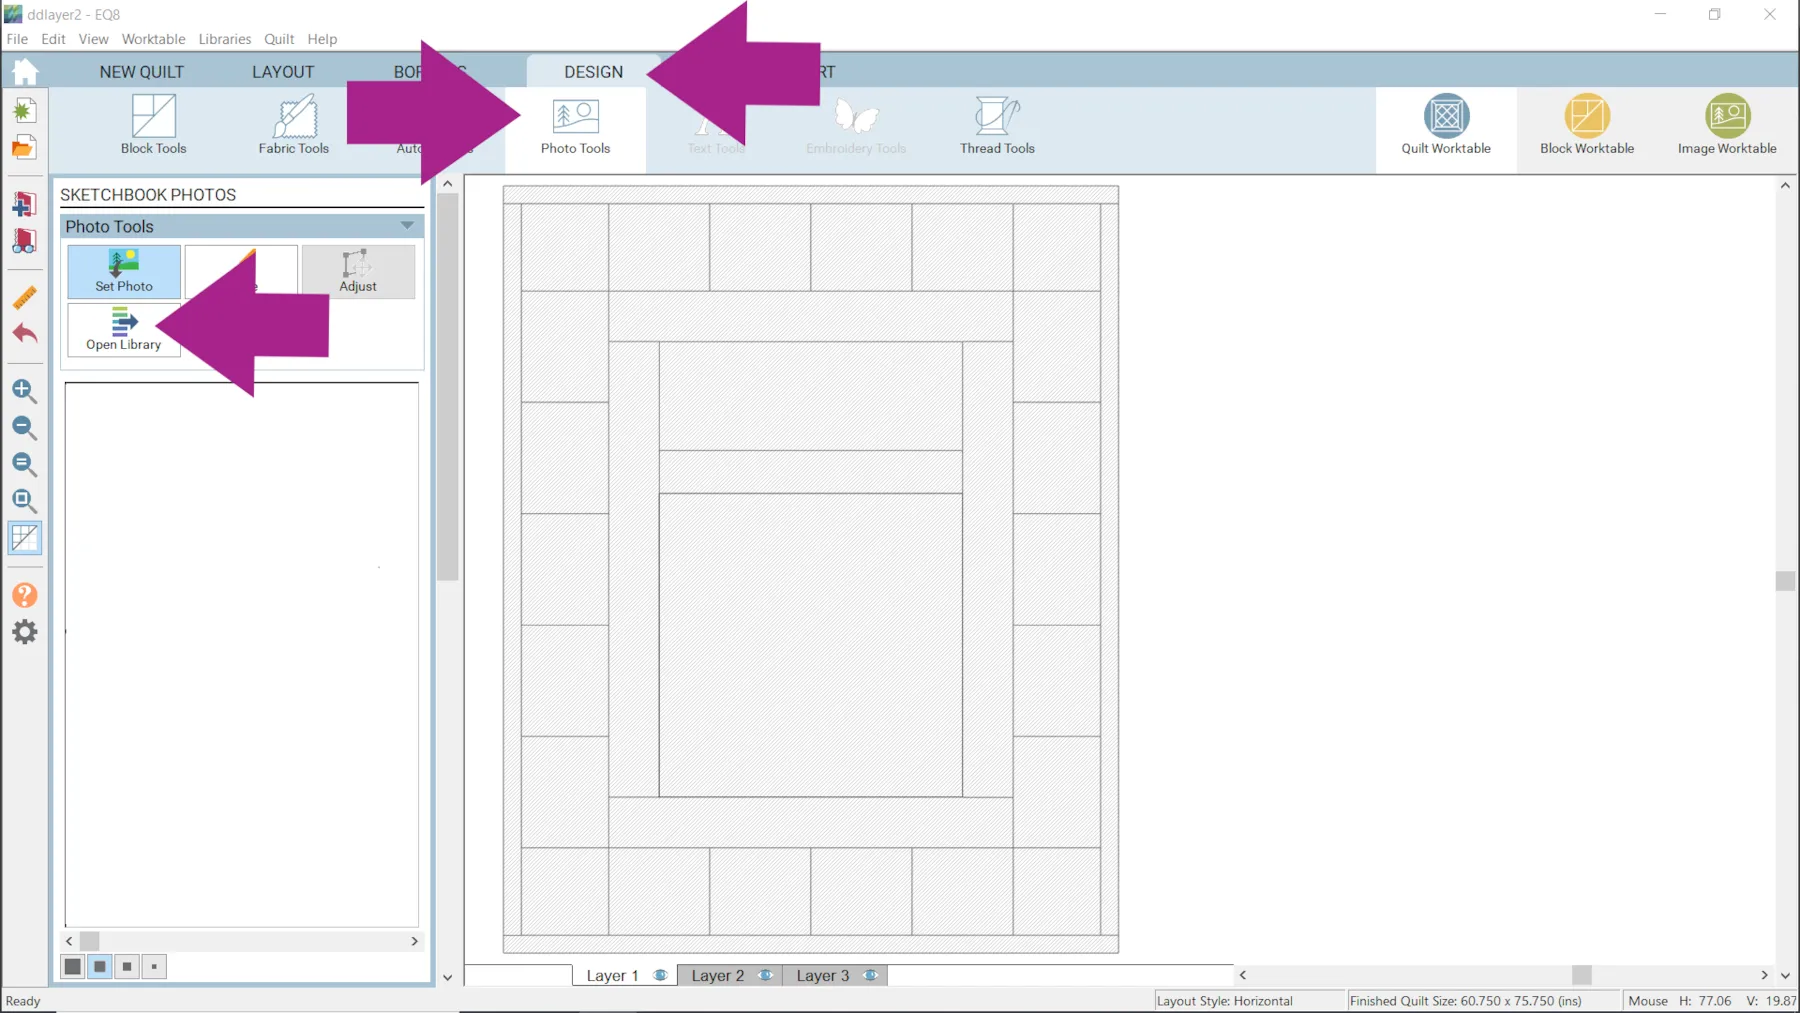
- Click the DESIGN tab > Photo Tools > Open Library

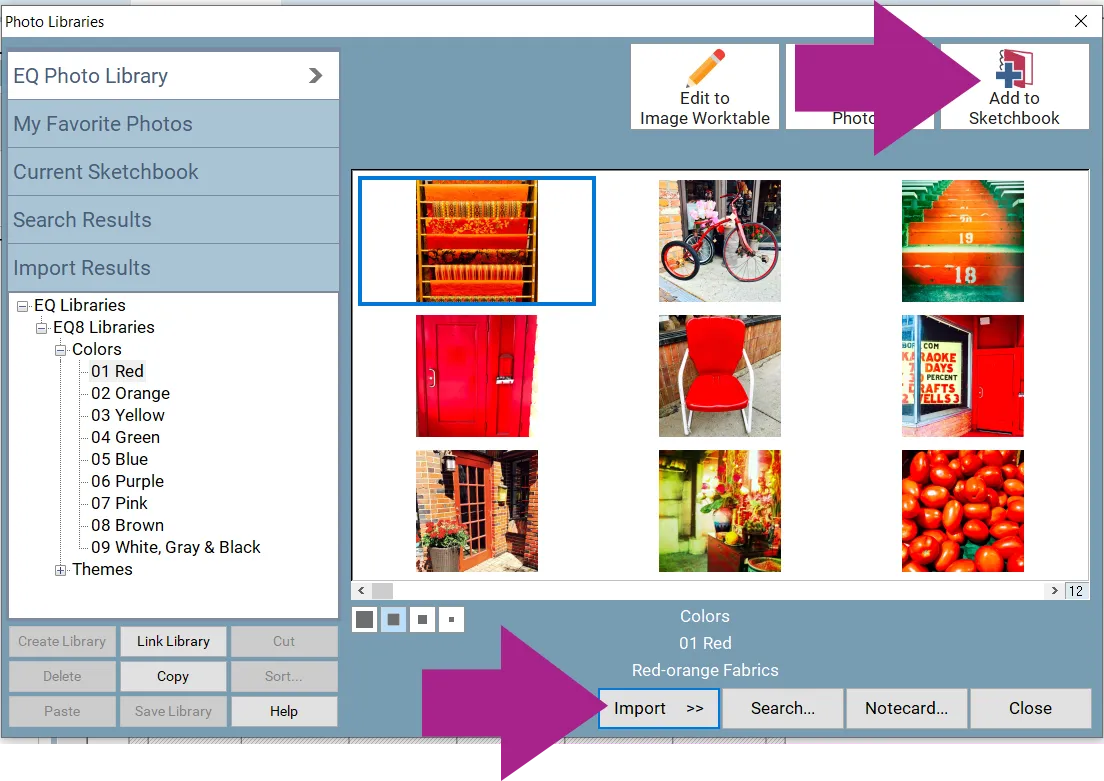
- Choose some photos and click Add to Sketchbook
OR click the Import Button to use some of your own photos.
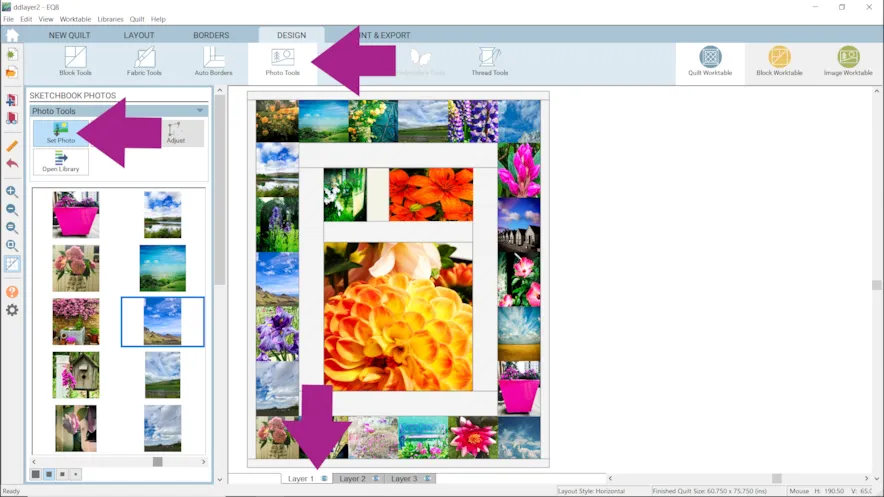
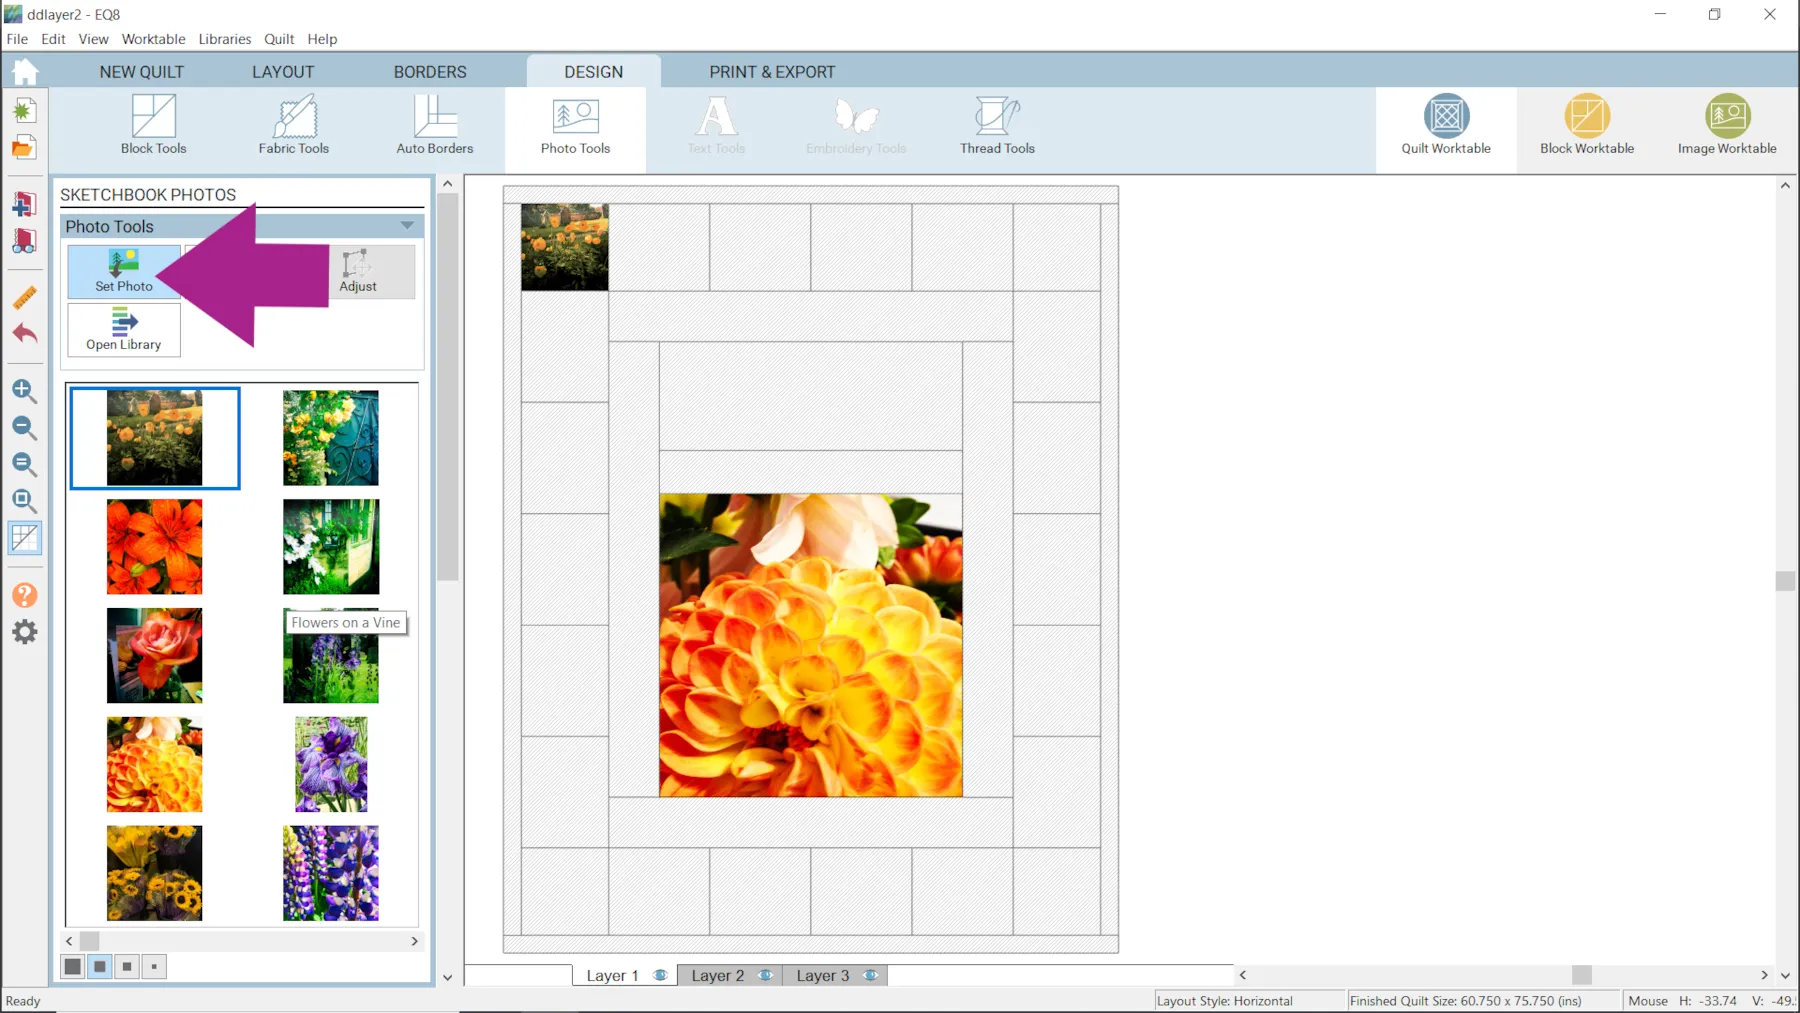
- Click the Set Photo tool and start placing your photos.
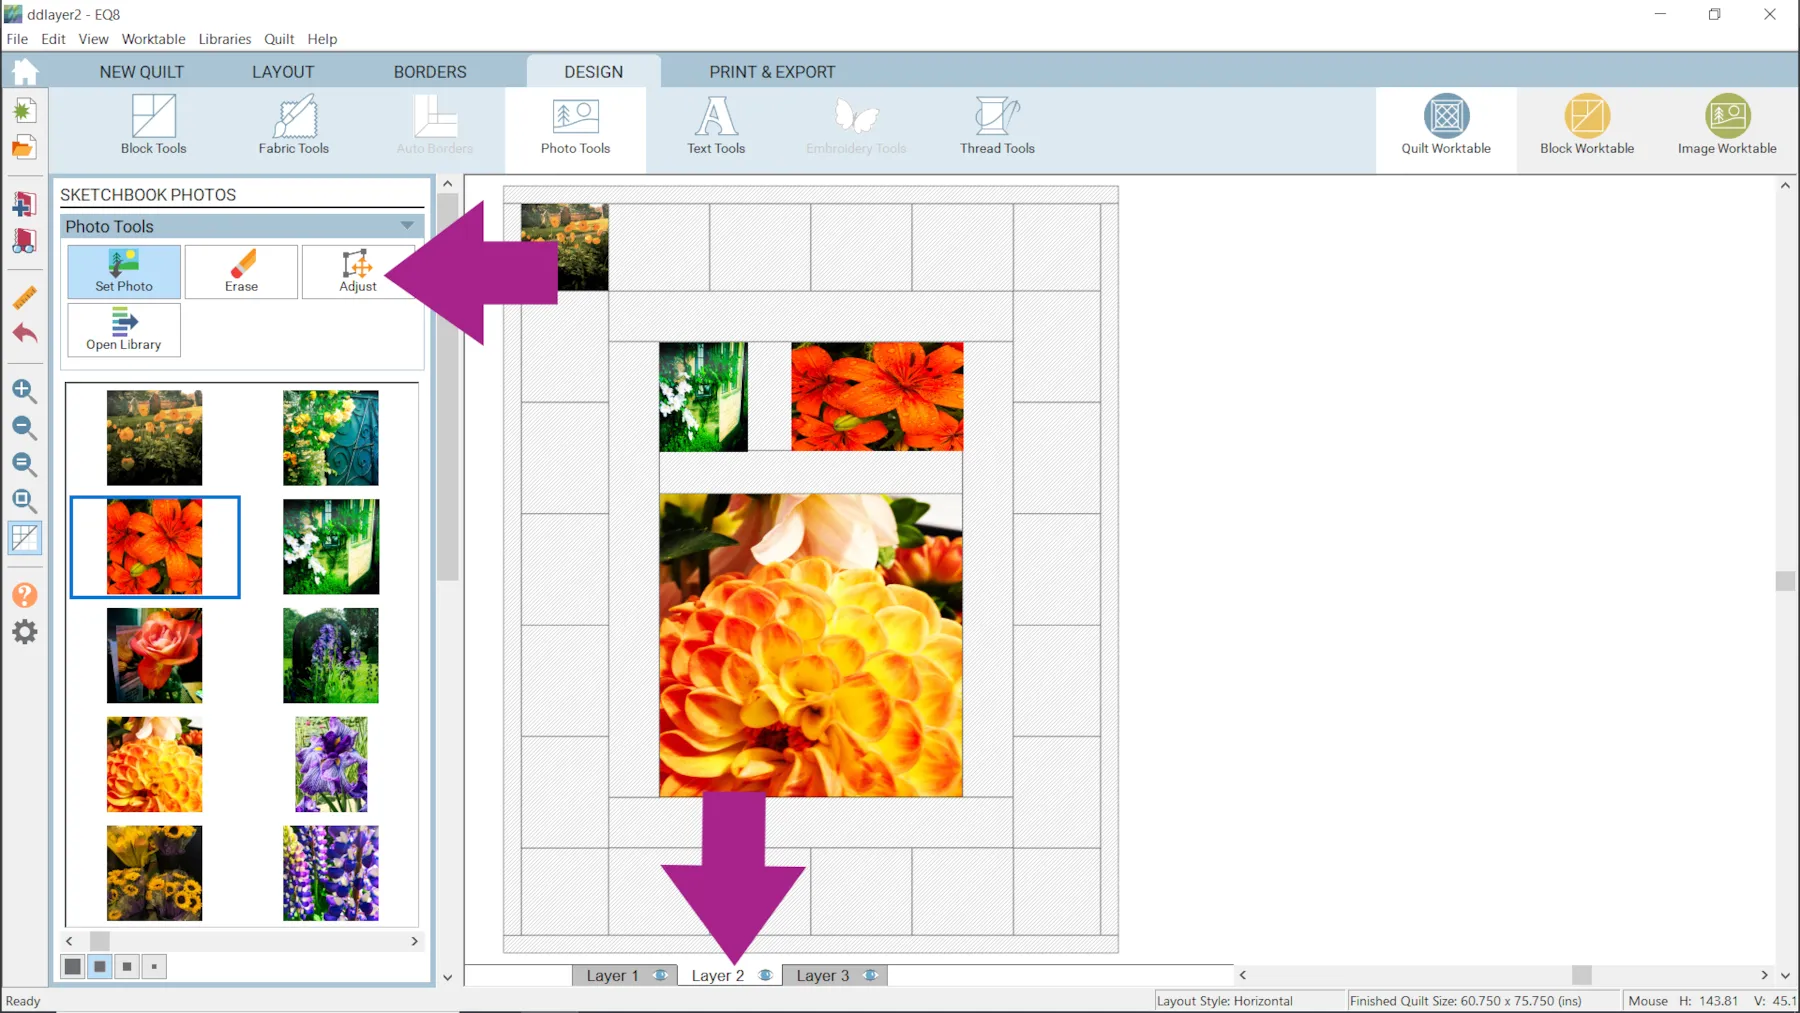
Now let’s use Layer 2 to add photos in sizes we wouldn’t otherwise be able to do. - Click Layer 2 and drag two more photos onto the quilt.
- Use the Adjust tool to place them in the second border. If you are having trouble getting it just right, make sure to check your Grid Snap Increments.
- Leave a space in between the photos.
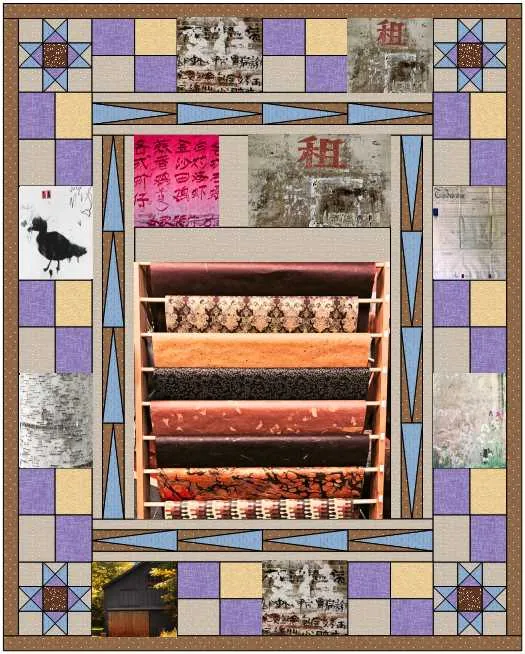
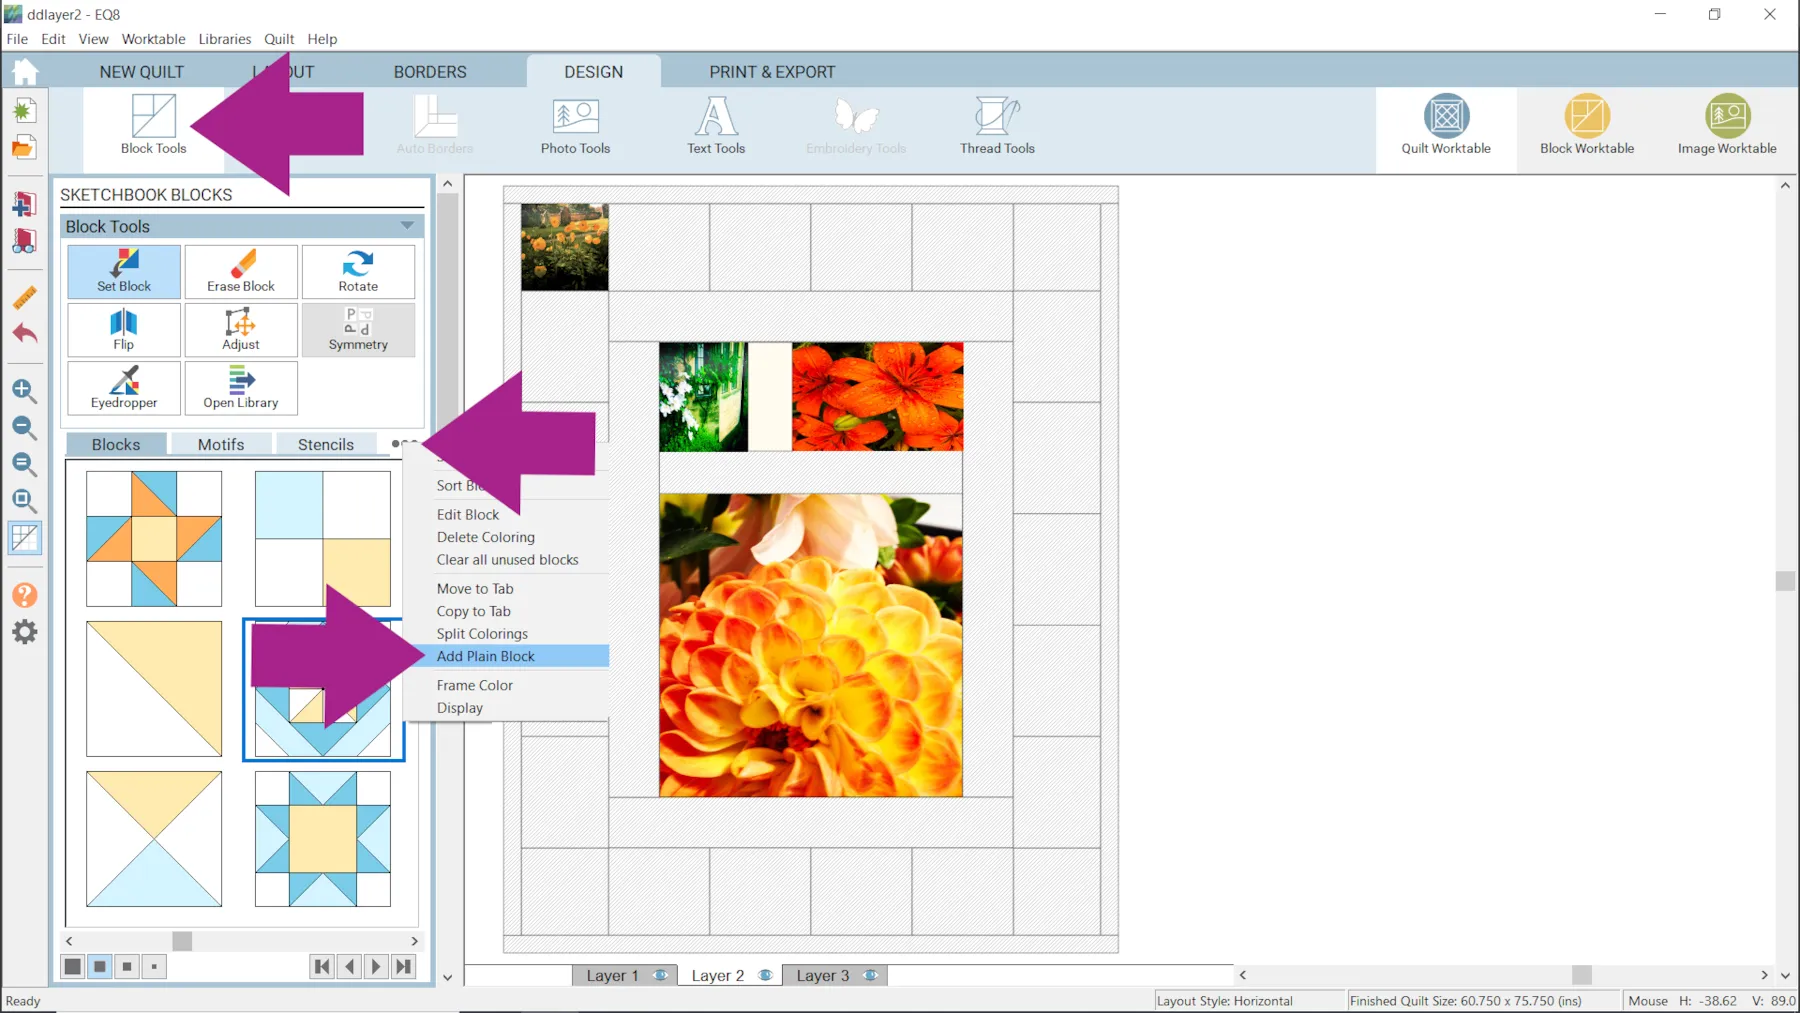
- Click Block Tools
- Click the three dots next to the Stencils tab
- Click Add Plain Block
- Drag the plain block onto the quilt and use the Adjust tool to move and resize it to fit in between the two photos.

- Click on Layer 1
- Click Photo Tools > Set Photo and continue placing photos.
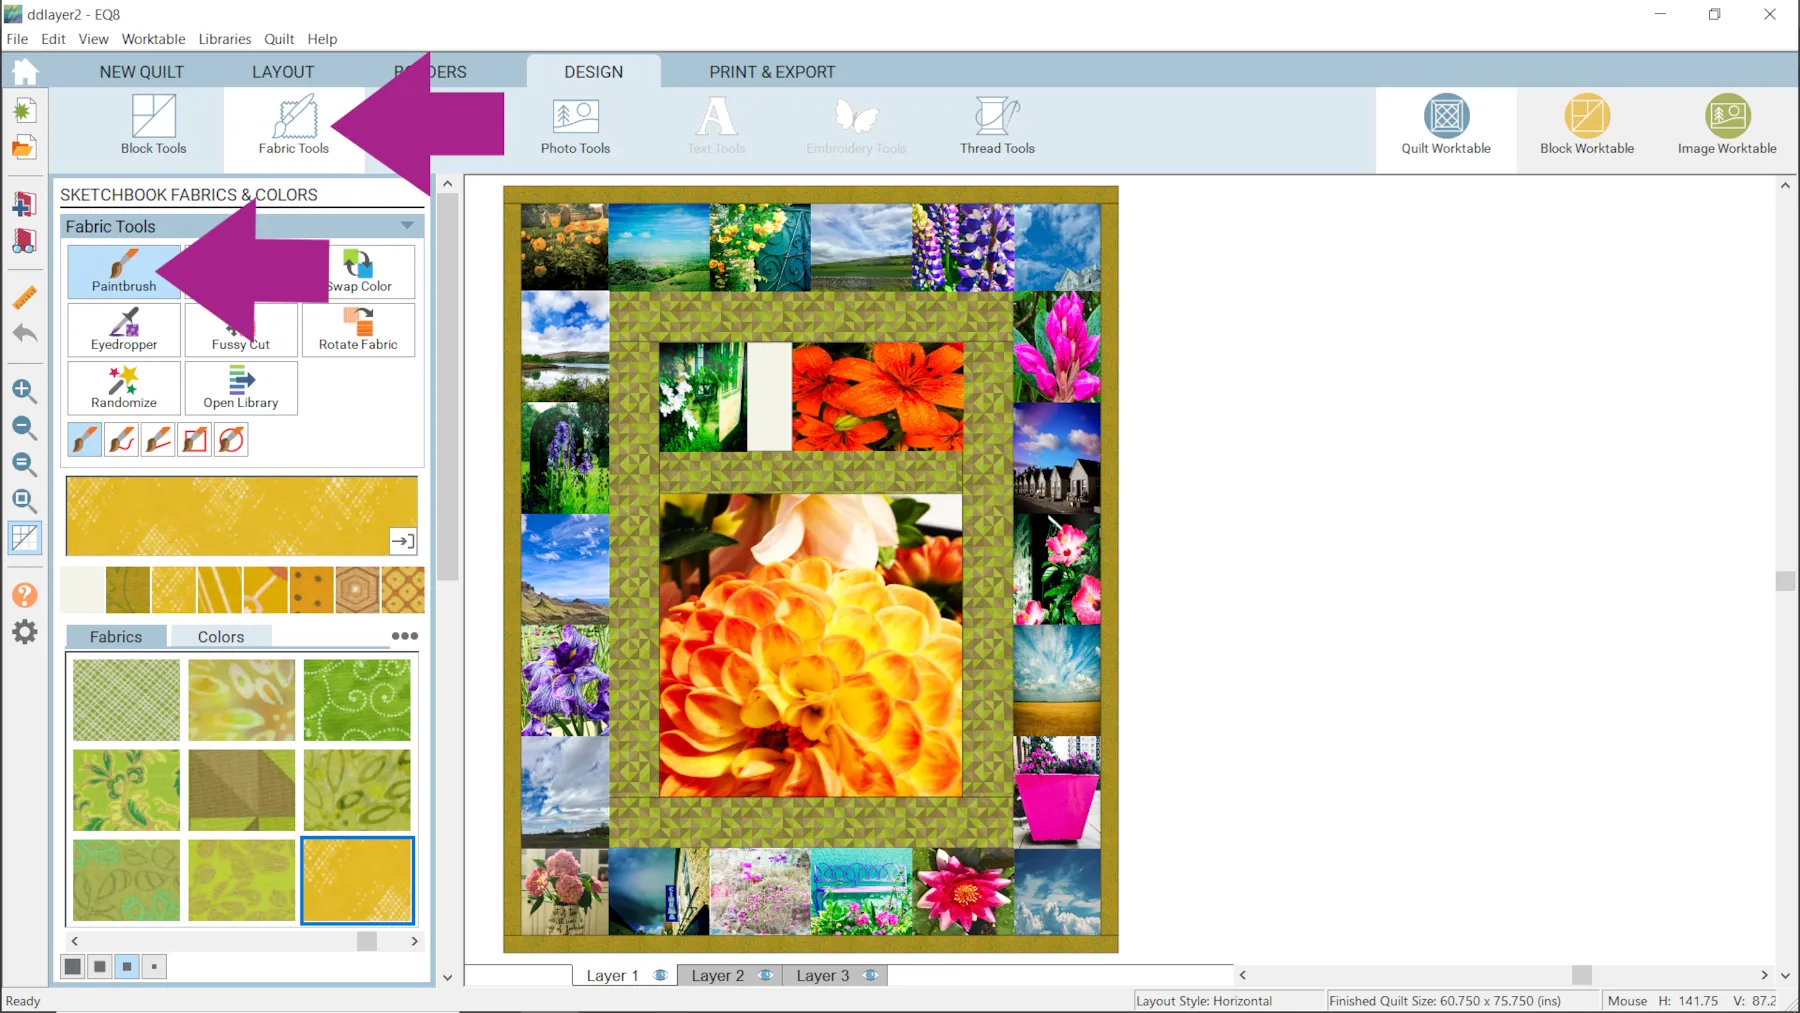
- Click Fabric Tools > Paintbrush and color your quilt as desired.
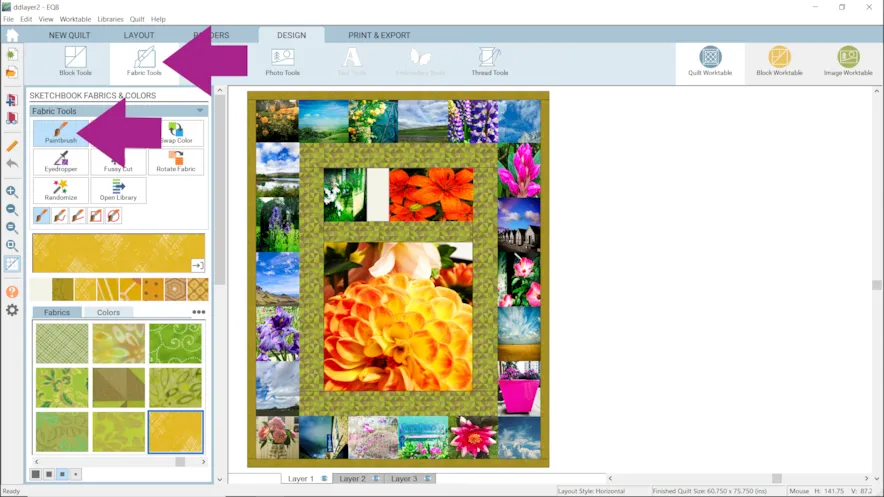
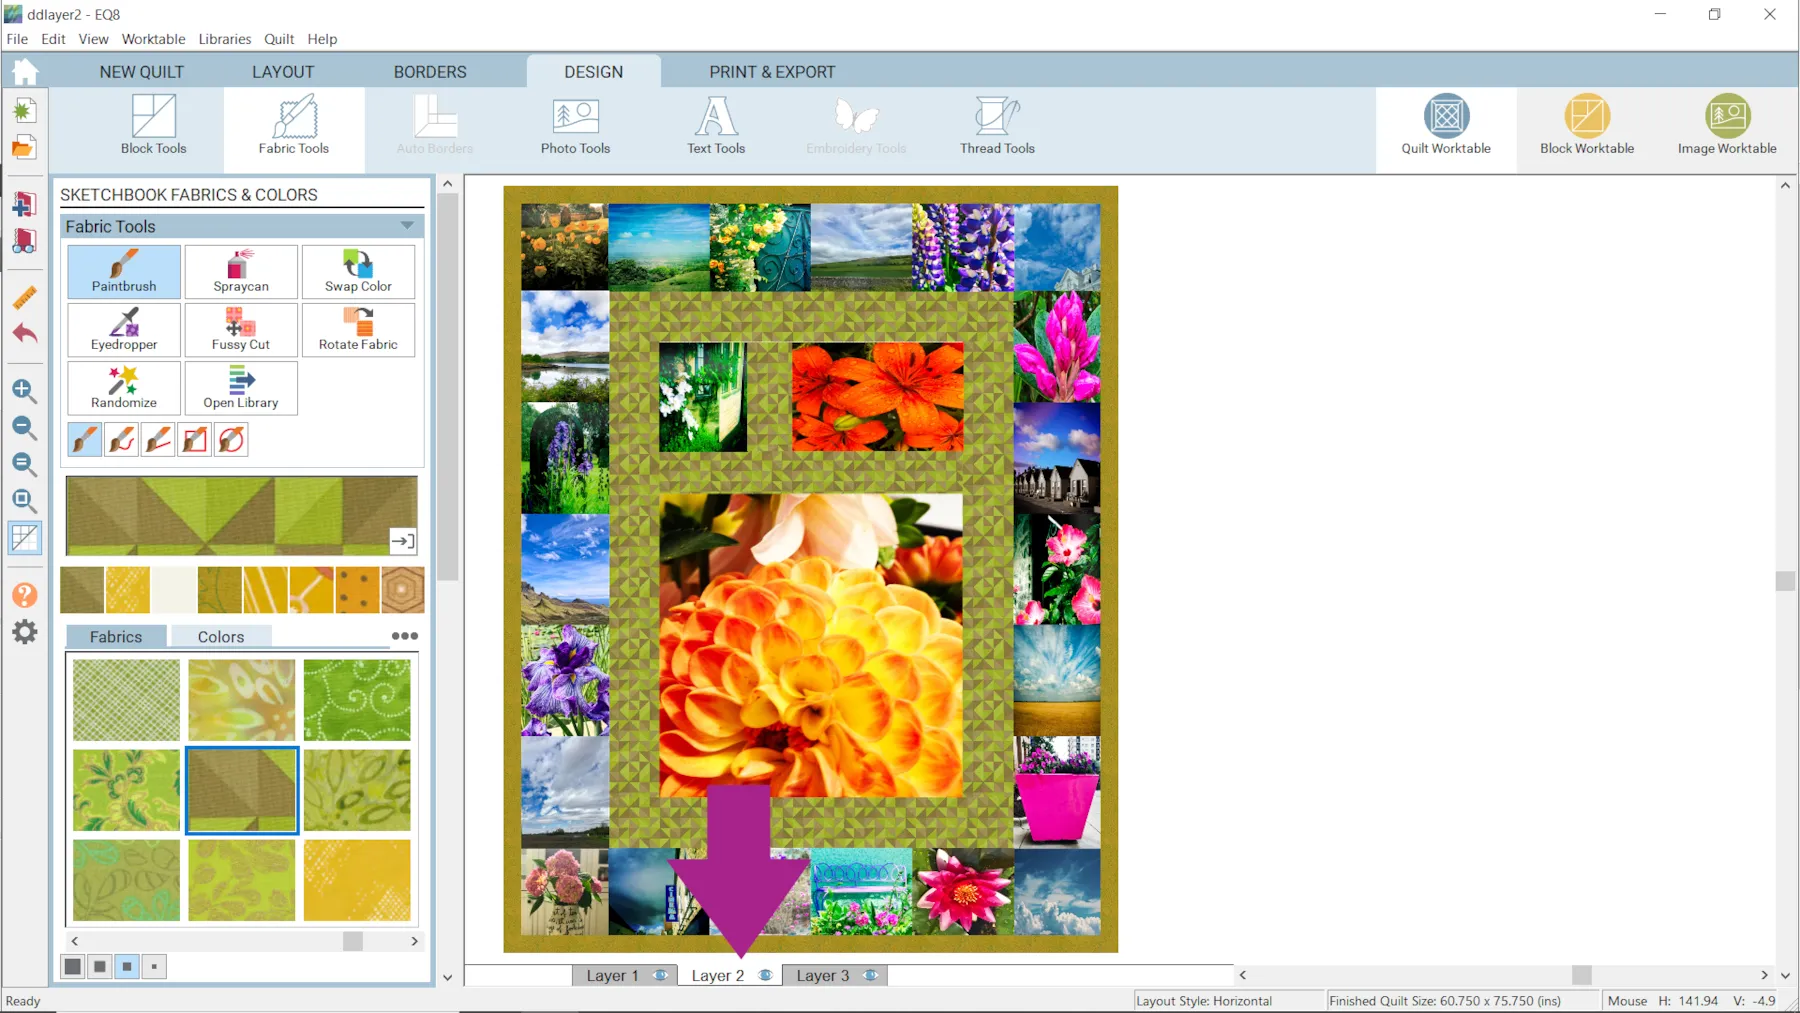
- Click Layer 2 to recolor the plain block on Layer 2.
- Click Add to Project Sketchbook
.


If you want to post images of a quilt you’ve designed from this lesson, here is how to export the images.
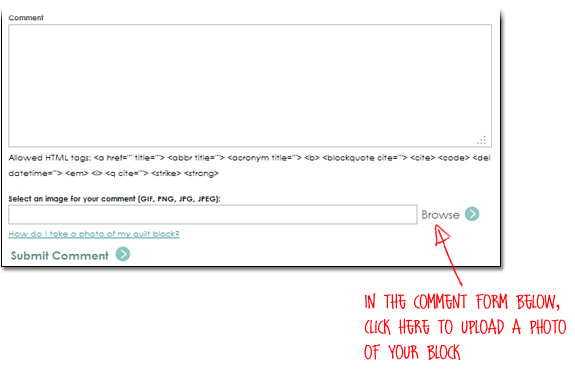
To post your image click to comment on this post. Fill in your info and then click Browse.Go to: Documents\My EQ8\Images
I can’t wait to see what you’ve done! I hope you enjoyed the lesson! If you have questions about the lesson feel free to post them below. If you have questions about something else EQ related, please contact techsupport@electricquilt.com. If you have suggestions for new Design & Discover lessons feel free to comment below or email Heidi@electricquilt.com