We’ve seen a few snowflakes here in Ohio and it inspired me to design a snowy quilt in EQ8 using the WreathMaker. It’s super easy and you’ll have a Sketchbook full of unique snowflakes in no time!

Let’s Make Some Snow!
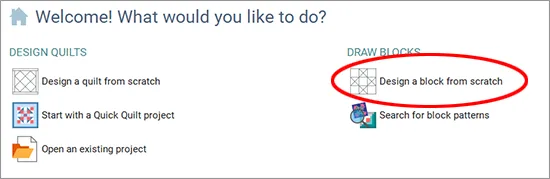
- Open EQ8 and click Design a block from scratch on the Home screen.

- On the Block Worktable, click Applique on the ribbon, then Motif in the palette.
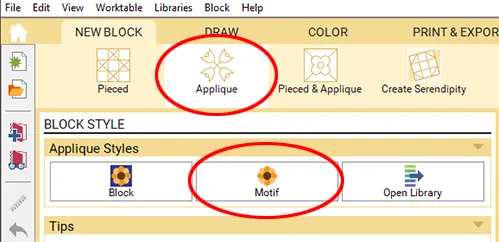
(If you want your snowflakes to have a background block, you can choose Block instead of Motif. But I have a plan for these snowflakes you’ll see at the end of this lesson!) - For this exercise, the block size doesn’t really matter. But I do think it’s helpful to have the Graph Paper on with the Horizontal and Vertical set to 2 so you have a vertical guideline to draw your shapes on.

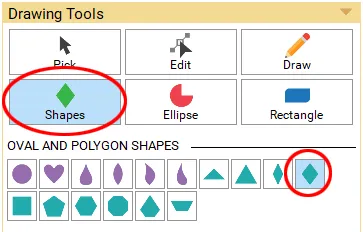
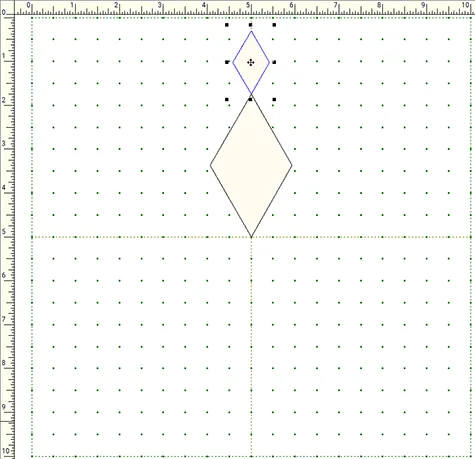
- Click the Shapes tool and select one of the sub-tools. I’m using the Diamond in this example.

- In the top half of the block, draw a couple of shapes along the center vertical line.
Note: To draw with the Shapes tool, click on the worktable where you’d like to start the shape. Hold down your mouse button and drag to create the shape. Release the mouse button when you are done dragging out the shape. Click here to watch a video on drawing applique shapes.

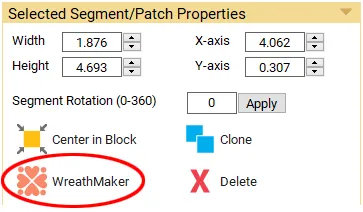
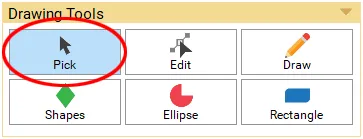
- Click the Pick tool and then press Ctrl+A (Command+A) on your keyboard to select all the shapes on the worktable. (You can also click Edit > Select All on the top menu bar.)

- In the palette, click WreathMaker.
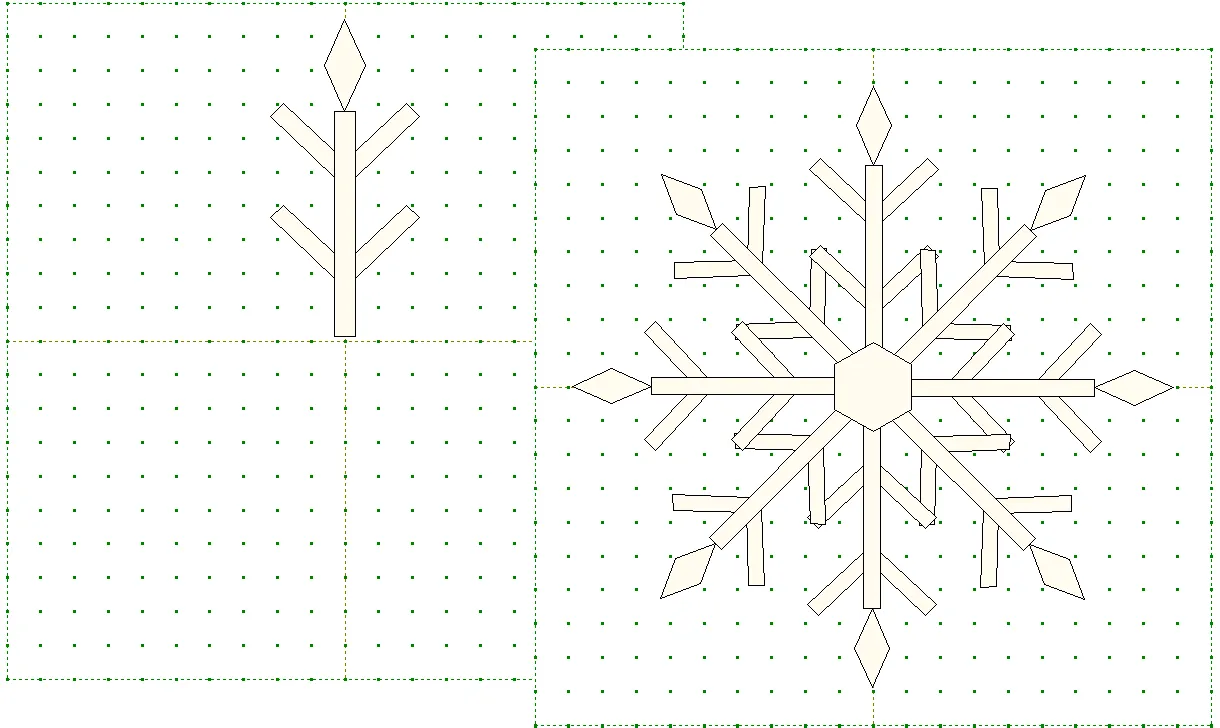
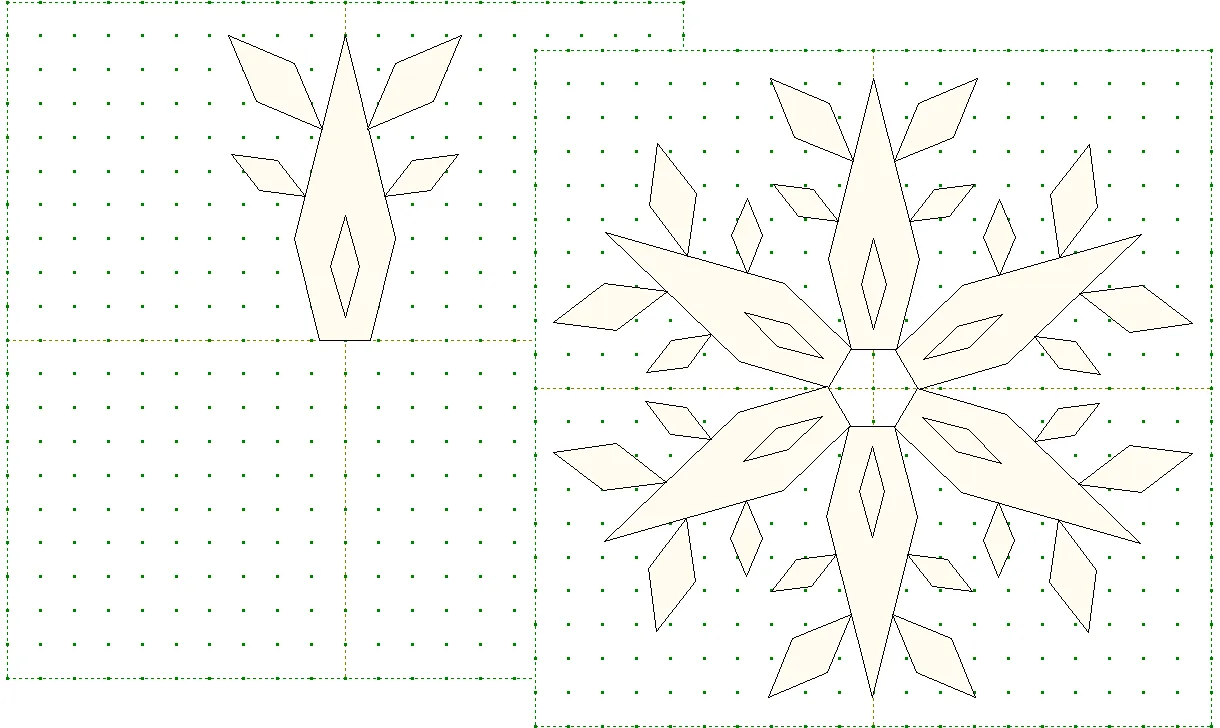
- In the WreathMaker window, experiment with the settings on the left until you see a design you like in the preview area. When you have a snowflake you like, click OK.

- The design will appear on the worktable. If you’d like, click the COLOR tab and use the Paintbrush tool to color the snowflake. Click Add to Project Sketchbook to save the design in the Sketchbook. If you haven’t named the project yet, you’ll get a warning to do so. Make sure you save the project so you don’t lose all these wonderful snowflakes you’re about to create!

- To start a new snowflake, click the NEW BLOCK tab at the top of the screen. Then click Applique on the ribbon, and Motif in the palette.
- Draw some shapes and then use the WreathMaker. Make your snowflakes as simple or as complex as you’d like! Remember to click Add to Project Sketchbook for each design.


Inspiration
Below are some examples with the starting shapes on the left and the WreathMaker design on the right.

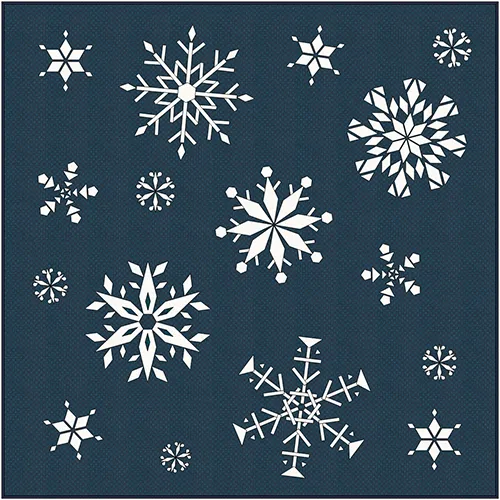
On the Quilt Worktable, I created a Custom Set quilt with a plain square background and set the snowflake motifs on Layer 2. See Setting Fabric as a Background in a Custom Quilt for more info.
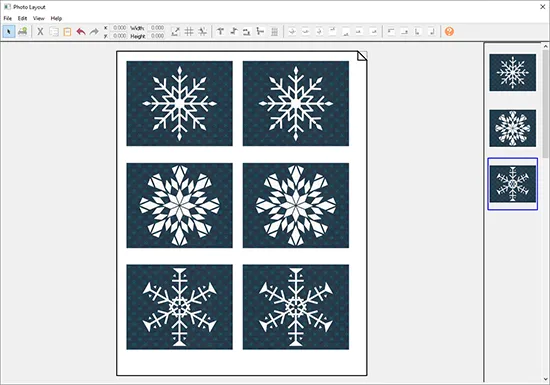
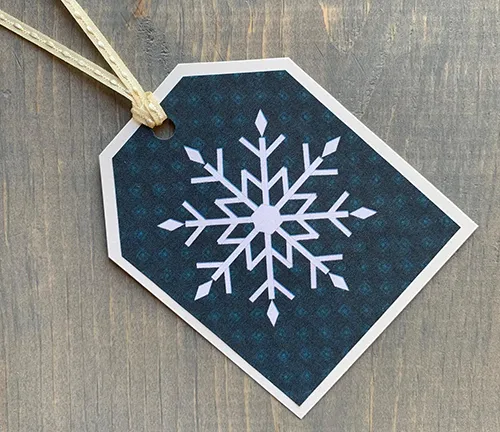
I also made smaller quilts with one snowflake each and printed gift tags! In the Quilts section of the Sketchbook, use the Copy to Photos button to add a photo of each quilt to the Photos section of the Sketchbook. Then you can use the Photo Layout option to place several tags on one page to print.
Have fun experimenting with the WreathMaker and creating your own snowflakes!


11-20-2020
2:06 pm
I love this tips! Thank you guys!
11-20-2020
2:07 pm
I love this tips! Thank you guys!❤️❤️
11-20-2020
2:36 pm
I’m glad your enjoy the lessons! Thanks for stopping by the blog
11-20-2020
2:15 pm
Thanks for another fun idea! I love this. Your pic of the Quilt with many snowflakes sparks another idea, it looks like it would be a pretty fabric; save Quilt as a photo & use Image to create a repeat, to create an image of that. Fun!
11-20-2020
6:40 pm
Perhaps have it printed at Spoonflower!
11-20-2020
2:38 pm
Yes! It would make a fun fabric too! You could take this idea in a lot of great directions
11-20-2020
3:09 pm
What a great idea! Off to make some tags.
11-20-2020
6:43 pm
I love learning new things and I had never used the Photo Layout function. Tedious but still fun. Wish it had the potential of re-coloring the background fabric. If there’s a way please let me know. Also – is there a way to post my jpg files here? Thanks!!
11-20-2020
6:45 pm
I also couldn’t figure out how to make all the blocks the same size. I couldn’t see anything that looked like what you can do with the Pick tool and just type in what you want.
11-23-2020
1:10 pm
The snowflakes I made were motifs. So I re-colored the background fabric on the Quilt Worktable. If you choose “Block” in step 2 (rather than motif), then you could color the background on the Block Worktable.
I’m not sure what you’re asking in regards to the Pick tool and resizing. If you are asking about making the blocks the same size on the Photo Layout, you can use the Resize Dialog to size all the blocks (it’s the button to the right of the Width and Height buttons).
11-20-2020
7:59 pm
I love snowflakes, but not applique. Can the wreath maker be used on a pieced or paper pieced block?
11-23-2020
1:02 pm
Sorry! WreathMaker is only available for applique shapes.
There are some pieced snowflake designs in the Block Library in 02 Contemporary Pieced > Kaleidoscopes.
11-21-2020
7:57 am
Thanks for another great idea!
11-21-2020
12:59 pm
Maybe I am having a senior moment today. Please tell me if there is a way to export the snowflake designs to either my Scan N Cut or my Cricut so that I can cut the various pieces out perfectly.
11-24-2020
12:57 pm
Here are a couple of tutorials for using EQ8 designs and cutters:
https://www.youtube.com/watch?v=hcTyXUI3VSc
https://www.onpointquilter.com/blog/svg-files-from-eq8
11-21-2020
2:58 pm
This is a really cool project. I too am interested in a way that the applique pieces could be exported to a Cricut or other cutter.
11-24-2020
12:57 pm
See the comment above for a couple of tutorials
11-21-2020
5:31 pm
Great tutorial.
11-30-2020
7:51 am
This is a great tutorial! I was stuck on how to make a decent snowflake and this did the trick. I now have a nice wall hanging pattern that I love!