This month we will be learning four different ways to make Medallion Quilts.
The first way is the easiest.
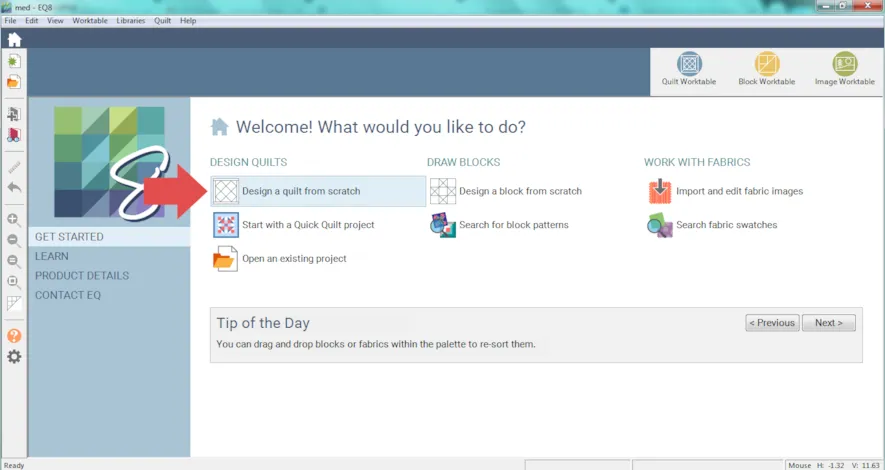
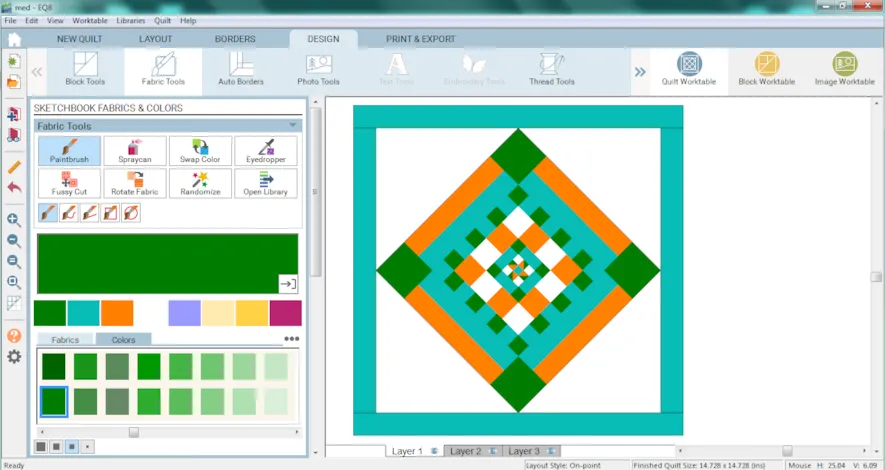
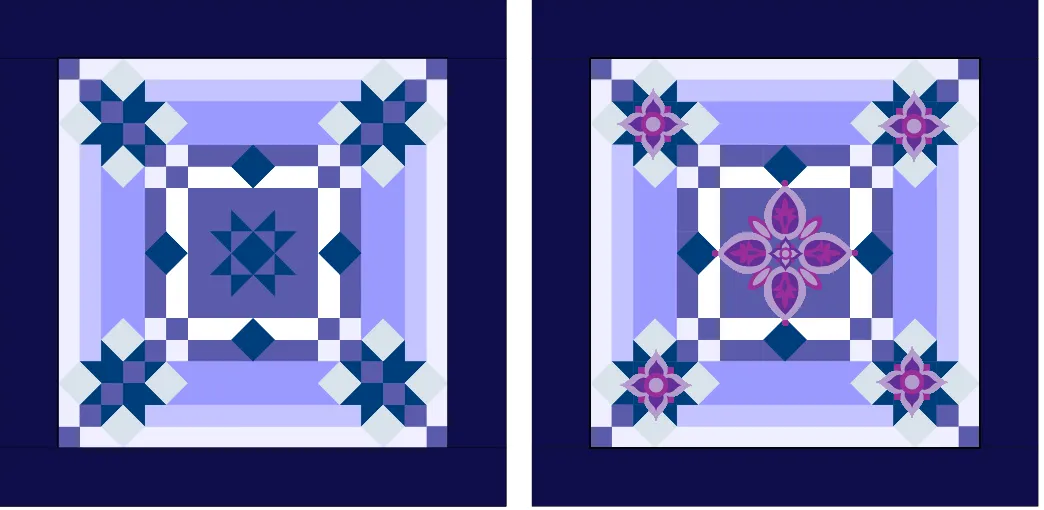
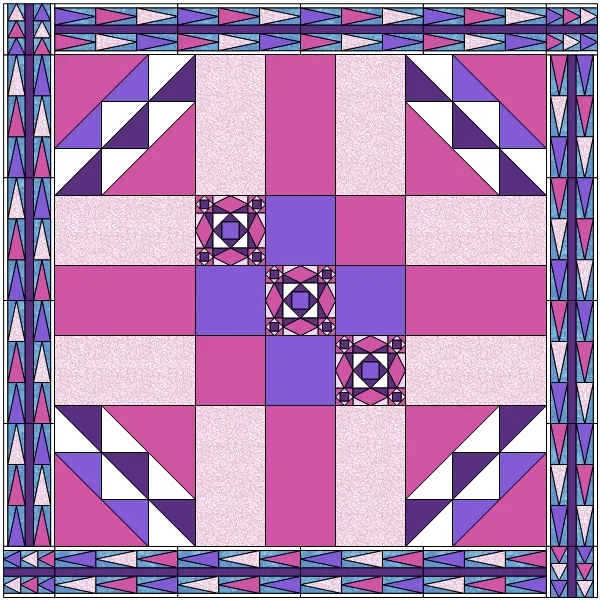
#1 Using a Block From the Library
- Open EQ8
- Click Design a Quilt from Scratch
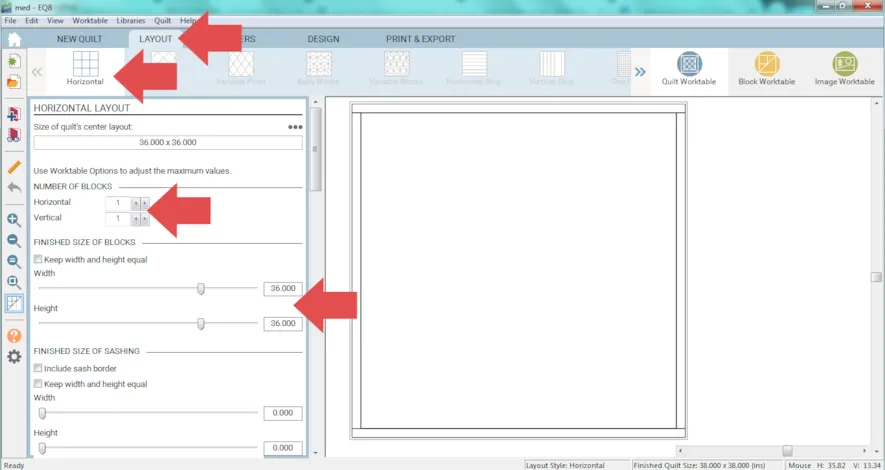
- Click Horizontal
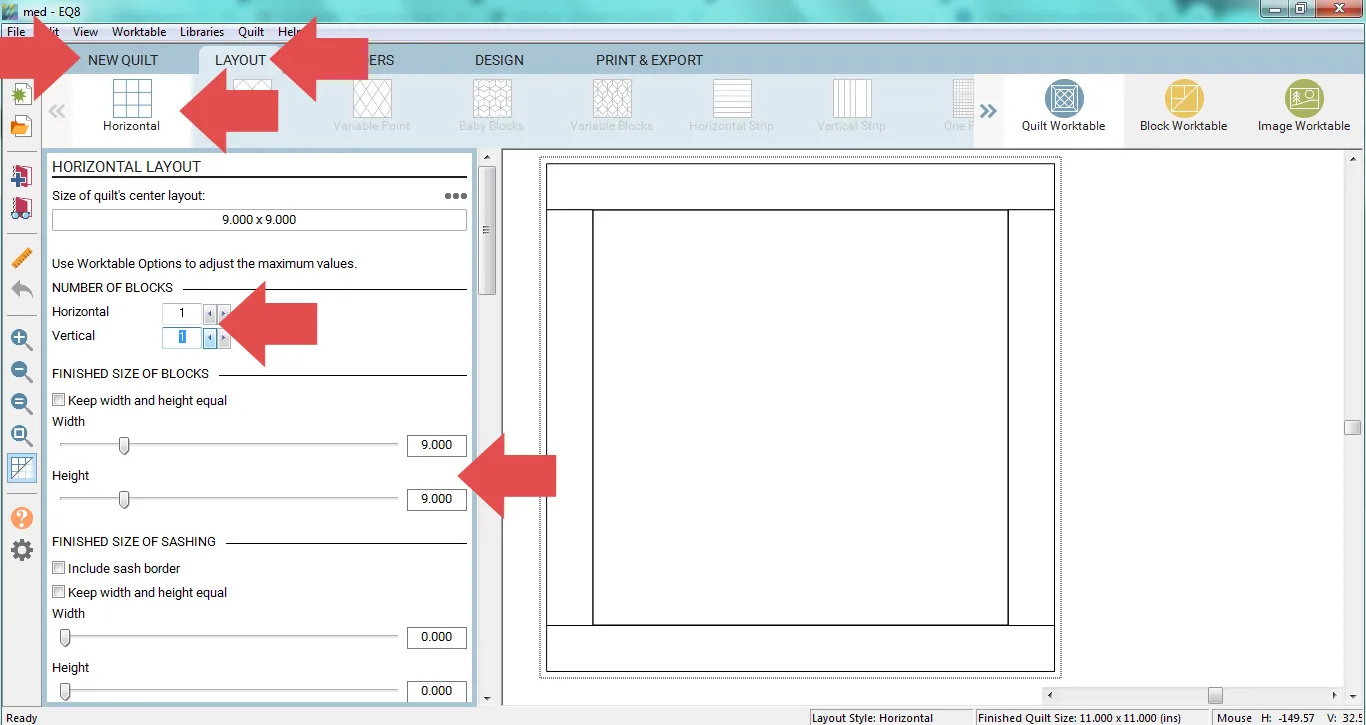
- Click the LAYOUT tab
- Under NUMBER OF BLOCKS
Horizontal: 1
Vertical: 1 - Under FINISHED SIZE OF BLOCKS
Width: 30
Height: 30
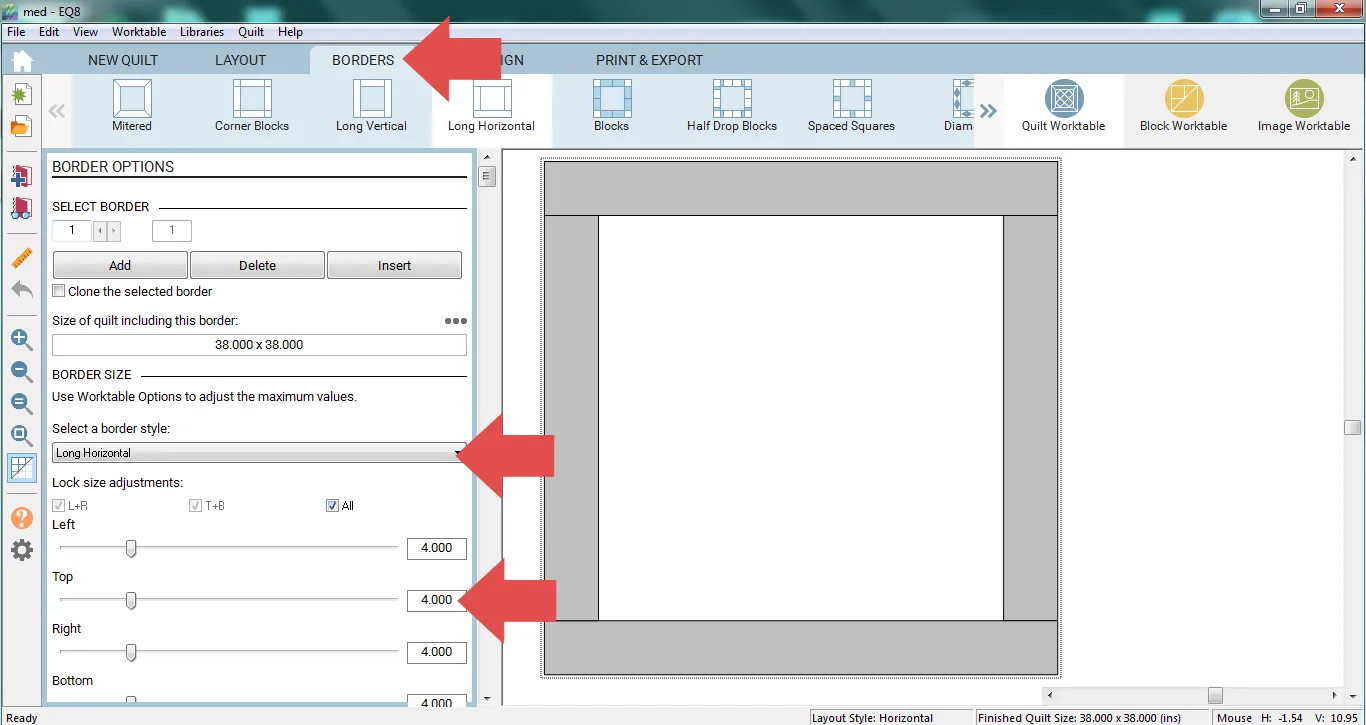
- Click the BORDERS tab
- Under Select a Border Style choose: Long Horizontal
- Under BORDER SIZE make all sides: 4

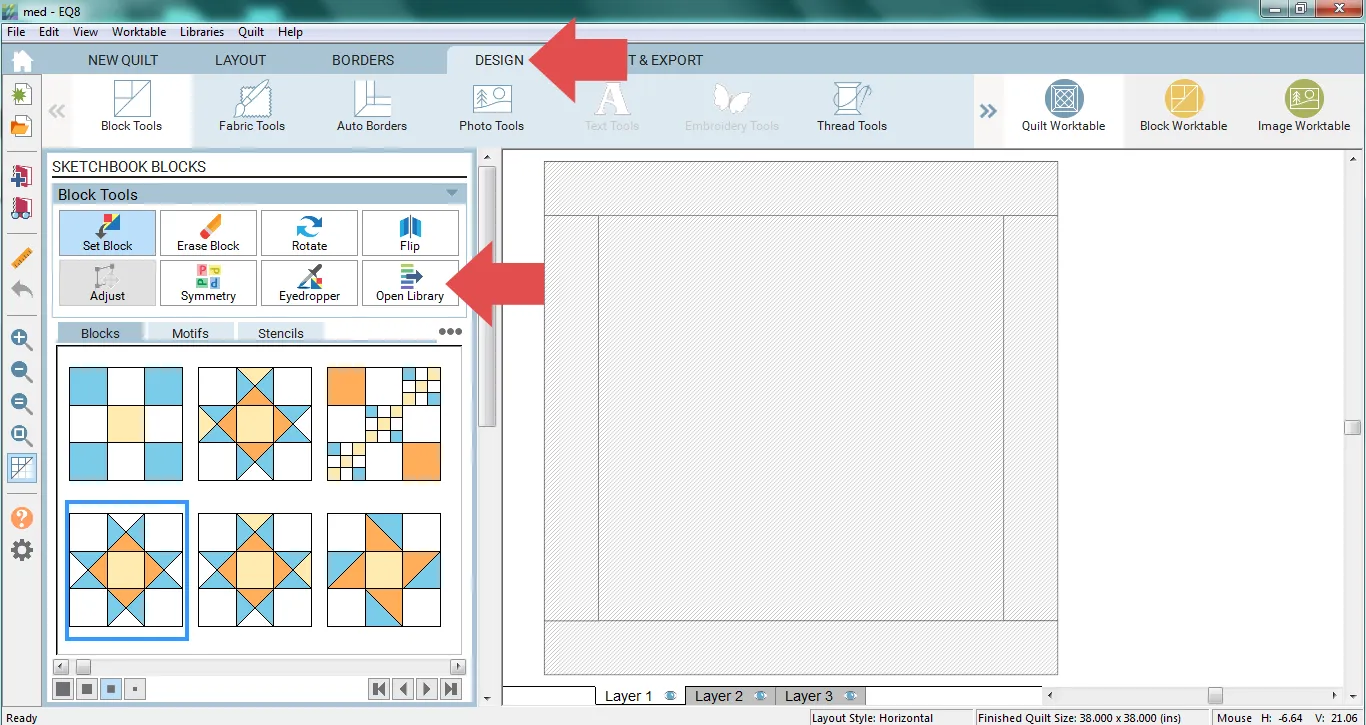
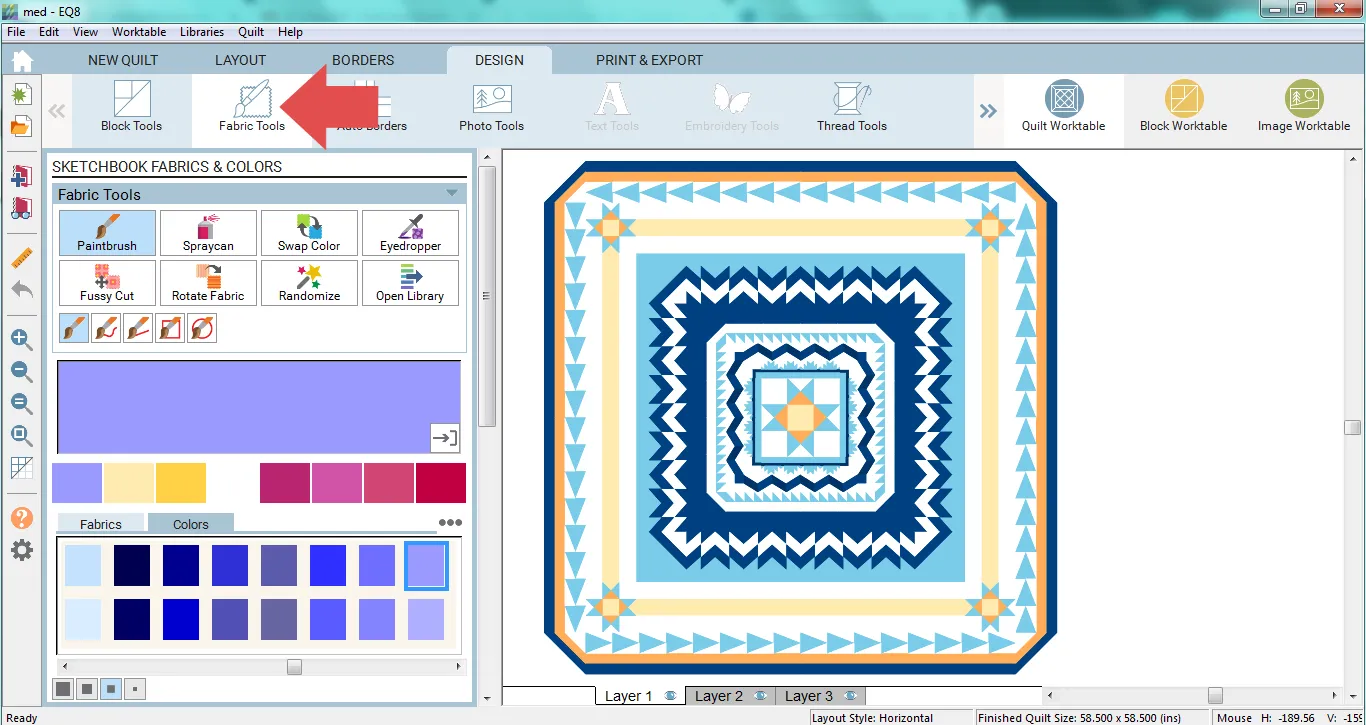
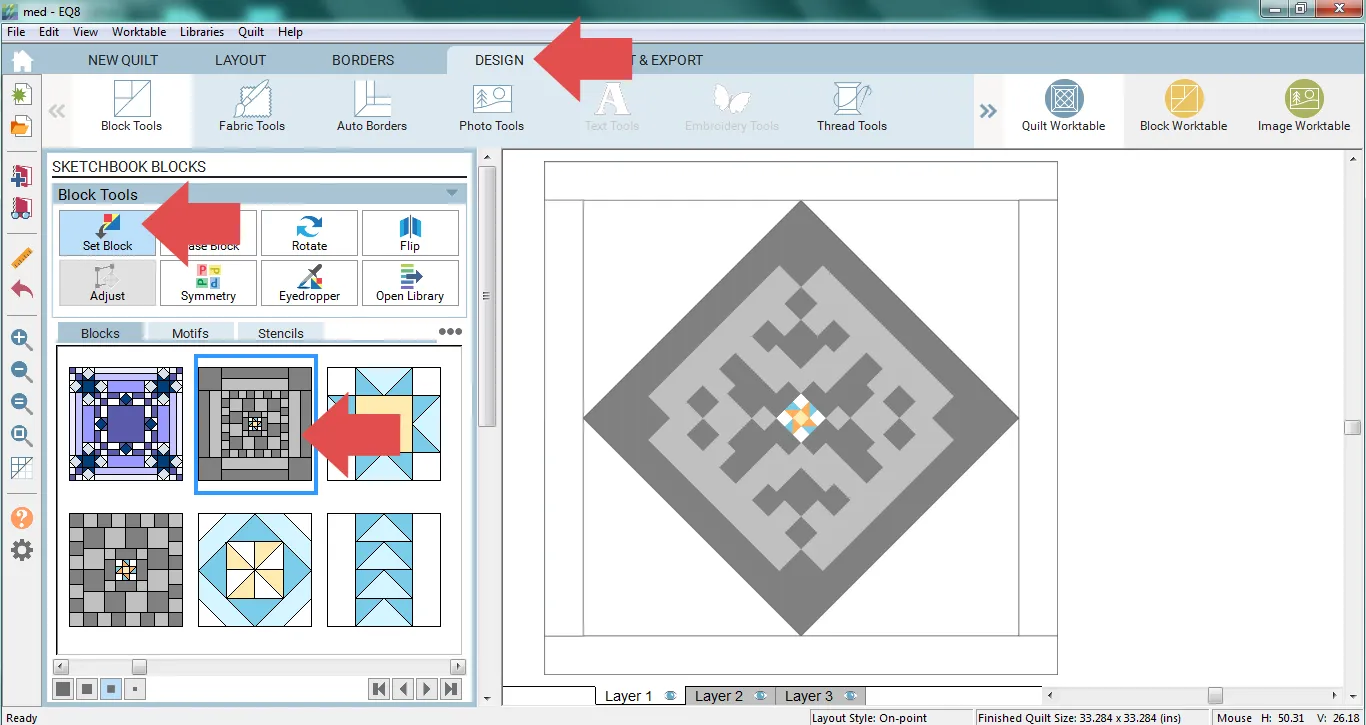
- Click the DESIGN tab
- Click Open Library
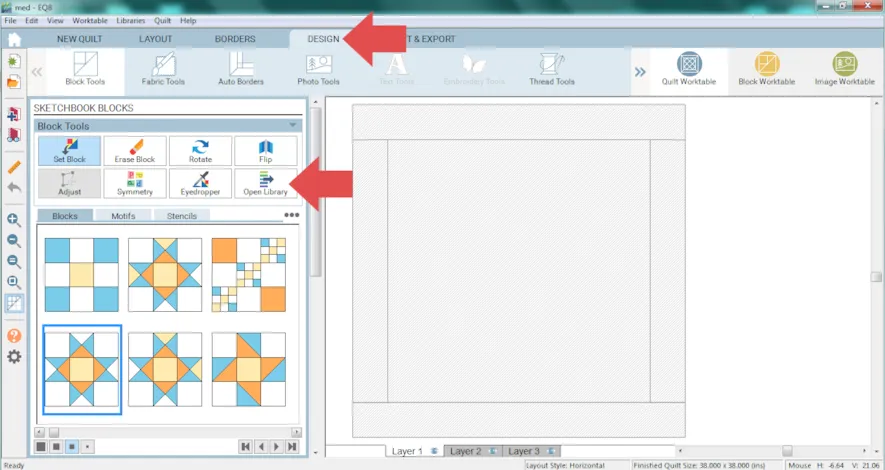
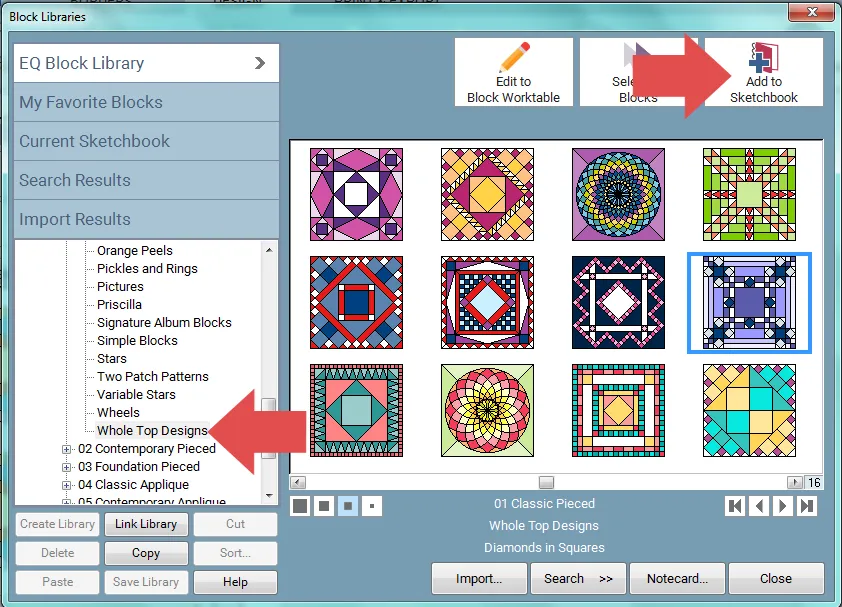
- Under EQ Libraries > EQ8 Libraries > 01 Classic Pieced >Whole Top Designs - choose a block. The example is using Diamonds in Squares.
- Click Add to Sketchbook.
- Click Close.
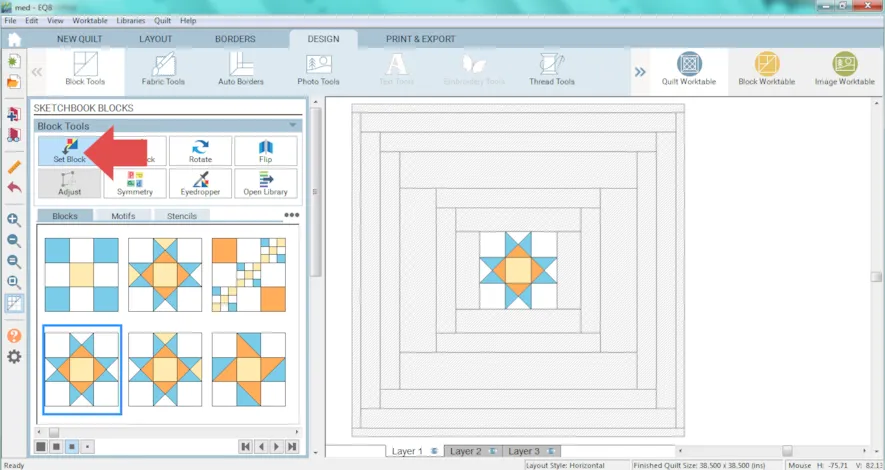
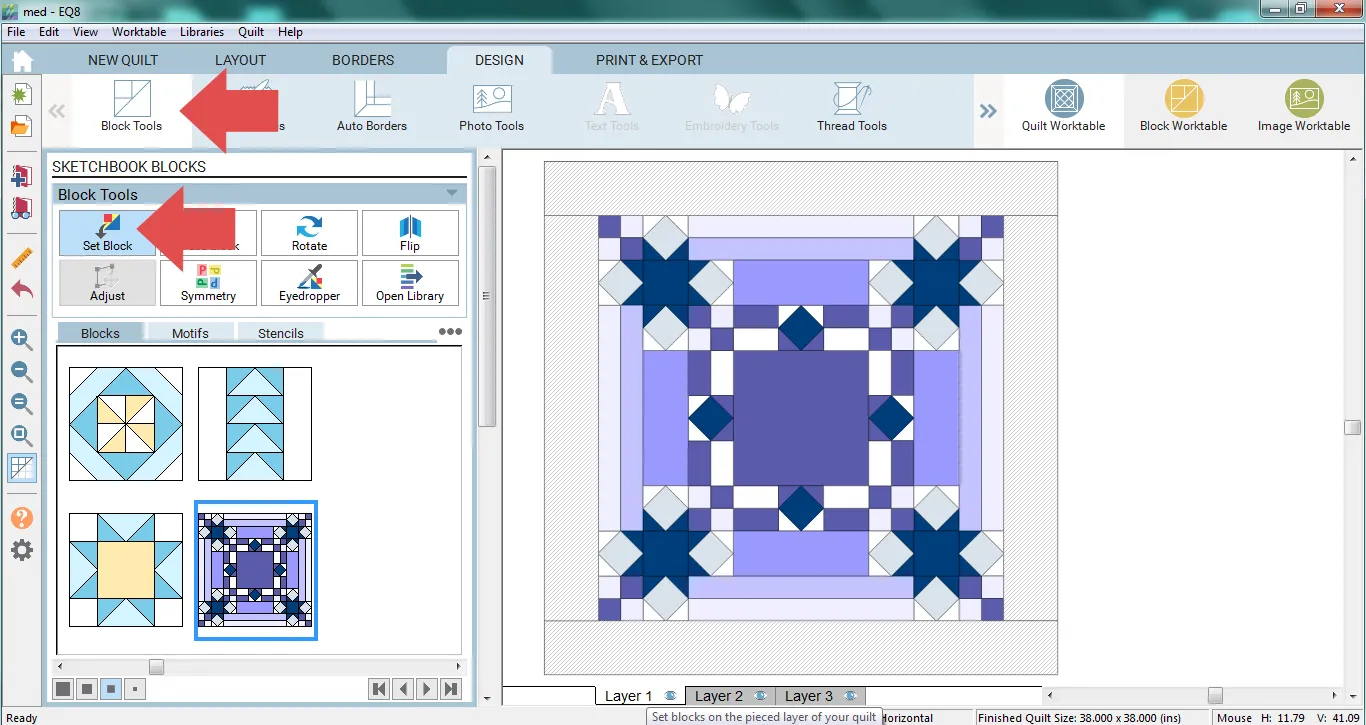
- Click Block Tools
- Click Set Block, and click on the quilt worktable to set your block.
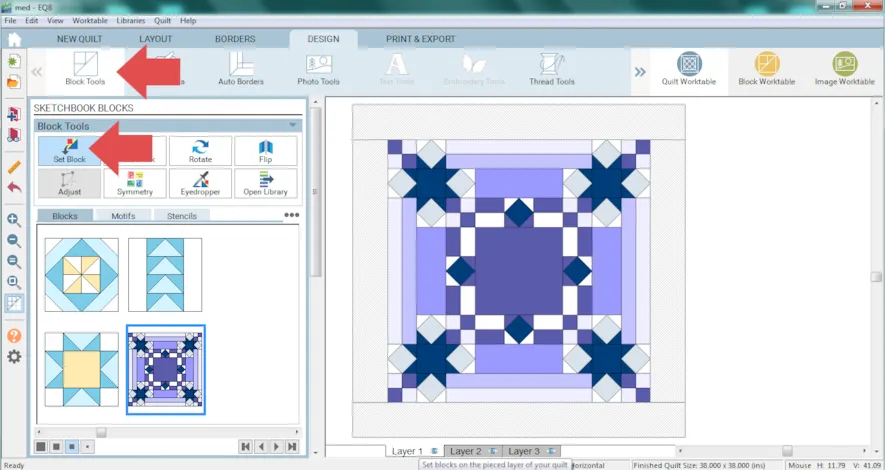
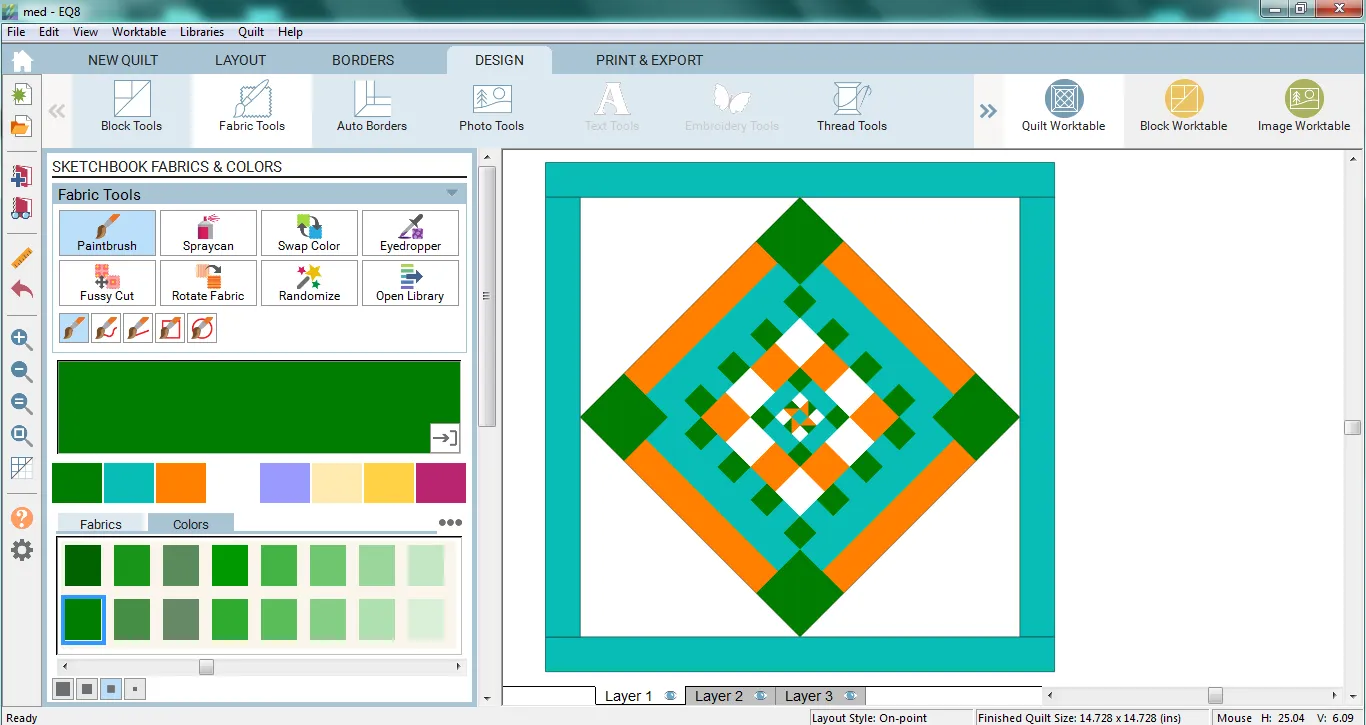
- Design the quilt as you would like. You can edit the block on the Block Worktable, recolor the block, or whatever you want to do!
Click Add to Project Sketchbook . If you haven’t named your project yet, EQ8 will prompt you to do so. (To be saved, your item needs to be in the Sketchbook AND your project needs to be named. Here is more information.)
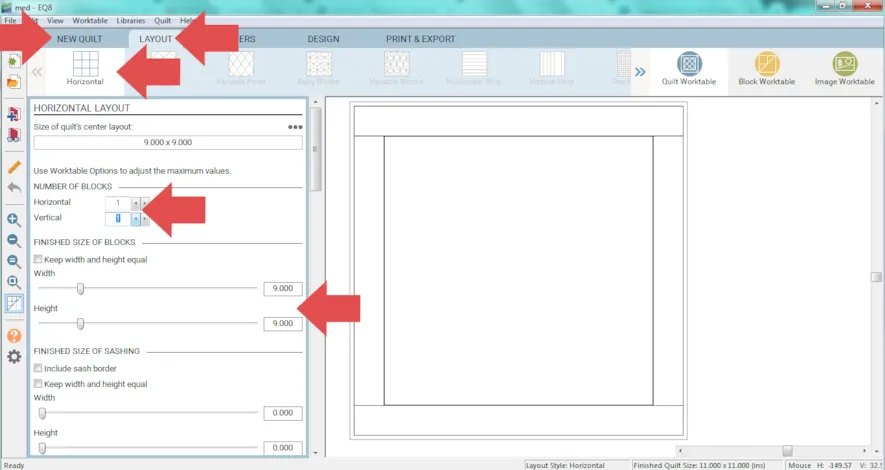
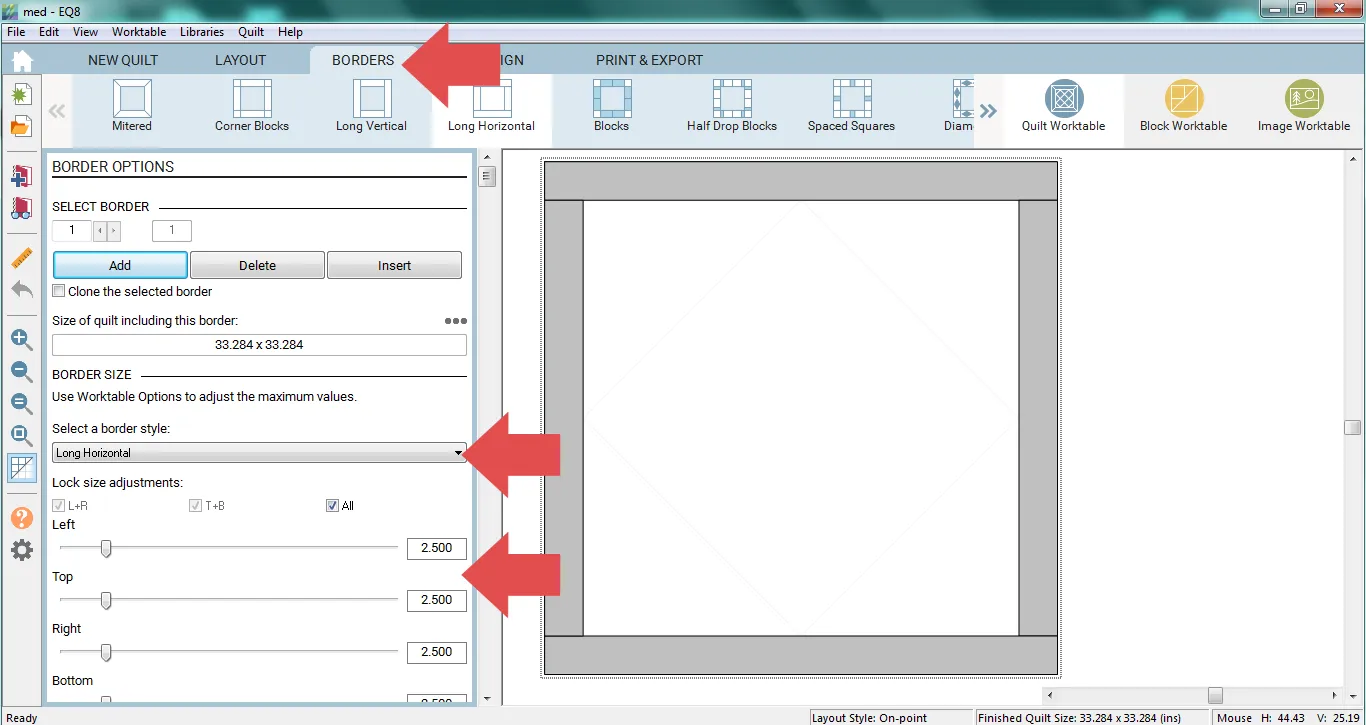
#2 Using Borders - Click NEW QUILT
- Click Horizontal
- Click the LAYOUT tab
- Under NUMBER OF BLOCKS make
Horizontal: 1
Vertical: 1 - Under FINISHED SIZE OF BLOCKS make
Width: 9
Height: 9
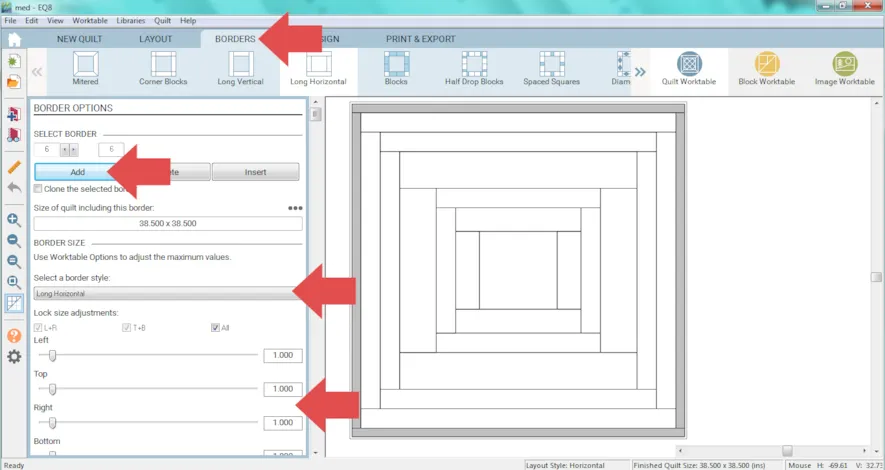
- Click the BORDERS tab
- Click the Add button until you have 6 borders (they can all be Long Horizontal).
- Make the sizes of all your borders different. Don’t spend too much time on this though, it will probably get changed later.
- Place a block in the center with the Set Block tool.
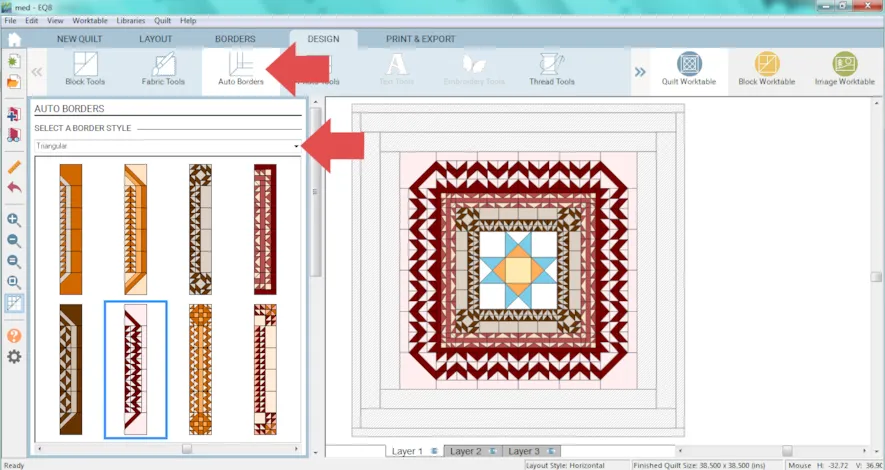
- Click Auto Borders
- Click the
 under SELECT A BORDER STYLE
 - Click on an Auto Border and then click on a border to watch it instantly fill in the space. To change it, simply click on a different Auto Border and click on the border to see it replaced.
Experiment with all the different styles. If you want to change the width of a border click the BORDERS tab. You can also add more borders. If you add more blocks to the border the auto borders design will automatically update.The borders under the BORDERS tab can also be used to build the design. Here is more information on Borders vs. Auto Borders. - To continue working on Auto Borders click DESIGN > Auto Borders.
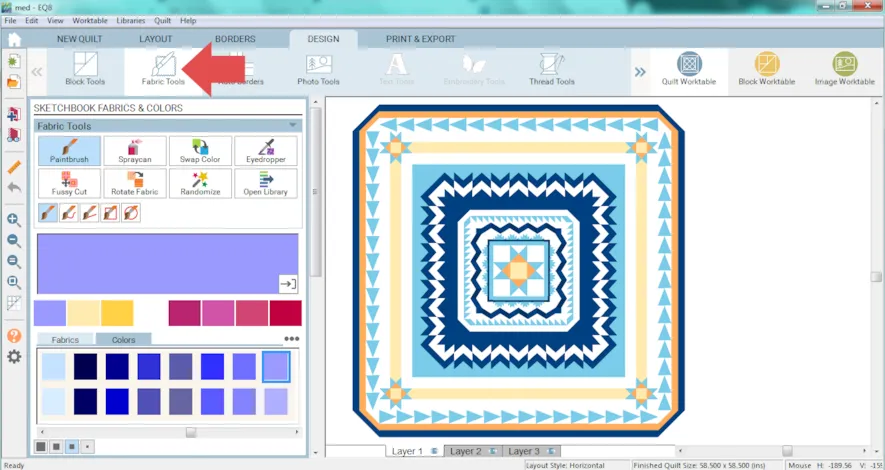
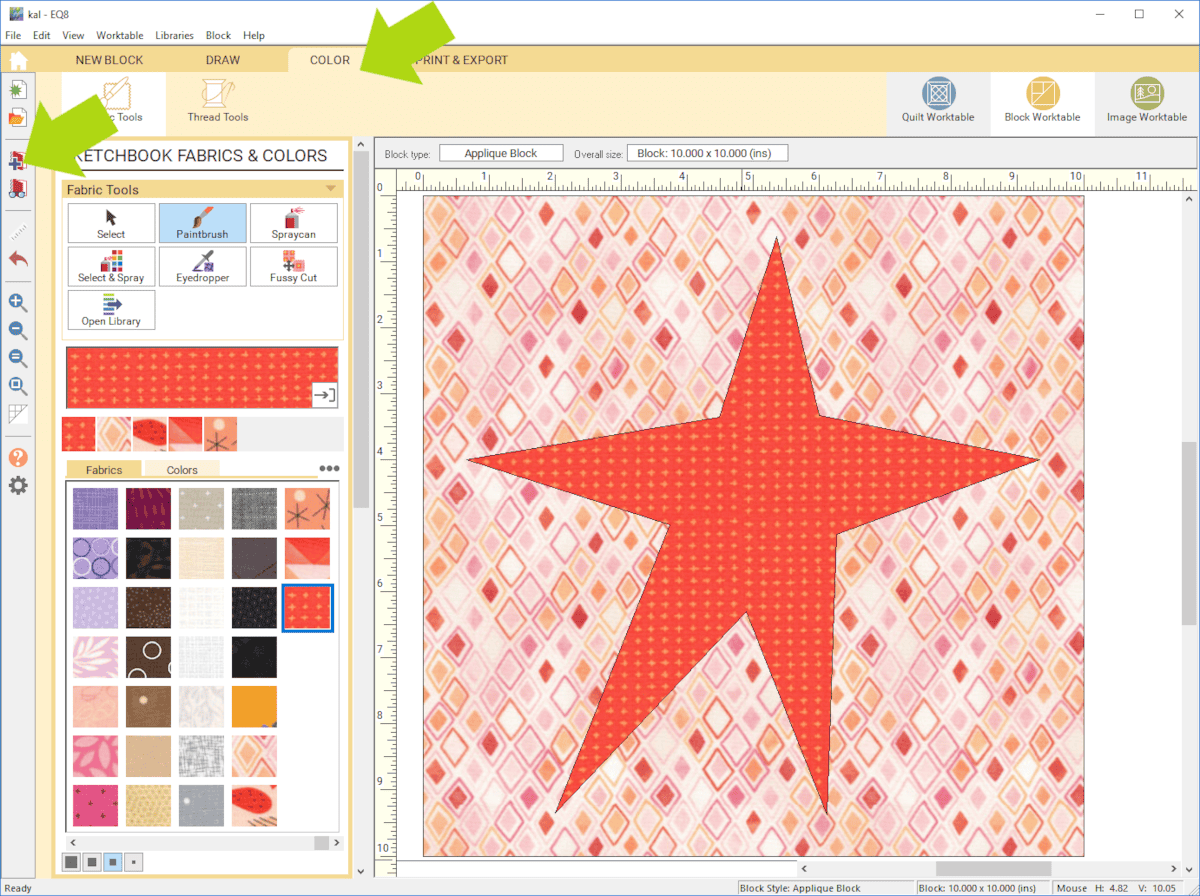
- Click the Fabric Tools and recolor.
- Click Add to Project Sketchbook
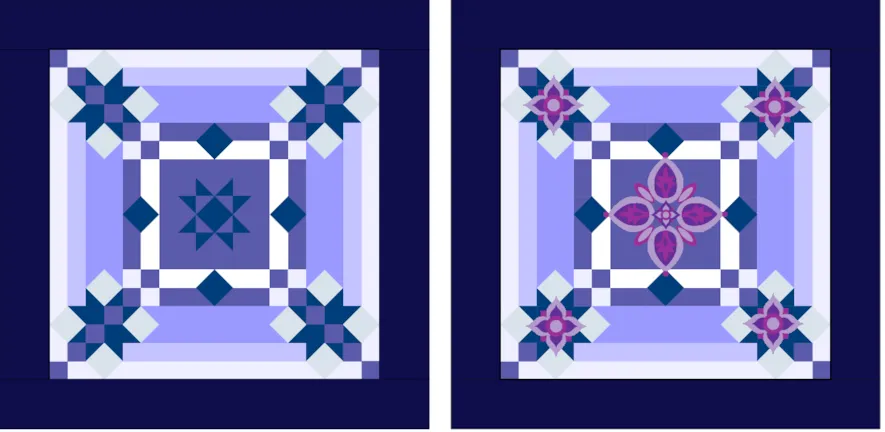
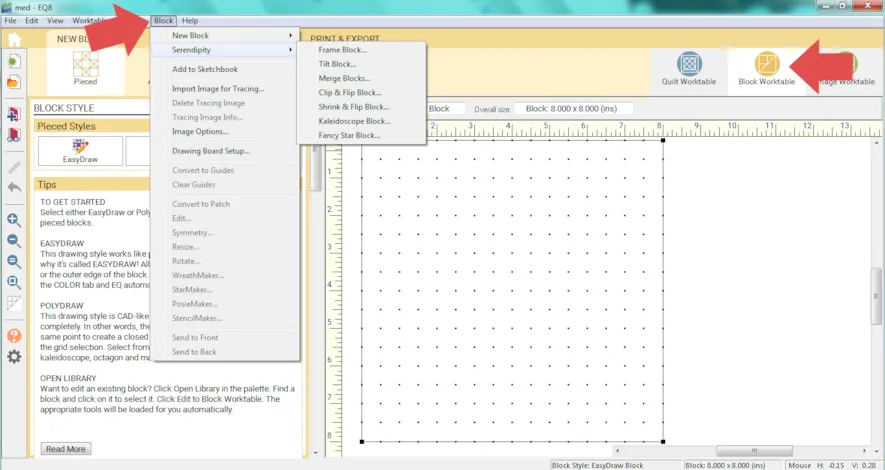
#3 Serendipity Tool - Click Block Worktable
- Click Block > Serendipity > Frame Block…
- Choose a frame and a block.
- Click Add to Sketchbook.
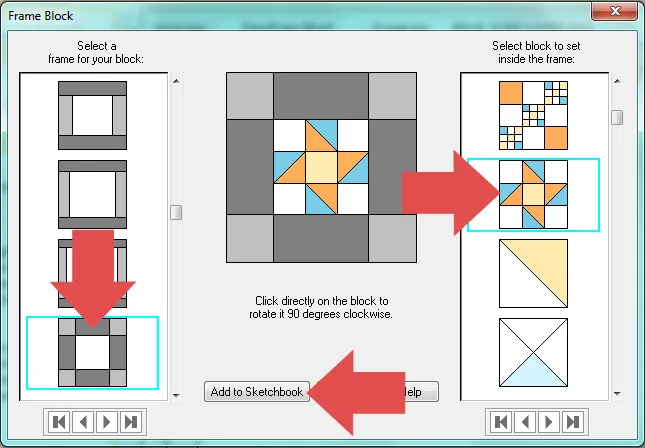
- Scroll down on the right to see all the blocks. The block that was just created will be the last one. Click on the last block.
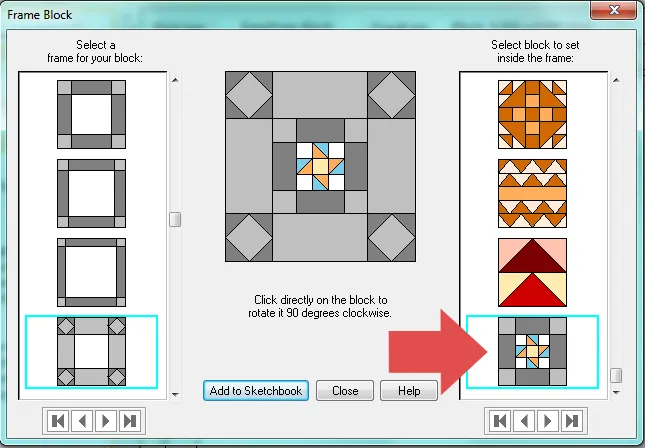
- Add another frame
- Click Add to Sketchbook
- Repeat steps 37-39 as many times as you’d like.
- Click Close when you’re done.
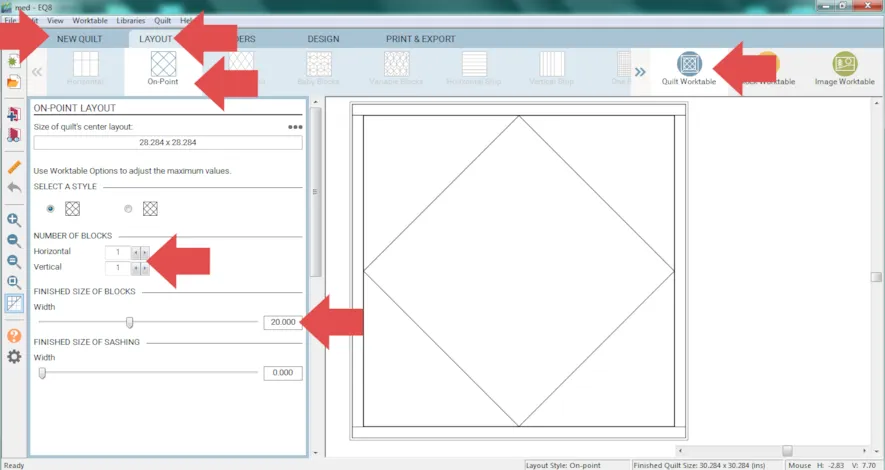
- Click Quilt Worktable
- Click New Quilt
- Click On-Point
- Click the LAYOUT tab
- Under NUMBER OF BLOCKS
Horizontal: 1
Vertical:1 - Under FINISHED SIZE OF BLOCKS make
Width: 20
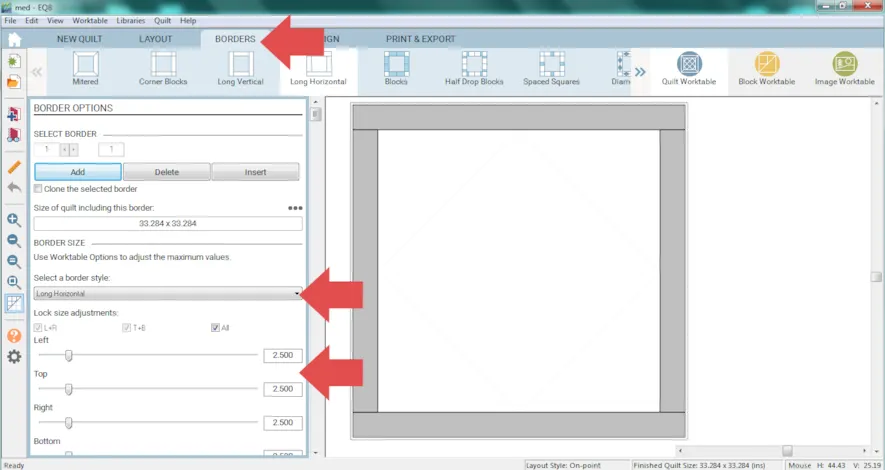
- Click the BORDERS tab
- Under Select a border style choose: Long Horizontal
- Make all the sides: 2.5
- Click the DESIGN tab
- Click Set Block
- Click the framed block you added and click to place it in the quilt.

- Recolor as you wish.
- Click Add to Project Sketchbook
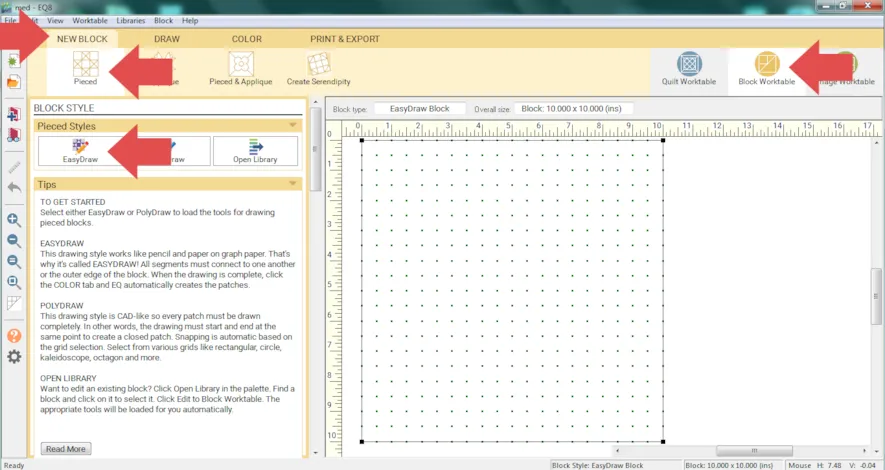
#4 Create Quilt from Block - Click Block Worktable
- Click NEW BLOCK
- Click Pieced
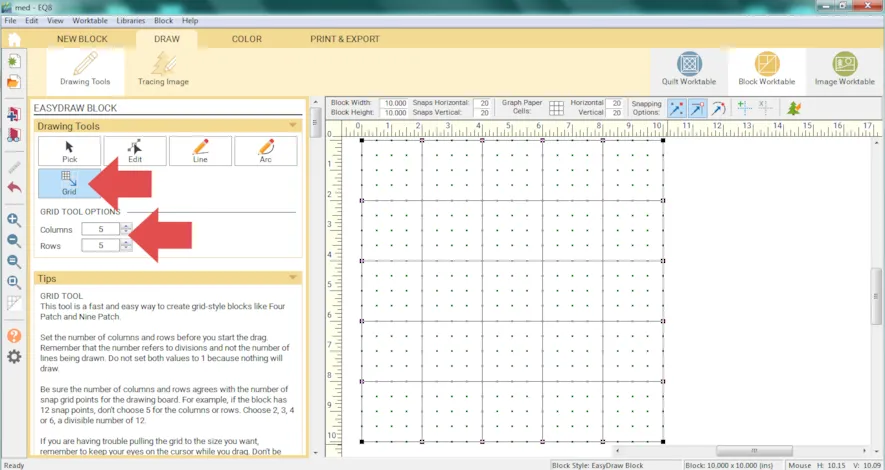
- Set the Block Width and Height to: 10
- Set the Snaps Horizontal and Vertical to: 20
- Turn the first two Snapping Options ON

- Click the Grid tool
- Under GRID TOOL OPTIONS make the Columns and Rows: 5 and make the grid (start at the top-left corner, click, drag, and release in the bottom-right corner. Here is more information about using the Grid tool.).
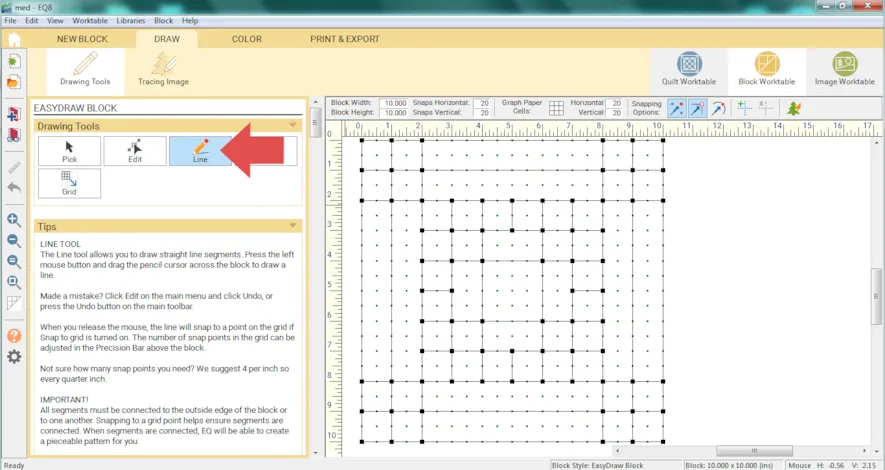
- Use the Line tool to create a block that will be the layout for the final quilt in this lesson.
- Use the Pick tool to delete lines as needed.
- Click Add to Project Sketchbook
- Click Quilt Worktable
- Click Quilt
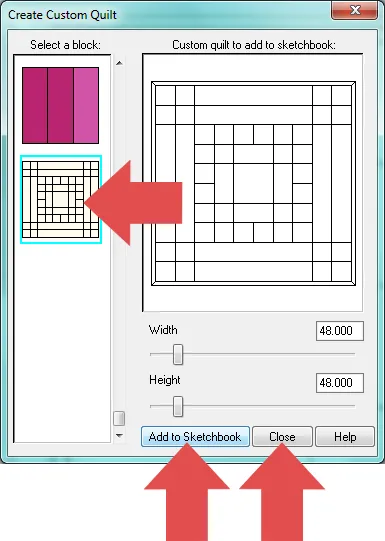
- Click Create Quilt from Block…
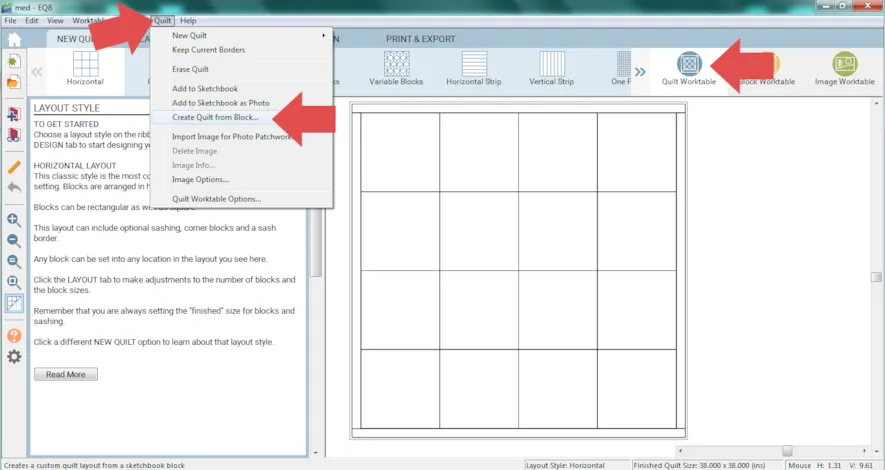
- Choose the last block from the left column.
- Change the Width and Height as desired.
- Click Add to Sketchbook
- Click Close
- Click the View Sketchbook button.
- Click Quilts and scroll to the last quilt in the Sketchbook.
- Click Edit
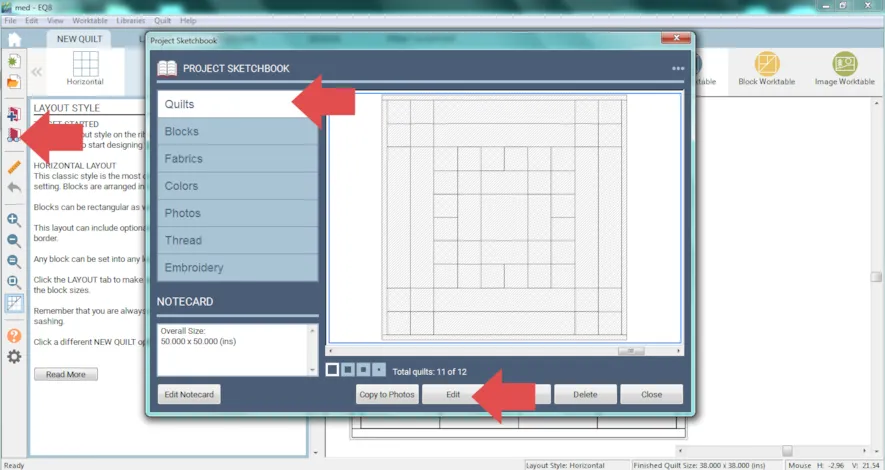
- Place blocks and recolor as desired.
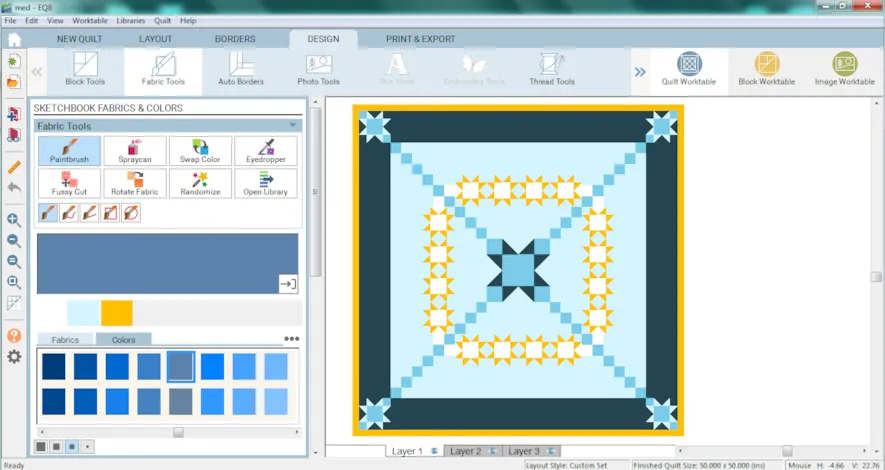
- Click Add to Project Sketchbook
If you want to post images of your quilt, here is how to export the images.
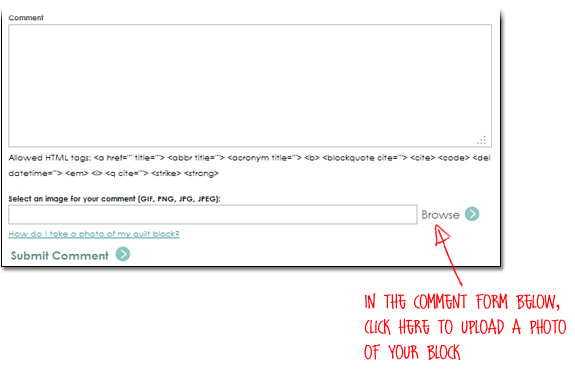
To post your image click to comment on this post.Fill in your info and then click Browse.
Go to: Documents\My EQ8\Images
I can’t wait to see what you’ve done! I hope you enjoyed the lesson!
If you have questions about the lesson feel free to post them below.
If you have questions about something else EQ related, please contact techsupport@electricquilt.com.
If you have suggestions for new Design & Discover lessons feel free to comment below or email Heidi@electricquilt.com.


