This lesson is all about adding stencils to your quilt. Stencils are the drawings that show the quilting lines on your quilt.
You may want to audition different stencils to decide how you might want to quilt your design and to help you figure out what approach you will take when quilting.
You can have stencils that go over individual blocks or you can create a stencil that goes over an entire sections of your quilt.
For this lesson, I will show you how I quilted the Anchor’s Away quilt from the last lesson. If you haven’t completed that lesson, you can find it HERE.
First, lets talk about the layers of a quilt. When you are on the Quilt Worktable, you will see three tabs at the bottom of the screen.
Layer 1
This layer is made up of pieced or applique blocks that are stitched together to make the quilt top.
Layer 2
This layer is for blocks, motifs and text that are sewn onto the quilt top.
Layer 3
This layer is for your quilting or embroidery stitches. We are going to focus on quilting stitches today.
PLEASE NOTE: We are working with the Anchors Away quilt from the previous Lesson. You will need to complete that lesson before starting this one.
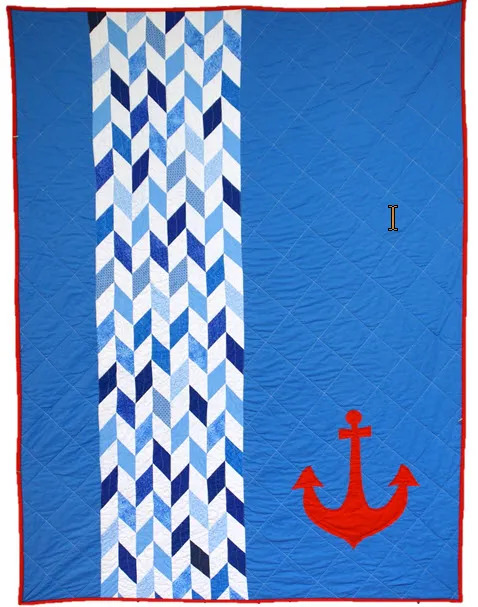
Anchors Away Quilt
Skillset: Beginner/ Advanced Beginner
Size: 48″ x 60″
Skill Builders:
- Working with Stencils
- Draw a Stencil
- Clip to Edge
- Open EQ8.
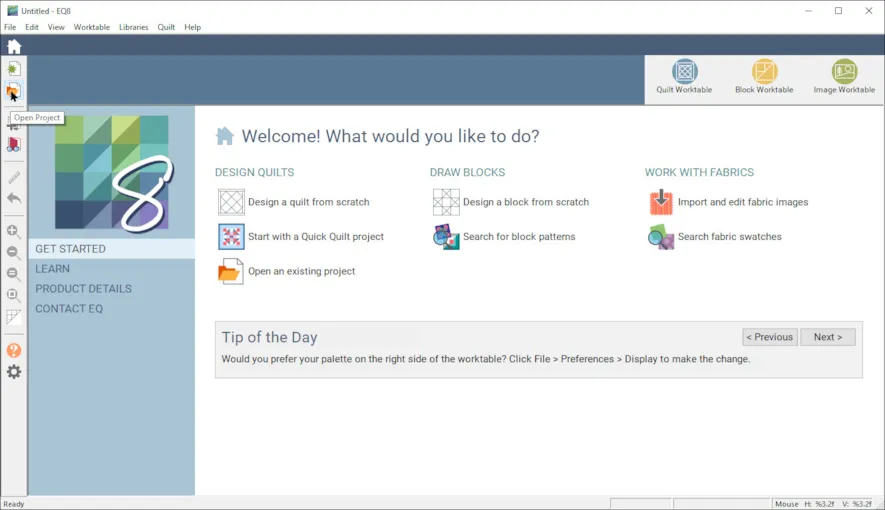
- Let’s open the Project. The project name appears at the top left of the EQ8 Window. Right now the project says Untitled – EQ8.
- On the left side toolbar, click the Open project button.
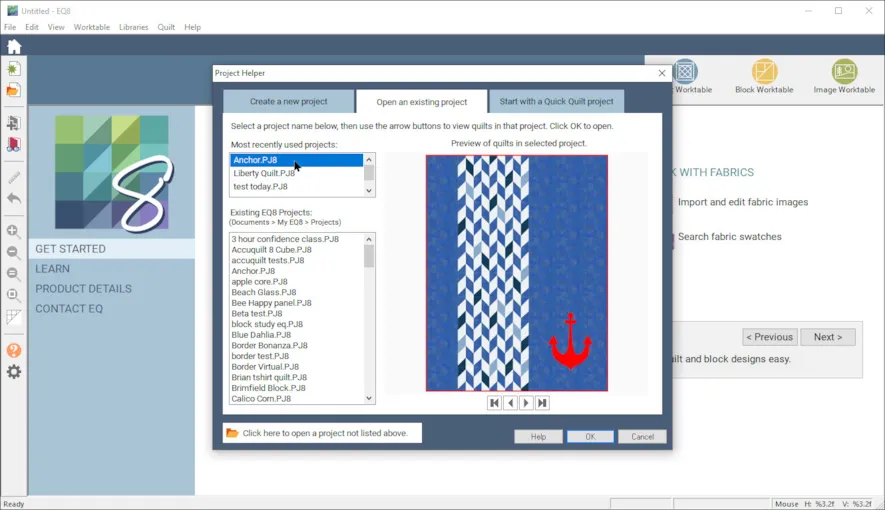
- On the Open and Existing project tab, find your Anchor project name in the list. Select it and click OK. The box will close. Notice the project name Untitled has been replaced with Anchor.
- View Sketchbook, Quilts and select your Anchors Away quilt you previously designed. Click Edit.
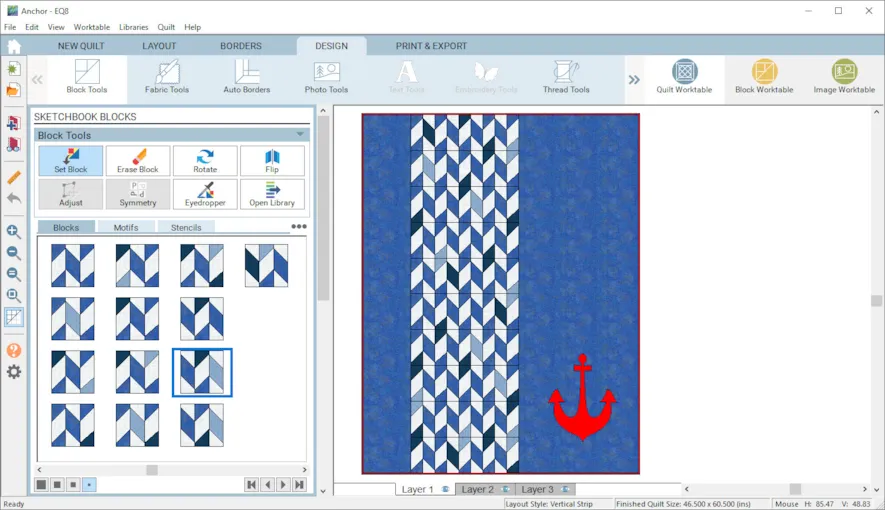
- You will now be on the Design Tab in the Quilt Worktable.
- First, I want to see if there are any existing stencils for the 45 degree squares I want to quilt in the solid blue sections on the left and right sides of the quilt.
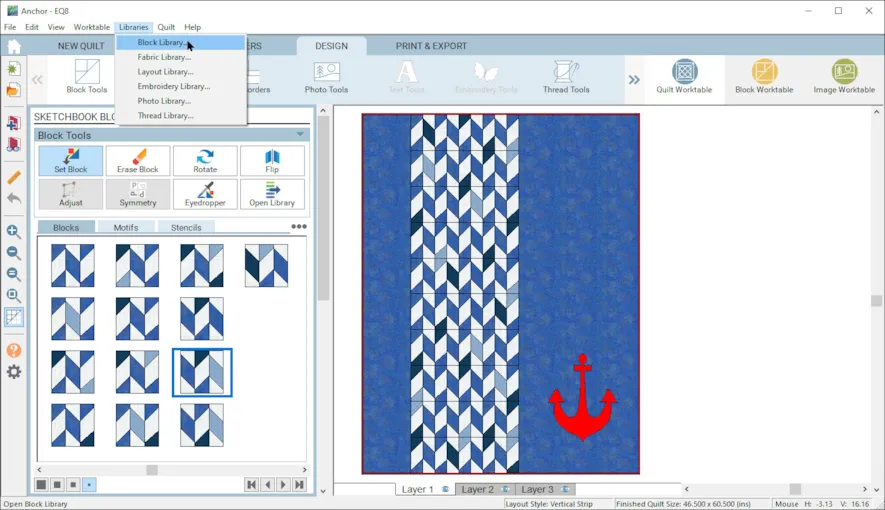
- On the top main menu, go to Libraries, Block Library. The library will open.
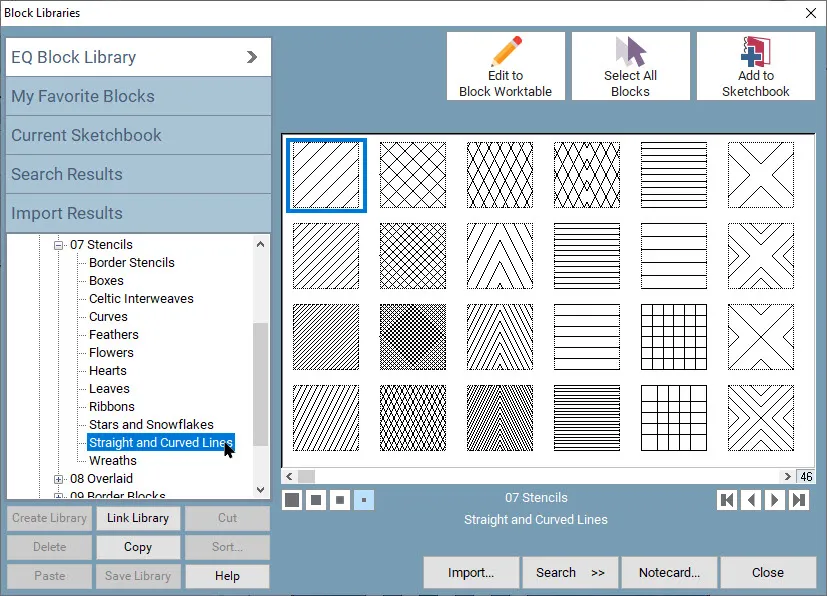
- Go to 07 Stencils, select the category Straight and Curved Lines.
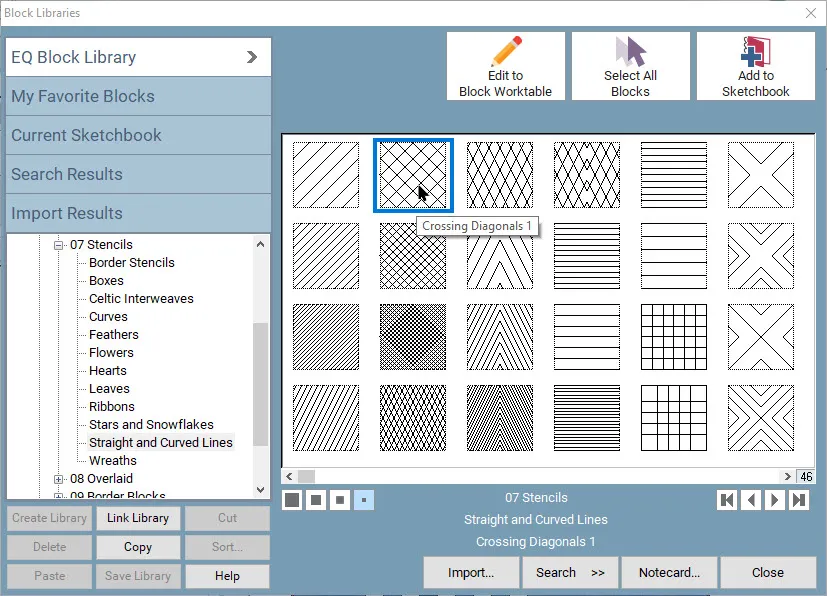
- Choose Crossing Diagonals 1 and add to the Sketchbook. Close library.
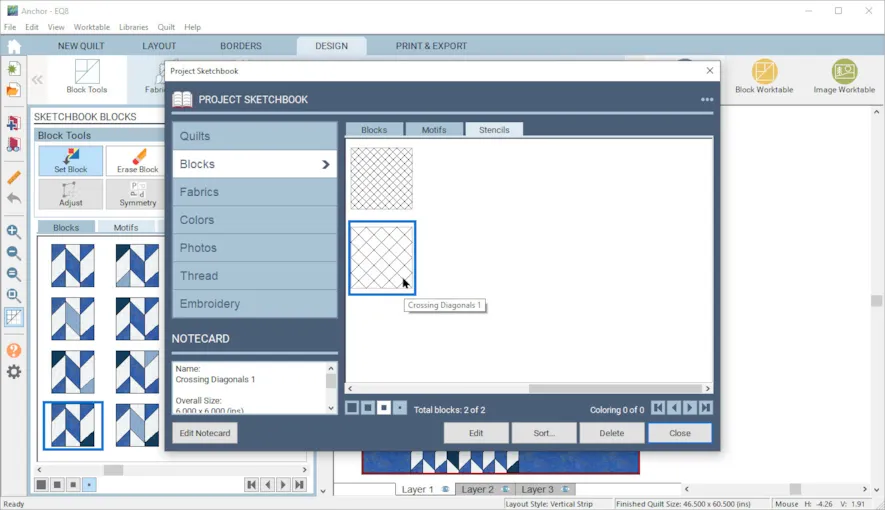
- View Sketchbook, Blocks, Stencils, Choose Crossing Diagonals 1 and Edit. The stencil will be opened on the Block Worktable.
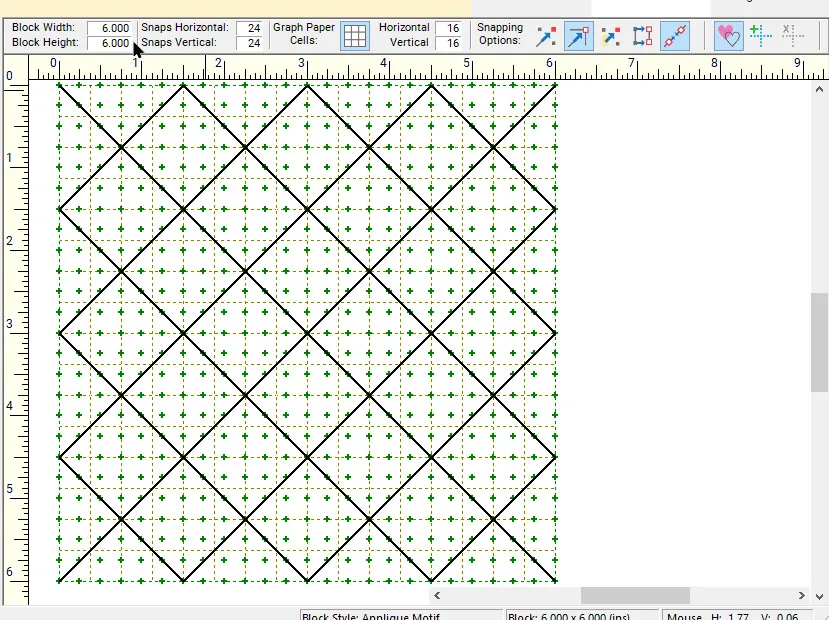
- The stencil is only a 6 x 6 block and the size of the squares on the diagonal are too small. We want them to be about 4 inches square.

- Resize the stencil to 18″ x 18″. The size of the squares is now approximately 4 ” which is the large size I want for my quilting. Add the updated stencil to your Project Sketchbook.
- Lets add this stencil to the sides of the quilt. Go to Quilt Worktable, Design Tab.
- Under Block Tools, Select the stencil tab. Select the last stencil which is the one we just updated.
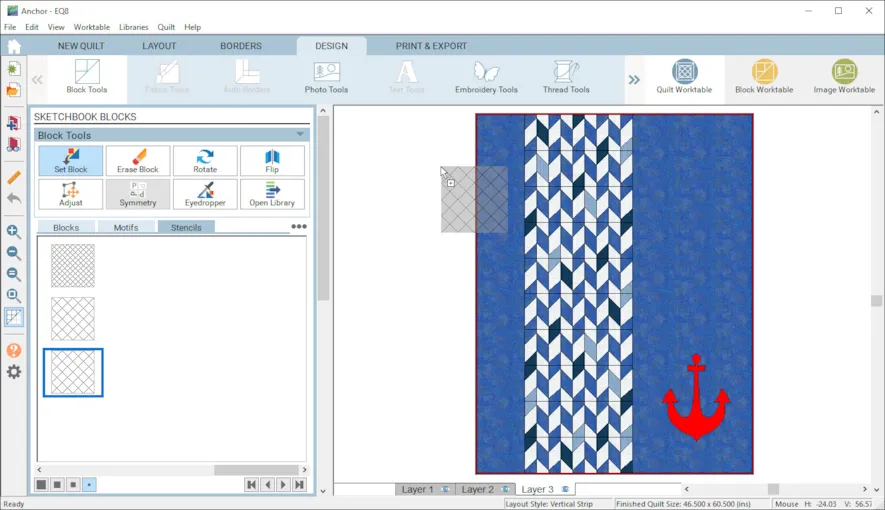
- Select Layer 3 of the quilt using the tabs at the bottom of the screen. Now drag the stencil over to the quilt.
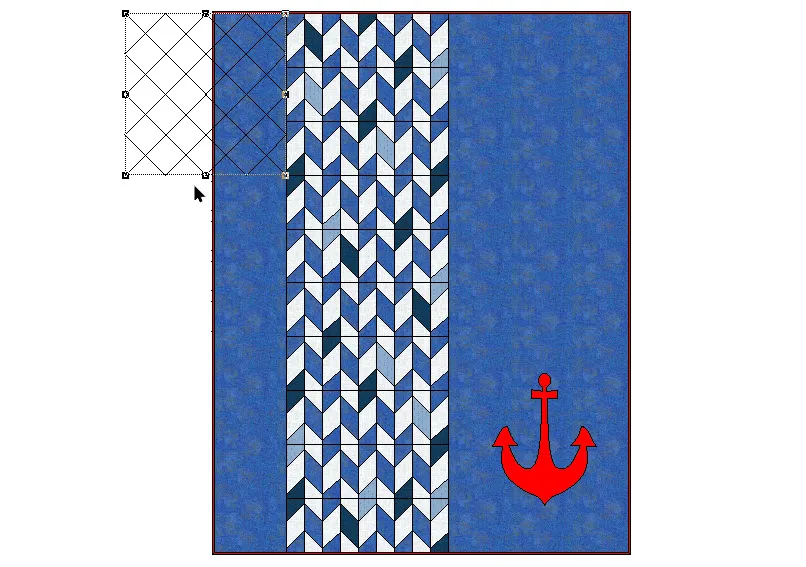
- It may be larger than the space. Let the extra stencil hang off the quilt, not over the pieced section. HINT: To make it easier to place the stencils, make sure snapping is turned on and the snap increments are at 1 inch.
- To get rid of the part of the stencil that is hanging over the quilt, click on the Adjust tool and select the stencil. Once it is selected, you should be able to see the part that is overhanging the quilt.
- Under Single Select Options in the tool palette, select Clip to Edge to clean it up.
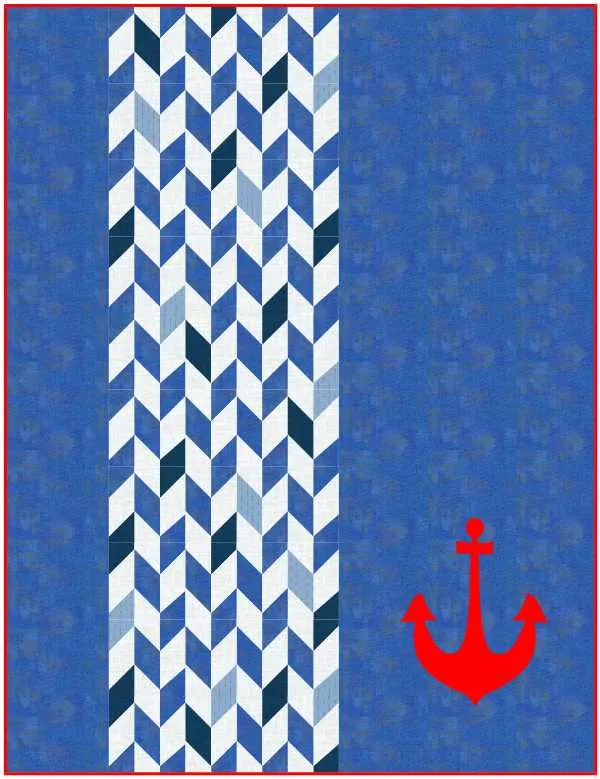
- Continue to add instances of the stencil until you have filled in the Blue sections on each side. You may need to zoom in and/or use the adjust tool to line up the stencils. Add to Sketchbook.
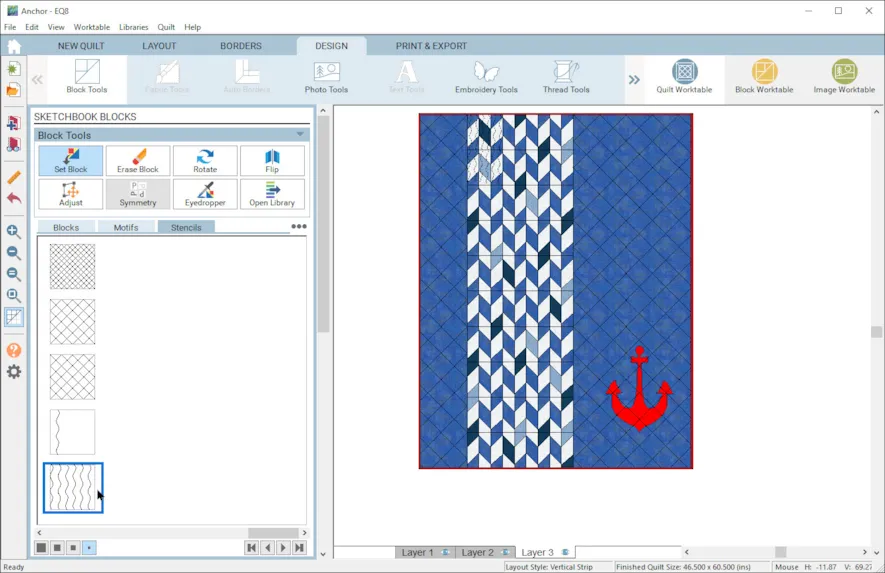
- For the pieced insert, I want to stitch vertical organic wavy lines. I didn’t see anything in the library like what I wanted, so let’s draw the stencil.
- Go to the Block Worktable, New Block, Applique, Motif. Make sure the size of the block is 6″ x 6″ in the precision bar.
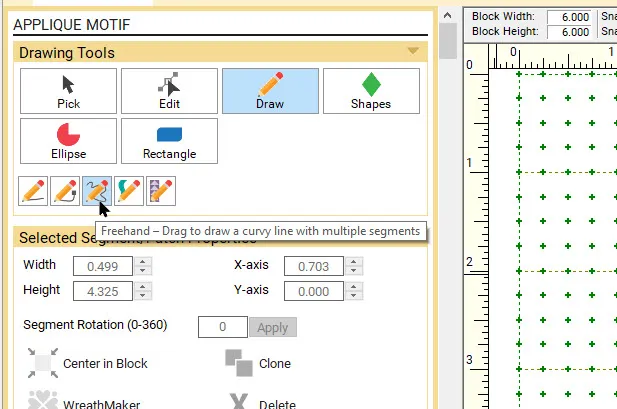
- Select Draw, then from the drawing tools, select Freehand – Drag to draw a curvy line with multiple segments.
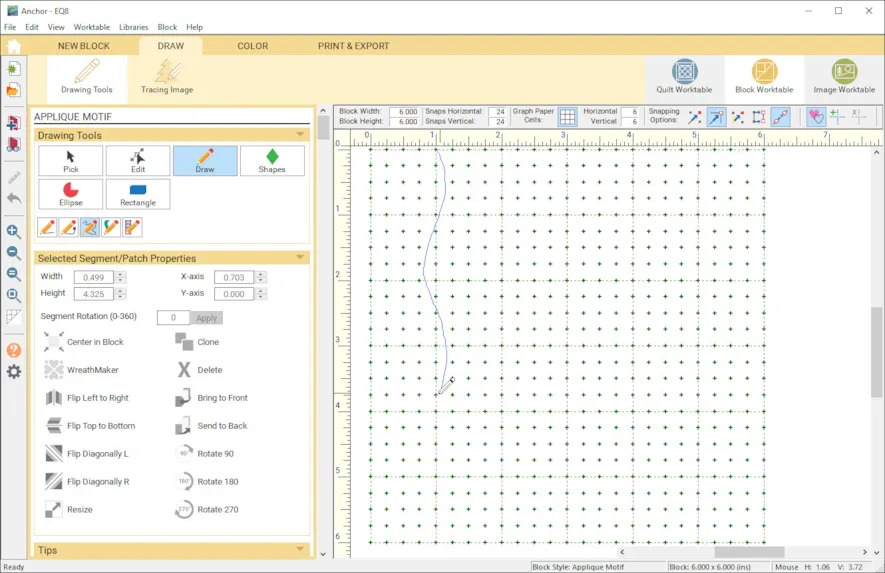
- Starting at 1 inch, draw a wavy line from the top to the bottom ending at the 1 inch mark. This makes it easier to line up the stencils. (If you have to try more than one, that is great practice.)

- Once you have one nice wavy line, click on the Pick tool to select it. Once it is selected, click Clone to clone the segment 5 times. Arrange the 6 wavy lines in the space. Add to Project Sketchbook.
- Our stencil is created. Let’s add it to the pieced sections of the quilt.
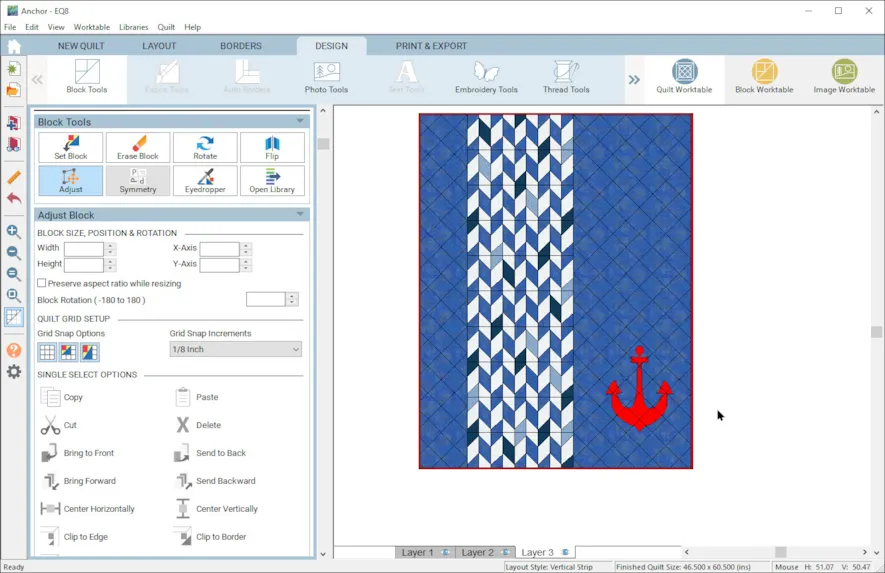
- Go to Quilt Worktable, Design Tab. Under Block Tools, Select the stencil tab. Select the last stencil which is the one we just created.
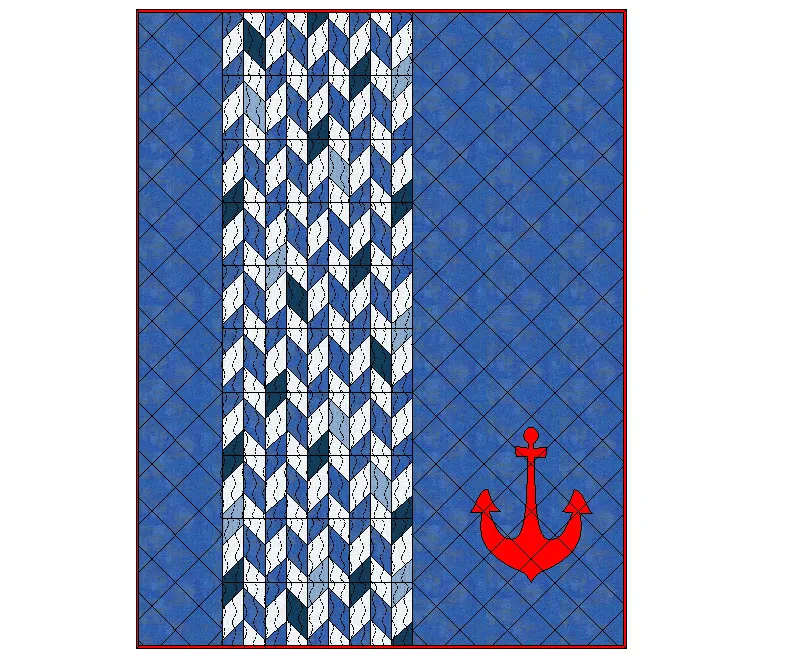
- Make sure you are on the Layer 3 tab. Drag and drop the stencil onto the pieced block area of the quilt. Since we sized the stencil to match the size of the blocks, it fits without any part of it overlapping. Hint: Zoom in to match up the stencils easier. Don’t forget to use the Adjust tool if necessary.
- With the stencils added, you have a great idea of what the quilting will look like on the finished quilt.
You can stitch up this fun Anchors Away throw quilt, see the tutorial on my Lori Miller Designs Blog.

Don’t forget to check out my previous post for a coordinating pillow! Shipmates Bench Pillow
Lori J. Miller lives in Oxford, Michigan, where she designs, stitches and sews quilts and quilty things. She loves experimenting with fun colors and designs to make playful and clever products for the modern sewist. Sewing since age 11, Lori has deep roots in sewing and quilting traditions that add a unique dimension to her designs. She loves designing using Electric Quilt 8, Electric Quilt Mini and EQ Stitch. You can follow her quilting adventures on her blog at lorimillerdesigns.com or on instagram @lorimillerdesigns


11-22-2019
12:46 pm
Great tutorial Lori! Thanks for the clear explanations of the steps. I haven’t tried this yet because I wasn’t sure what I was doing but now I’m going to play with it!
11-22-2019
9:06 pm
Thanks Sue! It was much easier than I thought as well. You can use the thread tools to change the color of the quilting thread too. Lori
11-27-2019
6:25 am
I set myself the challenge of working through EQ8 tutorials several times a month. One thing I like to do is follow the instructions, while making it my own. This tends to cement the lesson for me. I added quilting stencils, but selected different ones for anchor. There are several nice waves and wavy lines I melded together to get more of an ocean feel on the right hand side. For the pieced section I used the shape maker, selecting an “eye” shape. What took me some time to find is how to go from motif to stencil. That instruction was missing from the tutorial. I finally found something like Move to Stencil tab by right clicking.
I really appreciate the tutorials. I find they are a great tool for developing my EQ8 skill set.
11-29-2019
5:13 am
Boy does that beat drawing lots of dotted lines on my print outs of my quilt designs! Yhank you.
11-27-2019
12:57 pm
Absolutely your skill builders! Keep ‘em coming!
07-20-2020
1:22 pm
I am starting in EQ8 and following all the lessons from the first one. They are very well explained, but I have a problem: I am Spanish and although the computer translates the lessons very well, in steps 18 and 19 I do not know where I have to click to cut the excess stencil. You say trim to the edge to clean it but I don’t know where to do it. Thank you.
08-02-2020
8:25 am
There is a button on the left called Clip to edge, that is what you use once you have it placed where you like it. That button then clips it off to the edge. See if that will work for you.
10-05-2020
1:36 am
Thank you and I think I understand this, but I want to try to bring in my digital patterns that I use to quilt with my longarm. I have my quilts designed in EQ8 and ready to piece and quilt. I purchased these digital files and they are vectors, not images. Can I import them into my favorites and use them on the Layer 3? Thank you. Karen
10-05-2020
1:34 pm
Karen,
You will have to convert the vectors which I think are .svg files to a format that EQ8 can read. It needs to be something where the background can be transparent. I am going to suggest you call EQ Customer Service for more information on that technical question. Thanks!
12-26-2020
6:07 pm
Great information!
06-01-2021
2:09 pm
Hi, Lori,
I’m putting quilting patterns onto a very bright and busy quilt top and I can hardly see the cross-hatch pattern. Can I change the color and brightness of the quilting pattern so it’s brighter?
Thanks,
Tony
06-09-2021
6:23 pm
Tony,
You can change the thread color so it is easier to see with a black or other color on your quilt. On the quilt worktable, on the Design Tab, look for the Thread tools. You can change the color, style and weight of the line showing the thread on stencils. I find that I need to zoom in on the quilt to be able to click on the thread to change the color. I hope that helps! Lori
06-29-2021
4:36 pm
Lori,
Thank you for the info on changing the thread colors on the quilting layer. Makes a big difference!!
Tony
12-19-2022
11:56 pm
So im a bit confused. Is there away to transfer your stencils you make to your machine to stitch out? Or is the ideal of stencils simply to get a visual? Thankyou Louise