
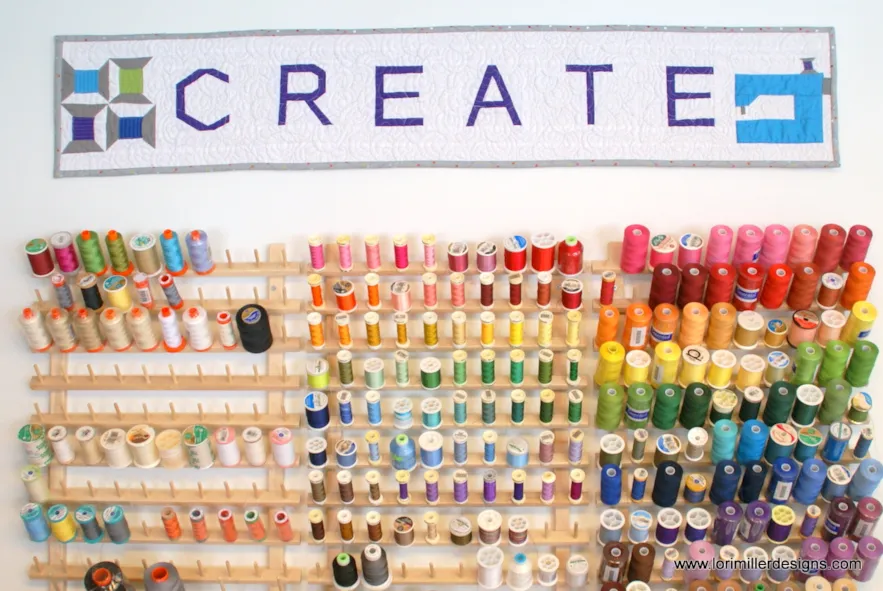
Today’s lesson is a fun project that I created to decorate my Quilt Studio. This design creates a banner or mini quilt using existing blocks in EQ8. Our skillbuilder will be editing a few of those blocks to adjust the design. Many times you will find a block already in EQ8 that is pretty close to what you want but not quite right, so why not edit it to perfection? I hope this will inspire you to design your own banner for your sewing space, for some home decor, or maybe a fun banner for a child’s room.
Let’s get to work!

CREATE banner quilt
Size: 8″ x 48″
Skill Builders:
- Edit an existing block
- Lets Begin!
- Open EQ8.
- Let’s name the Project. The project name appears at the top left of the EQ8 Window. Right now the project says Untitled – EQ8.
- On the left side toolbar, click the New project button.

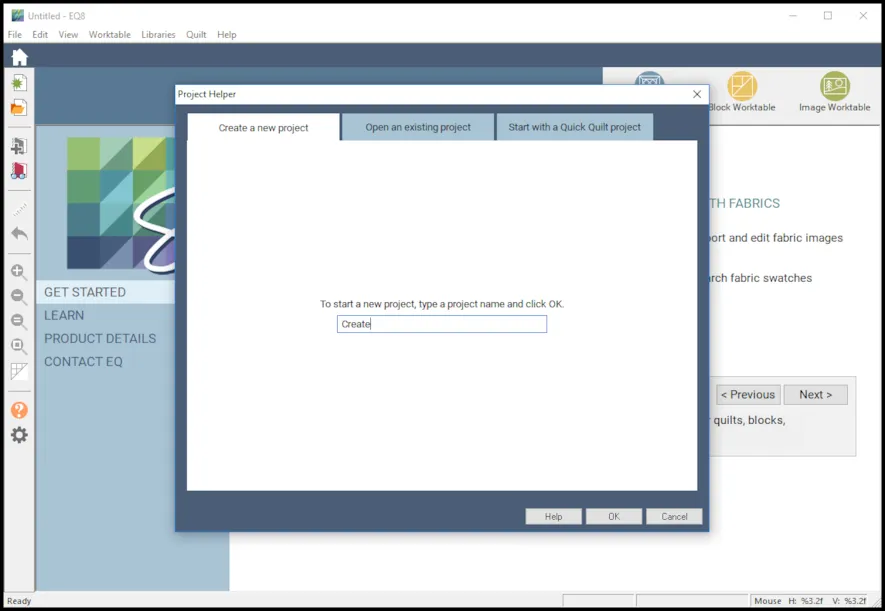
- On the Create a new project tab, type in the project name field Create.
- Click OK. The box will close. Notice the project name Untitled has been replaced with Create.
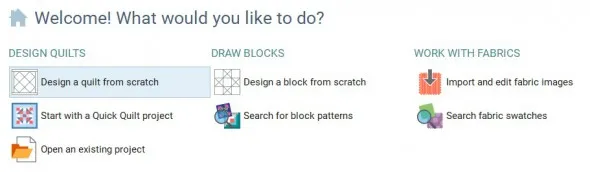
- Under DESIGN QUILTS, select Design a quilt from scratch.
- Choose the NEW QUILT tab.

- Under the NEW QUILT tab, select Horizontalfrom the ribbon bar.
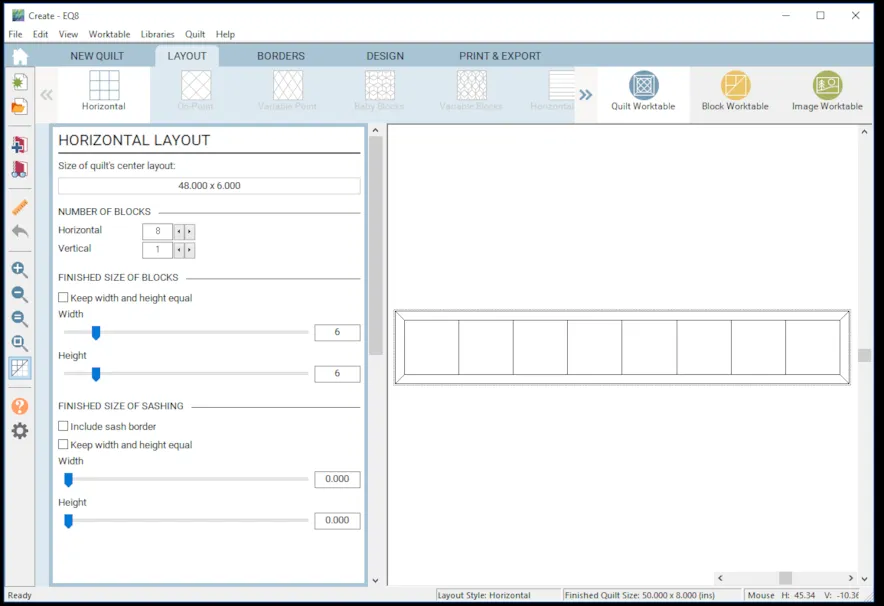
- Under LAYOUT, Update the Horizontal Layout Palette.
- Under Number of Blocks, enter Horizontal 8, Vertical 1.
- Finished Size of Blocks is Width 6″ and Height 6″

- Select the Borders tab to display the Borders Palette.
- Select a border style of Mitered using either the ribbon bar or the drop down menu.
- Under Lock size adjustments, select all and move the borders to 1/4″.
- Insert a Border. Change the border style to Long horizontal.
- Under lock size adjustments, uncheck All but leave L+R and T+B Checked.
- Change Left and Right borders to 0, change Top and Bottom to 1″.

- Select the Design tab.
- Select BLOCK TOOLS
 on the ribbon bar.
 - Open the Block Library
 .
.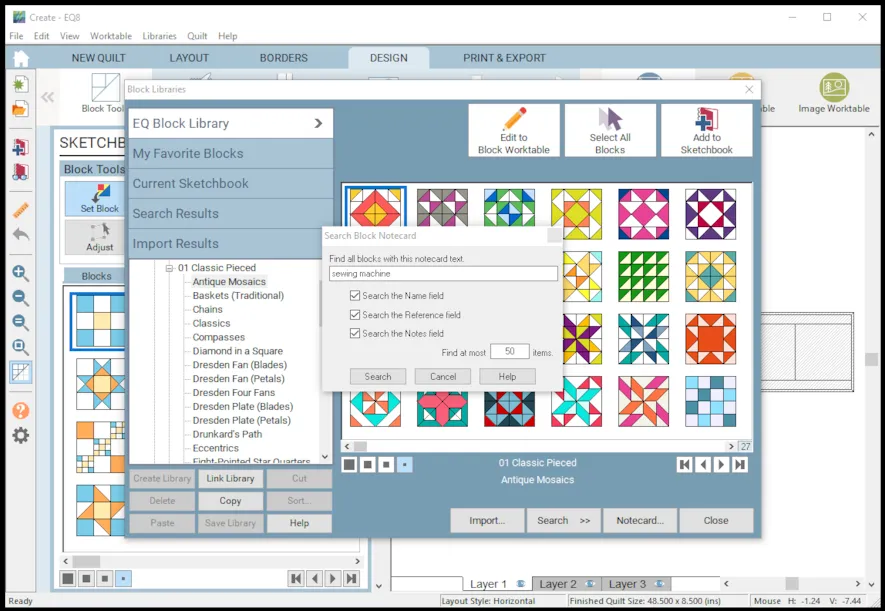
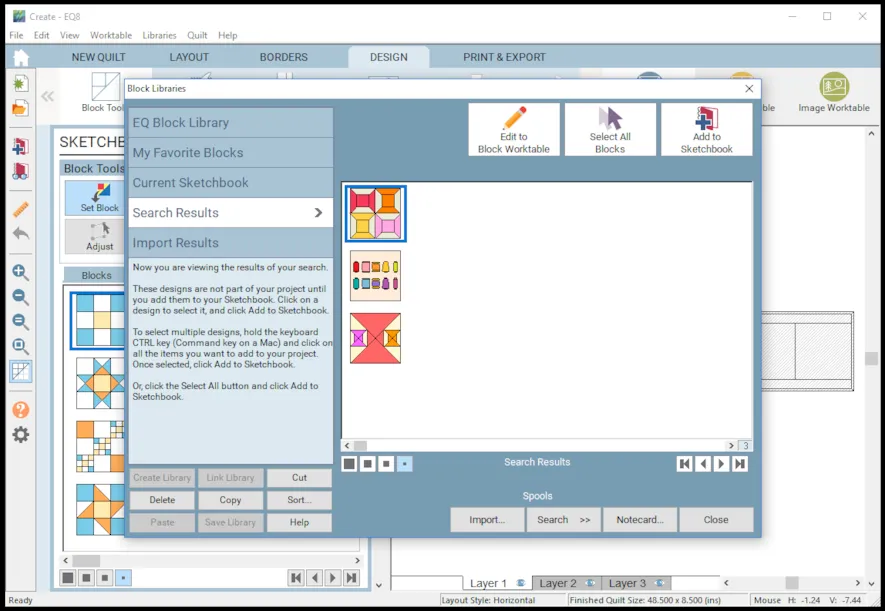
- Search by Notecard for Sewing Machine. Select the first pieced Sewing Machine with the purple background and add to Sketchbook.
- Search by Notecard for Spools. Select the first pieced Spools block and add to sketchbook.
- In the block list of the library, navigate to 03- Foundation Pieced, Alphabet Basic and choose the Upper Case letters C, R, E, A, T and add them to the Sketchbook.
 . Close the block library.
 - In the Sketchbook blocks palette, choose the Set Block Tool.

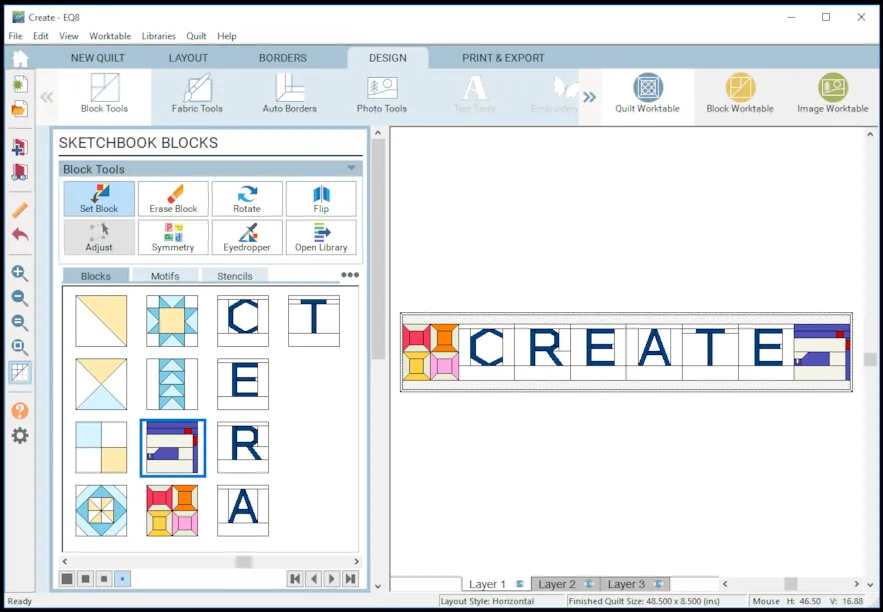
- Set the blocks into the quilt. As you can see, the design is not really centered and looking at it, there are some changes I want to make so it is easier to stitch up.
- Here is where the block editing starts. We are going to center the letters vertically. We will make the spool of thread on the sewing machine match the thread spools in the first block and we are going to redraw the four spools block to get rid of Y seams. All of these will require editing the blocks. Lets start with the letters.
- Go to the Block Worktable.

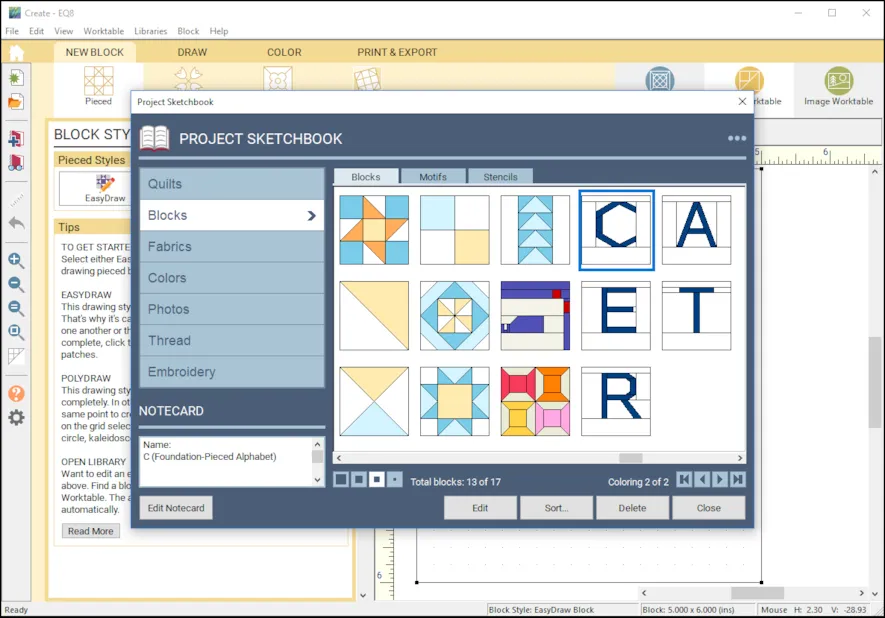
- View Sketchbook and choose the capital letter C. Click EDIT.
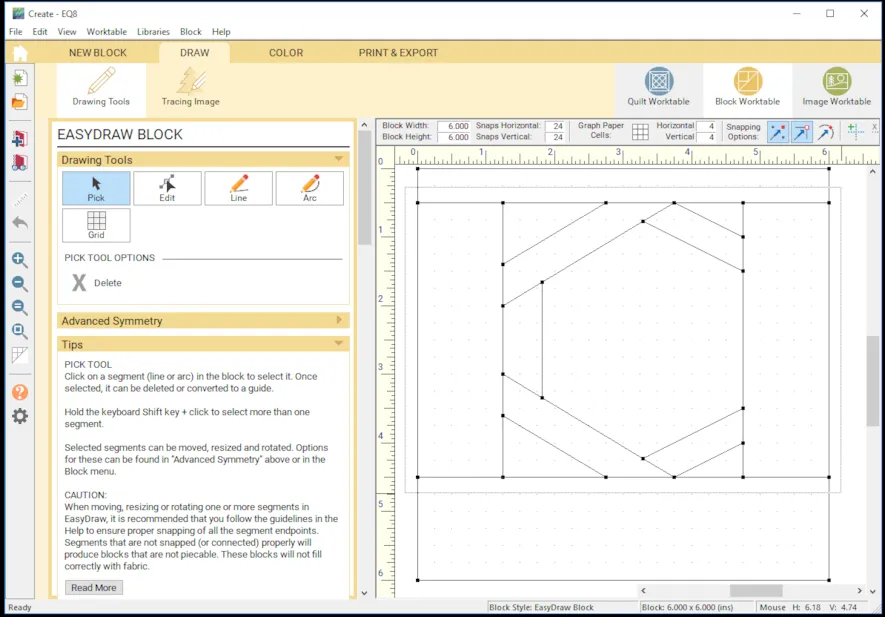
- Now choose the Pick tool. Using your mouse, left click, hold and drag a box around the segments in the letter c. When you let go, you should have selected all of the segments in the letter C.
- You should see a crosshair in the center of the selection. Hover your mouse over the cross-hair until you see the mouse turn into a cross-hair. Click and hold and drag the segments down to the center of the block. Add to Sketchbook.
- Don’t worry if you accidentally click something or don’t grab it right the first time, you can just go back to the sketchbook and pull it in again to edit.
- Go to the Block Color tab after you edit the block. You may need to recolor the block. Edit all of the letters in CREATE in the same way to center the letter vertically.
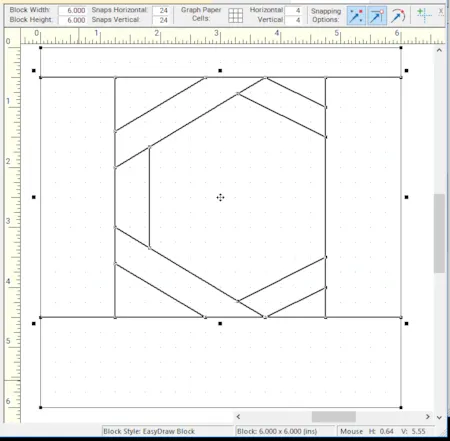
- Next, lets edit the Spools block. View sketchbook, select the spools block and select EDIT.
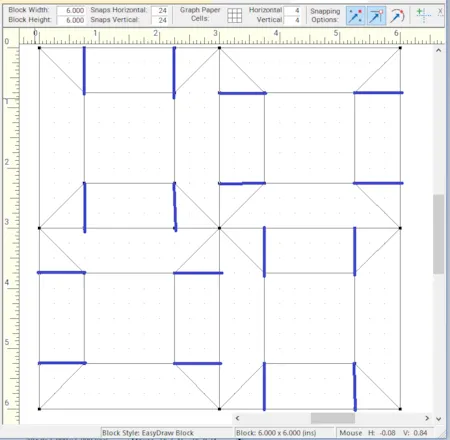
- Using the LINE drawing tool, add the highlighted blue lines to the spools so you won’t have Y seams to piece.
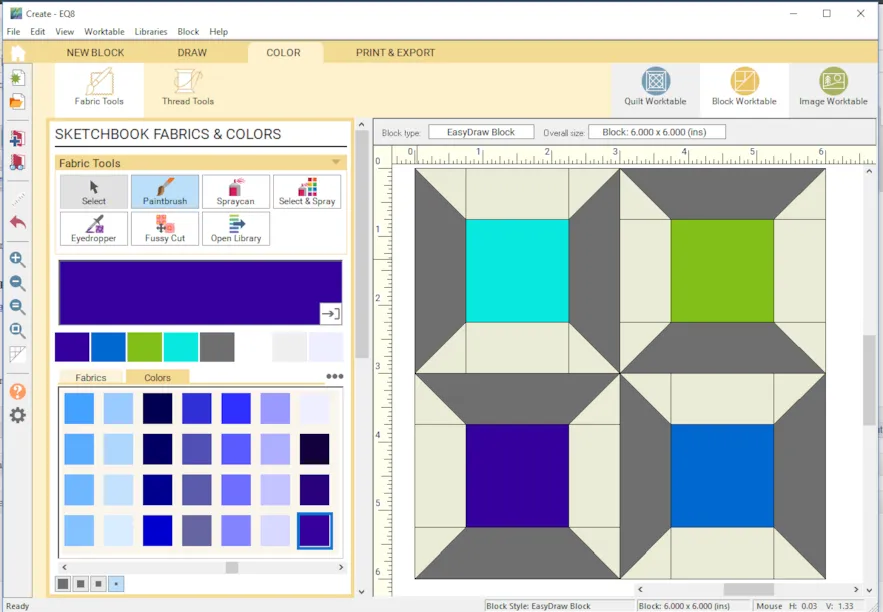
- Go to the Block Color tab and recolor the spools. Add to Sketchbook.
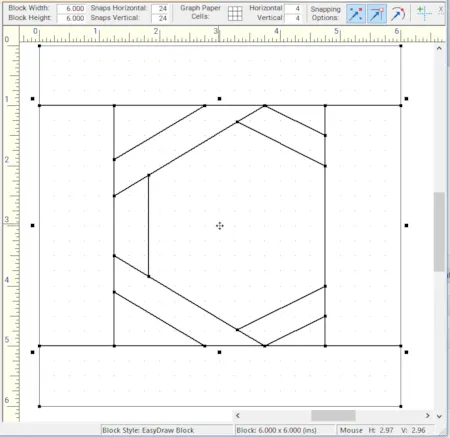
- Finally, lets edit the spool on the sewing machine block to match our spool block. View Sketchbook, select Sewing Machine and EDIT.
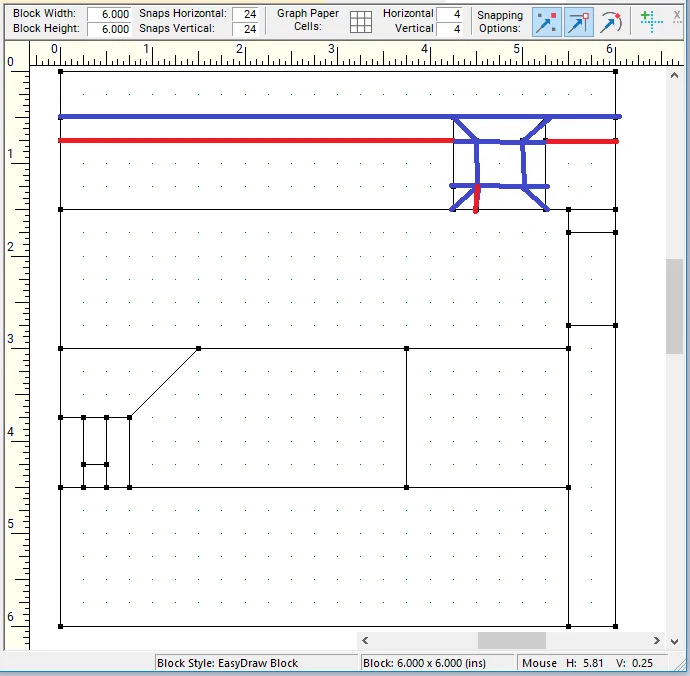
- Use the Pick tool to select the RED lines to delete. Select the Line tool to draw in the new Blue lines.
- Go to the Block Color tab and recolor the sewing machine and new spool. Add to Sketchbook.
- Go to the Quilt Worktable.
 , Design, Block Tools, Set Block. Update the quilt with the new edited blocks.
 - Go to Fabric Tools and finish coloring the quilt and binding.
Congratulations! You have designed and edited your CREATE banner mini quilt!
Here are Tips and Help Articles to help you get ready to sew up your design.
Want more design tutorials? Check out my other posts EQ8 Lessons with Lori on the Do You EQ BLOG.
Want to stitch up some EQ8 designs? Head over to the free tutorials on my Lori Miller Designs BLOG.
Questions or Feedback?
Please share your ideas, questions and feedback in the comments. I would love to hear from you. Thanks!
Lori J. Miller lives in Oxford, Michigan, where she designs, stitches and sews quilts and quilty things. She loves experimenting with fun colors and designs to make playful and clever products for the modern sewist. Sewing since age 11, Lori has deep roots in sewing and quilting traditions that add a unique dimension to her designs. She loves designing using Electric Quilt 8. You can follow her quilting adventures on her blog at lorimillerdesigns.com or on instagram @lorimillerdesigns or on Facebook at Lori Miller Designs.


02-22-2019
11:43 am
Thanks for a great lesson, Lori. Such a cute wall hanging!
02-22-2019
5:00 pm
Great quilt and nice tips in the instructions. Reminds me of when I duplicated the Notre Dame logo for the back of my niece’s and nephew’s quilts when they both went there.
03-07-2019
9:59 am
Thank you so much. That is a great idea for using the techniques. I am sure they loved the quilts.
03-06-2019
2:55 pm
I used this lesson as a jumping off point to design a possible banner for my granddaughter’s room. Thanks for the idea.
03-07-2019
10:00 am
Gwyned, I think it would be great to make a childs room special and faster than a whole quilt!