This month we will be taking a EQ project and using Metafiles and Microsoft Word to show how you could make a pattern, or write instructions.
The only feature difference between using EQ8 on the Mac versus using EQ8 on a PC is that there is no way to export Metafiles on a Mac. The technology in Windows that build the Windows Metafile format are copyrighted by Microsoft and unfortunately there is no equivalent for OS X for us to keep this feature. Read more about Metafiles here.
However, here are Mac and PC instructions for exploding blocks using Adobe Illustrator. We also have a lesson (with video) for exploding blocks using a free software called Inkscape that can be used on Mac or PC. Lastly, we have an article on our support site about this too.
For this example I will be using Microsoft Word and the Outstanding Orchards project. You can download the project here, or of course, feel free to use one of your own projects.
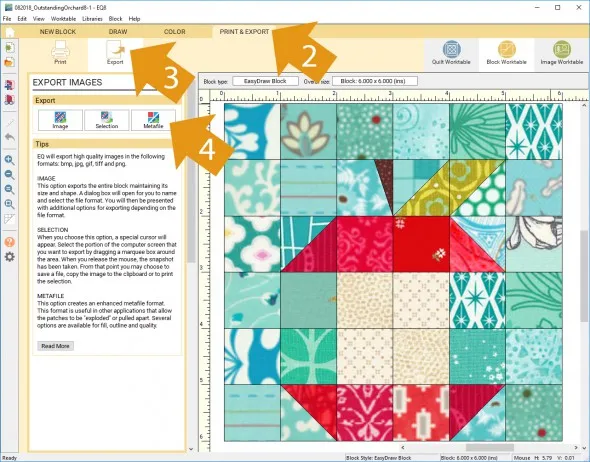
Export to Metafile is only available from the Block Worktable so, that is where we will start.
1. Open a block to the Block Worktable.
2. Click the Print & Export tab
3. Click Export
4. Click Metafile
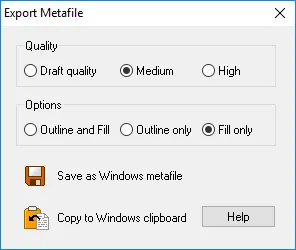
5. You can choose your Quality and Options then click Copy to Windows clipboard
6. Open Microsoft Word
7. Use Ctrl + V on your keyboard to paste
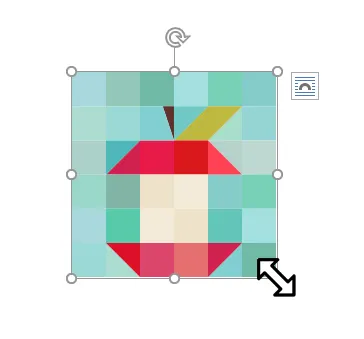
Your block should show up, like this. If fabric is used in the block, the fabric will be converted to the average color of the fabric.
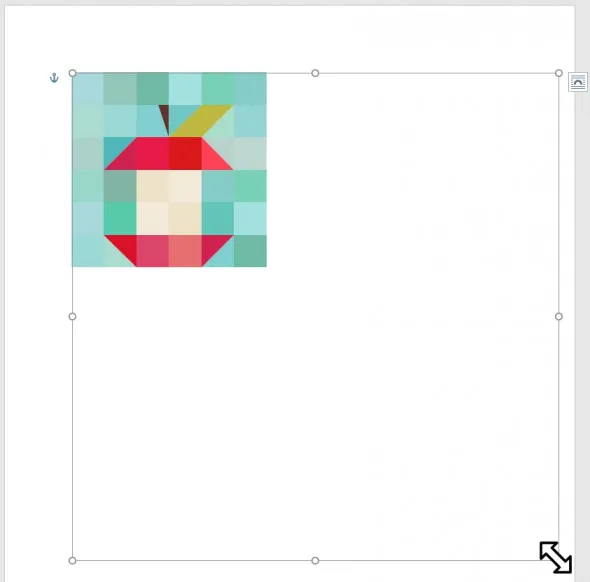
8. To resize the block grab one of the corner circles by clicking on it. Your cursor will turn into a double arrow cursor.
9. Holding your mouse button down, drag to resize your block.
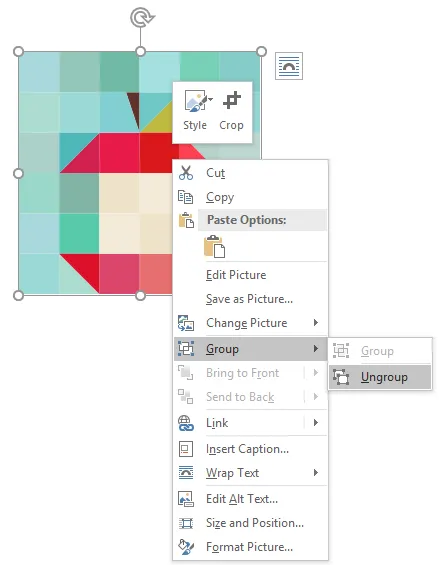
10. Right click on the block and choose Group > Ungroup
11. You may get this message. Click Yes.
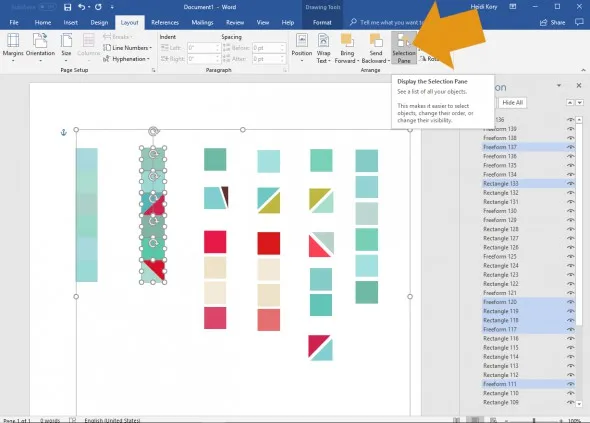
12. Click on a corner circle. You will see the double arrows. Holding your mouse key down, drag out the selection pane to make it larger.
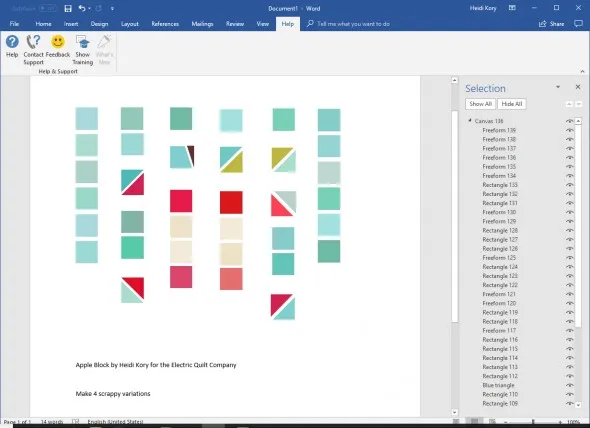
13. Now you can click on any of the shapes to move them within the selection pane. Arrange them however you’d like to form visuals for piecing directions.
A few tips:
You can click the Selection Pane button and it will show you a list of all of your shapes. You can rename them if you’d like so they make more sense to you. You can also hide and unhide and select them by name.
You can hold down the Shift key or the Ctrl key on your keyboard to select more than one shape, or drag a box around shapes to select more than one.
14. Click to place your cursor before or after the image and start typing to add any text you’d like.
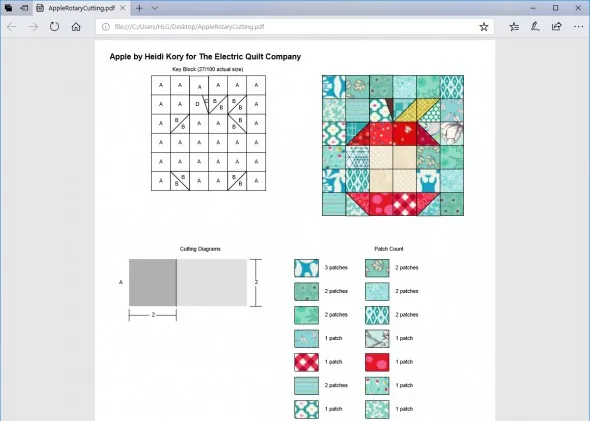
15. You can also make PDFs of other instructions in EQ8. For example, if you want to include the rotary cutting instructions for this block, you can use a PDF writer to save the print preview as a PDF. Here are detailed instructions on how to do that.
If you want to merge the Word document and the PDF together, try this:
16. In Word, click File > Save As.
17. In the drop down menu choose PDF and name it as you wish.
18. Use a free PDF merger to merge your Word document PDF and your rotary cutting PDF together. (One example of a free PDF merger is PDFforge — and here are the specific directions on how to merge PDFs in PDFforge)
And we’re done!
If you have questions about the lesson feel free to post them below.
If you have questions about something else EQ related, please contact techsupport@electricquilt.com.






09-01-2018
12:16 pm
I can’t get the section pane to expand, all that happens it the image expands. Is there a second way to do this?
09-06-2018
9:36 am
Hi Marlu,
Try ungrouping again and see if that helps. That may be the issue.
09-01-2018
2:00 pm
That was some awesome information!!!! Thank you for sharing the “how-to”
09-06-2018
9:36 am
Thank you!
09-01-2018
6:35 pm
I am trying to use the block outline drawing to create the quilt as an outline. I have successfully done this several times but everytime I print the page, instead of printing 2″ blocks, they become 3/8″ squares. I can’t figure out what is causing this!
09-06-2018
9:37 am
Hi Dawn,
Double check your printer settings to make sure it’s not scaling it. If you are still having trouble please contact techsupport@electricquilt.com
09-06-2018
12:42 pm
What a great lesson. Pity as a MAC user it isn’t readily available to me. Illustrator is out of my price range now that Adobe requires you to subscribe. Inkscape isn’t compatible with the current version of MAC’s OS without adding another application XQuartz to get Inkscape and my MAC “maybe” speaking to each other by causing my MAC to think it is running Windows. This is far outside my senior tech and comfort skills. I did watch the Inkscape video you recommended, but it was done for EQ7 before Inkscape was made redundant by MACs current OS. Any other work around for MAC users?
09-06-2018
2:40 pm
Hi Gwyned,
XQuartz isn’t a Windows/Mac emulator, if that’s what you mean. Here is more information about running Inkscape on a Mac https://web.archive.org/web/20180831141845/https://inkscape.org/en/download/mac-os/ If you have more questions regarding Inkscape on a Mac please call us at 419-352-1134 and talk with Matt.
09-23-2018
2:19 pm
I can’t seem to get my Windows 7 to ungroup. Do I need an updated windows version?
09-24-2018
1:37 pm
Hi Cynthia,
Do you have everything selected? Do you see the option for Ungroup? If you are still having trouble you can also contact techsupport@electricquilt.com
01-18-2024
11:59 pm
This is the best tutorial I have seen yet in my quest to integrate EQ8 images into written directions. I just discovered it today and will be practicing to get it down pat. I realize once this process has become automatic by me, my instructions will be a lot clearer. THANKS