I love taking simple artwork and making it interesting by editing and adding elements to the artwork to make it my own. Lately I have been working on creating shadow applique (along with other applique options). I am using the artwork from the stencils and applique stitch designs all ready in our EQStitch program.
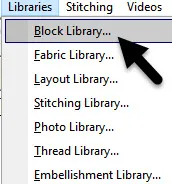
Open your EQStitch program.![]()
Click on the work on stitching worktable icon at the top of the screen. ![]()
On the properties bar at the top of the screen, click on the drawing board options box icon ![]() to open it.
to open it.
In the dialogue box, set the embroidery edge stitches to be a bean stitch and the embroidery fill options to be a no fill selection.
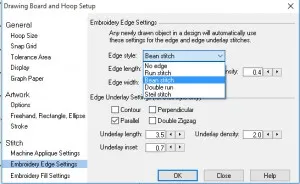
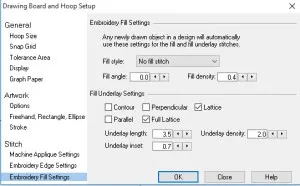
Be sure to click the OK in the bottom of the drawing board options box to apply the new settings.
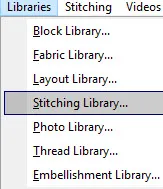
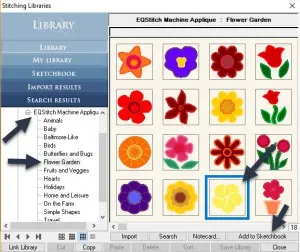
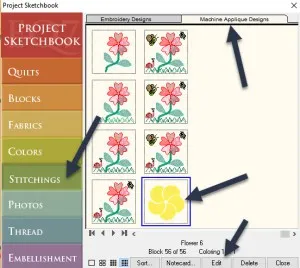
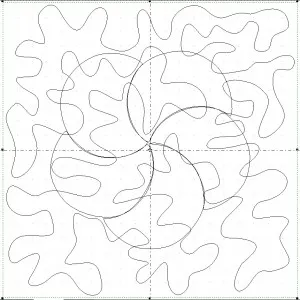
Click on LIBRARIES>Stitching Library>Machine Applique>Flower Garden>Flower 6
Select the Flower 6 by clicking on it and then add it to the sketchbook.
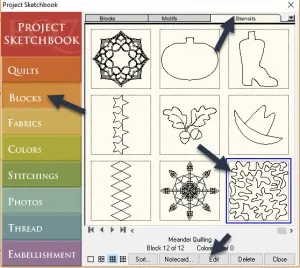
Click on LIBRARIES>Block Library>07 Stencils>Straight and Curved Lines and select the meander stitch by clicking onto it and add it to the sketchbook.
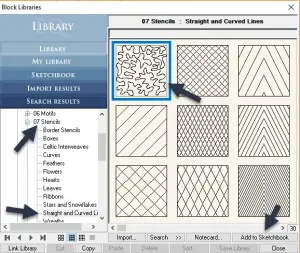
After adding the designs to the sketchbook, click on the word ‘close’ to shut the library box.
The two designs you just selected are now in the sketchbook ready for you to use.
Click on ‘view sketchbook’ icon ![]() at the top of the screen to open the sketchbook.
at the top of the screen to open the sketchbook.
In the sketchbook, open the stitching heading and select the flower applique design. Click on the word ‘edit’ at the bottom of the box to place it onto the artwork tab of the worktable.
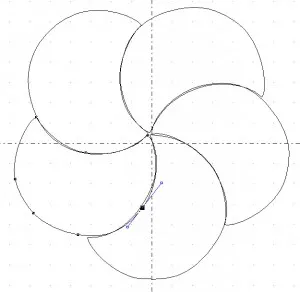
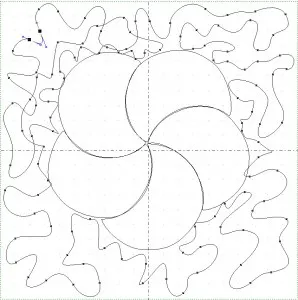
Click on the shape tool ![]() and then click on the lines of the artwork to see the nodes. Gently click/hold/drag/release the nodes so the elements line up next to each other.
and then click on the lines of the artwork to see the nodes. Gently click/hold/drag/release the nodes so the elements line up next to each other.
Add the edited flower shape to the sketchbook![]()
Click on the view sketchbook icon ![]() and locate the meander stitch design in the blocks section of the sketchbook. Click on the block to select it and then click on the word edit at the bottom of the sketchbook to open it on the artwork tab.
and locate the meander stitch design in the blocks section of the sketchbook. Click on the block to select it and then click on the word edit at the bottom of the sketchbook to open it on the artwork tab.
The design will open on the block worktable since that is where it was created.
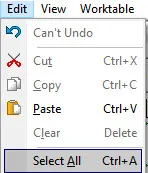
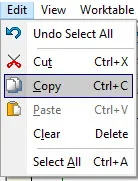
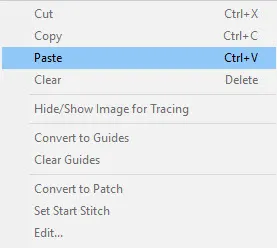
Click on EDIT>Select All and then EDIT>Copy to place a copy of the artwork on the windows clipboard.
Click on the work on stitching icon ![]() worktable to open the design you had created for the flower.
worktable to open the design you had created for the flower.
Move the cursor over to the flower and right click>paste to add the meander stitch to the artwork tab.
The design comes in off center so click on the center selected objects icon![]() at the top of the screen to center the meander stitch design.
at the top of the screen to center the meander stitch design.
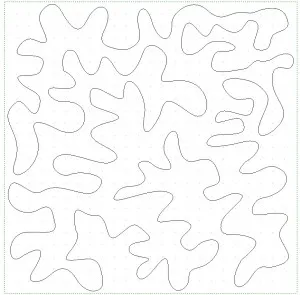
Click on the shape tool ![]() to select it and then click on the meander stitch lines. Click and move or delete nodes on the line so that the meander stitch is just outside the flower shape elements. This may take a little time to get it to be where you want it to be.
to select it and then click on the meander stitch lines. Click and move or delete nodes on the line so that the meander stitch is just outside the flower shape elements. This may take a little time to get it to be where you want it to be.
We want this meander stitch to stitch first before we do our flower applique (shadow trapunto) so click on the meander stitch with the pick tool ![]() to select it and then click on the icon send to back
to select it and then click on the icon send to back![]() .
.
Add the design to the sketchbook.![]()
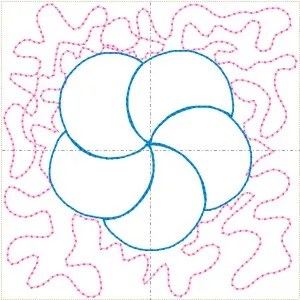
Click on the stitch tab at the bottom of the screen. The stitch preferences we set in the drawing board options box should be automatically applied.
Color the stitches with the set thread icon ![]() on the toolbar.
on the toolbar.
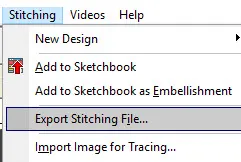
Add the completed design to the sketchbook![]() and then export the stitch file in the format you need for your embroidery machine.
and then export the stitch file in the format you need for your embroidery machine.
At the machine you can create this design in multiple ways. You could just stitch through a quilt sandwich (top, batting, backing) in the hoop to create the design. You could also use the center area of the design to add applique fabric. If you step through the design at the machine and stitch the applique element first, then add a layer of sheer fabric over the top of the design and stitch the meander stitch, you would have a shadow trapunto design. Or , you could decide to create the block on plain white fabric and paint the center defined applique area for more effect. There are so many choices and you get to create just the look you want for your project.
Below are some similar designs I created with a little more detail added. Notice how they are all very different but use the exact same stitch file.
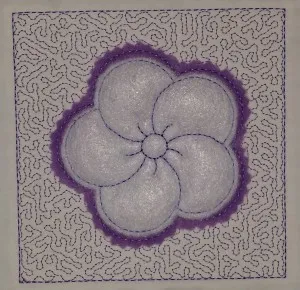
1. Two layers of felt on top to create a trapunto (thickly padded) applique flower. The inner white part of the flower was accomplished be slightly resizing the design at the machine to make the area stand out in relief to the background purple applique. The purple felt was trimmed with pinking shears and the white felt applique fabric was trimmed with a straight edge applique scissor.
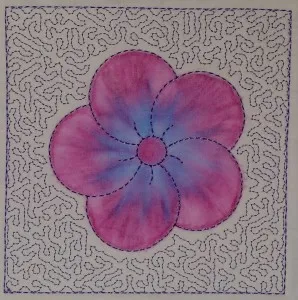
2. Design stitched on white quilt sandwich and then painted the flower with watercolor pencils.
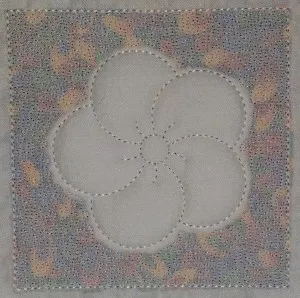
3. Design stitched with a highly colored background fabric and then extra batting and white felt added and stitched and trimmed for the flower. A sheer layer of white fabric was added over the top of the applique before stitching the meander stitches to get the effect of shadow trapunto.
EQ Academy is all most here. Sign up soon to reserve your spot. I am taking a break from teaching EQStitch at the Houston Quilt Festival in 2017 –so if you want a hands on class for EQStitch, then EQ Academy is the time and place for you! Registration is happening now. Be sure to get your place reserved.


02-19-2017
3:13 pm
molto bello e utile, grazie!
02-19-2017
3:36 pm
You are welcome, Nella. Enjoy!!
03-06-2017
11:34 am
Wow. I can’t wait to try this!