Welcome to the Block 4 post for the EQ7 Summer Drawing Series! It’s the last block in this drawing+sewing series and I hope you’ve learned a lot about the EQ7 Block Worktable along the way.
Block 4 is drawn on the EasyDraw + PatchDraw Block Worktable. This kind of block combines both pieced and appliqué elements. For the pieced layer of the block, EasyDraw tools are used (like Block 1). And for the appliqué layer of the block the Appliqué PatchDraw tools are used (like Block 3).
Remember that EasyDraw is like drawing with paper and pencil; we draw lines or curves and EQ7 creates the patches. And with the PatchDraw Appliqué tools we can draw closed or open patches. Closed patches can be filled with fabric or solid colors. Open patches will be treated as thread, and can be colored with the Set Thread tool.
You can find more examples of EasyDraw + PatchDraw blocks in the EQ7 Block Library > 08 Overlaid.
Let’s get started with our block!
(Want an easy-to-print version of this lesson? Click here to download the Block 4 Lesson PDF file.)
- Open EQ7.
- Click the Open an existing project tab in the Project Helper window and open your sew along project file, which was named EQ7 Summer Drawing Sew Along in the first lesson. Most likely, your project will be listed under Most recently used projects (unless you’ve designed lots of projects since our last lesson!). Click on the project file name to select it, then click OK. The Sketchbook will appear, click Close to put it away.
- Click the Work on Block tool
 . You are now looking at the Block Worktable.
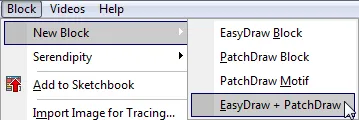
 - Click Block > New Block > EasyDraw + PatchDraw. The EasyDraw tab will be selected.
- Make sure your Precision Bar is visible by clicking VIEW and then looking for the checkmark next to Precision Bar. If there isn’t, click to put a checkmark there.
- Now we’ll set up the Precision Bar. Input the following settings:
Block Width and Height: 12
Snaps Horizontal and Vertical: 24
Graph Paper Cells: ON
Graph Paper Horizontal and Vertical: 6 (this gives us graph paper lines every two inches)
Snapping Options: Snap to Grid ON, Snap to Nodes ON, Snap to Drawing OFF
- Click the Line tool
 . When drawing in EasyDraw, click at the starting point of the line and hold down the mouse button as you drag your mouse to the end point of the line and then release the button.
 - Draw a vertical line at the 6” mark. Draw a horizontal line at the 6” mark.
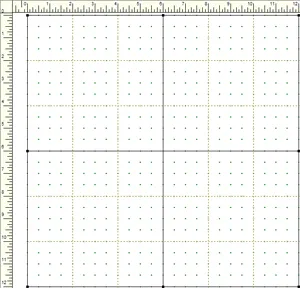
- We’re going to draw an on-point square in the middle of the block. Draw a diagonal line starting at the 4” mark on the vertical center line and ending at the 8” mark on the horizontal center line.
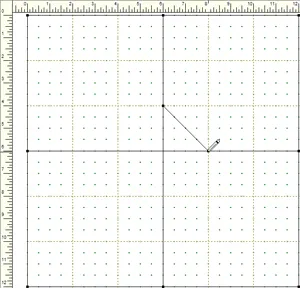
- Starting at the end point of the previous line, draw a line diagonally to the 8” mark on the center vertical line.
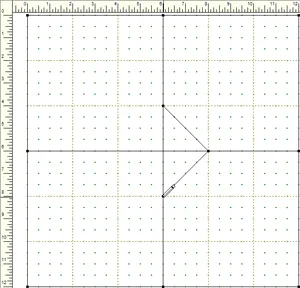
- Draw a diagonal line up to the 4” mark on the horizontal center line.
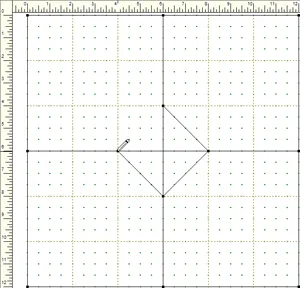
- Finish the square by drawing a diagonal line up to the starting point.
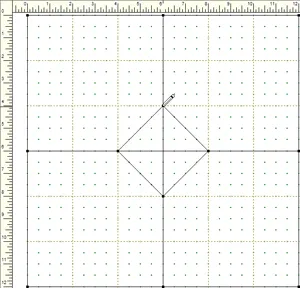
- Starting at the 2” mark on the left edge of the block, draw a diagonal line up to the 2” mark on the top edge of the block.
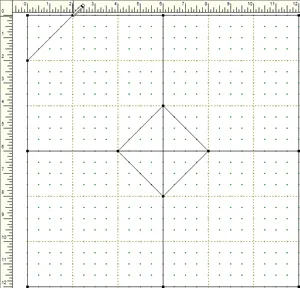
- Starting at the 4” mark on the left edge, draw a diagonal line up to the 4” mark on the top edge.
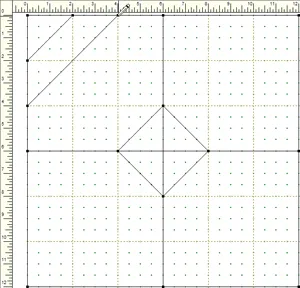
- Draw matching lines in the remaining three corners of the block.
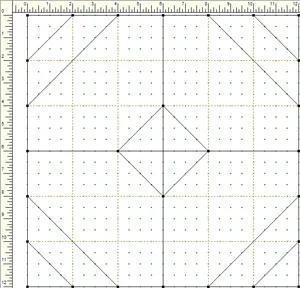
- The pieced portion of our block is now done. Click Add to Sketchbook
 to save our in-progress block.
 - Click the Applique tab.

- Click the Pick tool
 and then turn all the snapping options ON on the Precision Bar.

- Click the Line tool
 . Make sure Auto Fill
  is turned on (pressed in) on the Precision Bar.
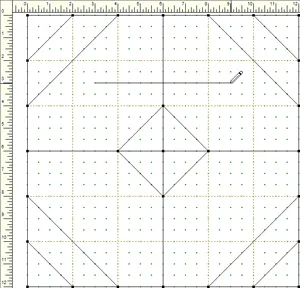
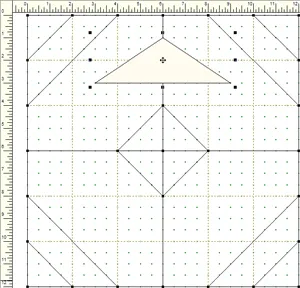
 - We are going to draw a wide-bottomed triangle. Starting at the grid point at 3” across and 3” down, draw a horizontal line to the grid point at 9” across and 3” down.
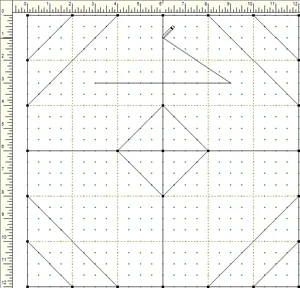
- Starting at the end point of the previous line, draw a diagonal line up to the 1” mark on the center vertical line.
- Now draw a diagonal line down to the starting point to finish the triangle.
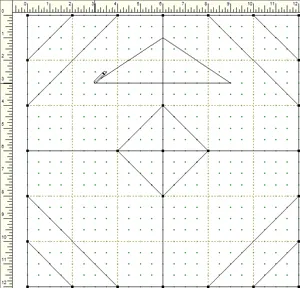
Because we have the “auto join” snap setting selected and Auto Fill turned on, the triangle will automatically become a closed shape and fill with a solid color.
- Click on the Shape tool
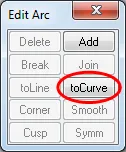
 , making sure to click on the small red square as you do so, to bring up the Edit Arc box.
 - We are going to change all three straight lines to curves. Click on a line to select it, then click toCurve in the Edit Arc box. Repeat for the remaining two lines.
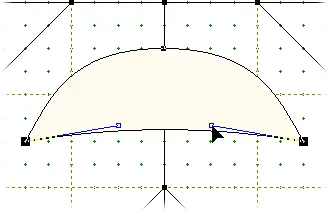
- Click on the node at the top point of the triangle. Notice that the Edit Arc box has changed to say Edit Node. Click Smooth.
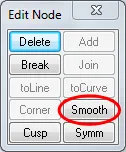
The two handles attached to this node are now locked in a straight line.
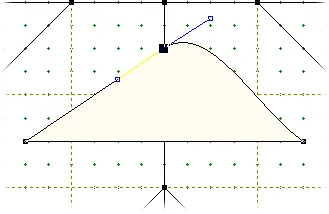
- Drag the upper handle down so the two handles lie in a horizontal line.
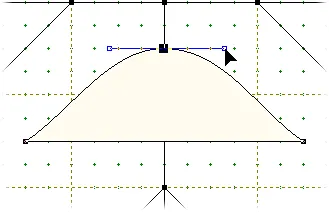
- Pull each handle to the side so that it touches the graph paper lines.
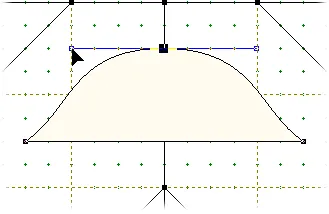
- Click on one of the side nodes and drag the upper handle up to create a smooth curve.
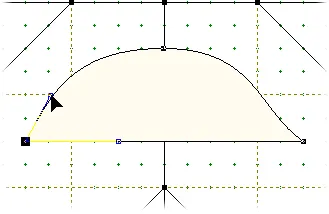
Repeat for the other side.
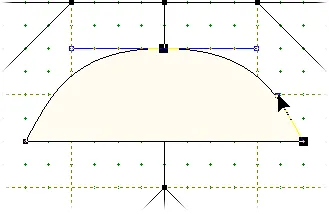
- Click on the base line of the triangle. Drag both handles up slightly to create a gentle curve.
- Click the Pick tool
 , clicking on the small red square as you do so, to bring up the Symmetry box.
 - Click on the edge of the modified triangle shape to select it.
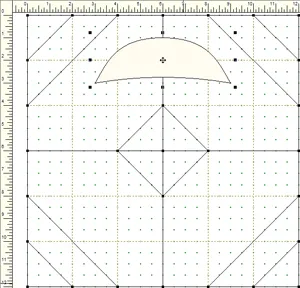
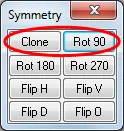
- In the Symmetry box, click Clone, then Rot 90.
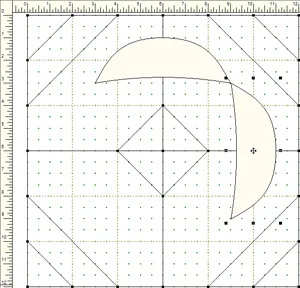
- Drag the new shape down and to the right, so that the points of the two shapes touch. (If you have difficulty getting the patch to stay in place, try turning Snap Whole Patch to Grid OFF
 on the Precision Bar.)
- Repeat steps 32-33 two more times.

- Click the Color tab at the bottom of the screen.

- Use the Paintbrush tool
 to color your block. You can use fabrics or solid colors.
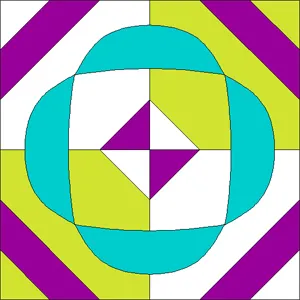
- Click Add to Sketchbook
 .
. - Click View Sketchbook
 . Click the Blocks section on the left and click the last block to select it.
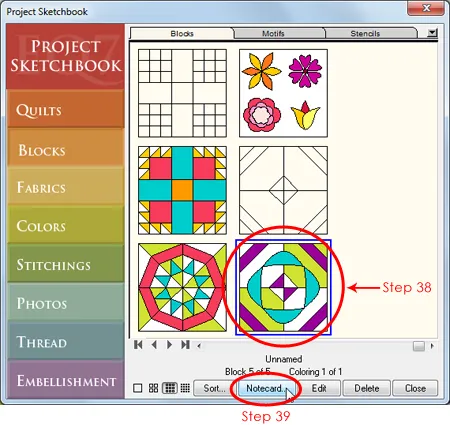
- Click the Notecard button. Your cursor should be blinking on the first line of the notecard next to Name. Type “EQ7 Summer Drawing: Block 4”. If you’d like to add more info to the Notecard, click beneath the word Notes to move your cursor there and type.
Adding information to a block’s notecard helps to keep us organized, especially if you keep lots of in-progress drawings in your Sketchbook. The name that you type on the notecard will appear on your pattern printouts too!
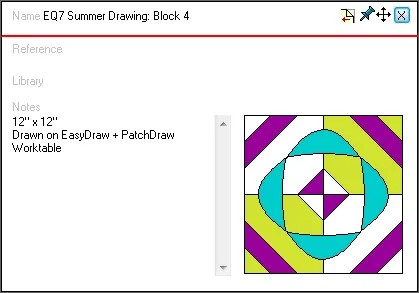
- Click the X in the top right corner of the notecard to close it. Then click Close to close the Sketchbook.
- Now we need to print our pattern so that we can get to the best part of the design process—sewing! Click the Print button
 . For this last block, I’m going to leave it up to you on how to print the patterns. Depending on how you’d like to make this block, you may want to print a combination of pattern styles.
If you need a refresher on the printing styles, you can refer to the previous block lessons in this series:- Block 1 – Rotary Cutting
The chart will only give you the patterns for the patches that are rotary cuttable. - Block 2- Foundation Pattern
You can foundation piece the base layer of the block. You will have to section and number the block yourself. - Block 3- Templates
Templates will print all the patches of the block. If you are printing the templates only for the appliqué patches, you can delete the pieced patches in the Print Preview window.
- Block 1 – Rotary Cutting
- After you’ve printed your patterns, click Save
 to ensure all your work is saved. Now close EQ7 and start sewing!
Want to see this lesson in action? Watch the video below!









08-02-2013
9:54 am
thank you for this fourth block! I just finished it! always beautifully explained! more explanatory video is absolutely magical! thank you very much! thanks to these monthly blocks, I do a lot of progress!
Again thank you wholeheartedly!
Françoise/Italy
08-03-2013
12:00 pm
Hi Jenny,
I am just beginning the Block 4 lesson. After creating the wide-bottom triangle, and clicking on the red dot on the shape tool, I don’t get the “Edit Arc” pop-up window. I get the “Edit Node” window and the options are greyed out for the next step. PLease help because I’m not sure what am I doing wrong? Thank you.
08-05-2013
9:15 am
Hi Laura,
If a line or a node is not selected with the Shape tool, then all of the options in the Edit Arc/Edit Node box will be greyed out. You have to click on a line (step 24) and then the applicable options will become available.
When you move on to step 25, click on the node to select it first and then you’ll see the box change to Edit Node and the options become enabled.
08-04-2013
7:31 pm
I am at step 33 for the fifth time. After completing step 32 and dragging the new shape down to the right so that the points of the two shapes touch, the shapes will not line up. They either go far to the right or then far to the left. I have not been able to line them up no matter how many times I start the entire lesson over. What might I be doing wrong? I have even watched the video and am doing everything just as you instructed. Thanks for your help.
08-05-2013
9:26 am
Hi Mary,
Double-check your snap settings on the precision bar. Are both horizontal and vertical snap settings to 24?
08-05-2013
5:55 pm
My snap settings were correct. I started over one more time and FINALLY was able to rotate the shapes. Still don’t understand why I was not able to do so the first time around but thank goodness it finally worked. Thanks again for a wonderful series. I have learned a ton and am no longer at a loss as to how to use my EQ7.
08-06-2013
10:25 am
Thanks Jenny! Your comments helped! Also, I didn’t see step 18 at the bottom of my page of instructions…I went on to the next page without turning the snapping options on before I started step 19. I am at step 33-34 and the tips of the new shape won’t stay put when I drag them to touch one another! lol I’ll figure it out sooner or later. Once I get that to work, I can color my design. Looks pretty tho
08-06-2013
10:28 am
Oh I see Mary is having same trouble I am. I will check my snap settings, I even tried holding the control key while I dragged the shapes, but that didn’t work either.
08-14-2013
9:47 am
Hi All,
If anyone else is having trouble with their cloned & rotated patch not staying in place (step 32), try turning Snap Whole Patch to Grid OFF on the Precision Bar. I’ve updated the steps above to include this note with step 32 and I’m added this to the PDF instructions if you’d like to re-save it.
Jenny @ EQ
08-27-2013
4:32 pm
I have not had too much trouble ….. the English language for me is a bit difficult, I have to translate in french with google translator! but I got there! so far I’ve done 4 + blocks those in supplements, and I learned many new things! I am very happy … thank you again for what you do for us.
Françoise (Italy)
04-26-2014
10:18 am
Nice step by step tutorial. I’m creating a new design by following your guideline for practice and I will submit it you as soon as i complete it.