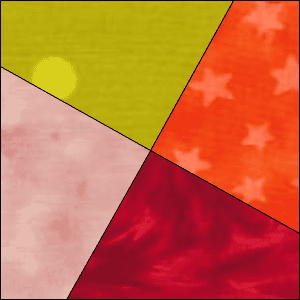
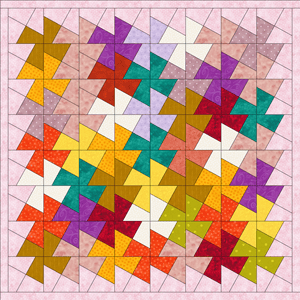
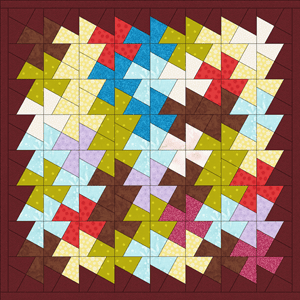
The Twister block is simple. The true beauty of the design comes out when the block is repeated and then colored on the quilt in such a way to create the overall design. It’s a great scrap quilt, and easy enough for an EQ beginner to design and sew.
And it forms an overall design:
For EQ8
DRAW THE BLOCK
- Open EQ8.
- Click Block Worktable.
- Click New Block > Pieced > EasyDraw
- Block Height: 4.5
Snaps Horizontal: 9 (2 x 4.5 = 9 which would let us start a line at any 1/2″ spot across the block)
Snaps Vertical: 9 - Graph Paper Cells: ON
Horizontal: 9 (this allows us to see each 1/2″ mark on the block)
Vertical: 9 - Snapping Options:
Snap to Grid: ON
Snap to Nodes of drawing: ON
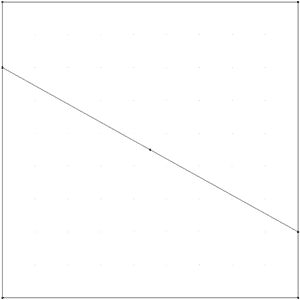
Snap to Lines and arcs of drawing: OFF - Looking at the ruler, draw a line from 1″ down on the LEFT side to 3 1/2″ down on the RIGHT side.
- Draw a second line from 1″ over on the BOTTOM to 3 1/2″ over on the TOP.
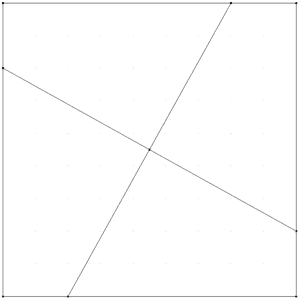
- That’s our block! Looks like nothing at all, since the design is really formed when the block is repeated, then recolored on the quilt.
- Click Add to Sketchbook.
SET THE BLOCK IN A QUILT
- Click Quilt Worktbale
- Click New Quilt > Horizontal.
- Click the LAYOUT tab.
- Make the number of blocks you want. Our example uses: 8 x 8.
- Make the size:
Horizontal: 4.5
Vertical: 4.5 - No sashing.
- Click the DESIGN tab.
- Click the Set Block tool. Your uncolored Twister block appears here.
- Point to the quilt, and CTRL/Cmd+click. Your Twister block drawing will set in all spaces at once.
COLOR ON THE QUILT
- Click the Paintbrush tool.
- Now color the pinwheels, to create the overall design. Notice that the overall design needs you to color the corner patches in adjacent blocks. When you color your first pinwheels, it should look like this:
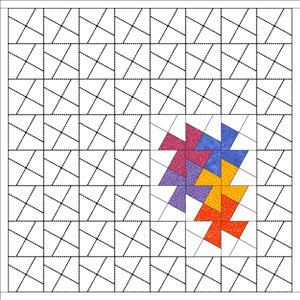
- Continue coloring the corners of each touching block a different color.
- Click Add to Sketchbook to save your quilt.
- To find a color you’ve used previously somewhere on the quilt, use the Eyedropper tool.
- Once your whole quilt is colored, it will be very easy to recolor the pinwheels, to change the look of your quilt. You may want to try out the Randomize tool. This tool is a fun way to discover potential new color schemes.
For EQ7
NAME YOUR PROJECT
- Open EQ7.
- On the Create a new project tab type: Twister.
- Click OK.You’re now ready to create the design, starting by drawing the block.
DRAW THE BLOCK
- Click WORKTABLE > Work on Block.
- Click BLOCK > New Block > EasyDraw Block.
- Click VIEW > make sure you have a check in front of Precision Bar. Since these blocks are often cut from charm squares, I figured the block’s finished size would be 4.5, out of an unfinished 5″. Now up on the precision bar, make the block size:Block Width: 4.5
Block Height: 4.5Snaps Horizontal: 9 (2 x 4.5 = 9 which would let us start a line at any 1/2″ spot across the block)
Snaps Vertical: 9Graph Paper Cells (pressed down):
Horizontal: 9 (this allows us to see each 1/2″ mark on the block)
Vertical: 9Snapping Options:
Snap to Grid: ON
Snap to Node: ON
Snap to Line: OFF
- Looking at the ruler, draw a line from 1″ down on the LEFT side to 3 1/2″ down on the RIGHT side.

- Draw a second line from 1″ over on the BOTTOM to 3 1/2″ over on the TOP.

- That’s our block! Looks like nothing at all, since the design is really formed when the block is repeated, then recolored on the quilt.
- Click Add to Sketchbook.
SET THE BLOCK IN A QUILT
- Click WORKTABLE > Work on Quilt.
- Click QUILT > New Quilt > Horizontal.
- Click the Layout tab.
- Make the number of blocks you want. Our example uses: 8 x 8.Make the size:
Horizontal: 4.5
Vertical: 4.5
No sashing. - Click Layer 1.
- Click the Set Block tool. Your uncolored Twister block appears here.
- Point to the quilt, and CTRL+click. Your Twister block drawing will set in all spaces at once.
COLOR ON THE QUILT
- Click the Paintbrush tool.
- Now color the pinwheels, to create the overall design. Notice that the overall design needs you to color the corner patches in adjacent blocks. When you color your first pinwheels, it should look like this:

Continue coloring the corners of each touching block a different color, like this:
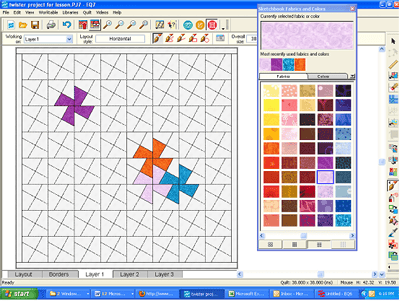
Tip: To find a color you’ve used previously somewhere on the quilt, use the Eyedropper tool. When you get to the edge of your quilt, you may want to use the Swap tool to color everything that is not colored (the edge patches) the same color, to form a background for your design.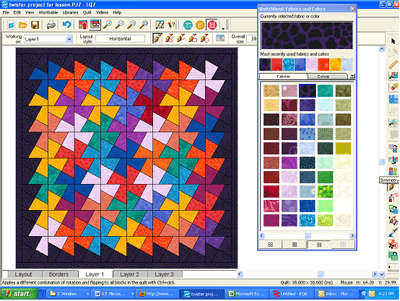
- Click Add to Sketchbook to save your original coloring.
Once your whole quilt is colored, it will be very easy to recolor the pinwheels, to change the look of your quilt. You may want to try out the Random Recolor tool. This tool is a fun way to discover potential new color schemes. But it takes some real understanding, and experimentation. The Random Recolor tool is not on your toolbar by default. To add it to your toolbar: right-click the QUILT toolbar on the right side of the screen > choose Add/Remove tools > click to select the Random Recolor tool.
USE THE RANDOM RECOLOR TOOL
- Click the Random Recolor tool.
- Click “Randomize.”
- Click on the quilt. You’ll see a new random coloration of your quilt.
To see what fabrics in these colors would look like, click “Map to fabrics.”
NOTE: The greater the variety of fabrics in your Sketchbook, the more fabric variety (and success you’ll have) when you “map to fabrics.” So you may want to go to the Fabric Library and add some fabrics in different colors to your quilt.
You will find that after a certain number of clicks you’ll have adjoining pinwheels of the same color. Then it’s time to get out your original coloring of the quilt and begin again.

